

- Google Chrome now includes AI features such as "Help me write," tab organizers, and AI themes, which may concern users who value privacy and prefer a simple browser experience.
- To disable Chrome's AI features on Windows 11, you can start by using the standard settings toggle in Chrome, but to ensure they don't return with updates, you can make permanent changes using the Registry Editor or Group Policy Editor.
- A fourth method involves modifying the Chrome shortcut to prevent AI features from running at startup, providing different options for users to maintain privacy and remove unwanted features effectively.
Google Chrome is no longer just a window to the web; it is rapidly becoming an AI-powered assistant whether you asked for one or not. In recent updates, Google has aggressively integrated Generative AI directly into the browser interface, introducing features like “Help me write,” automatic tab organizers, and AI-generated themes.
While Google pitches these tools as productivity boosters, many users see them differently: as privacy risks, unnecessary bloatware, or simply distracting clutter in what should be a clean workspace. Furthermore, these features often require sending your browsing data and text inputs to Google’s servers for processing, a trade-off not everyone is willing to make.

If you prefer a browser that just browses, toggling a simple switch in the settings often isn’t enough, as updates can quietly revert your preferences. To truly reclaim your browser, you need a more permanent solution. This guide will walk you through the most effective methods to Disable Google Chrome AI Features on Windows 11 permanently, moving from simple settings tweaks to system-level locks that Google can’t override.
Method 1: The Standard Settings Toggle (Easiest)
The quickest way to Disable Google Chrome AI Features is via the browser’s internal menu. While this can be reset by future updates, it is the first line of defense.
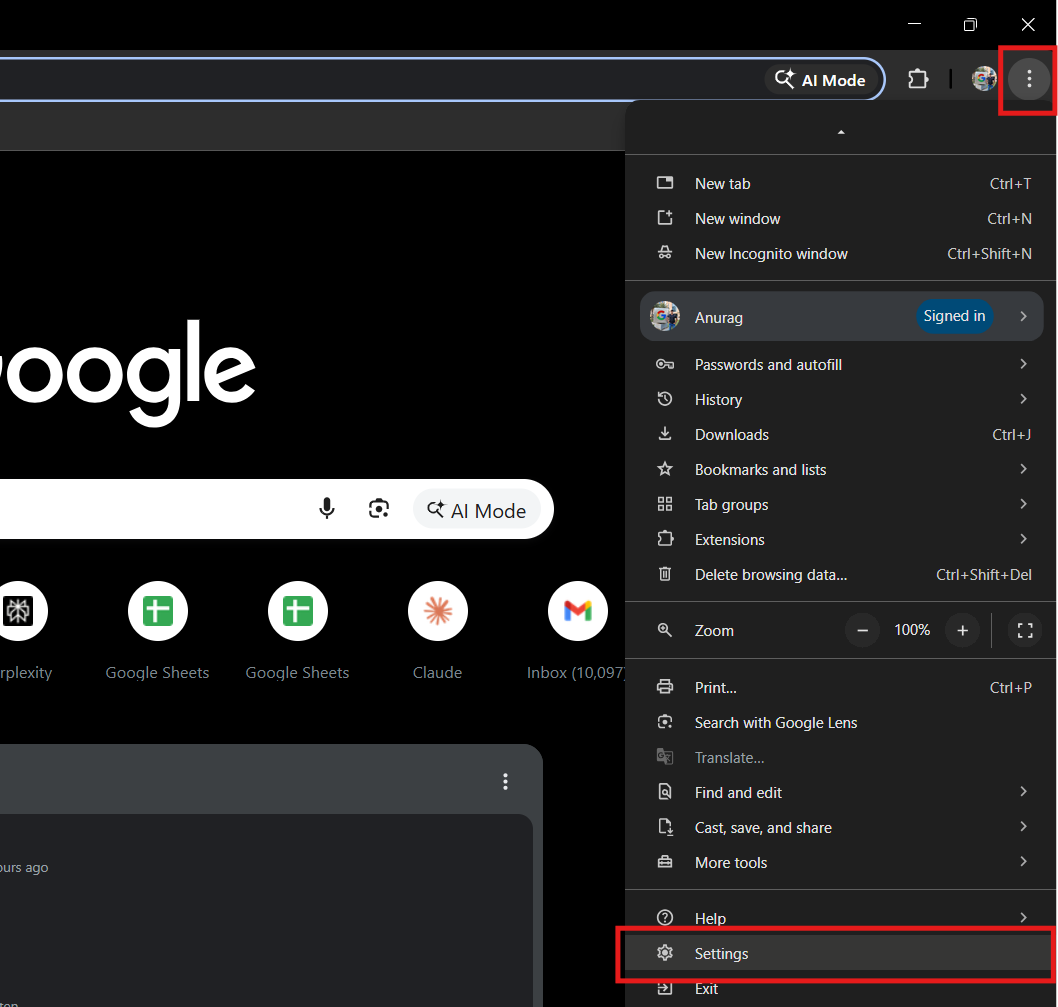
- Open Chrome and click the three dots menu (top right) > Settings.

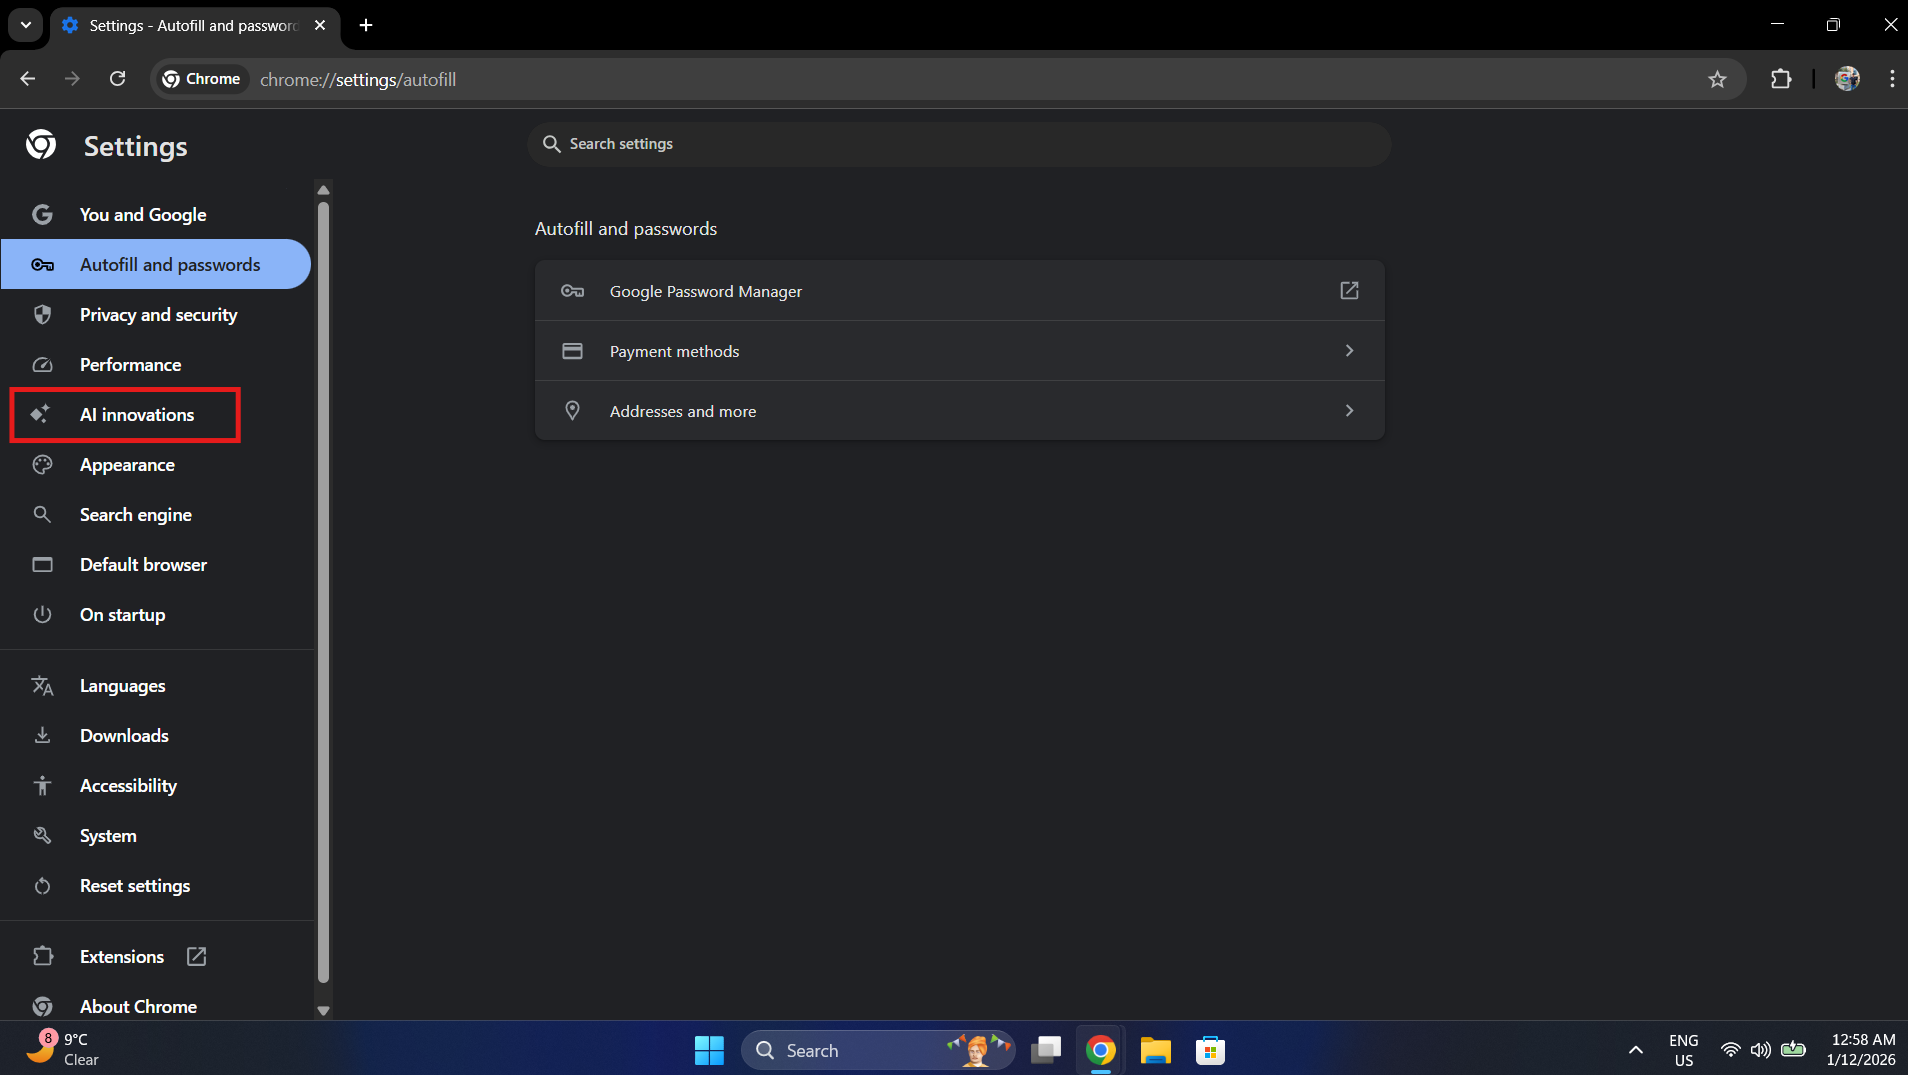
- In the left sidebar, look for AI Innovations (or just AI depending on your version).

- You will see three main toggles:
- Help me write
- Tab organizer
- Create themes with AI
- Toggle all three to Off.
- Restart Chrome.
Note: Google can (and often does) re-enable new features after major updates. For a permanent ban, use Method 2 or 3.
Method 2: The Registry Edit (Permanent Fix for Home Users)
This method forces the system to Disable Google Chrome AI Features by adding a policy key to the Windows Registry. Chrome will see this policy and gray out the options, preventing them from running.
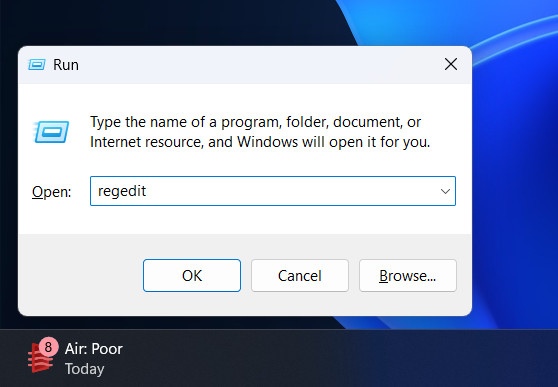
- Open Registry Editor:
- Press Win + R, type regedit, and hit Enter.

- Press Win + R, type regedit, and hit Enter.
- Navigate to the Policies Key:
- Go to: HKEY_LOCAL_MACHINE\SOFTWARE\Policies\Google\Chrome
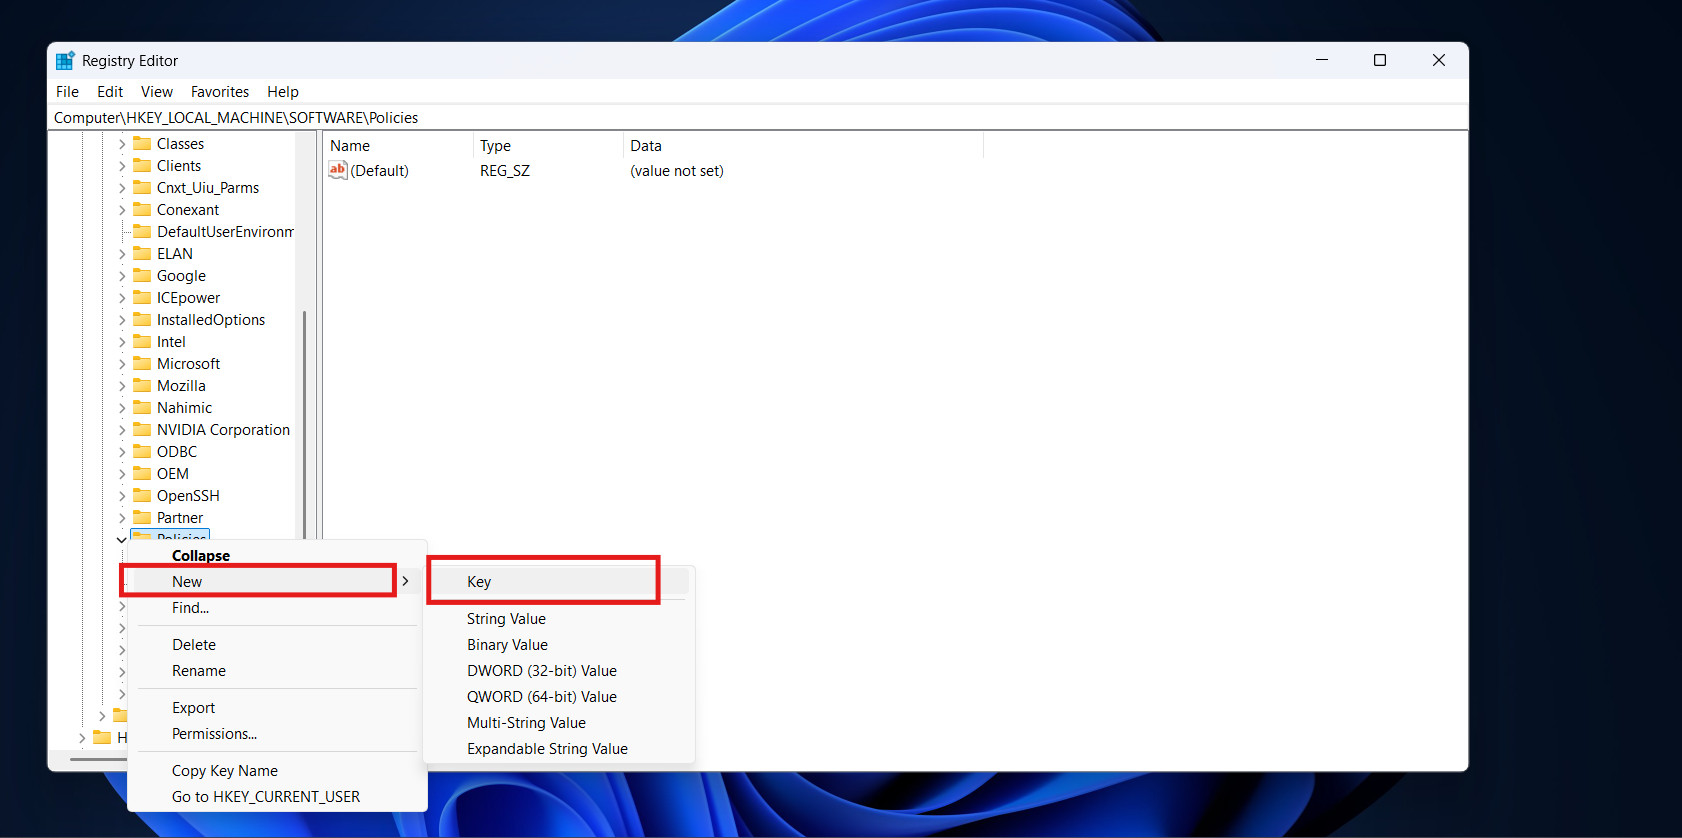
- Note: If the Google or Chrome folders don’t exist, right-click the previous folder > New > Key and name them accordingly.

- Create the Blocking Value:
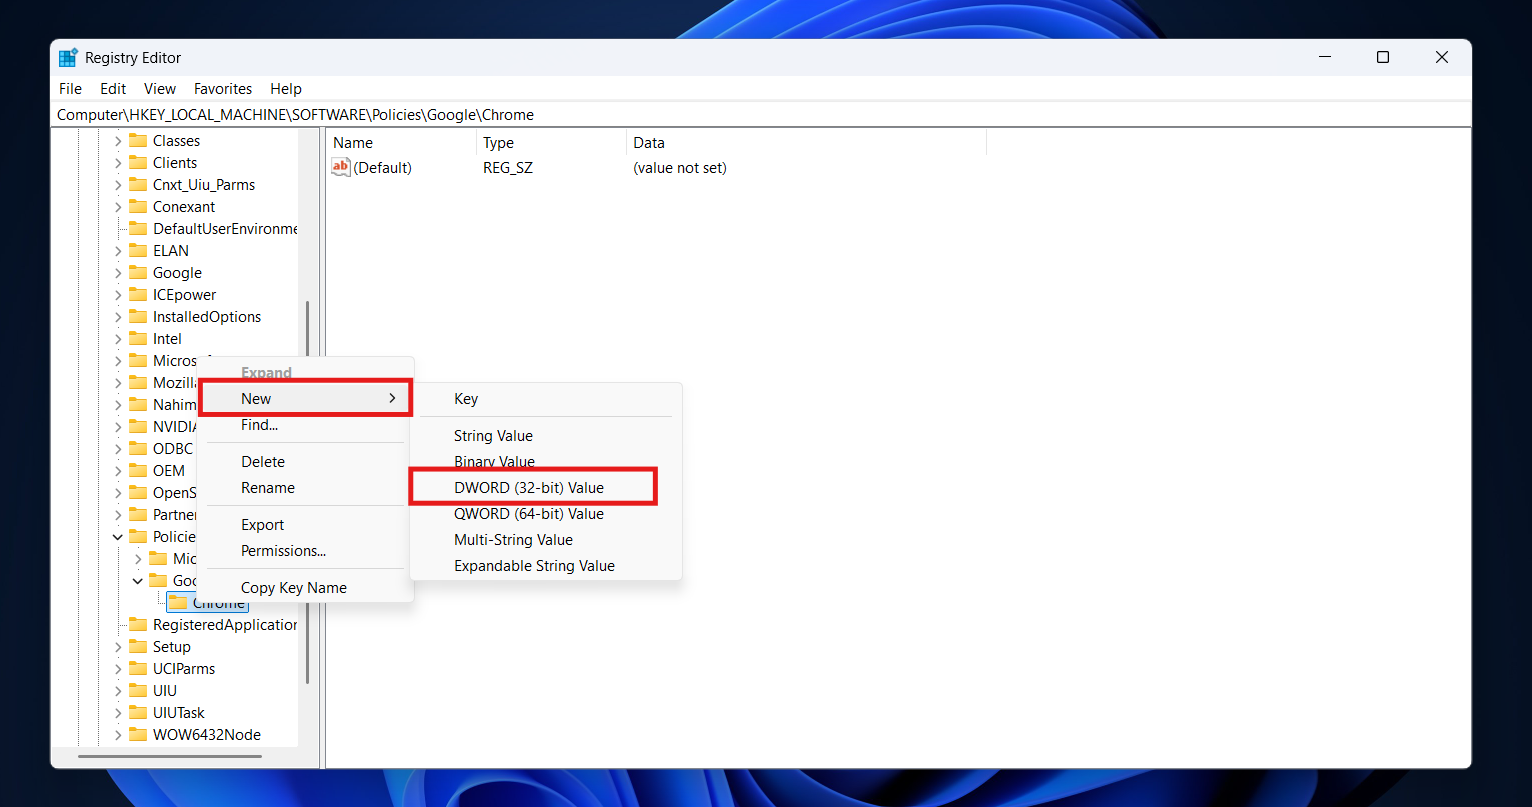
- Right-click on the Chrome folder (on the left).
- Select New > DWORD (32-bit) Value.

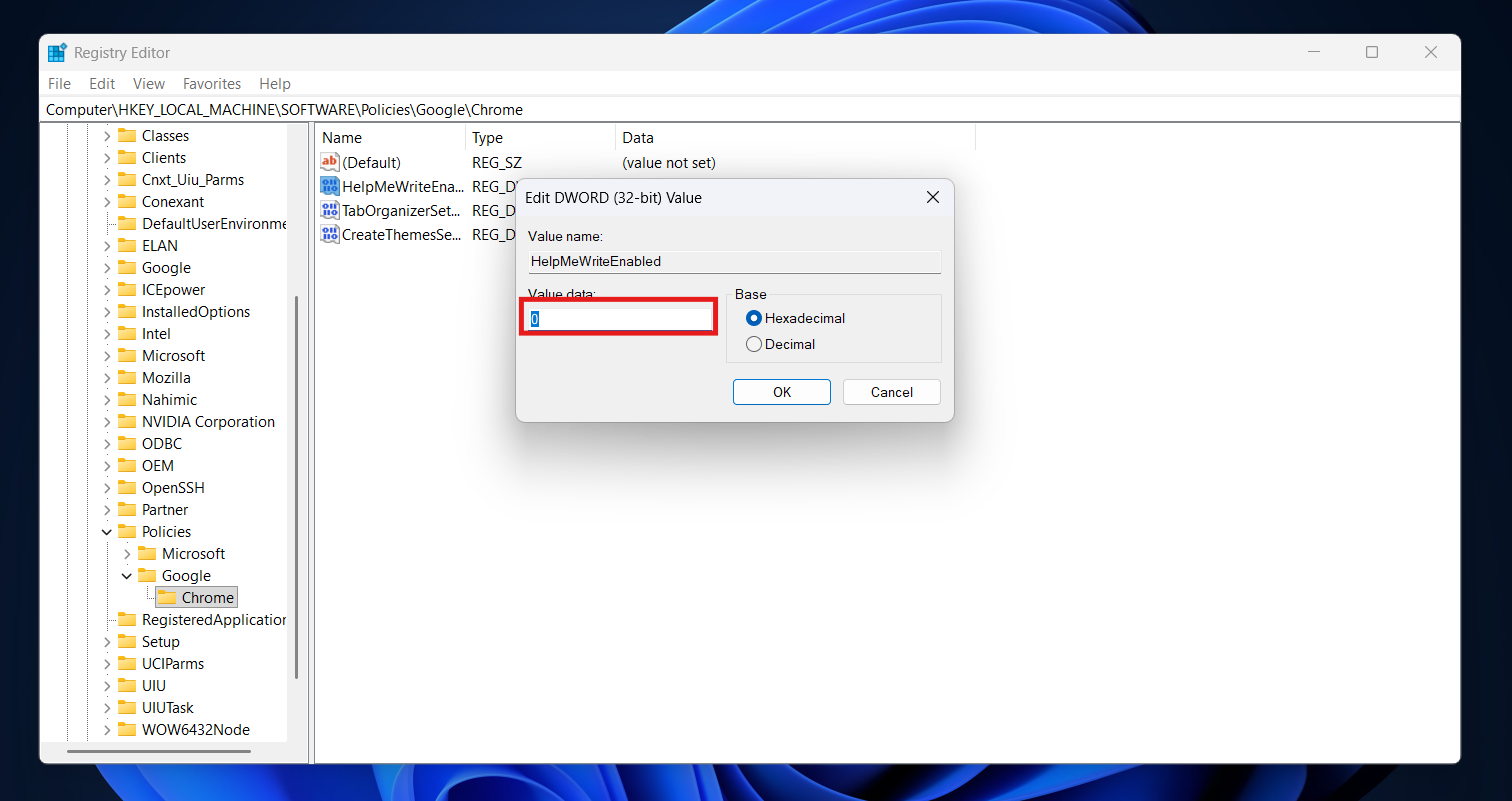
- You need to create three specific DWORDs to kill the current suite of AI tools. Create these three entries and set their Value data to 0:

- HelpMeWriteEnabled -> Set value to 0
- TabOrganizerSettings -> Set value to 0
- CreateThemesSettings -> Set value to 0
- Restart Chrome:
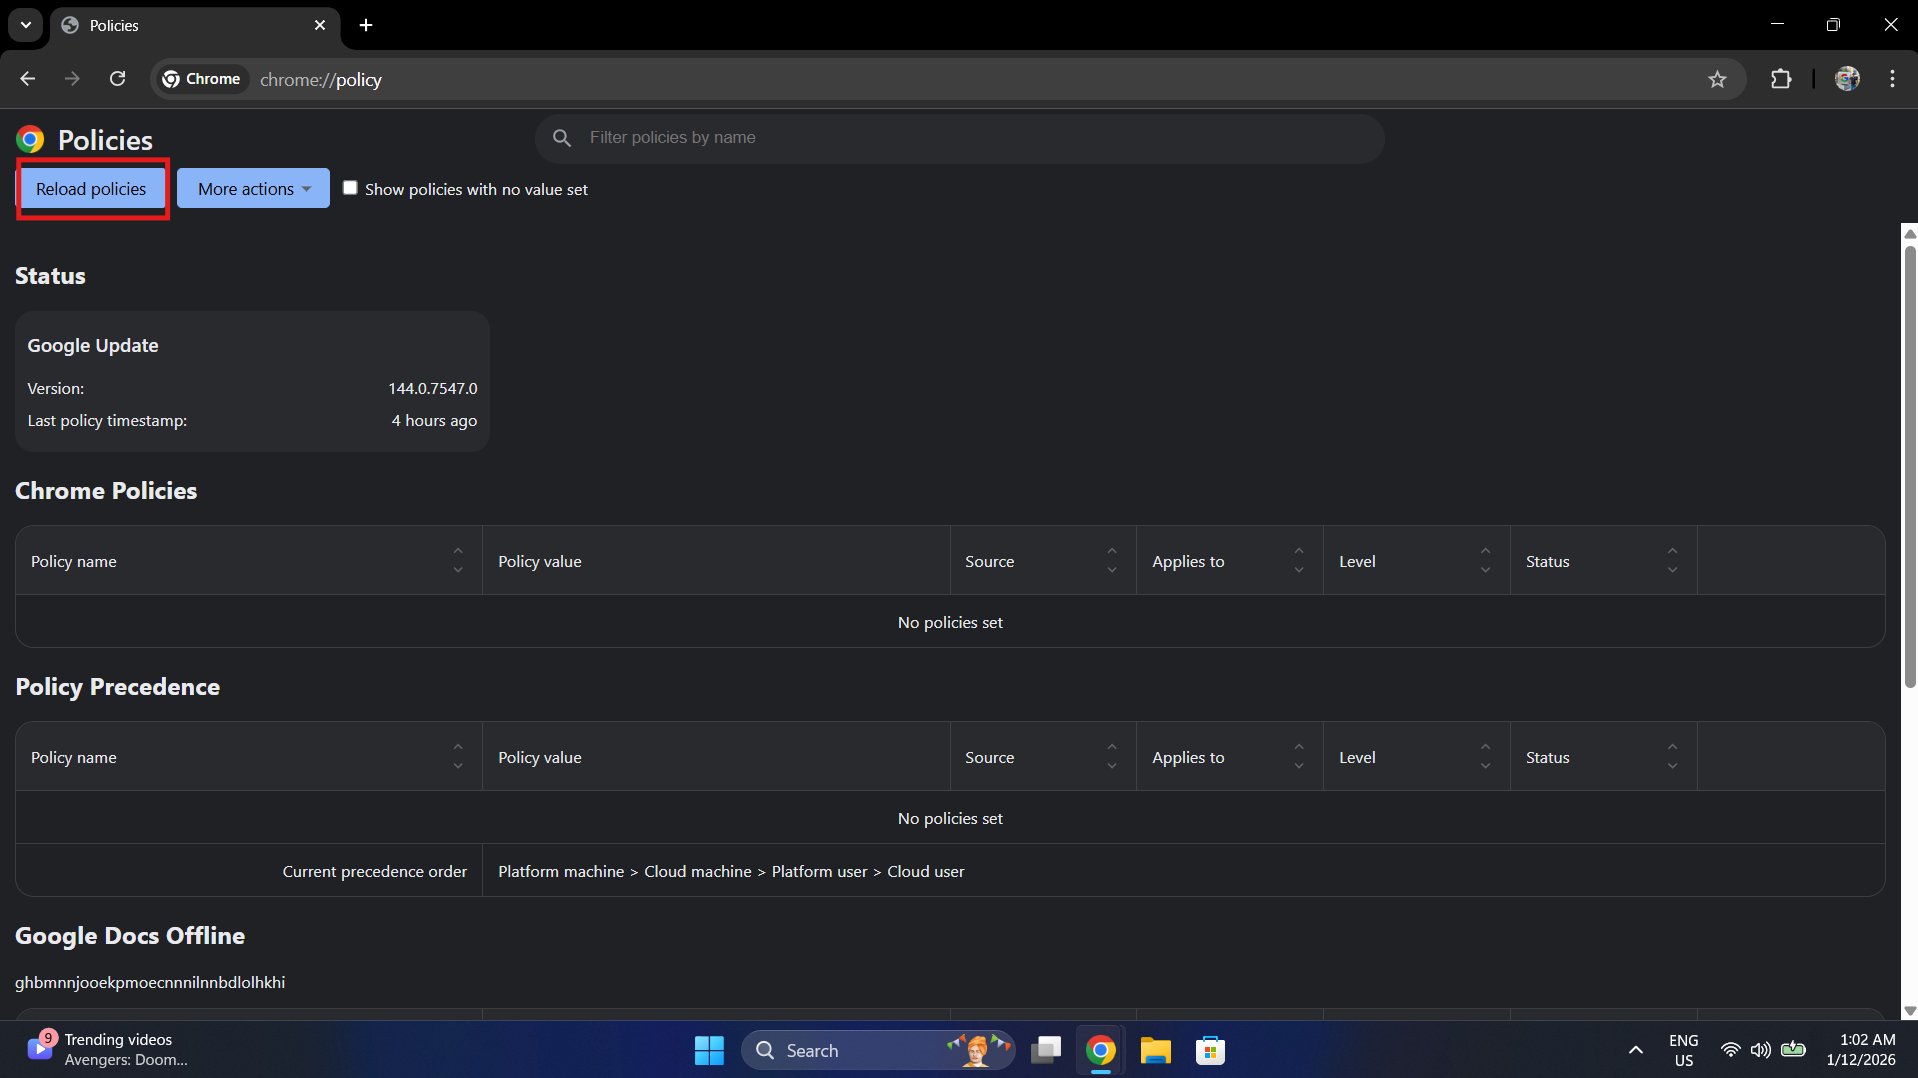
- Open Chrome and type chrome://policy in the address bar.
- Click Reload Policies.

- You should see the policies listed with status “OK.” The AI features are now hard-disabled.
Method 3: Group Policy Editor (For Pro/Enterprise Users)
If you manage multiple computers or have the Windows 11 Pro edition, using Group Policy is the professional way to Disable Google Chrome AI Features across the system.
- Download Policy Templates:
- You likely need the Chrome administrative templates. You can download the policy_templates.zip from the official Google Chrome Enterprise website.
- Extract the zip. Go to windows > admx.
- Copy chrome.admx to C:\Windows\PolicyDefinitions.
- Copy chrome.adml (from the en-US folder) to C:\Windows\PolicyDefinitions\en-US.
- Open Group Policy:
- Press Win + R, type gpedit.msc, and hit Enter.
- Navigate to Chrome Settings:
- Go to Computer Configuration > Administrative Templates > Google > Google Chrome.
- Disable the Features:
- Look for a folder named Generative AI.
- You will find settings for “Enable Help me write,” “Enable Tab Organizer,” etc.
- Double-click each one and set it to Disabled.
- Apply:
- Run gpupdate /force in a command prompt or simply restart your computer.
Method 4: Change the Target Shortcut (The “Mod” Way)
If you don’t want to touch the registry, you can force Chrome to launch with specific command flags that Disable Google Chrome AI Features during startup.
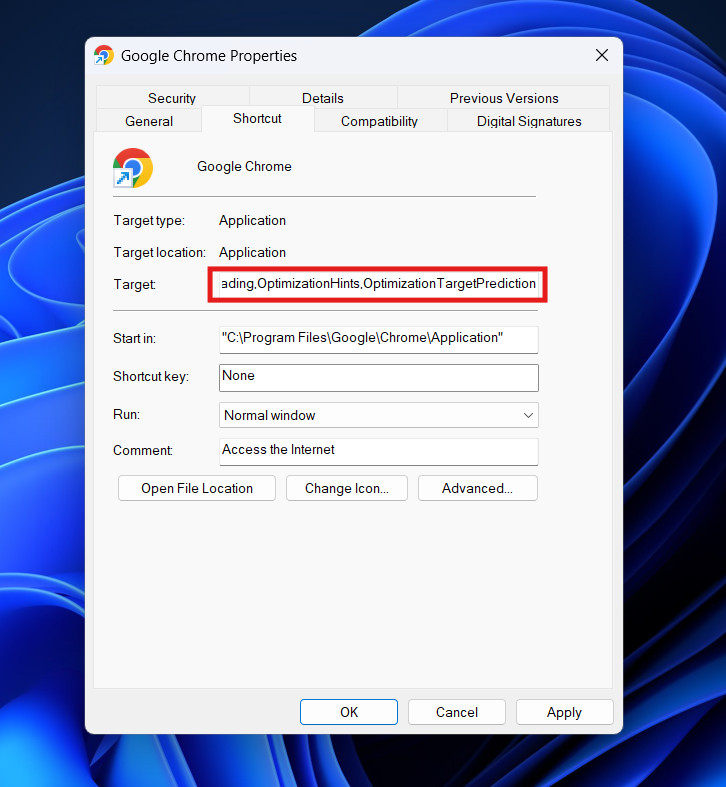
- Right-click your Chrome shortcut on the desktop/taskbar.
- Select Properties.
- In the Target field, add this text to the very end (after the quotes): –disable-features=OptimizationGuideModelDownloading,OptimizationHints,OptimizationTargetPrediction

- Click Apply and OK.
- You must launch Chrome using this specific shortcut for the block to work.
Conclusion
The integration of AI into our daily software is inevitable, but it should always be optional. While features like “Help me write” or “Tab Organizer” might dazzle some, for others, they represent a drift away from the speed and simplicity that made Chrome popular in the first place.
By using the Registry Editor or Group Policy methods outlined above, you do more than just turn off a feature; you assert control over your operating environment. You ensure that your text inputs stay local and your interface remains consistent, immune to the whims of the next automatic update.
Whether you are a privacy-conscious user, an IT administrator managing a fleet of PCs, or someone who simply prefers a minimalist tool, these steps guarantee a classic, predictable experience and successfully Disable Google Chrome AI Features on Windows 11.
ALSO READ: