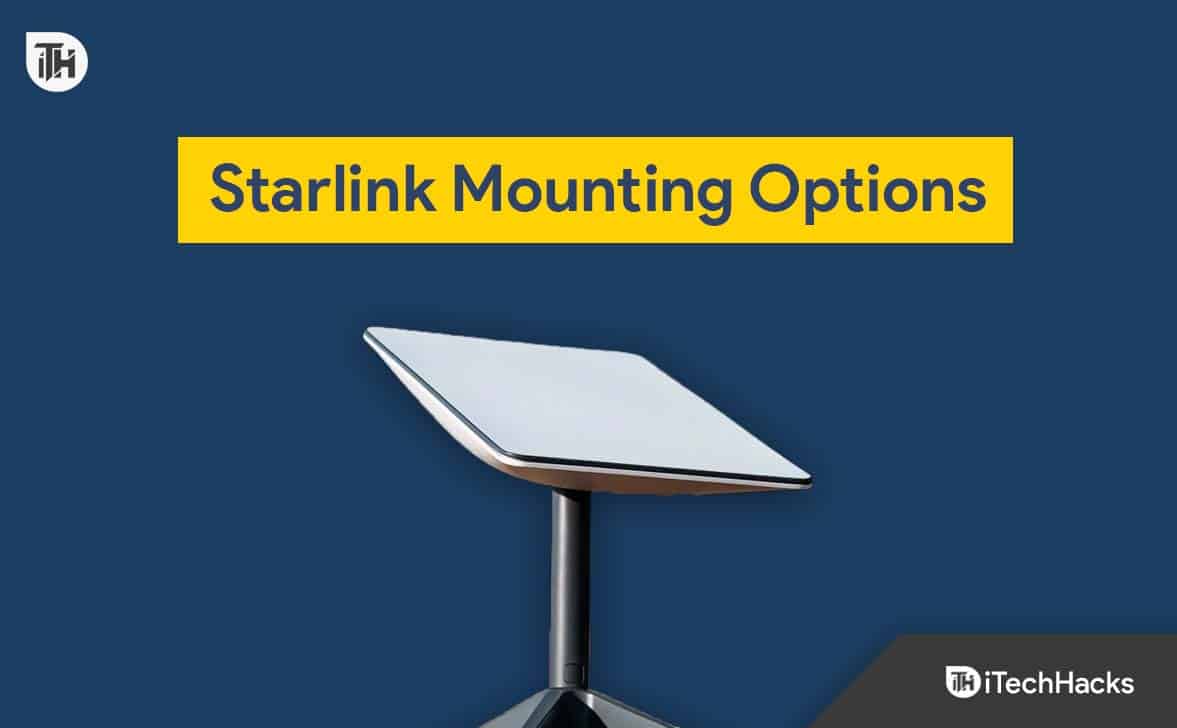
- Starlink mounting options remain essential for overcoming obstructions that cause network issues, with solutions available for every type of residence—from apartments to rural homes.
- The classic seven mounts—J-Mount, Non-Penetrating Roof Mount, Flashing Mount, Tower Mount, Tripod Mount, Pole Mount, and Chimney Mount—are still widely used, each offering unique benefits for different setups.
- New 2025 options like the Standard Pivot Mount, Masonry Mount, Pipe Adapter Kit, Balcony/Railing Mounts, and heavy-duty Tower Kits provide even more flexibility for modern installations.
So, you’ve got your Starlink set up and running. That’s a big step, but if you’re noticing drops in signal or slower speeds, the culprit is often obstructions around your dish. Trees, chimneys, or nearby buildings can block the line of sight to satellites.
This is where the right Starlink mounting setup makes all the difference. Whether you live in an apartment, a rented flat, or your own house with a terrace, there’s a mounting option that will work for you. Even if you don’t have a traditional roof, you can still get creative with mounts designed for balconies, backyards, and even portable setups.
Before choosing the best Starlink mounting option, you need to know exactly where your obstructions are.
How to Check for Obstructions in 2026
The Starlink app is still the go-to tool. After your dish has been running for at least 12 hours, open the app and check the obstruction statistics. It will clearly show if objects are interfering with your connection.
Unlike older guides that recommended keeping your dish within a 15–40 degree angle, the newer Starlink Gen 2 and Gen 3 dishes automatically adjust their angle. That means you only need to focus on placing the dish in a location with the clearest possible view of the sky your dish will handle the rest.
Once you’ve identified the problem areas, it’s time to choose a mounting option that clears those obstructions and gives your Starlink the stable base it needs.
Starlink Mounting Options 2026
Here we will be discussing the several mounting options available for Starlink. Since Starlink Shop’s delivery and response time is longer than ever, we will be going with alternative products available on Amazon that work equally great.
But before that, you need to know what and where your obstructions are so that you can choose the perfect Starlink mounting option.
Satellite Dish Mounts that Work With Starlink
Here we will be discussing 7 different satellite mounts that will work flawlessly with your Starlink dish. However, make sure that you are good at DIY; otherwise, you may have to hire a contractor to get the job done.
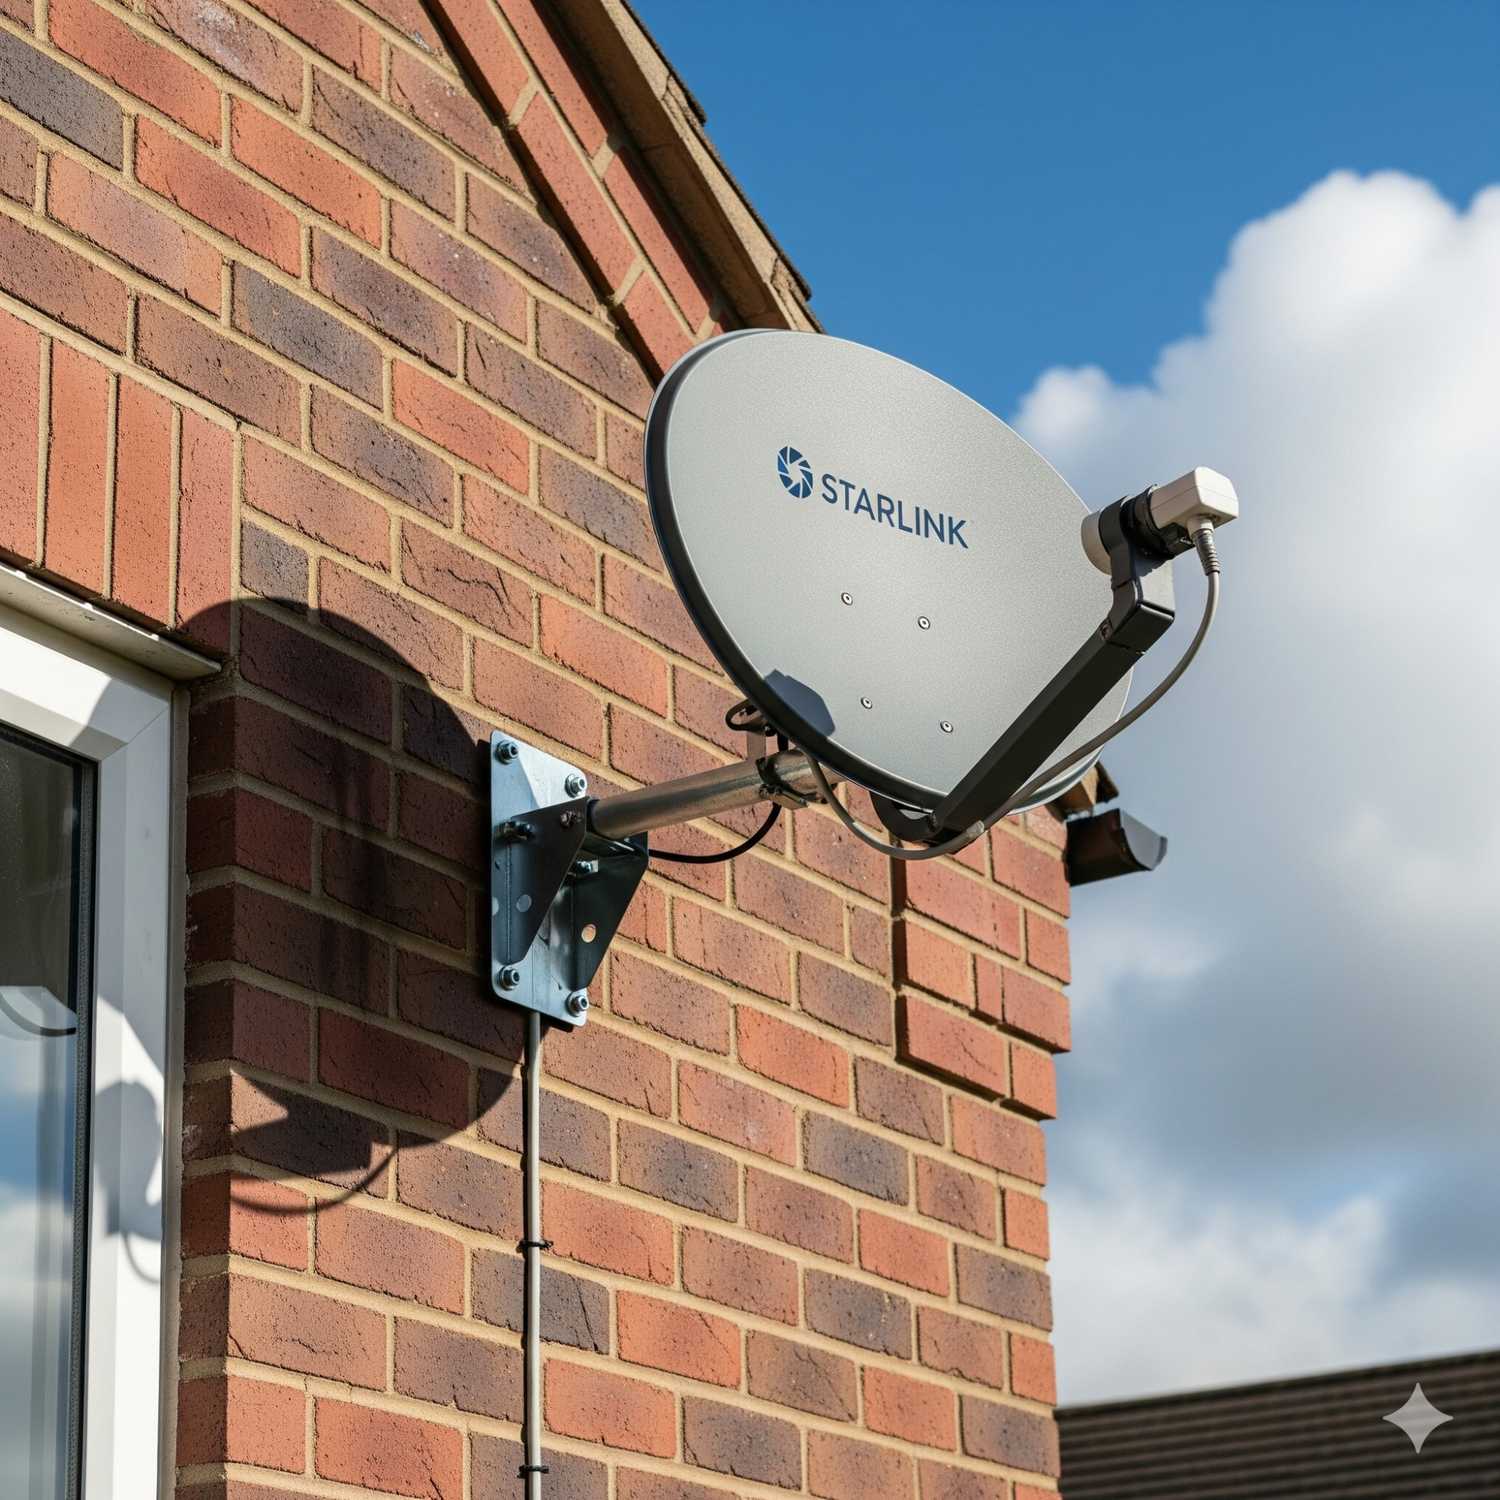
1. J Mount – Overall, the Best Option
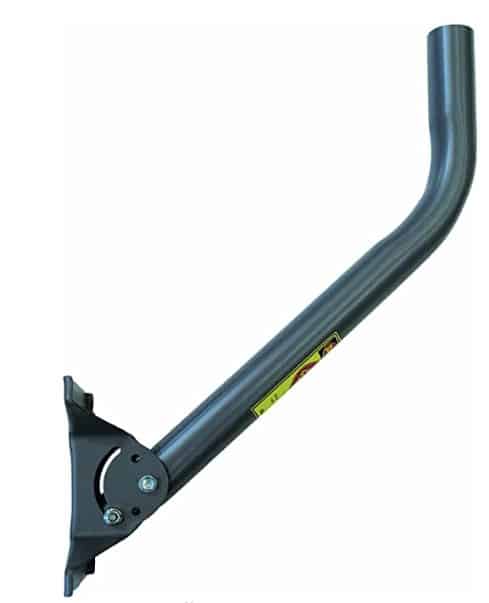
he J-Mount remains a reliable and cost-effective choice for Starlink mounting in 2026. If you have nearby obstructions such as trees or neighboring houses, this mount gives you enough flexibility to position your dish at a better angle.
J-Mounts are widely available from satellite TV suppliers and hardware stores, and many people already have one left over from older services like Dish Network.
The key improvement for 2026 is that you no longer need to use makeshift fixes like spacers or electrical tape. Starlink now sells an official Pipe Adapter Kit, which allows you to securely attach your Starlink dish to most standard J-Mounts without hassle. Just make sure the mount’s pipe diameter is around 1.5 inches (the most common size).
When to Choose a J-Mount:
- You want a budget-friendly and proven mounting option.
- You already have a satellite J-Mount installed.
- You’re comfortable doing a simple DIY install on the side of your house or roof edge.
👉 You can buy J-Mounts from hardware retailers or satellite suppliers, and the Pipe Adapter Kit directly from the Starlink shop for the perfect fit.
2. Non-Penetrating Roof Mount
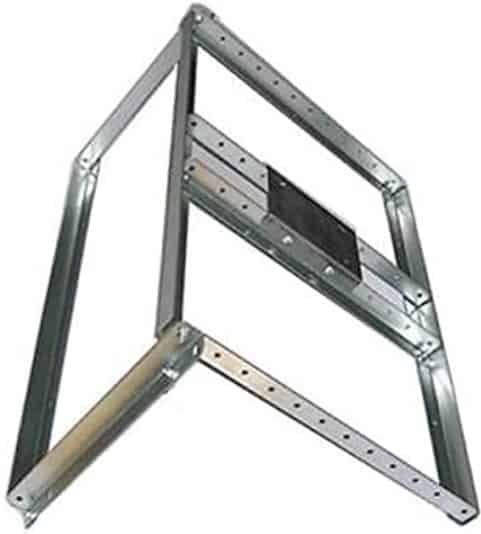
If you can’t drill into your roof or don’t want to make permanent changes, a Non-Penetrating Roof Mount is an excellent option. These mounts don’t require screws or bolts. Instead, they are secured with weighted blocks like sandbags or concrete.
There are two main types:
- Ridge line versions – sit along the roof ridge and require you to add your own mast (like a J-Mount).
- Flat roof versions – come with a mast included, where you can slide your Starlink dish in and secure it with U-bolts.
For added protection, especially on asphalt shingles, it’s smart to place protective pitch pads underneath the mount to prevent wear on the roof.
Choose a Non-Penetrating Roof Mount if:
- You live in a rented home and can’t drill.
- You have a flat roof and want a stable, heavy-duty option.
- You need something temporary yet strong.
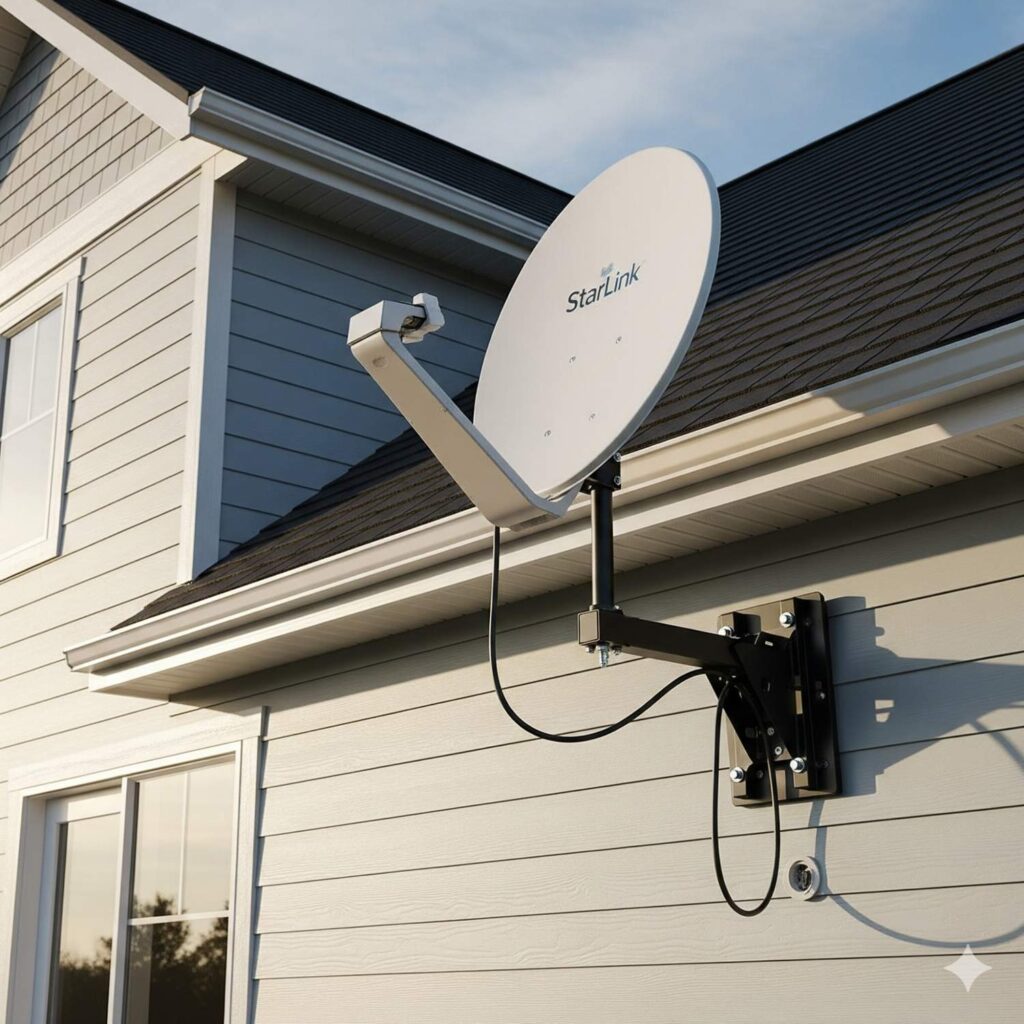
3. Flashing Mount For a Professional Look
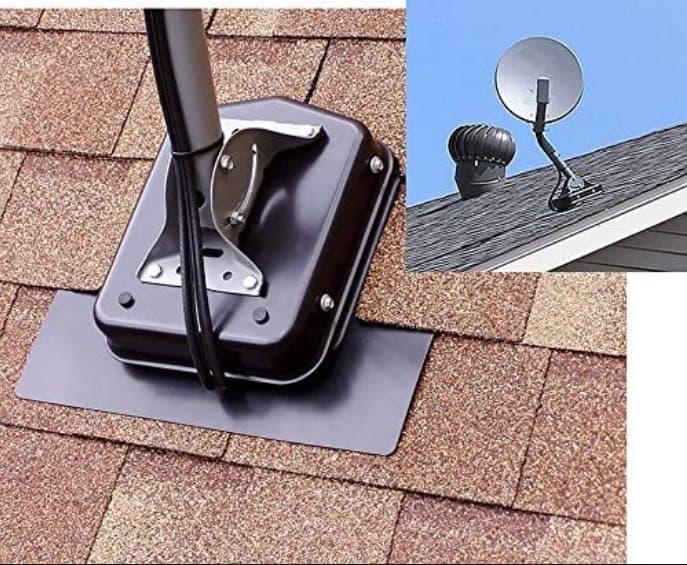
For a permanent and professional roof installation, the Flashing Mount is one of the most popular Starlink mounting options in 2026.
The mount slides under your shingles and secures into the roof deck, creating a watertight seal that prevents leaks. Unlike older recommendations that leaned on aftermarket products, the latest 2nd-generation Starlink Flashing Mount is now one of the best choices—it’s leak-resistant, affordable, and designed to fit seamlessly with the dish.
If you live in an area with snow or heavy rain, flashing mounts are especially useful since they prevent roof damage. The only downside is that installation can be tricky if you’re not comfortable working on roofs, so hiring a professional may be worth it.
Choose a Flashing Mount if:
- You want a permanent, watertight roof install.
- You live in a wet or snowy climate.
- You prefer a sleek, professional look.
4. Tower Mount

If you live in a dense neighborhood with tall trees or buildings, sometimes the only way to get clear sky view is to go higher. That’s where a Tower Mount comes in.
Tower mounts elevate your Starlink dish well above obstructions, giving you the best possible signal. They’re not as expensive as building a full tower and can be a great DIY project for rural users.
That said, they do require careful installation and anchoring, especially in areas with high winds or heavy rain. Rust-proofing and stabilizing are essential.
Choose a Tower Mount if:
- You have tall obstructions nearby.
- You want the best line of sight possible.
- You’re comfortable with larger DIY projects.
5. Tripod Mount
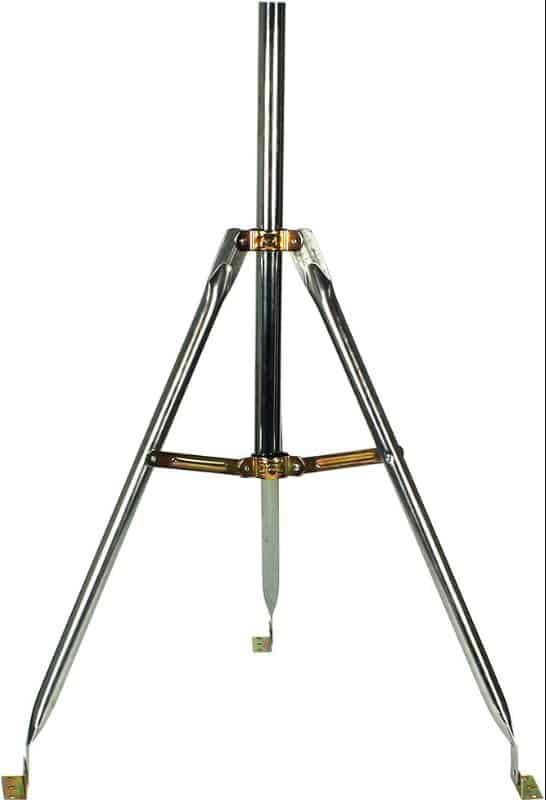
The Tripod Mount is exactly what it sounds like: a tripod stand that holds your Starlink dish.
This is the most flexible option and is especially useful if you move your dish around often. You can place it in the yard during good weather and bring it inside during storms or snow.
It’s also perfect if your roof isn’t suitable for permanent installation or if you’re experimenting with different locations to find the best signal.
Choose a Tripod Mount if:
- You want portability without paying for Starlink’s portability add-on.
- You live in an area with frequent bad weather and want to bring the dish inside.
- You want a temporary setup that’s easy to move.
6. Pole Mount – Great for Backyards
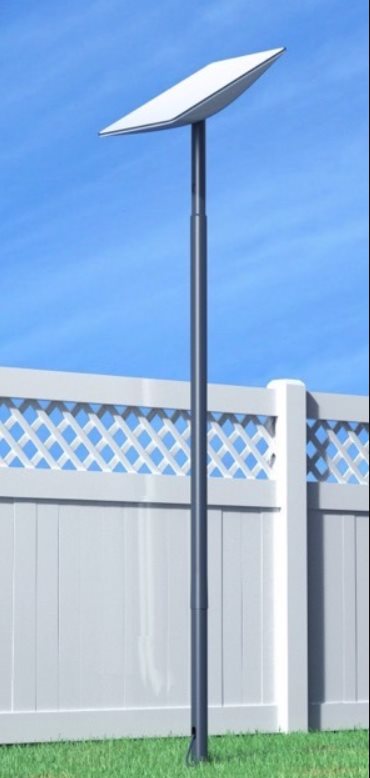
If you have a backyard with open sky and few trees, a Pole Mount may be the easiest and cleanest solution.
You simply install a sturdy pole in the ground and attach your Starlink dish using either the Starlink Pole Mount Kit or the official Pipe Adapter. Most poles are 1.5–2 inches in diameter and can be purchased from hardware or fencing suppliers.
Pole mounts are especially good for renters who don’t want to modify the building itself, or for situations where people live above you and roof access isn’t practical.
Choose a Pole Mount if:
- You have outdoor space like a yard.
- You want a non-roof solution.
- You prefer to avoid drilling into walls or shingles.
7. Chimney Mount – Height Advantage, With Caution
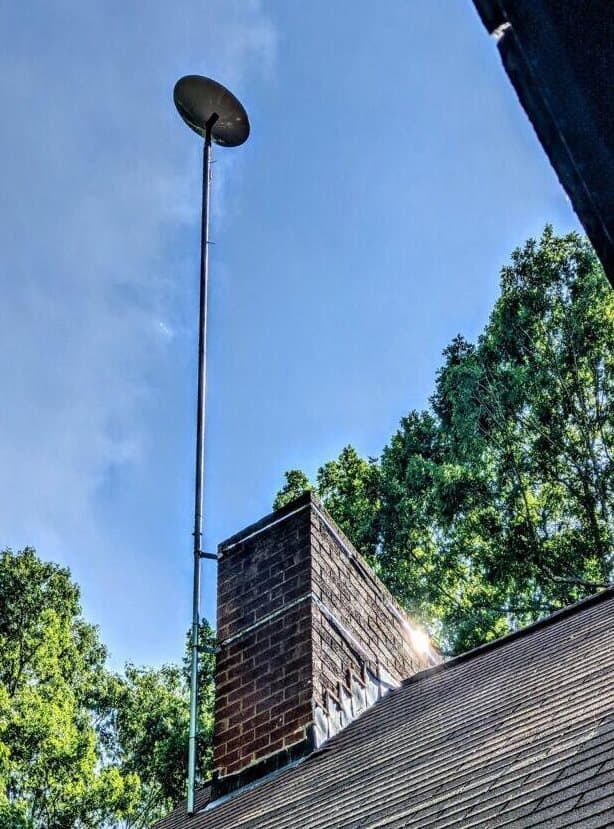
The Chimney Mount attaches your dish to your home’s chimney, giving you instant height and usually a clear line of sight.
While this works well in many cases, there are some downsides. Chimneys can be unstable or weakened over time, and Starlink warns against mounting on structures that may vibrate or deteriorate. In 2026, stabilizing straps and careful inspection are strongly recommended before using this method.
You’ll also need to consider soot buildup and snow accumulation, which can interfere with your dish.
Choose a Chimney Mount if:
- Your chimney is structurally sound.
- You need extra height without installing a tower.
- You’re okay with occasional maintenance.
8. Starlink Standard Pivot Mount – Adjustable and Simple
The Standard Pivot Mount is one of Starlink’s latest official accessories. Designed mainly for wall installations, this mount allows you to adjust the tilt of your dish with ease.
It’s sturdier than most third-party J-Mounts and integrates perfectly with the Gen 3 dish. If you want a clean, no-hassle installation on the side of your house, this is one of the best Starlink mounting options in 2025.
Choose a Pivot Mount if:
- You’re installing on an exterior wall.
- You want precise angle adjustments without DIY tweaks.
- You prefer an official Starlink accessory built for Gen 2/3.
9. Starlink Masonry Mount – For Brick and Concrete Walls
The Masonry Mount is a newer Starlink option that makes it easy to install your dish on brick or concrete surfaces.
This is especially useful in urban areas, apartments, or houses where you don’t have a traditional roof or backyard. It attaches securely to solid walls and is built to handle wind and weather.
Choose a Masonry Mount if:
- Your building has brick or concrete exterior walls.
- Roof installation isn’t possible.
- You need a safe, permanent setup on a flat wall.
10. Official Pipe Adapter Kit – Secure Fit for Any Pole
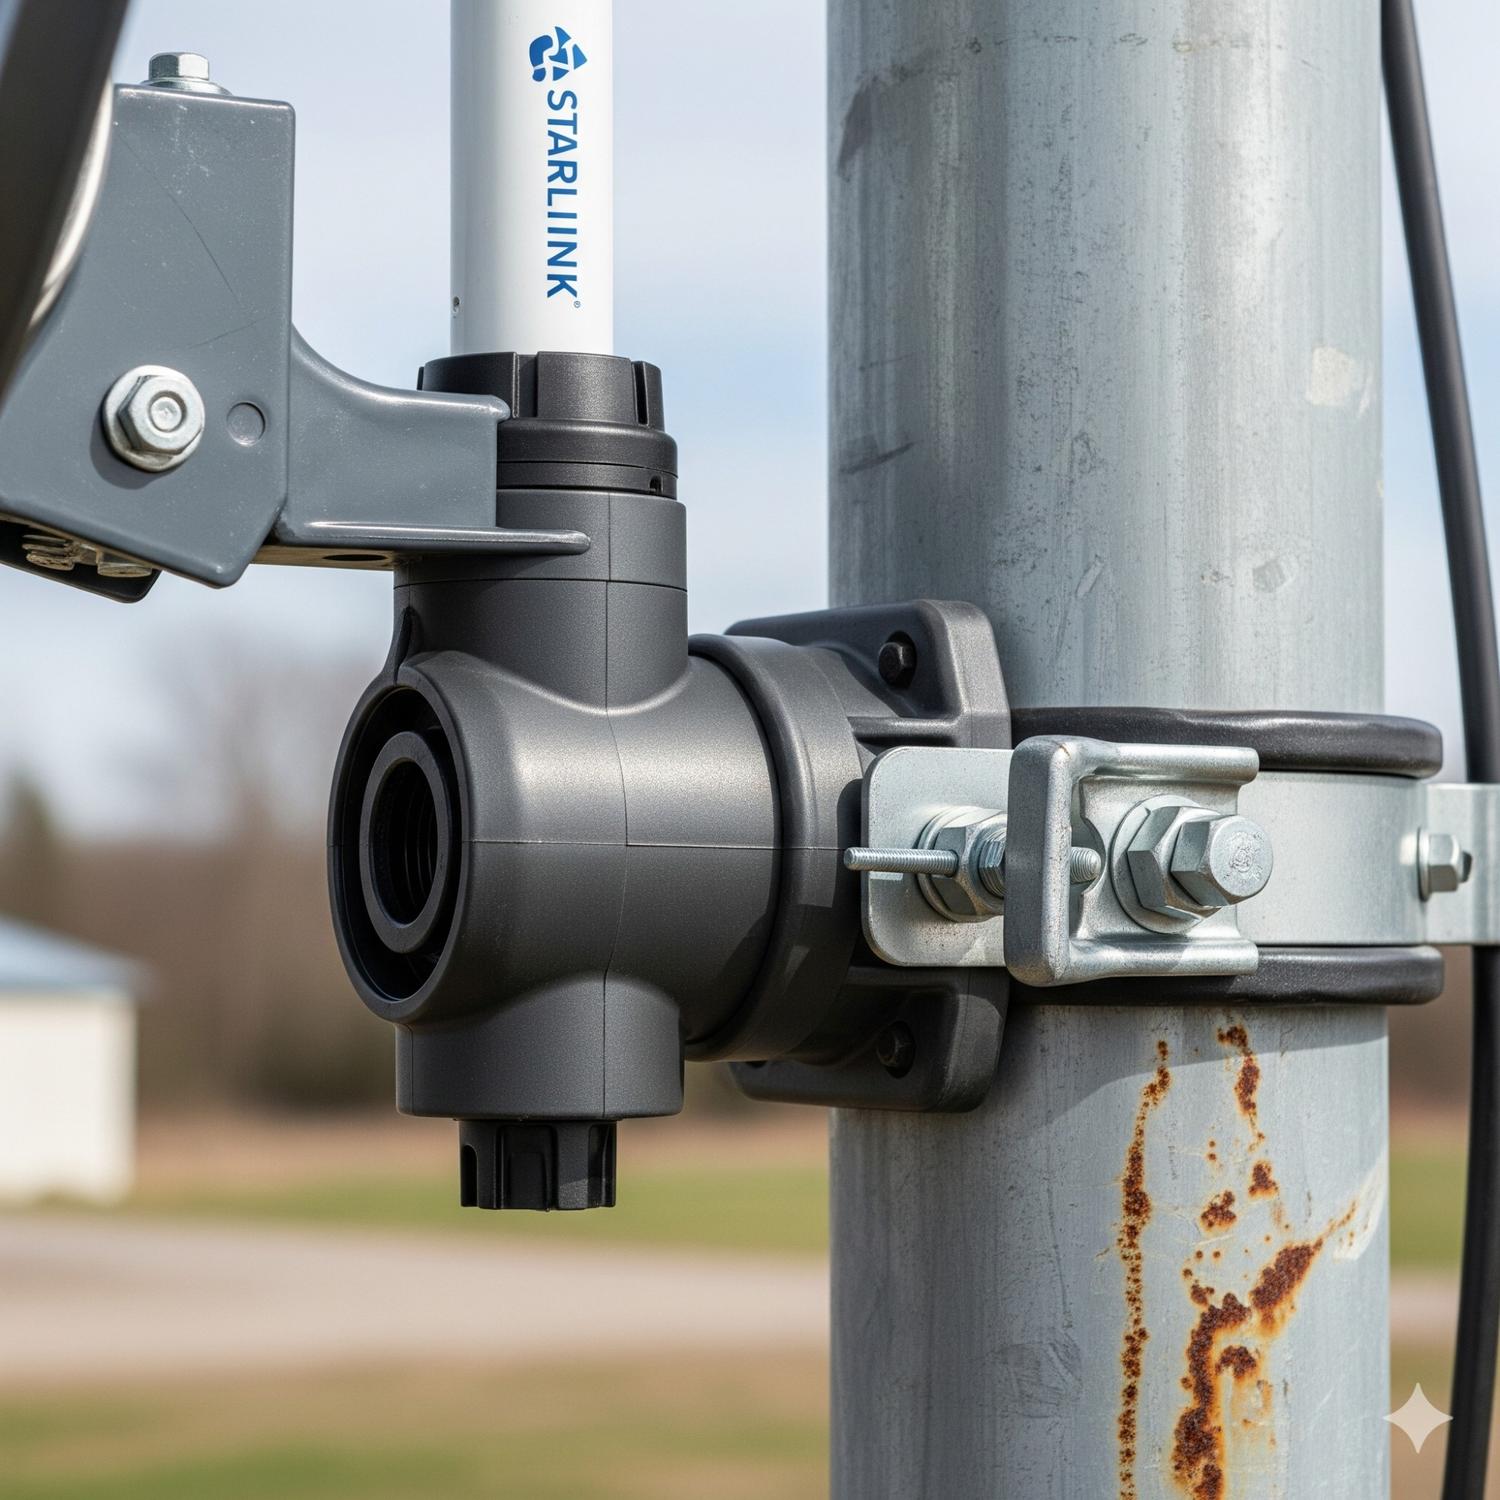
Back in the early days, users had to improvise with spacers or even electrical tape to fit Starlink onto standard poles. In 2026, the Starlink Pipe Adapter Kit makes things much easier.
This kit lets you mount your dish onto most poles between 1.25″ and 2.5″ diameter. It ensures a snug, weatherproof fit that won’t loosen in storms.
That means you can pick up a sturdy steel pole from your local hardware store and easily make it into a Starlink mount.
Choose the Pipe Adapter if:
- You already have a standard pole installed.
- You want a cheap, simple ground or wall-mounted option.
- You don’t want to buy a custom Starlink mount.
11. Balcony or Railing Mounts – Ideal for Apartments
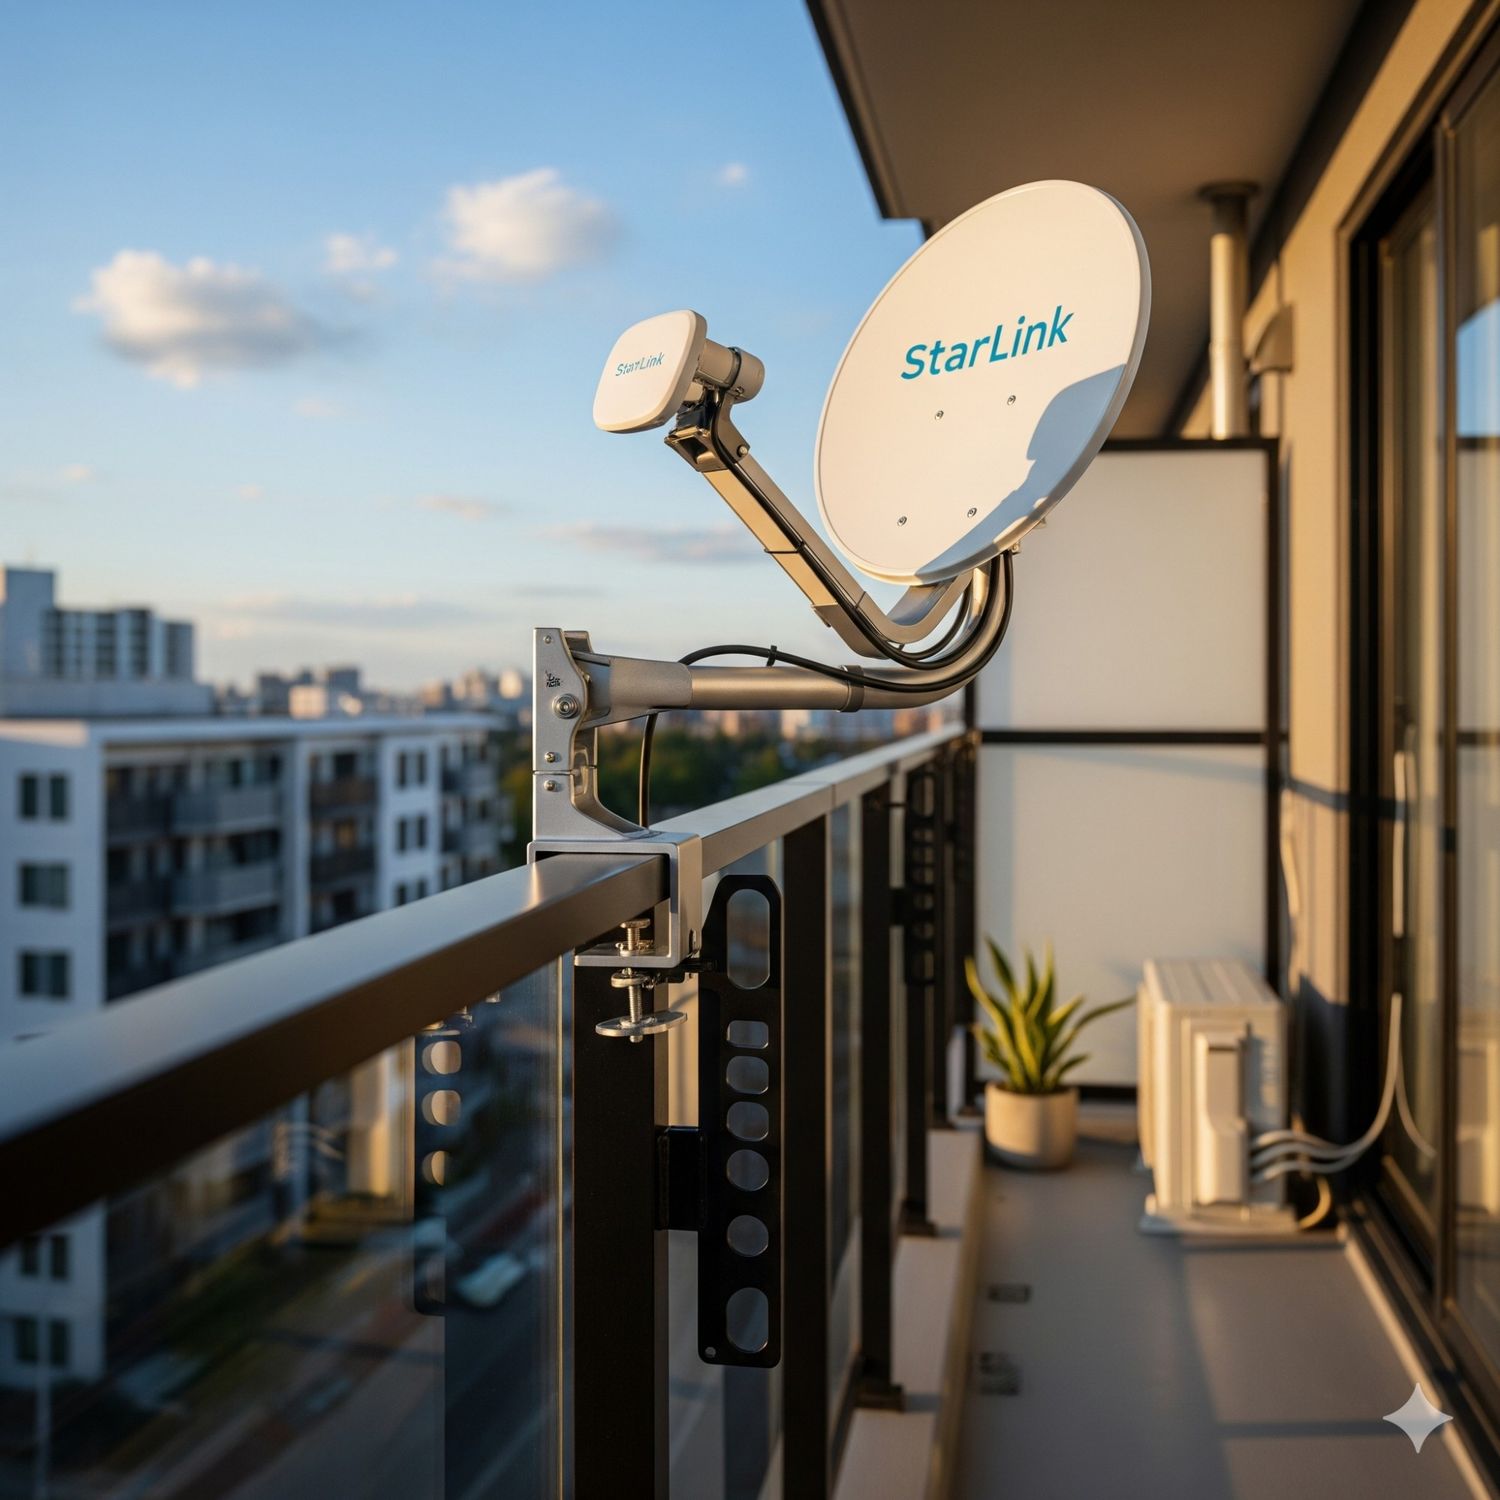
As Starlink grows in popularity in cities, balcony and railing mounts are becoming a go-to option. These are third-party mounts (not official from Starlink) that clamp securely to a balcony railing or deck edge.
They’re not as tall as a pole or tower, but they’re perfect for renters in high-rise apartments where roof access isn’t possible.
Choose a Balcony Mount if:
- You live in an apartment with a balcony.
- You need a non-permanent installation.
- You want flexibility to remove or adjust the mount.
12. Heavy-Duty Tower Kits – For Rural and Forested Areas
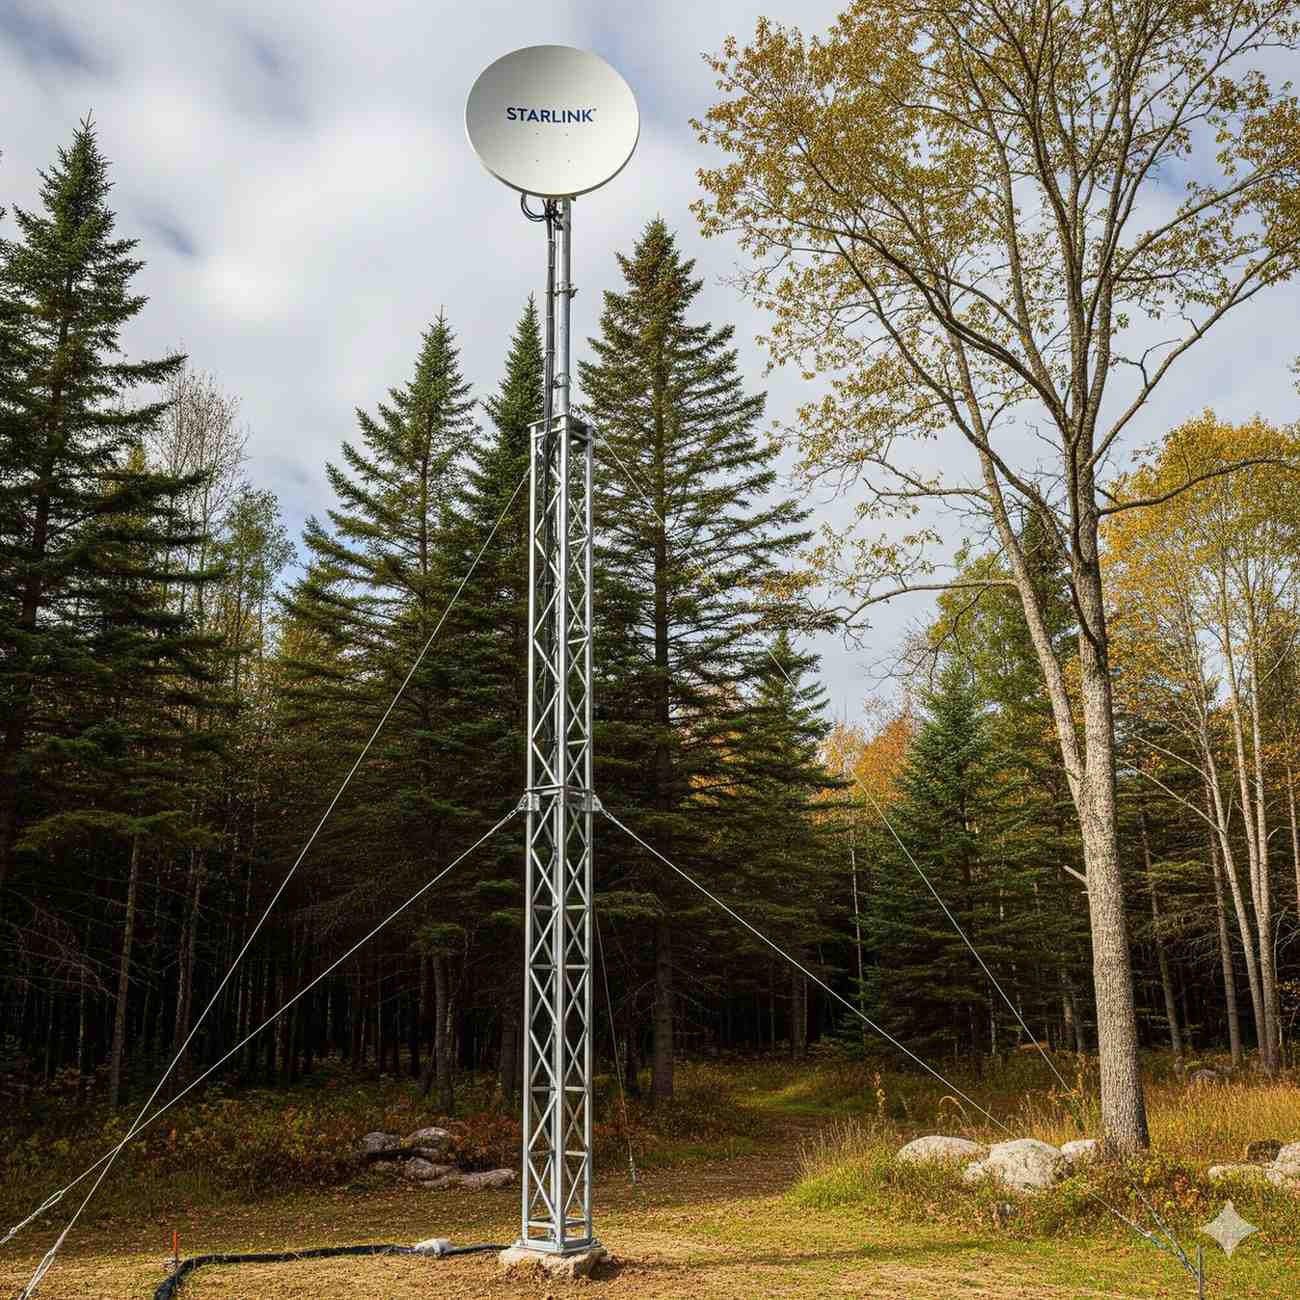
In 2026, Starlink began recommending compatible tower kits for users in areas with lots of obstructions, such as forests or hilly regions.
These towers can elevate your dish well above treetops and come with built-in grounding, making them safer during storms. While they’re more expensive and complex to install, they’re often the only way to guarantee a clear view of the sky in tough locations.
Choose a Tower Kit if:
- You live in a rural or wooded area.
- You want maximum height and performance.
- You’re comfortable with a larger, semi-professional install.
Starlink Mounting Tips for the Best Signal
- Use the app first: Always check obstructions in the Starlink app before installing.
- Go as high as needed: The more clear sky your dish can see, the better your speeds.
- Secure your mount: Wind, snow, and storms can shift mounts that aren’t properly fastened.
- Stick with official accessories when possible: The Starlink Pipe Adapter, Pivot Mount, and Flashing Mount are designed for easy integration and long-term durability.
The Bottom Line
In 2026, there’s no shortage of choices when it comes to Starlink mounting. From classic J-Mounts and pole setups to the new Pivot and Masonry mounts, each option has its own strengths depending on your home and surroundings. The best Starlink mounting option is the one that gives your dish a clear, unobstructed view of the sky while staying safe and secure through all weather. Take the time to match the mount to your space, and you’ll enjoy faster, more reliable Starlink internet for years to come.
RELATED GUIDES:
- How To Buy, Sell, And Transfer Used Starlink Dish
- Why Are My Starlink Speeds So Slow and How to Improve it
- How To Switch Starlink From Residential to RV
- How to Update Starlink Firmware 2026 Latest Version List
- Starlink Down: Is Starlink Down Right Now | Starlink Outage
- How to Factory Reset Starlink Router
- How to Stow Starlink 2026: Guide to Stowing Your Starlink


