- Windows 11 does not display file extensions by default, but it is important for security reasons when downloading files from the internet.
- You can make file extensions visible in Windows 11 by enabling the option in File Explorer command bar, adding a file type column, using a batch file, or modifying the Registry Editor.
- Following these methods will allow you to show file extensions in File Explorer and enhance security on your Windows 11 system.
When you are manually opening a file, you may need to find the file extensions. Windows 11 doesn’t display the file extension. Having a file extension can be useful, for security purposes. When downloading a file from the internet, you may have to check whether the file extension is apt with the file type you are downloading and if there are no viruses attached to it. For instance, if you are downloading an image, but it is downloaded in MP3 format, or any such may lead to security concerns.
You do have the option to show File Extensions in Windows 11, but it is not enabled by default. If you want to know the file extensions of the file on your system, then you will have to enable this option.
Enabling File Extensions From The Command Bar In File Explorer
You can enable the option to show file extensions in Windows 11 from the command bar in File Explorer. Follow the steps given below to enable the file extensions-
- Press the Windows + E key combo to open the File Explorer on your PC.
- Here click on the Layout and view options icon that is present on the ribbon on the File Explorer.
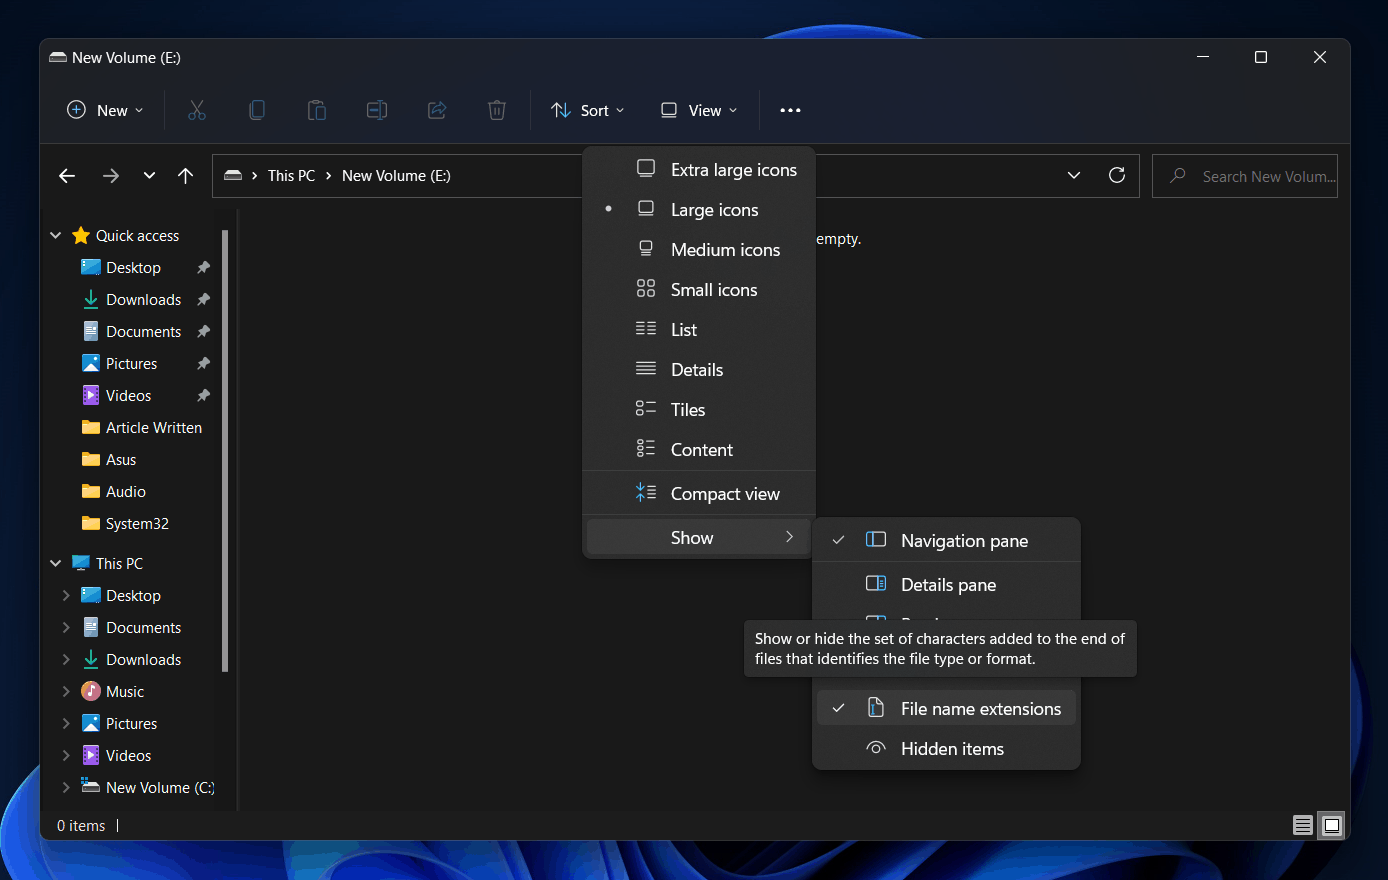
- Click on the Show option and then click on File name extensions to enable showing file extensions of the file in File Explorer.
Adding File Type Column
You can add the file type column in the File Explorer which also shows the extension of the file on your PC. This can be helpful if you don’t want the file extension to appear on the name of the file. To add a file type column, follow the steps given below-
- Open the File Explorer by pressing the Windows + E key combo, and then navigate to the folder of which you want to know the file type.
- Right-click on the header bar which is present right below the address bar. Click on the Type option to enable showing file type column.
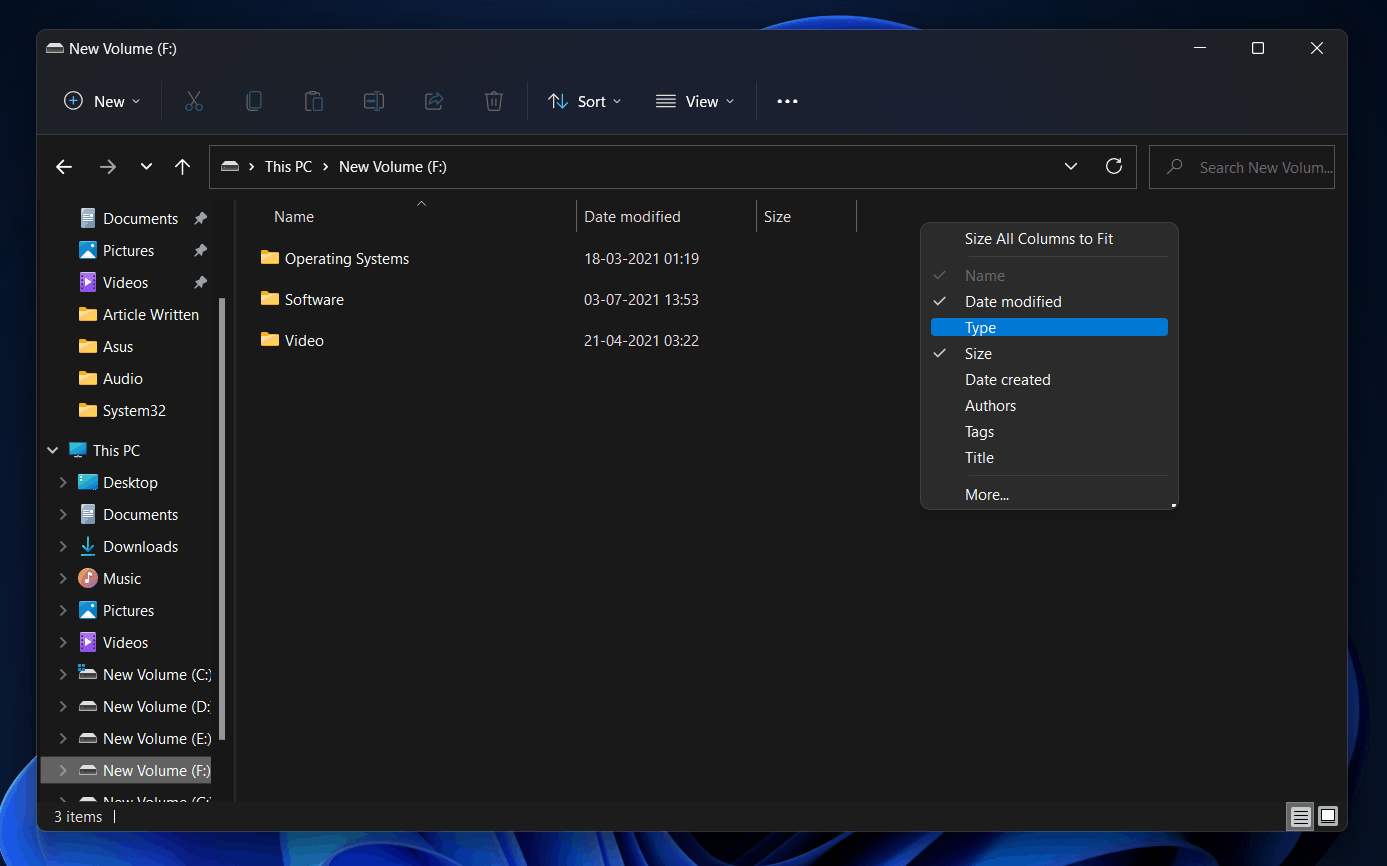
Do note that this will only enable the file type column for the particular column for which you want to enable it. You won’t see any changes in any other folder on your PC.
Enabling File Extensions From The Folder Options
You can enable showing file extensions from the folder options. Here you will have to uncheck the file name extensions option to unhide the File Extension. To do so, follow the steps given below-
- Open the File Explorer by double-clicking This PC icon on your desktop or clicking on the File Explorer icon on the taskbar. You can either press the Windows + E key combo to open the File Explorer.
- In the File Explorer, click on the Three Ellipses on the ribbon. Click on the Options.
- You will be headed to the Folder Options app. Click on the View tab to open it.
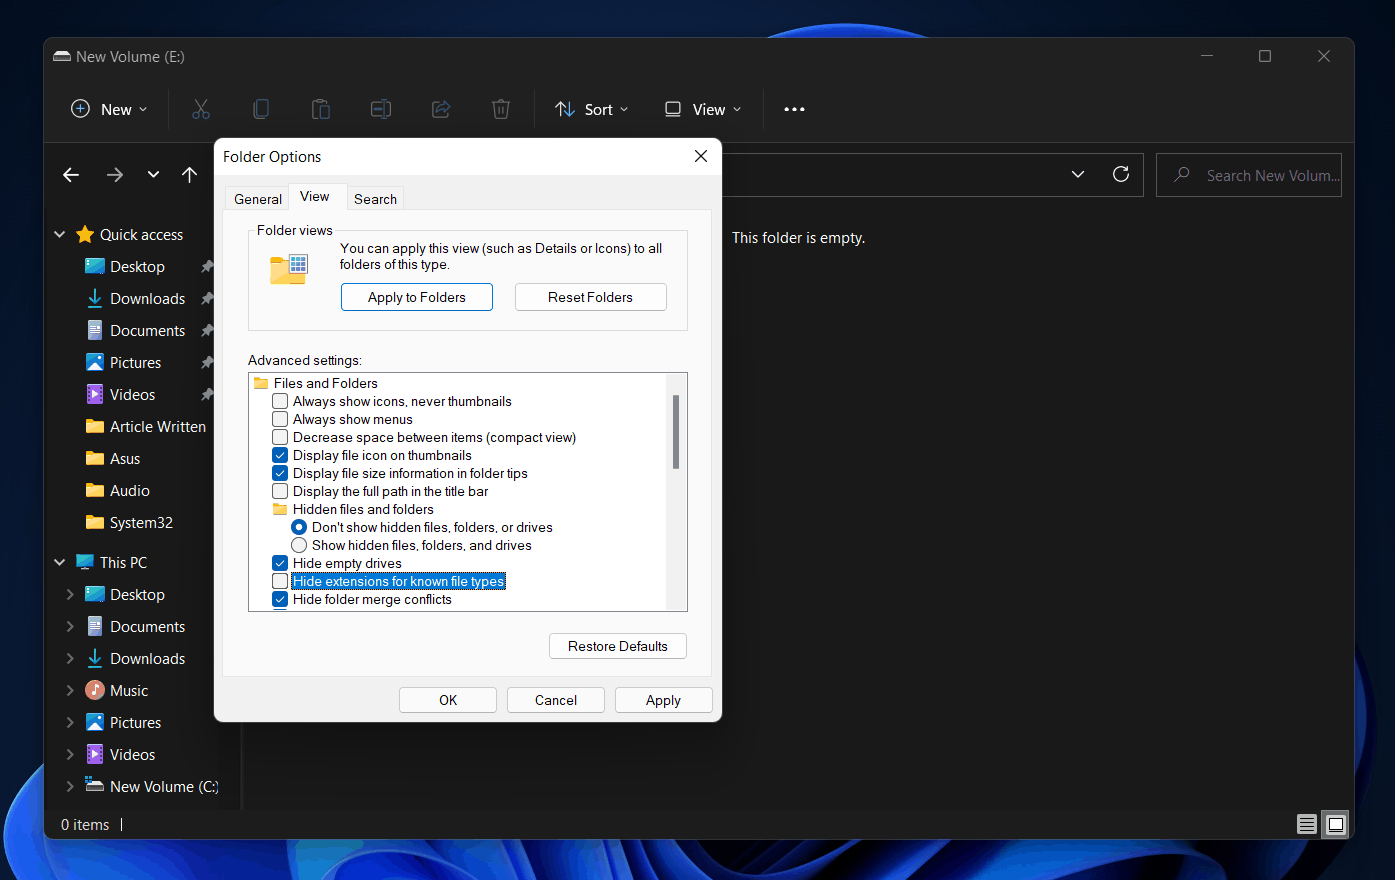
- Here uncheck the Hide Extensions For Known File Types.
- Click on Apply and then click on OK to save the changes.
Using The Batch File To Enable Showing File Extensions
You can create a batch file that will enable showing file extensions in Windows 11. To create a batch file that does so, follow the steps mentioned below-
- Right-click on an empty space on your desktop, and then click on New in the context menu, and then click on Text Document.
- Double-click on the text document to open it, and then paste the following-
-
reg add HKCU\Software\Microsoft\Windows\CurrentVersion\Explorer\Advanced /v HideFileExt /t REG_DWORD /d 0 /f
-
- Click on the File option in the text document, then click on Save As.
- Set the File Type from the Text document to All Files and enter the name as ShowFileExtension.bat and then click on Save.
- Now double-click on the file you created to execute it, and the changes will take place.
If you want to hide the file extensions, then paste the following code reg add HKCU\Software\Microsoft\Windows\CurrentVersion\Explorer\Advanced /v HideFileExt /t REG_DWORD /d 1 /f in the text document, instead of the above one, and save it as a batch file to unhide the file extension.
Enable Showing File Extension From The Registry Editor
The last way to show file extensions in Windows 11 is using the Registry Editor. Making some tweaks in the Registry settings can do the work for you. Follow the steps given below to enable showing file extensions using the Registry Editor-
- In the Start Menu, search for Registry Editor and open it.
- Head to the following location in the Registry Editor-
-
Computer\HKEY_CURRENT_USER\Software\Microsoft\Windows\CurrentVersion\Explorer\Advanced
-
- On the right side, search for HideFileExt and double-click on it to edit it.
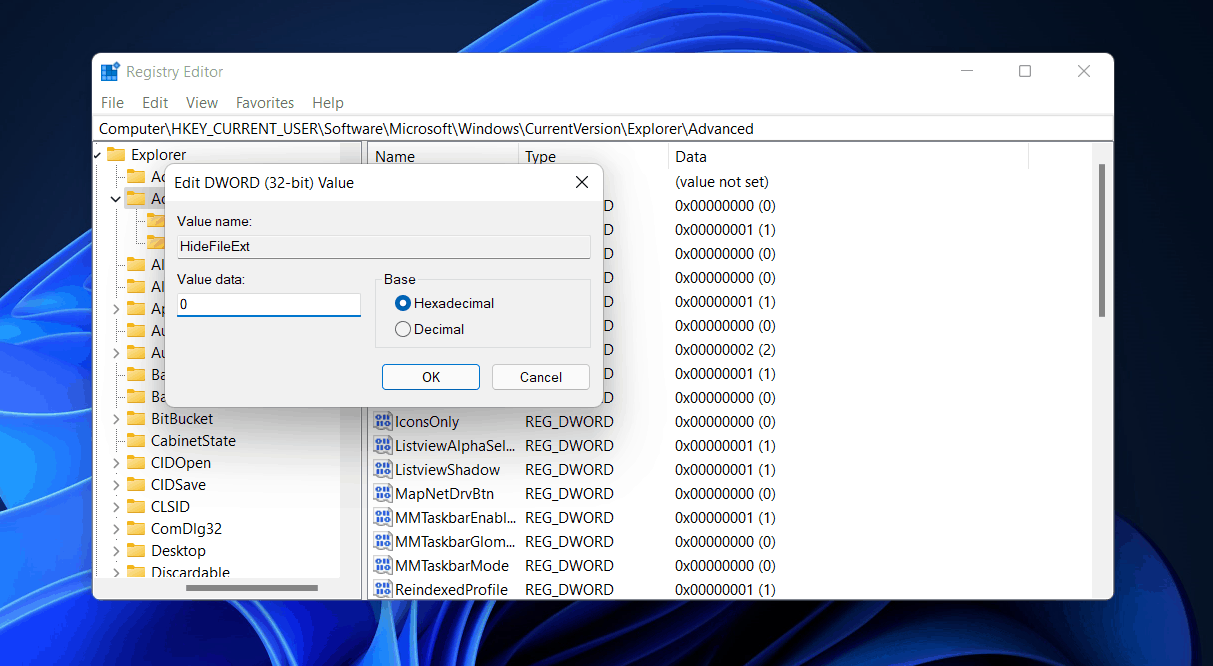
- Now change the value of the Registry key to 0 if you want to show the File Extensions. In case you want to hide the File extensions then set the value to 1.
- Click on OK to save the changes and close the Registry Editor.
- Save all your work, and log out and log in again on your PC, and you will be able to see the File Extensions.
RELATED GUIDES:
- How To Enable Windows 11 Text-To-Speech Voice Typing
- How To Fix Windows 11 PC Won’t Shut Down
- How To Update Apps In Microsoft Windows 11
- How to Fix Windows 11 Not Detecting Second Monitor (5 Ways)
Final Words
These were some of the methods to make file extensions visible in Windows 11. Following the above steps, you will be able to show the file extensions in file explore on your PC.


")

")
