- Windows allows users to change the MAC address, an essential device identifier, with five methods available.
- Consider the implications of changing the MAC address and ensure to note down any modifications for reversal.
- Detailed steps are provided to change the LAN MAC address in Windows 11, along with information on changing the Wi-Fi card MAC address and additional methods for modifying the MAC address using the Registry Editor or a utility like SMAC.
Windows allows the users to change the MAC address in the PC, and you got five methods to do it. However, you should have the right reasons to change the MAC since it works as a device identifier. I will start with the easiest method, then move on to the advanced versions to ensure the process success rate. I want to remind you to take notes of the modifications, so you can revert the recent changes in the system.
What you Should Consider before Changing the MAC Address in Windows 11?
Media Access Control Address (MAC) addresses are given the hardware component by the manufacturer. You cannot erase the network component address, and you can find it in Bluetooth, Wi-Fi card, and LAN network. The MAC address is a unique serial number and works as a device identifier. The MAC address is meant to recognize the device to allow access, restrict access, put limitations, and so on.
My Wi-Fi router assigns static IP addresses based on the LAN or Wi-Fi card unique identifier. You can modify the address to bypass the limitations added by the network. Wireless cards don’t have an option to modify the physical address, so don’t be surprised if the option is missing in the Wi-Fi adapter. The virtual MAC address is exclusive for LAN adapters only.
Don’t modify the device’s unique address thinking that it will change the physical address permanently. Windows allows the users to modify the address, so you can overrule the network limitations.
Change Windows 11 MAC Address in 2024
Let me show you five ways to change the MAC address in Windows 11 machine.
Change LAN MAC Address in Windows 11
Millions own desktops and laptops with a wireless card preinstalled in the machine. Let me show you how to assign a virtual address of the network in Windows 11.
- Press Windows Key, and I key simultaneously.
- Choose “System” then select “About”.
- Scroll down, then select “Device Manager” from the options.
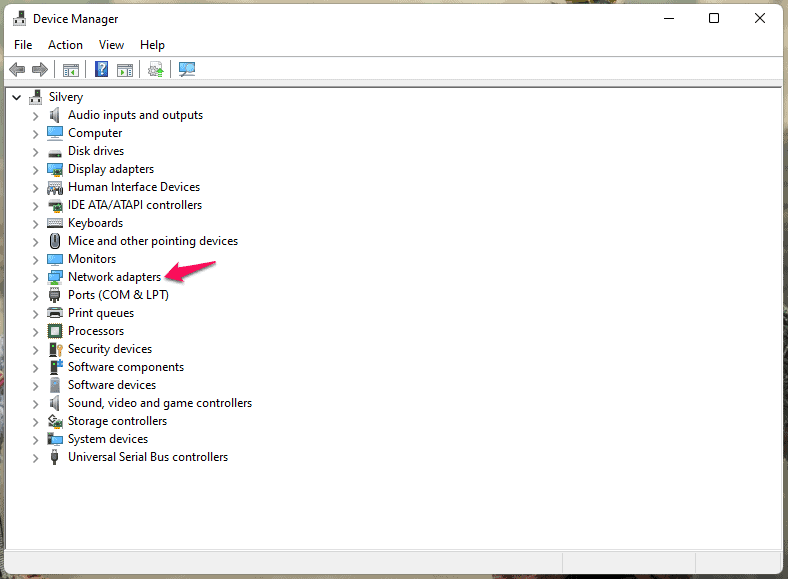
- Device Manager pops up on the screen and click on “Network adapters”.
- Select the network adapter, then right-click the mouse to select “Properties”.
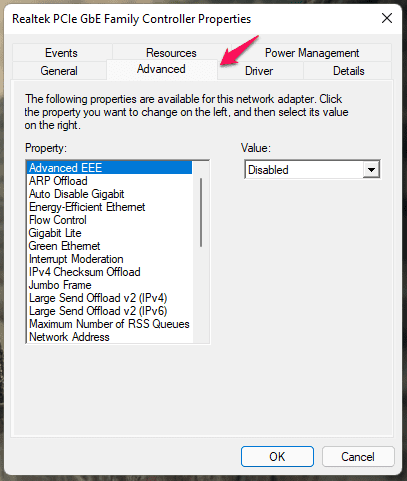
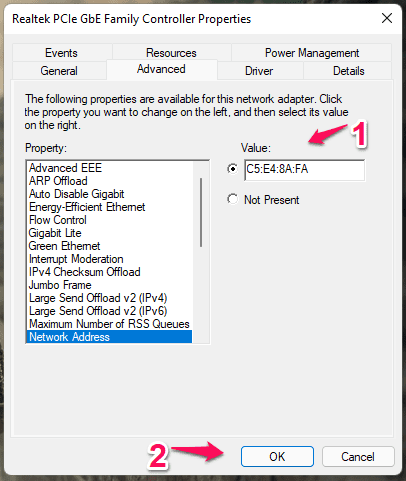
- Choose “Advanced” from the top menu.
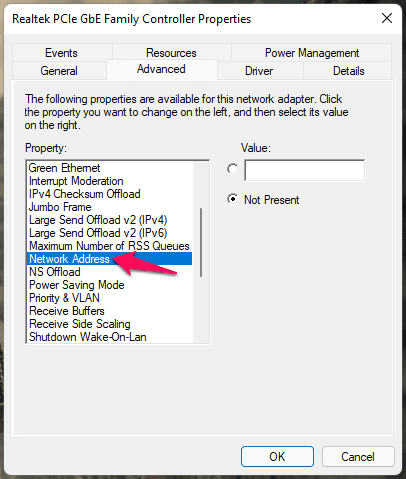
- Select “Network Address” or “Locally Administrated Address” from the options.
Note: The feature name differs due to the regional vocabulary such as English (US), English (UK), etc.
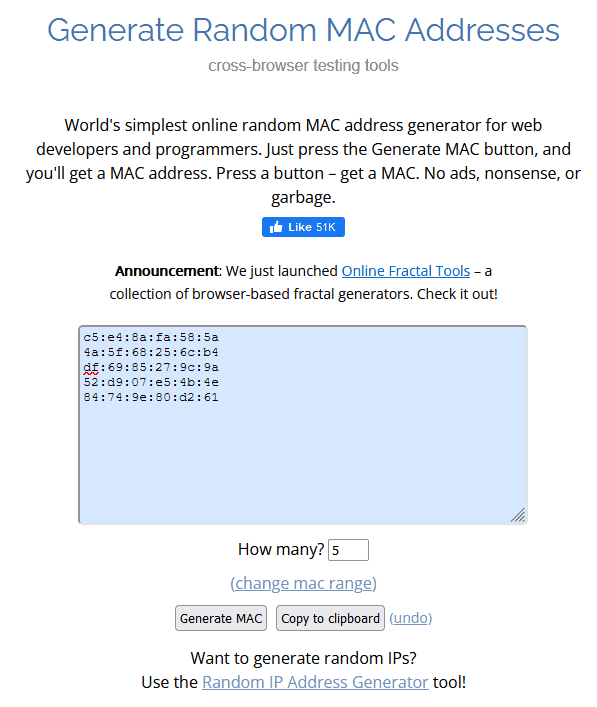
- Go to any MAC address generator and copy the address.
- Paste the random address in the machine.
- Click on “OK” to apply changes.
Close all programs running in the background and restart your Windows 11 machine.
Change WiFi Card MAC Address in Windows 11
Many laptops don’t come with an onboard LAN adapter, which is frustrating in my opinion for the power users. Unfortunately, you cannot change the wireless adapter MAC address, and the manufacturer disabled the feature due to security reasons.
Of course, we cannot pin the blame on the manufacturers for limiting the Wi-Fi adapter and not the LAN adapter. I do have a solution that will help you to change the Wi-Fi MAC address in laptops and desktops without putting security at risk.
The wireless network adapters are the solution. They cost less than $10 on Amazon or are cheaper in the nearby peripheral store. The external Wi-Fi cards have permanent MAC addresses, and they are removable. Changing the unique device address is easy with removable Wi-Fi cards.
Modify Mac Address from Control Panel
Control Panel is the traditional Windows management tool, and you can use the same to access the custom MAC address field. Let me show you the way and modify the network adapter address.
- Open Control Panel using the search bar.
Path: Control Panel\Network and Internet\Network and Sharing Center
- Choose “Network and Internet” from the list.
- Select “Network and Sharing Center”.
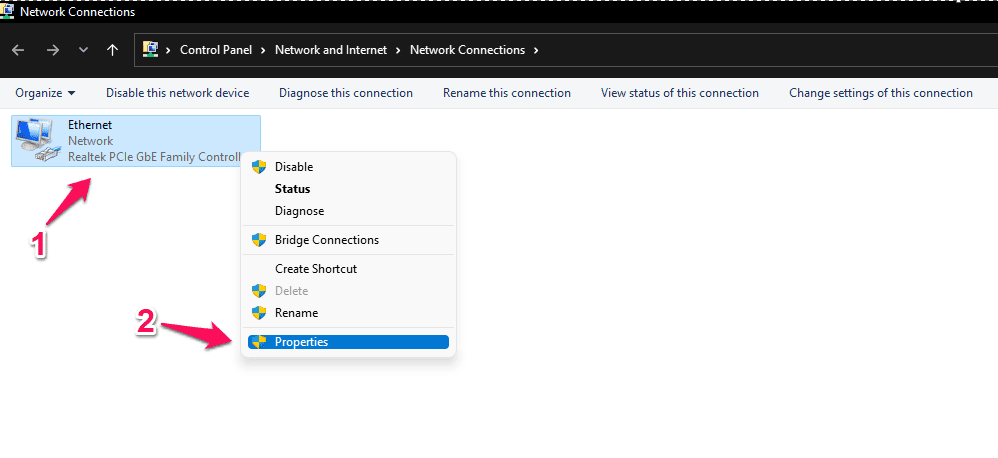
- Click on “Change adapter settings” to continue.
- Select the network adapter, then right-click the mouse to choose “Properties”.
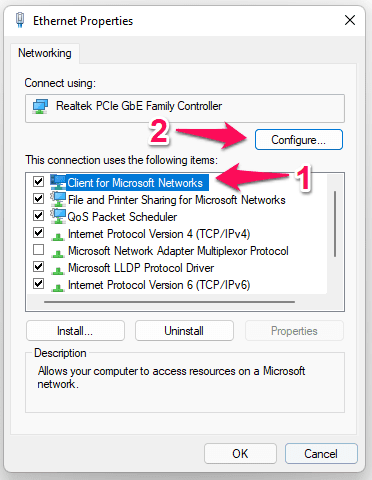
- Select “Client for Microsoft Networks” and click on “Configure”.
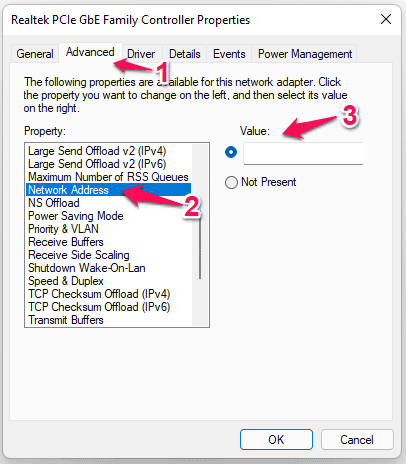
- Choose “Advanced” from the top menu.
- Select “Network Address” or “Locally Administrated Address” from the options.
Note: There are several MAC address generators online, and copy the address.
- Paste the random address in the empty field.
- Click on “OK” to apply changes.
You have to restart the Windows machine, so close all background applications.
Use Mac Address Modifier Utility
Millions own Windows machine but they lack technical knowledge and wants to avoid the complicated part. There are free utilities out there that help the users to change the MAC address with ease. Let me suggest one program that was a premium solution back in the days, but it’s freeware now.
Download SMAC for Windows (scroll down and download it from PC WORLD)
You have to run SMAC in compatibility mode, and Windows XP is the preferred selection. I don’t think it is updated for Windows 11, but it works flawlessly in the 11th edition.
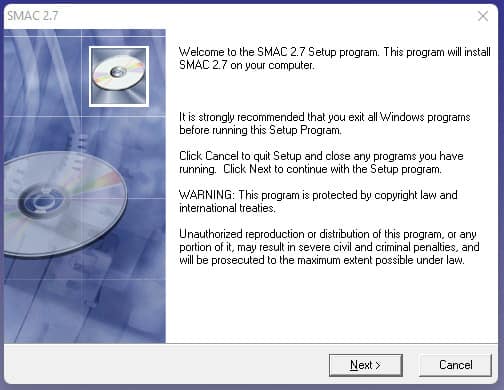
Step 1: Run the SMAC executable file as administrator.
Step 2: Click on the “Next” option.
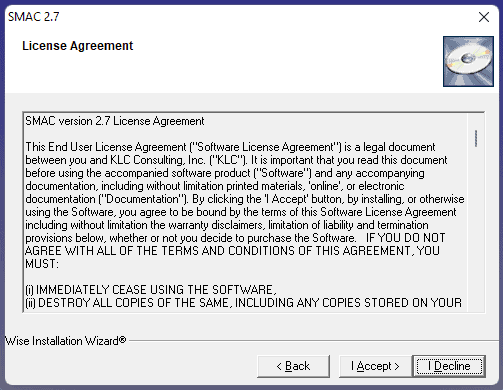
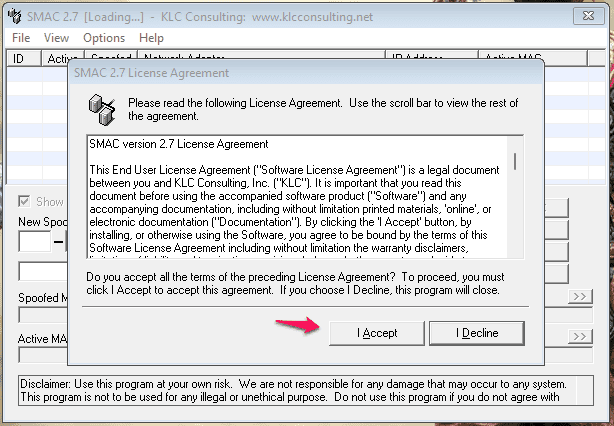
Step 3: Read the policy and click on the “I Accept” option to proceed further.
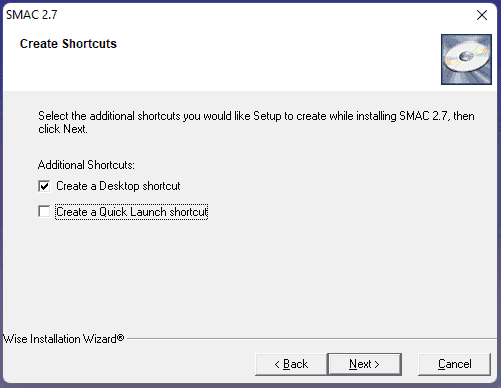
Step 4: Choose your options and click on ”Next” to continue.
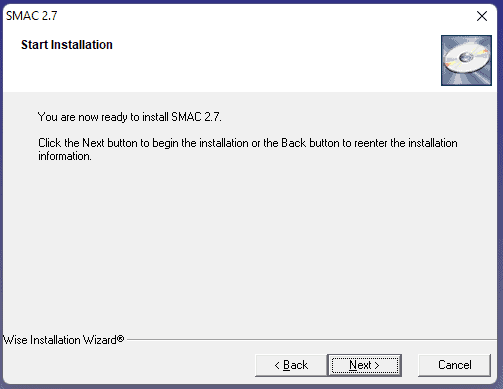
Step 5: Click on “Next” to continue.
Step 6: Launch SMAC in Windows 11.
Step 7: Click on the “I Accept” button.
Note: If the program asks you to enter the license key, and then you will find the “Proceed” button. Click on “Proceed” to use the freeware.
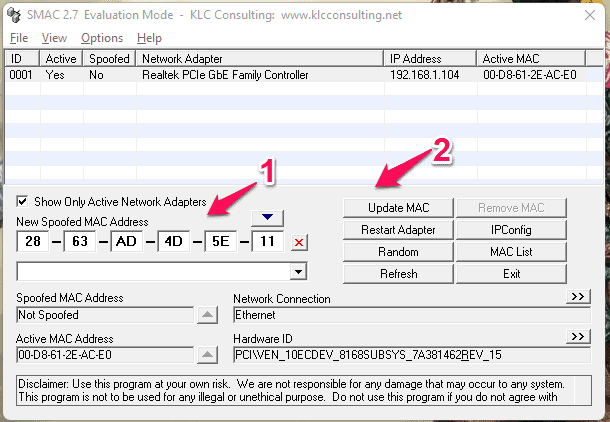
Step 8: Add a random MAC address manually, then click on the “Update MAC” option.
Close background running applications and restart the machine to make the changes effective immediately.
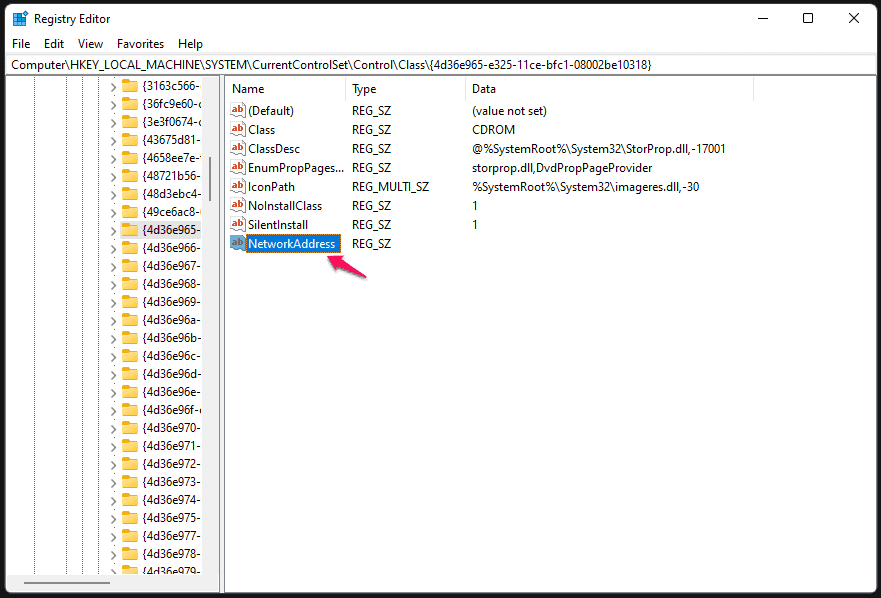
Add Custom MAC Address using the Registry Editor
Registry Editor is an integral part of the Window system, and that’s what we are going to use to add a custom MAC address in Win 11.
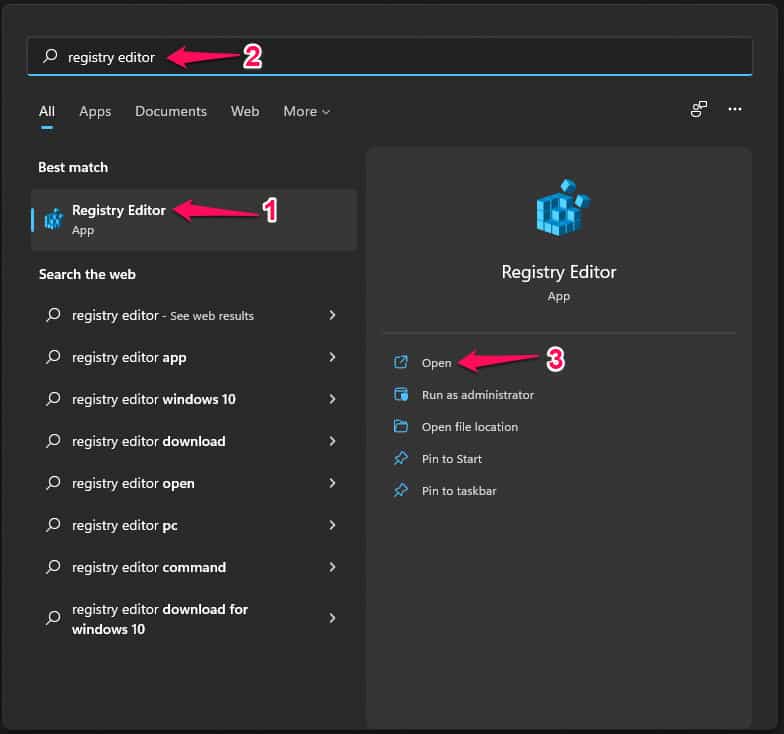
- Press the Start key.
- Search for “Registry Key” and click to open it.
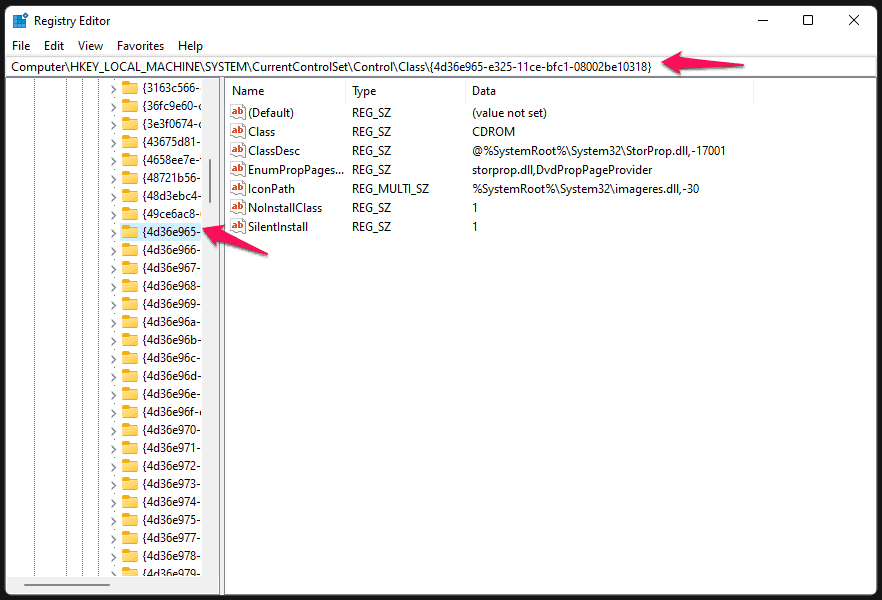
- Go to “HKEY_LOCAL_MACHINE\SYSTEM\CurrentControlSet\ControlClass\{4D36E972-E325-11CE-BFC1-08002BE10318}” location in the registry.
- I opened the folder manually.
- Right-click the mouse to create a new “String” in the registry.
- Name the new strong “NetworkAddress”.
- Double-click to open the newly created registry and paste the generated MAC address.
- Click on “OK” to save the changes.
Restart Windows 11 machine for the new settings to take effect immediately.
RELATED GUIDES:
- How To Fix Random Restart Problems In Windows 11
- How to Fix Ethernet Doesn’t Have a Valid IP Configuration Error in Windows 11
- How To Fix Windows 11 Blue Screen of Death Errors
- How To Fix Windows 11 Screenshot Not Working
What’s next? Windows 11 MAC address keeps changing
Many users have reported that the Wi-Fi router or network is not able to recognize the virtual MAC address. I recommend the readers get an external Wi-Fi card or network adapter to show a new MAC address instantly. Let us know which solution helped you change the LAN MAC address in your Windows PC.


