- Run the Network Adapter Troubleshooter from Settings → System → Troubleshoot → Other troubleshooters to automatically detect and fix mobile hotspot problems in Windows 11.
- Disable Bluetooth from Settings → Bluetooth & devices to avoid wireless interference that can interrupt hotspot sharing.
- Restart the Internet Connection Sharing (ICS) Service in the Services app—this replaces the old “Windows Mobile Hotspot Service,” which no longer exists in modern Windows 11 versions. Restarting ICS often restores hotspot functionality.
Many people use a mobile hotspot to connect to the Network. Mobile hotspots can be prone to various types of errors. You may face a problem with the mobile hotspot, and many times, it may not work properly. If you have been facing issues with the mobile hotspot and it is not working properly, this article will help you fix its problems.
Fix Mobile Hotspot Not Working in Windows 11
In this article, we will discuss how you can fix the mobile hotspot not working in Windows 11.
Run Network Adapter Troubleshooter
If the mobile hotspot is not working in Windows 11, and you have been facing problems using it, then you should try running the network adapter troubleshooter-
- Open the Settings app on your PC by pressing the Windows + I key combo.
- Click on the Troubleshoot option on the right side of the System tab.

- On the next window, click on Other troubleshooters. Click on the Run button next to the Network Adapter.
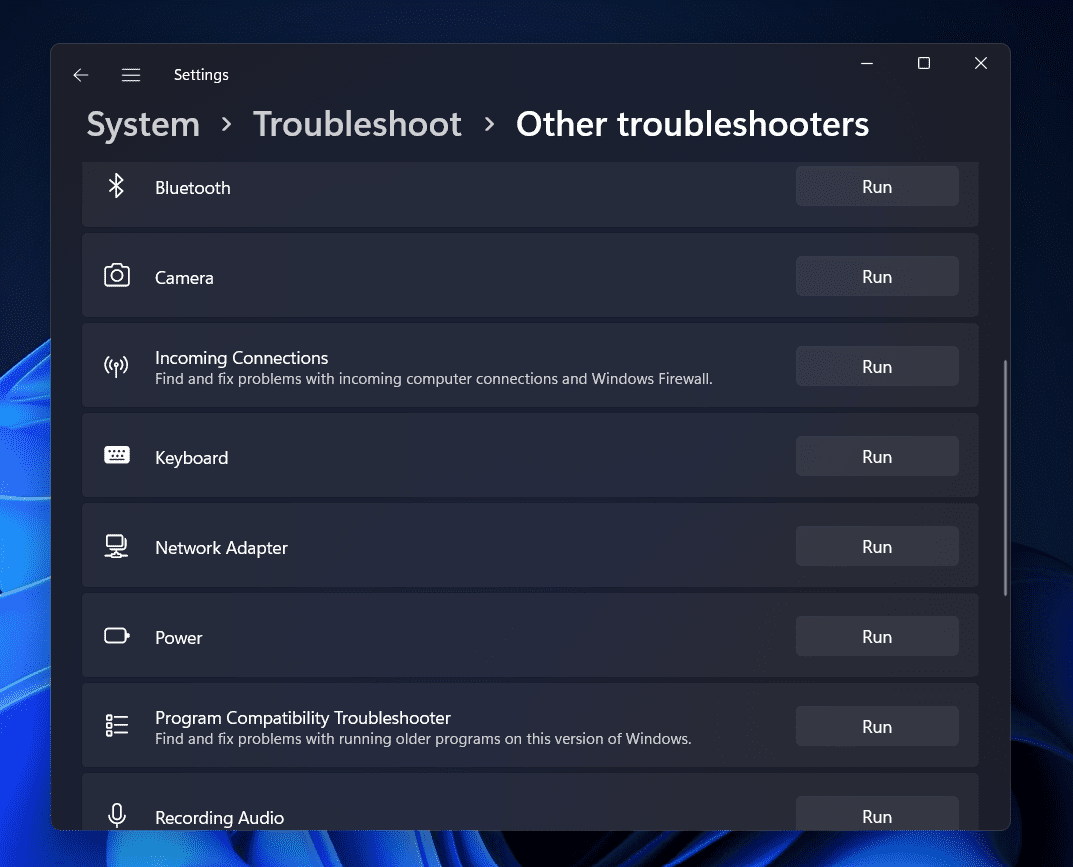
- Now, follow the on-screen instructions to run the network adapter troubleshooter.
- After doing so, the issue of the mobile hotspot not working in Windows 11 should be fixed.
Disable Bluetooth
Another thing that you can try doing is disabling Bluetooth. Bluetooth can many times disrupt the mobile hotspot, and you may face issues with it. Please turn off the Bluetooth option from the action center or turn it off from the Settings. To turn off the Bluetooth from the settings, follow the steps given below:
- Press the Windows + I to open the Settings.
- Now on the left sidebar of the Settings, click on the Bluetooth & devices.
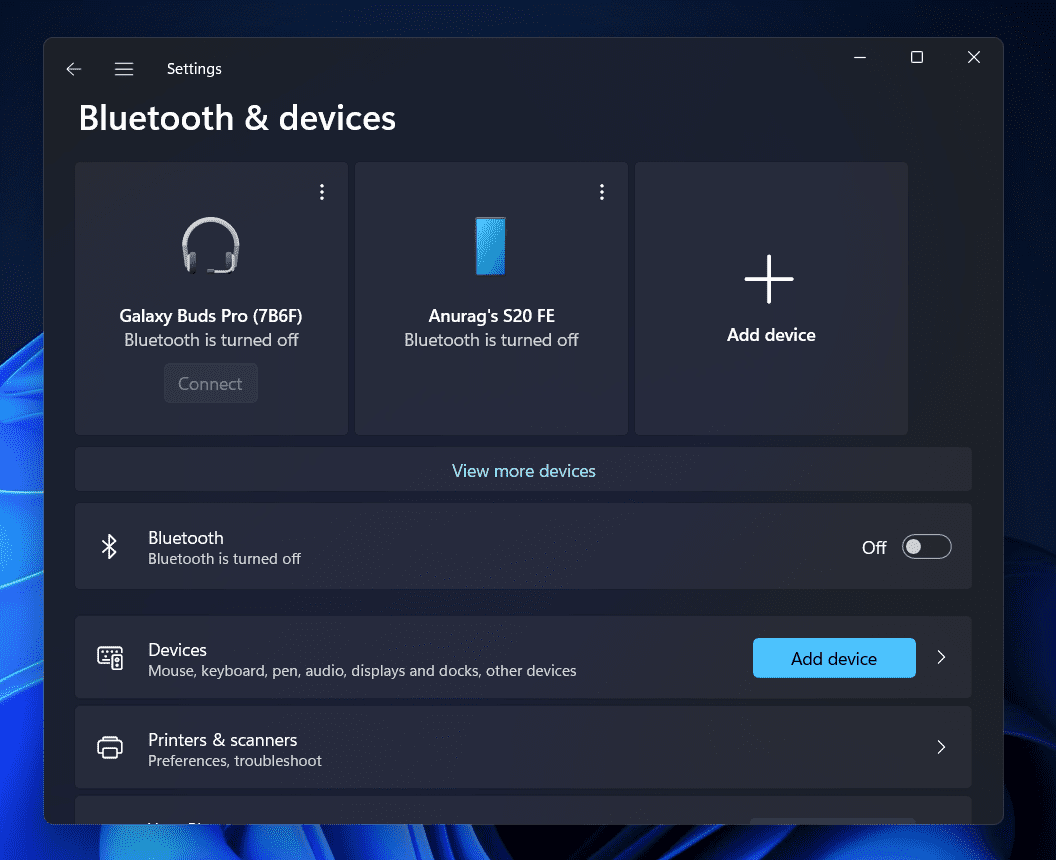
- On the right side, turn off the toggle for Bluetooth. This will turn off the Bluetooth.
Restart Internet Connection Sharing (ICS) Service
Windows 11 no longer uses the old “Windows Mobile Hotspot Service.” The feature now works through Internet Connection Sharing (ICS). Restarting it often resolves hotspot issues.
- To restart the ICS service, follow the steps below:
- In the Start Menu, search for the Services app and open it.
- Scroll down and locate Internet Connection Sharing (ICS).
- Double-click on it to open its properties.
- If the service is running, click Stop, wait a few seconds, and click Start again.
- Set Startup Type to Automatic.
- Click Apply, then OK.
This restarts the backend hotspot mechanism used in modern Windows 11 builds.
Turn Off Airplane Mode
If the airplane mode is turned on, and you are trying to use the mobile hotspot, then also you may face issues with it. Therefore, you should try turning off the airplane mode if the mobile hotspot is not working in Windows 11. To turn off airplane mode, follow the steps given below-
- Open the Action Center on the taskbar.
- Here you will see the Airplane Mode icon. If this icon is highlighted in blue, then that means Airplane mode is turned on.
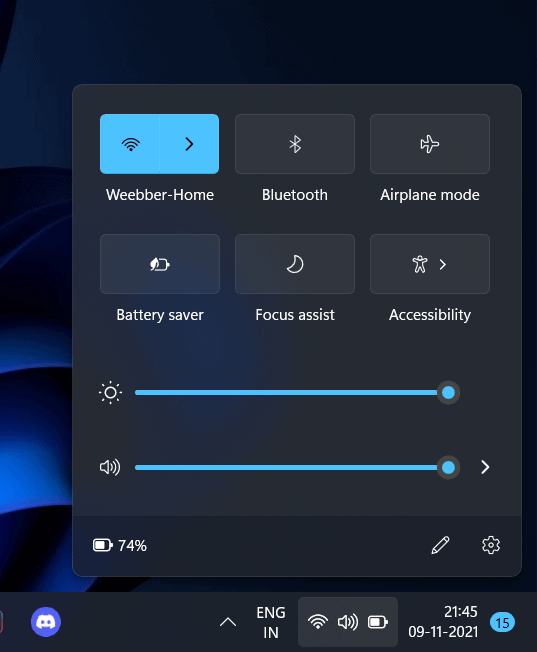
- Click on the Airplane Mode icon to turn it off. If the icon is no longer highlighted, then that means the airplane mode is turned off.
Turn Off The Windows Firewall
Windows Firewall can also cause issues with the mobile hotspot in Windows 11. Try turning off the Windows Firewall to solve the problem with the Network. To turn off the Windows Firewall, follow the steps given below-
- In the Start Menu, search for Windows Defender Firewall and open it.
- On the left sidebar, click on Turn Windows Defender Firewall On or Off.
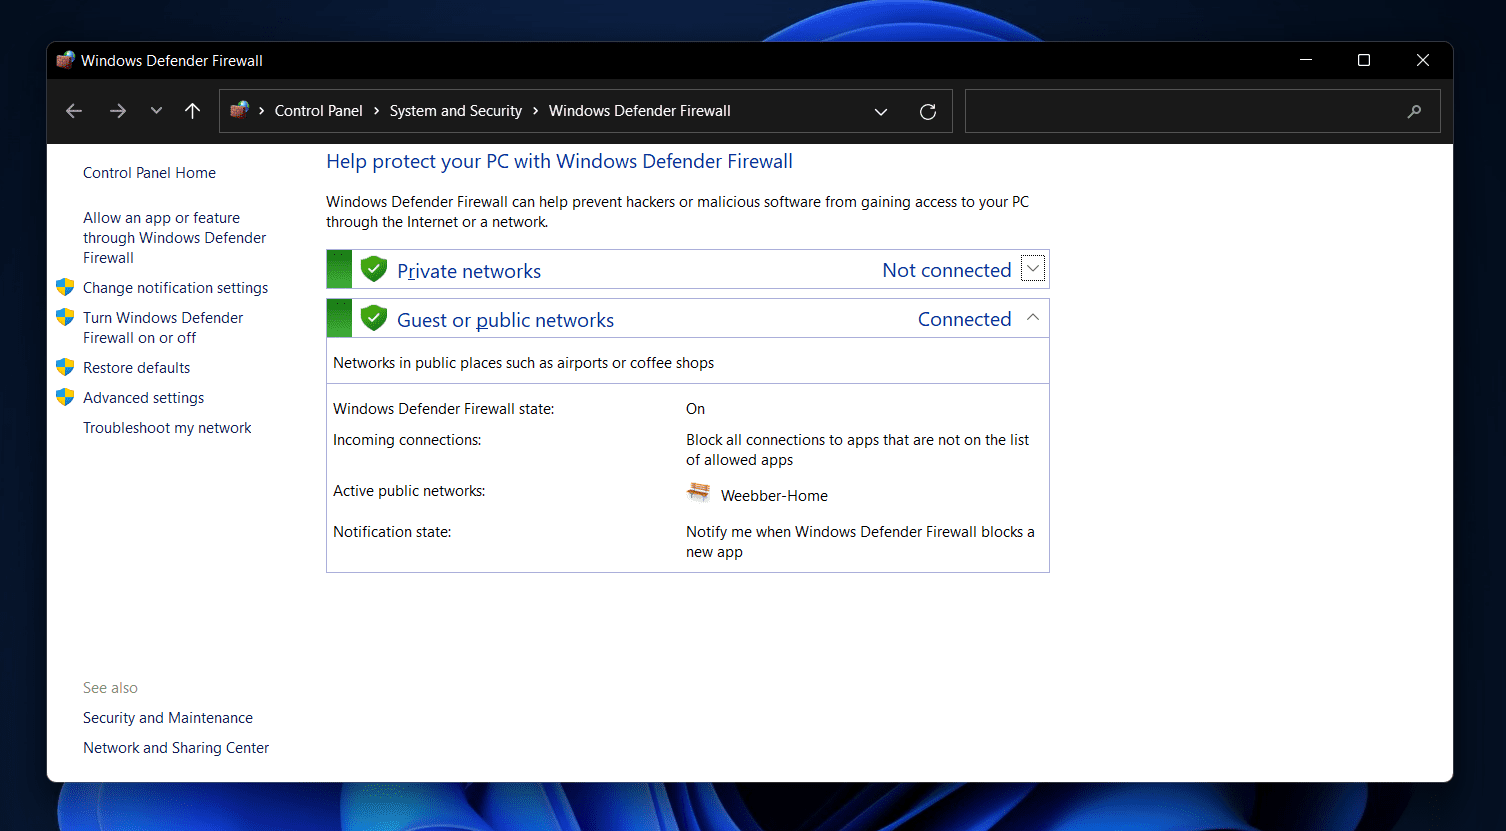
- Select Turn off Windows Defender Firewall option for the Private network settings or public network settings.
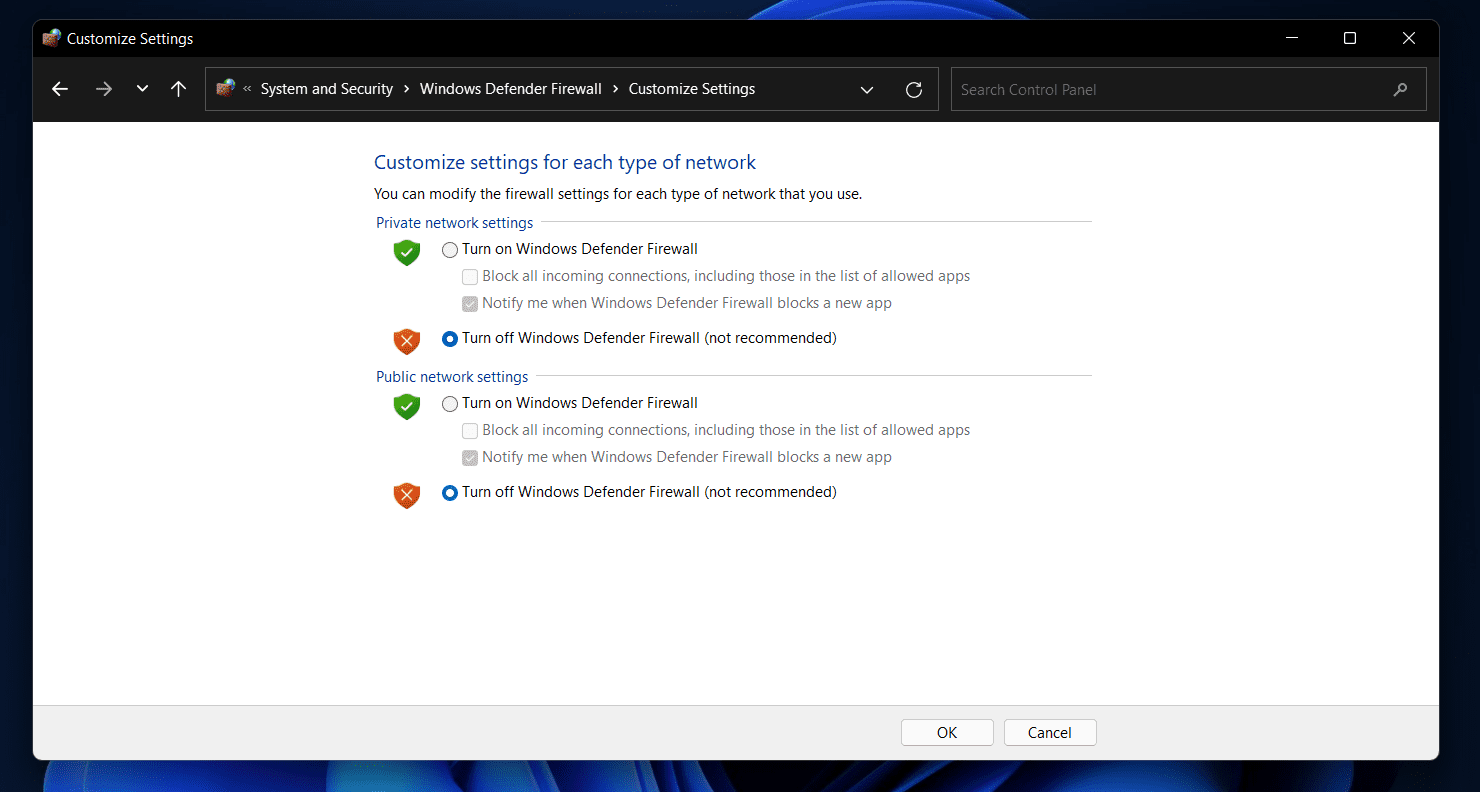
- After doing so, click on OK.
Change The Network Adapter’s Settings
Another troubleshooting step to help you fix the issue with the mobile hotspot is changing the network adapter setting.
- Head to the Settings app on your PC, and then click on Network & Internet tab in the left sidebar.

- Now on the right side, click on Advanced network settings.
- Under the Related Settings on the next window, click on More network adapter options.
- Select your Network from the next window that opens up. Right-click on it, and then click on Properties.
- Head to the Sharing tab in the properties window.
- Here, uncheck the checkbox saying Allow other network users to connect through this computer’s internet connection option.
- Now, click on OK and then restart your PC to save the changes.
Check if Your Wi-Fi Adapter Supports Hotspot / AP Mode
Modern Windows 11 no longer uses the legacy Hosted Network registry system. Instead, Wi-Fi sharing now depends on whether your network adapter supports AP Mode.
To check this:
- Open Command Prompt as Administrator.
- Type the following command:
netsh wlan show drivers
- Look for the line “Hosted network supported” or “AP mode supported”.
- If it says No, your Wi-Fi adapter cannot create a mobile hotspot.
You will need to: - Update Wi-Fi drivers from the manufacturer’s website (Intel, Realtek, Qualcomm), or
- Use a USB Wi-Fi adapter that supports AP mode.
This replaces the outdated registry tweak that no longer works in Windows 11 23H2/24H2.
Update The Wi-Fi Driver
If the Wi-Fi driver on your PC is outdated, then also you may face the same issue. You should try updating the Wi-Fi Driver on your PC, and then check if you still encounter errors/issues with the mobile hotspot. To update the Wi-Fi driver, follow the steps given below-
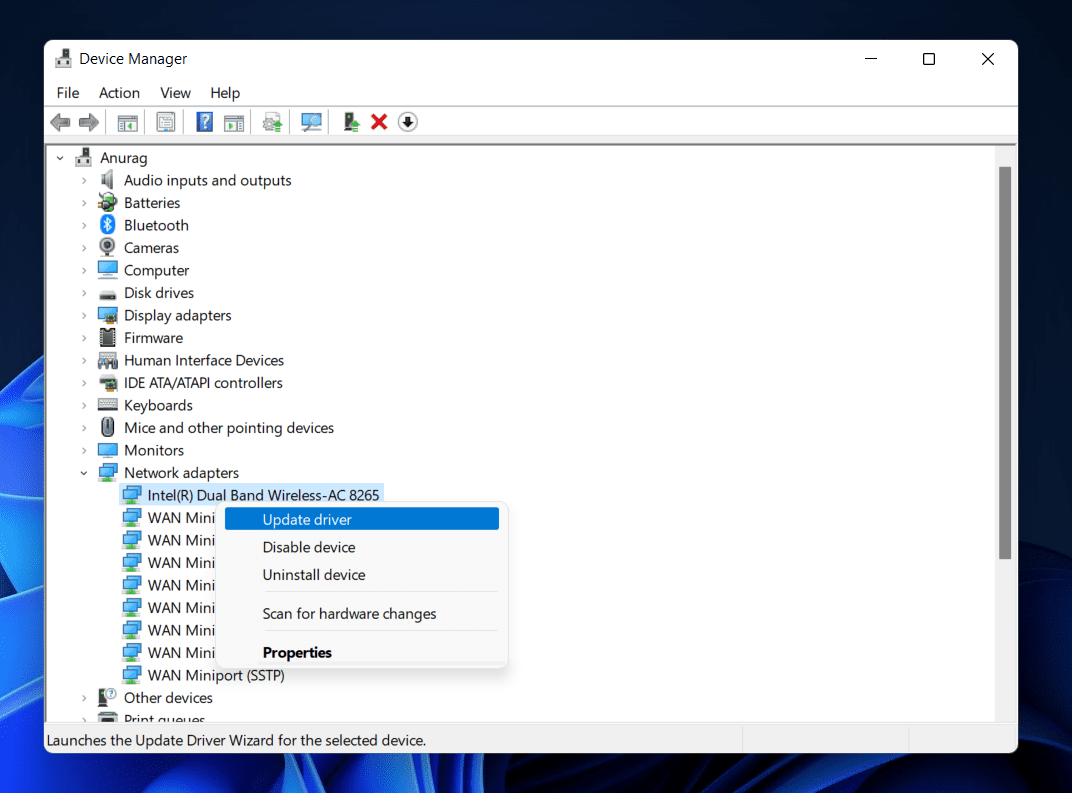
- Open the Device Manager on your PC. To do so, search for Device Manager in the Start Menu and open it.
- In the Device Manager, expand the Network Adapters section by double-clicking on it.
- Select your network adapter from the list of the adapter. Right-click on the network adapter, and then click on Update Driver.
- On the next window that opens up, click on Search automatically for drivers to begin scanning for the available drivers.
- After the driver is updated, restart your PC, and you should no longer face the issue.
Reset Your Network
Your last resort will be to reset your Network. If any of the above steps didn’t help you fix the issue, then you can reset your Network. Do note that, when you reset your Network, all the Wi-Fi networks that you connected to will be removed from your PC, and you will have to connect to them again.
To reset your Network, follow the steps given below-
- Open the Settings app on your PC. You can open the Settings app by pressing the Windows + I key combo.
- On the left sidebar, click on the Network & Internet tab.
- Now on the right side, click on the Advanced Network Settings.

- Now click on the Network Reset option under the More Settings.
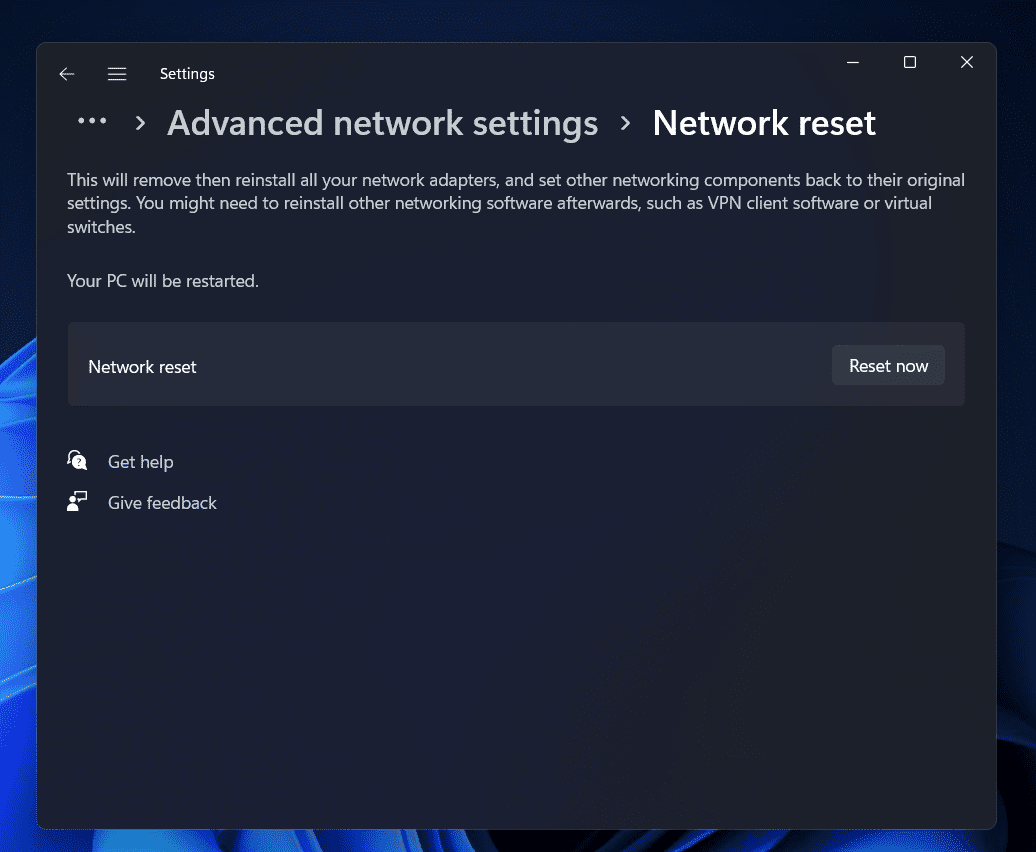
- On the next screen, click on Reset now button right beside the Network reset to reset your Network.
RELATED GUIDES:
- How To Install Bluetooth Driver Windows 11
- How to Fix WiFi Not Working in Windows 11
- How To Find Other Computers On A Network In Windows 11
- How To Forget A Wi-Fi Network In Windows 11
These are all the troubleshooting steps you can follow to fix the mobile hotspot not working in Windows 11. Issues with the mobile hotspot can be shared in Windows 11, especially when the operating system is in its early public launch phase. If you have been facing issues with the mobile hotspot in Windows 11, you can follow the steps given in this article to fix the problem.


")


")