- Windows users encounter "class not registered in Windows 11" error messages, indicating common issues in the operating system.
- Troubleshooting methods include re-registering ExplorerFrame.dll, running SFC scan, re-registering Windows Store Apps, and registering DCOM components.
- Additional steps like performing a System Restore can help resolve the Explorer.exe error in Windows 11.
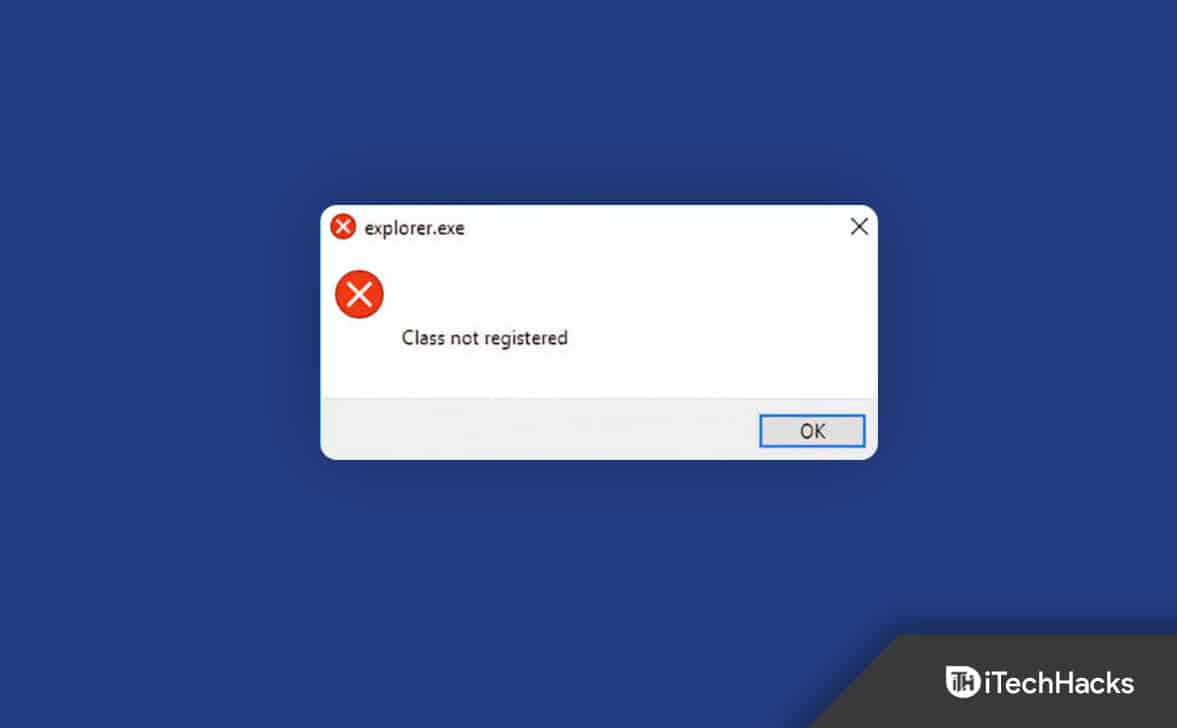
Multiple Windows users reported an error “class not registered in Windows 11” or “Class not registered error” message at different times on their PCs. Errors are common in the Windows 11 operating system, so you should anticipate them occasionally. After clinching what the Explorer.exe class not registered message means, we have compiled a list of possible ways for you to try in order to resolve this.
Typically, this error occurs when the system file associated with Explorer.exe has been deleted or corrupted.
Fix Explorer.exe Error Class Not Registered in Windows 11
You can easily resolve Explorer.exe class not registered in Windows 11 by following the methods mentioned in this article.
Re-Register ExplorerFrame.dll File
The first way to fix the Explorer.exe class not registered in Windows 11 is by re-registering the ExplorerFrame.dll. To do so, follow the steps given below-
- Press the Windows key on your keyboard and search for CMD in the Start Menu. Now, right-click on the Command Prompt and click on Run as administrator.
- Now in the Command Prompt, type and execute the command regsvr32 ExplorerFrame.dll.
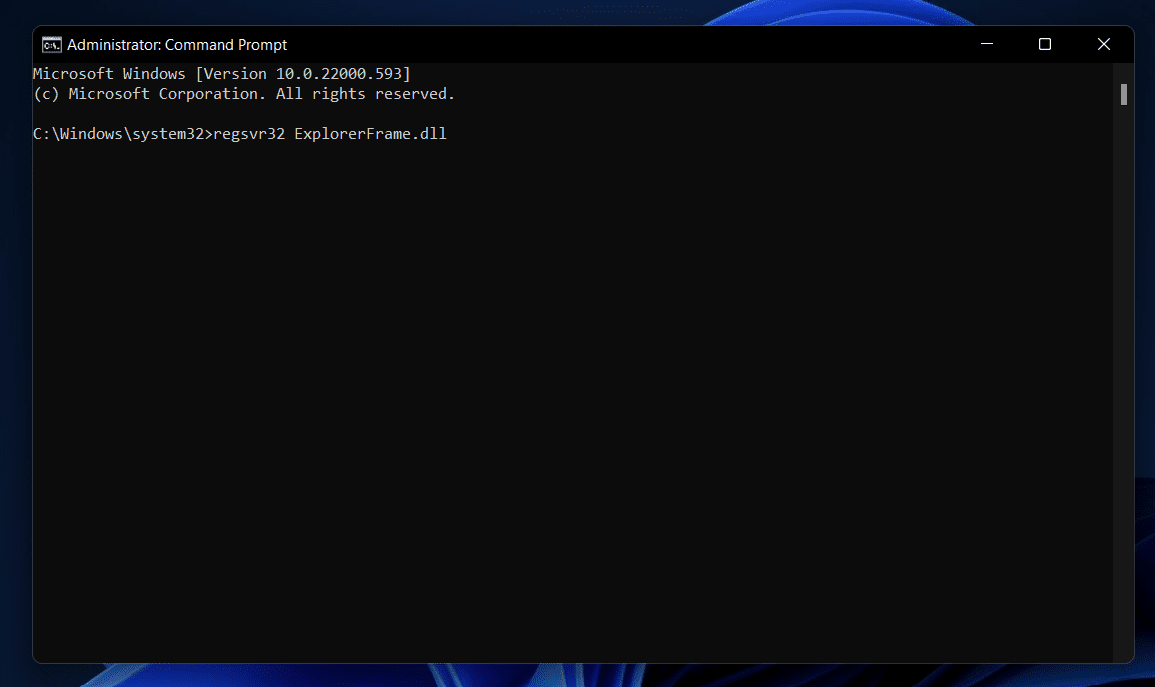
- Once done, restart your PC, and the issue should be fixed.
Run SFC Scan
Another troubleshooting step to follow is running the SFC scan. SFC scans your PC for errors due to corrupted files and fixes them. You can run the SFC scan by following the steps given below-
- Run the Command Prompt as administrator. Open the Start Menu by pressing the Windows key. Now search for CMD, right-click on it, and click on Run as administrator.
- In the Command Prompt, type the command SFC /scannow and hit Enter to execute the command.
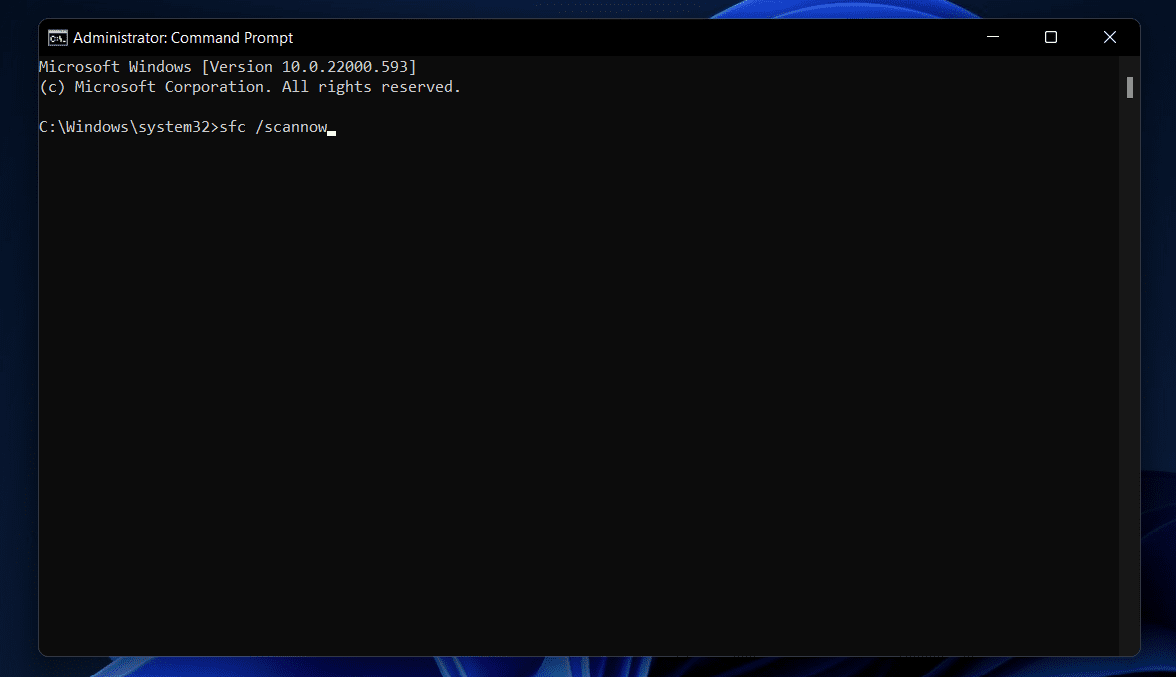
- Wait for the process to complete, and then restart your PC, and the issue will be fixed.
Re-Register Windows Store Apps
If you have been facing this issue, you should try re-registering Windows Store Apps. Given below are the steps to re-register Windows Store Apps-
- Press the Windows + X key combo, and then from the menu that opens up, click on Windows Terminal (Admin).
- In the Windows Terminal, type the following command Get-AppXPackage | Foreach {Add-AppxPackage -DisableDevelopmentMode -Register “$($_.InstallLocation)\AppXManifest.xml”} and hit Enter.
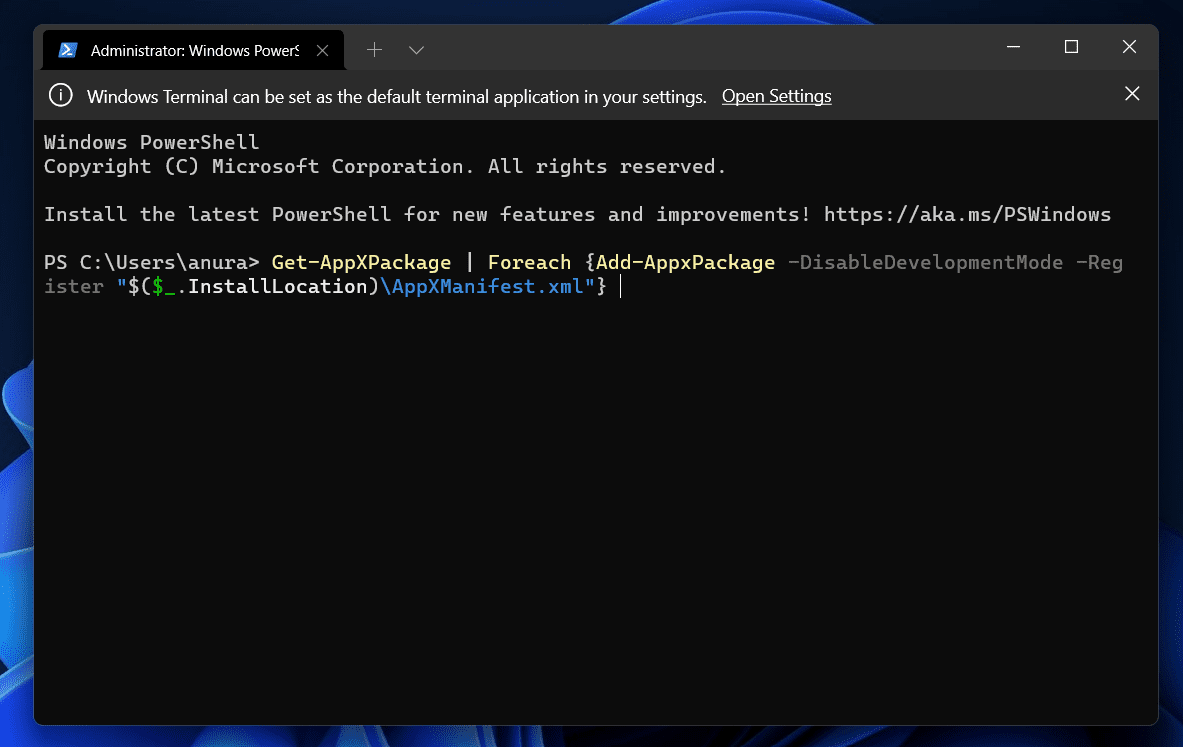
This will reinstall and re-register the Windows Store apps, and the issue should be fixed.
Register DCOM Components
You can also try registering the DCOM components to fix the Explorer.exe class not registered in Windows 11. To register DCOM Components, follow the steps given below-
- Press the Windows + R key combo to open the Run Dialog Box.
- In the Run Dialog Box, type dcomcnfg and hit Enter to open the Component Services.
- In the Component Services, head to the following path-
- Component Services > Computers > My Computer > DCOM Config
- Click on the arrow next to the DCOM Config, and you will see a message pop-up on the screen. Click on Yes, and this will register the DCOM component. Note that you may get the message pop-up a lot of time, so you will have to click on Yes every time it appears.

After following the above process, the issue you face should be resolved.
Perform System Restore
If none of it did help you, then you can try performing the System Restore. If you started facing this issue recently, then you can perform a system restore and revert your System to the point it was working fine. Do note that you will need a restore point to perform the System restore. To do so, follow the steps given below-
- Press the Windows key combo to open the Start Menu.
- In the Start Menu, search for Create a restore point. This will take you to the System Protection tab in the System Properties window.
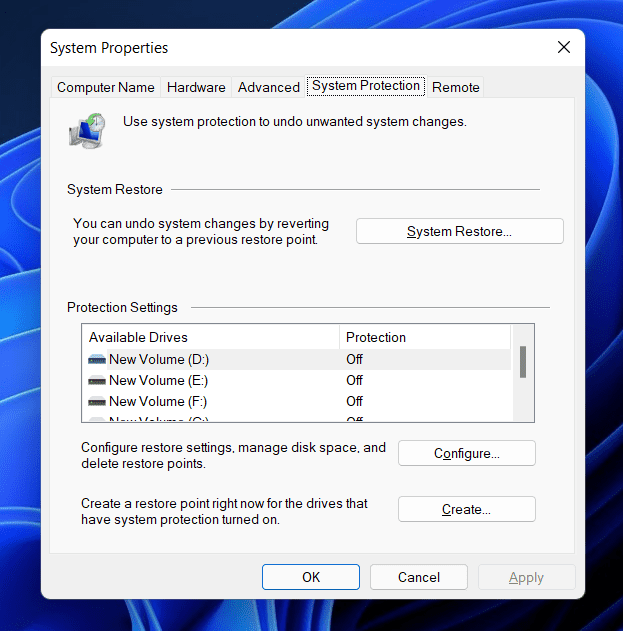
- Here, click on the System Restore button.
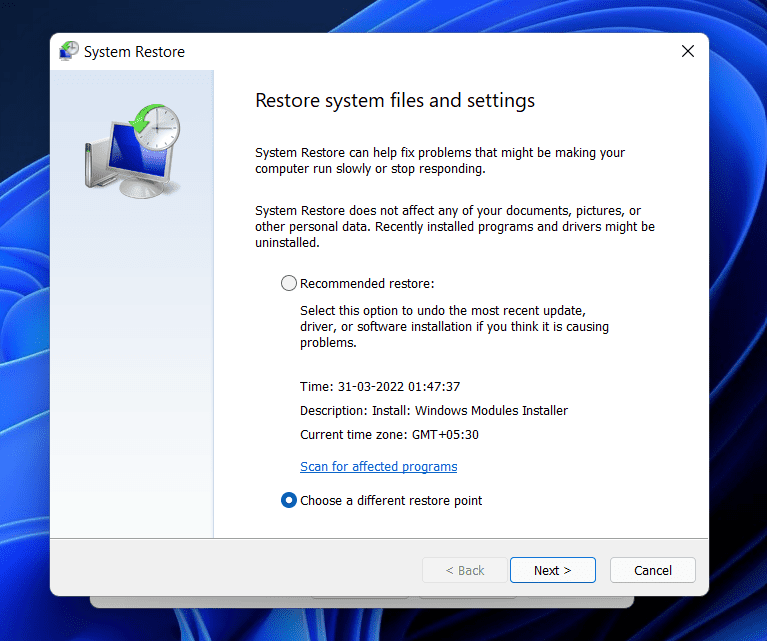
- Next, click on the Choose a different restore point and then click on Next.
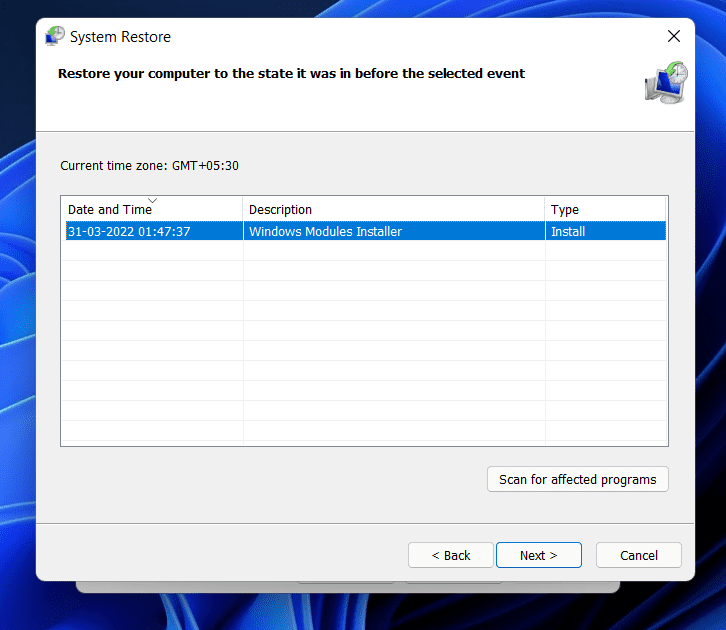
- Select the Restore Point from the list. Click on Scan for affected programs if you want to see what programs will be uninstalled and reinstalled.
- Follow the on-screen instructions to perform the System Restore.
- Your PC will restart and the issue will be fixed.
Final Words
Following the steps in this article, you will be able to fix the Explorer.exe class not registered in Windows 11. If you have been facing this issue, you can follow the above steps and fix the problem.
RELATED GUIDES:


