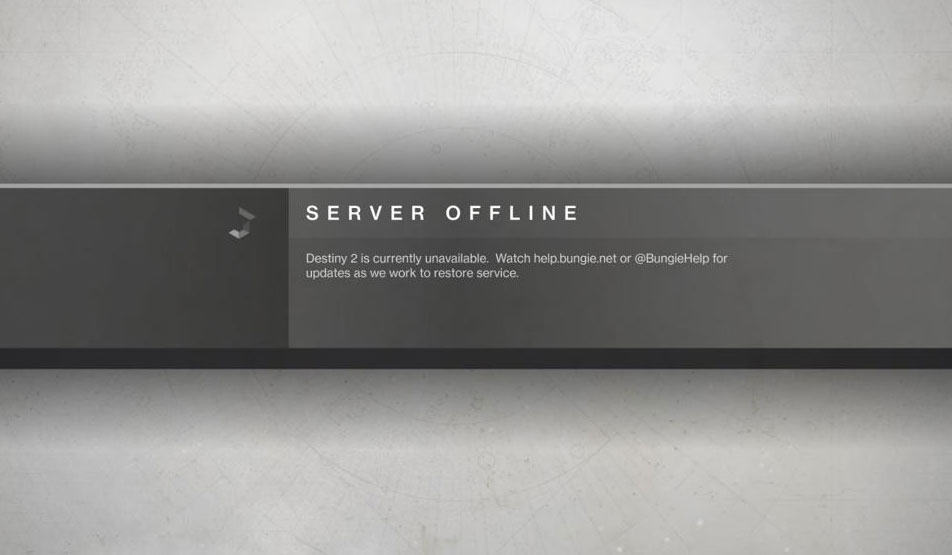
Are you getting a Destiny 2 server maintenance status message whenever you try to play Destiny 2? Well, this generally happens when the developer is down the servers for maintenance, such as software updates, bug fix, etc.
With this game’s reputation for keeping players online depending on its servers, this question does occasionally arise. Since Bungie was acquired by Sony recently, the game has been running smoothly. But, recently, some users started facing this problem; that’s why we are here to help you know how to check the Destiny 2 server status. So, let’s get started with the guide.
Here’s How to Check Destiny 2 Server Status and Downtime

You can check Bungie’s Destiny Server Status page on the company’s help website if Destiny 2’s servers are down or you can’t log in. In Destiny 2, server maintenance is a constant occurrence.
This page contains the current schedule of server maintenance. It is generally recommended to perform maintenance every week or so. In addition, major patch updates and fixes may require the game to be taken offline for a short period of time, affecting everyone’s ability to play the game.
On this page, you can find a schedule that shows when maintenance will begin and end on a given day, though the exact times are not always accurate. Neither the Server and Update Status Page nor the Status Page lists any outages or problems, so it may be an unexpected issue.
If this is the case, it is better to reach out to Bungie’s customer support team via Twitter, specifically @BungieHelp. It is primarily used to share information regarding game issues, from weapon suspensions due to exploits to unplanned server maintenance, which can result in connection errors or unplayable games. You can keep yourself informed on all potential Destiny problems by following them.
Is Destiny 2 Down?
You can also take a look at Down Detector, a website that reports server failures on almost any website. There is a Down Detector page for Destiny 2, which you can find here.
Additionally, this page will show which problems are most commonly reported, which are usually server connection issues and login problems. If you see a spike in reported outages, Bungie’s server is likely experiencing a more serious issue or maintenance.
These sites report no issues for Destiny 2 server status, so it might be a platform issue. Check those services if you’re experiencing any issues on Steam, Xbox Live, or the PlayStation Network.
How To Fix The Destiny 2 Server Issue
As we have already mentioned, it is possible that the Destiny 2 servers status are under maintenance, due to which you are getting the server maintenance error message. But, in some cases, there are chances that this may be occurring from your end. So, if that’s the case, make sure to check out these fixes:

Enable UPnP
By enabling UPnP, players can identify each other on the same network. It may be able to help resolve the Destiny 2 server problem, according to Bungie. In order to enable UPnP, follow these steps:
- From Settings, click Network & Internet. Next, click Network and Sharing Center.
- In the settings, select Change Advanced Settings.
- After that, you must turn on Network Discovery and click Save Changes.

- It is now possible to use UPnP. Afterward, launch the game and see if the error has been resolved.
Disable DHCP
You might encounter problems with DHCP (Dynamic Host Control Protocol) when you use Wi-Fi. It has been reported that disabling DHCP has resolved the server issue for many players. Here are the steps to disable DHCP:
- Go to Network & Internet Settings and open Network & Sharing Center.
- Then, on the left panel, click the Change Adapter Settings option.
- Next, click on the properties button next to your connection.
- Select Internet Protocol Version 4 (TCP/IPv4). After that, you need to select Properties.

- Thereafter, select Use the following IP Address and type your Computer’s IP address.
- Then, choose to Use the following DNS server address and type the same.
- Click OK to save changes.
Restarting the computer and the game will check if the error has been resolved.
Change DNS Server on Console
Still, having problems? If you don’t have Google’s DNS servers (8.8.8.8 and 8.8.4.4) on your gaming console, you can change them to the developer’s own. In addition to the developer, this fix is shared on the developer’s website.
Check to see if the error has been resolved after changing it. There is no alternative to waiting and letting developers fix the problem because, besides waiting, you have no other choice.
From Author’s Desk
So, that’s how to check and fix the Destiny 2 server status issue. We hope that this guide has helped you. We would be happy to provide you with more information if you need it, so feel free to comment below. Furthermore, don’t forget to check out our website, iTechHacks, for other latest guides.
RELATED ARTICLES:
- How to Fix Destiny 2 Stuck on Initializing
- Is Destiny 2 Cross-Platform? (PC, PS4, Xbox, PS5)
- How To Fix Destiny 2 Error Code Weasel
- Fix Valorant Not Opening/Working In Windows 11
- How to Escape Every Prison in BitLife
- Destiny 2 Error Code Baboon? Try These 7 Quick Fixes
- 10 Ways to Fix Destiny 2 Keeps Crashing on Steam/PC
- How to Fix Destiny 2 Stuck on Initializing

