- To upgrade to Windows 11, use the Installation Assistant tool provided by Microsoft, which makes the process safe and easy without losing personal files or installed apps. First, ensure your computer meets the new hardware requirements, like having TPM 2.0 and Secure Boot enabled, by using the PC Health Check App.
- Before upgrading, back up important files to an external drive or cloud storage, free up space by ensuring at least 9 GB is available, and temporarily turn off any third-party antivirus programs. These steps will help avoid any issues during the installation.
- Download the Installation Assistant from the official Microsoft website, run it as an administrator, accept the license terms, and follow the steps to download, verify, and install Windows 11.
You have likely been putting off the OS upgrade because the standard Windows Update menu is not automatically pushing it to your machine, or you are simply nervous about breaking your current setup. If you are stuck wondering how to manually force the update without completely wiping your hard drive, losing your local development environments, or deleting your video cache, you are not alone in this digital hesitation.
The easiest and safest way to make the jump to Microsoft’s newest operating system is by using their official, purpose-built utility. This tool acts as a direct bridge, bypassing the slow, staggered rollout of standard background updates and putting you directly in control of the installation timeline. This comprehensive guide will walk you through exactly how to Upgrade to Windows 11 Using the Installation Assistant, ensuring your personal files, installed apps, and software settings transition flawlessly without any data loss.

The Mandatory Pre-Flight Hardware Audit
Unlike previous generation jumps, Windows 11 introduced incredibly strict hardware requirements designed to enforce modern security standards. You cannot force this installation on outdated hardware without severe workarounds that compromise your system’s stability. Before you even download the assistant, you must verify your motherboard and processor are ready for the transition.
- Download the PC Health Check App: Microsoft provides a free diagnostic tool specifically for this purpose. Download it from the official Microsoft website, install it, and click the “Check Now” button. It will scan your system for a 64-bit processor, at least 4 GB of RAM, and 64 GB of total storage.
- Verify TPM 2.0 and Secure Boot: The biggest hurdles for most users are the Trusted Platform Module (TPM) version 2.0 and UEFI Secure Boot. TPM is a cryptographic chip on your motherboard that handles hardware-level encryption. The PC Health Check app will flag these if they are disabled. If your PC is relatively new but fails this check, you may need to boot into your motherboard’s BIOS/UEFI settings to manually enable TPM (sometimes labeled as PTT for Intel or fTPM for AMD) and toggle Secure Boot on.
- Check Your Current Windows 10 Version: The utility requires your current operating system to be relatively up to date to perform a seamless file migration. You must be running Windows 10, version 2004 or higher. You can verify your version by clicking the Start button, typing winver, and pressing Enter. A small window will pop up displaying your exact build number.
Crucial Pre-Installation Housekeeping
The official utility performs an “in-place upgrade.” This means it carefully extracts and replaces the core operating system files underneath your existing data, leaving your local repositories, documents, pictures, and installed software perfectly intact. However, technology is unpredictable. A sudden power outage or a severe driver conflict during the upgrade process can result in a corrupted boot drive.
- Back Up Your Critical Data: Never perform a major OS overhaul without a safety net. Push your local code commits to GitHub, and copy your most important project files and raw video footage to an external USB NVMe drive. Alternatively, ensure your local folders are fully synced to a cloud storage provider like OneDrive or Google Drive.
- Free Up Local Storage: While the absolute minimum requirement is 64 GB of total drive space, the assistant needs room to download, unpack, and stage the massive installation files. Ensure your primary C: drive has at least 9 GB of entirely free, unallocated space before starting.
- Disable Third-Party Antivirus: Aggressive third-party antivirus software often mistakes core operating system modifications for malware behavior. To prevent your security software from quarantining critical files and blocking the installation midway through, temporarily disable your antivirus shields until the upgrade is completely finished.
Windows 11 Installation Assistant: How to Force the Upgrade Safely
To safely Upgrade to Windows 11 Using the Installation Assistant, you must follow a highly specific sequence of events. Once your hardware is verified and your files are safely backed up, the actual upgrade process is highly automated.
Step 1: Download the Official Utility
Open your web browser and navigate directly to the official Microsoft Software Download page for Windows 11. Look for the very first section on the page specifically labeled “Windows 11 Installation Assistant.”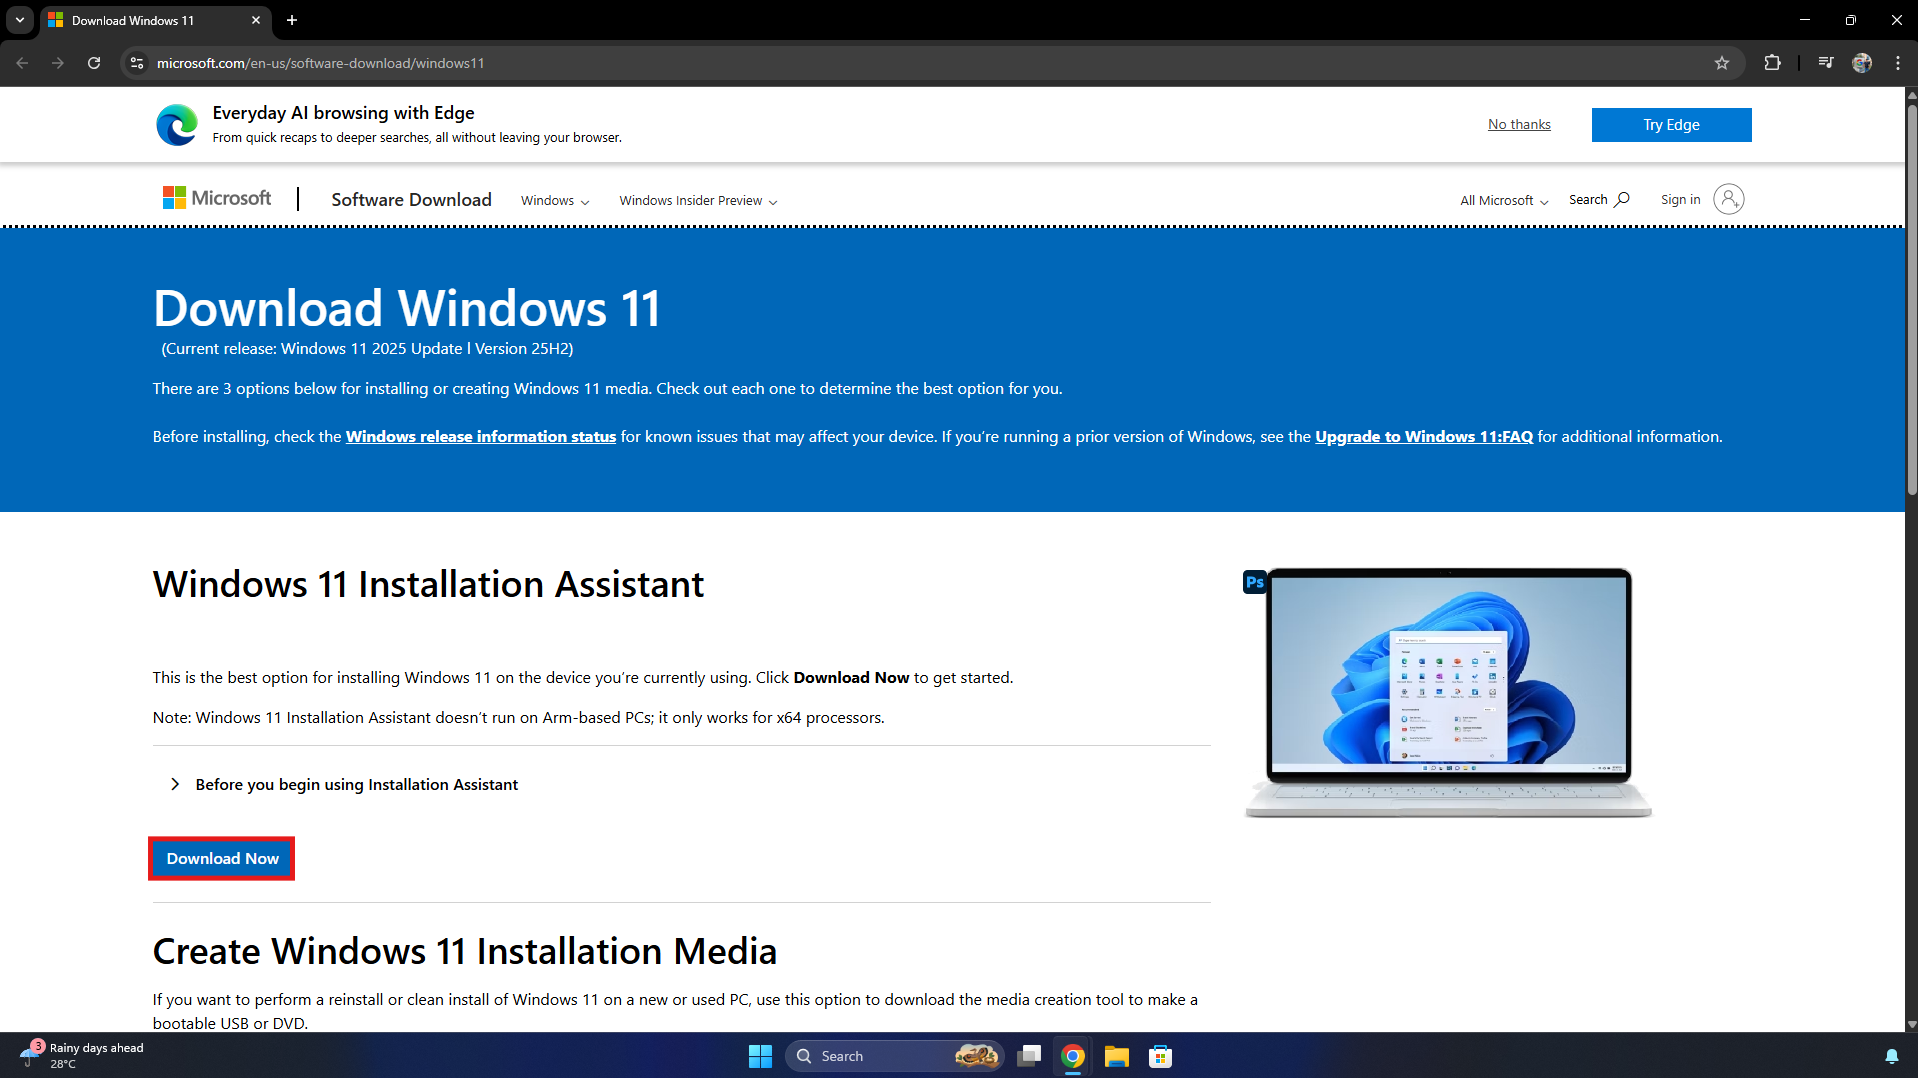
Click the blue Download Now button. Do not download this executable from third-party hosting sites or tech blogs, as unofficial sources can package the file with hidden malware or outdated builds.
Step 2: Launch with Administrator Privileges
Locate the downloaded file (usually named Windows11InstallationAssistant.exe) in your default Downloads folder. Right-click the file and select Run as administrator.
If the Windows User Account Control (UAC) screen pops up asking if you want to allow this app to make changes to your device, click Yes. The tool requires elevated system privileges to rewrite the core registry.
Step 3: Accept the Licensing Terms
The tool will immediately launch and perform one final, rapid background check of your hardware compatibility. If your system passes, you will be presented with the Microsoft software license terms. Read through the agreement and click the Accept and Install button located in the bottom right corner of the window.
Step 4: The Three-Phase Background Process
The moment you click accept, the utility takes full control and initiates a three-step automated process. The best part of this tool is that it runs entirely within your current desktop environment, meaning you can minimize the window and continue working, coding, or browsing while the heavy lifting happens behind the scenes.
- Downloading: The tool connects to Microsoft’s servers and pulls down the massive Windows 11 image file. The speed of this step depends entirely on your internet bandwidth.
- Verifying: Once downloaded, the assistant mathematically checks the files for any corruption, dropped packets, or incomplete data to ensure a flawlessly clean install.
- Installing: The tool begins unpacking the files and staging them across your hard drive, preparing the system architecture for the final OS swap.
Crucial Note: Do not panic if the percentage counter seems to hang or freeze at 99% during the installation phase. This is completely normal as the system prepares the final boot registry and migrates your current user profile data. Let it run uninterrupted.
Step 5: The Final System Reboot
Once the background installation hits 100%, the assistant will prompt you with a 30-minute countdown timer and a Restart Now button. This is the point of no return. Save any open documents, close your web browsers, shut down your IDEs, and click the button.
Your PC will reboot. The screen will turn blue or black, displaying the Windows update progress percentage. Your computer will restart several times during this phase as it applies the new operating system files over the old ones. Do not turn off your PC or unplug it during this process under any circumstances. Interrupting this final phase will permanently corrupt your operating system and require a total drive wipe to fix.
Post-Upgrade Checklist
After the final reboot, you will be greeted by the new Windows 11 lock screen and the centered Start menu. While the installation is technically complete, there are a few final steps you should take to ensure your system is running optimally and your development environment is stable.
- Check for Driver Updates: Immediately open the new Settings app, navigate to Windows Update, and click Check for updates. The jump to a new OS often requires updated display, audio, and network drivers. Let Windows pull the latest firmware designed specifically for the Windows 11 architecture to prevent random crashes.
- Verify Activation: Navigate to Settings > System > Activation to ensure your digital license transferred correctly. If your Windows 10 was fully activated and legitimate, Windows 11 will automatically activate itself upon connecting to the internet via Microsoft’s digital entitlement servers.
- Know Your Rollback Window: If you test out the new interface for a few days and decide it disrupts your workflow, or if a critical piece of legacy software you rely on is no longer compatible, you are not trapped. Microsoft gives you a strict 10-day window to revert your system. Go to Settings > System > Recovery and click the Go back button to seamlessly uninstall Windows 11 and restore your previous Windows 10 environment. Once those 10 days pass, the Windows.old folder is permanently deleted to save space, and going back will require a clean installation.
Final Words
Upgrading your operating system does not have to be a stressful, weekend-long project involving formatted hard drives, lost data, and complicated USB boot drives. When you decide to Upgrade to Windows 11 Using the Installation Assistant, you take the guesswork completely out of the equation and bypass the unpredictability of the standard update queue.
The steps outlined above are designed to give you a secure, automated path to the latest software while protecting your valuable files. By verifying your hardware, backing up your data, and letting the tool stage the files in the background, you can execute this massive system change with minimal downtime. Once the final restart completes, you can go back to using your computer soundly, knowing your hardware is up to date, visually refreshed, and operating on the most secure framework available.
ALSO READ:
- Windows 11 Black Screen of Death? Here’s How to Fix It Fast
- Fix Image and Video Thumbnails Not Showing on Windows 11
- How to Set Default Audio Device on Windows 11 (Speakers, Headphones & Mic)
- Reduce High RAM Usage on Windows 11 Using Microsoft PC Manager (One-Click Fix)
- How to Turn Off Share with Copilot AI Feature in Windows 11
")


