- Users facing 'This PC can’t run Windows 11' error need to ensure their PC meets system requirements, including TPM 2.0, secure boot, and other specifications.
- The error may be caused by older devices, lack of TPM support, or disabled secure boot; newer PCs should have TPM 2.0 but may require manual enabling.
- To fix the error, users can enable TPM 2.0 from BIOS by checking, enabling, and saving the setting, and similarly enable secure boot to meet Windows 11 requirements.
Many users have reported facing the error ‘This PC can’t run Windows 11’ when checking the compatibility of their PC using the PC Health Check App. Microsoft has laid out some system requirements, which your PC should meet to run Windows 11. Even if the PC meets the minimum system requirements, they get the error ‘This PC can’t run Windows 11.’ So what is causing this error, and how to overcome it? This article will discuss how you can fix the ‘This PC can’t run Windows 11’ error.
Minimum System Requirements To Run Windows 11
To be able to run Windows 11 on your PC, your PC must meet the given system requirements-
- Your PC must have a 64-bit processor with a 1GHz frequency or more with two or more cores.
- Minimum 4GB RAM and 64GB storage.
- Your system should be UEFI and secure boot-capable.
- Your PC must have TPM version 2.0
- Graphics Card with DirectX 12 compatibility or WDDM 2.x is required.
- Your PC must have a display greater than 9 inches and should support HD resolution.
These are the system requirements that your PC must meet to be able to run Windows 11.
What’s Causing This PC Can’t Run Windows 11?
Any modern computer is compatible with running Windows 11. However, if you are running a device older than four years, then you most probably encounter this error. Microsoft has said that a device older than four years won’t be able to run Windows 11.

Another reason you may encounter this error is TPM 2.0 is not supported on your PC, or it is not enabled. PC not older than four years generally have TPM 2.0, so if you have bought a new PC, your PC will probably have TPM 2.0, but it may not be enabled. PCs with Intel 8th gen or greater and with Ryzen 2000 series or greater processors have TPM 2.0. However, it might not be enabled on your PC by default, so you will have to enable it.
Another thing that can be causing the ‘This PC can’t run Windows 11’ error is a secure boot not being enabled on your PC.
Fixing This PC Can’t Run Windows 11 Error
Below are some of the fixes to help you fix the ‘This PC can’t run Windows 11 error.
Enable TPM 2.0 From BIOS Windows 11
As we have already discussed, TPM 2.0 can be causing the error. Any PC manufactured after 2016 has support for TPM 2.0. However, it may not be enabled on your PC by default. You will have to enable it manually from the BIOS. Follow the steps given below to enable TPM from BIOS.
- Firstly, you will have to check whether TPM is present on your PC or not. Press the Windows + R key combo on your keyboard, and then type tpm.msc and hit enter. This will open TPM management windows. Under status, you will find the status of TPM, .i.e., enabled or not, and you will be able to find the version under the TPM manufacturer information.
- If TPM is not enabled, then shut down your computer. Turn it on again, and as soon as your press the power button, you will have to open the BIOS/UEFI menu. You can access them by pressing the F1, F2, F10, F11, or DEL keys.
- It may vary depending on the manufacturer. You can check what key to press to access TPM for the particular manufacturer.
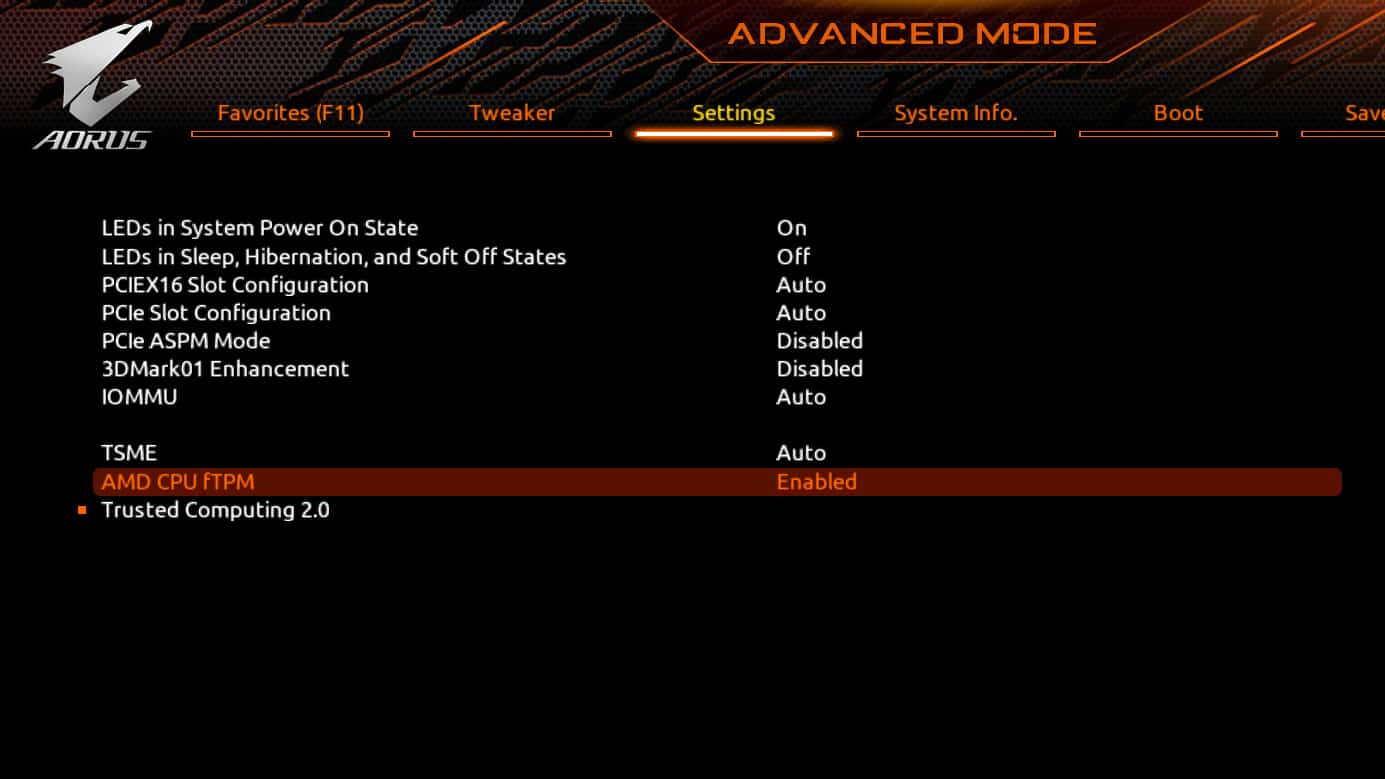
- In the BIOS, head to the security tab/section.
- You may find the TPM option here. You may often see this option in Advanced Settings > Security > Trusted Computing or Settings > Miscellaneous > Trusted Computing on some devices.
- Enable the TPN, and then select save and exit. Restart your PC, and check running PC health check app whether you still get the error or not.
Facing difficulty in BIOS Settings? You can follow How to Check and Update BIOS on Windows.
Enable Secure Boot
If that doesn’t work, you might get the error because of the secure boot not being enabled. You can enable secure boot on your PC by following the steps given below:
Step 1. In the start menu, search for system information and open it. Here search for the secure boot state. If it is on, then the secure boot is enabled on your PC. If it is off, then you will have to enable it from the BIOS.
Step 2. Access the BIOS menu on your PC. You can do so by pressing the F1, F2, F10, F11, or DEL keys. This may vary depending on the manufacturer you are using. You can check how to access BIOS for your PC.
Step 3. In the BIOS, access advanced mode and then head to security.
Step 4. You will find the secure boot option; enable it.
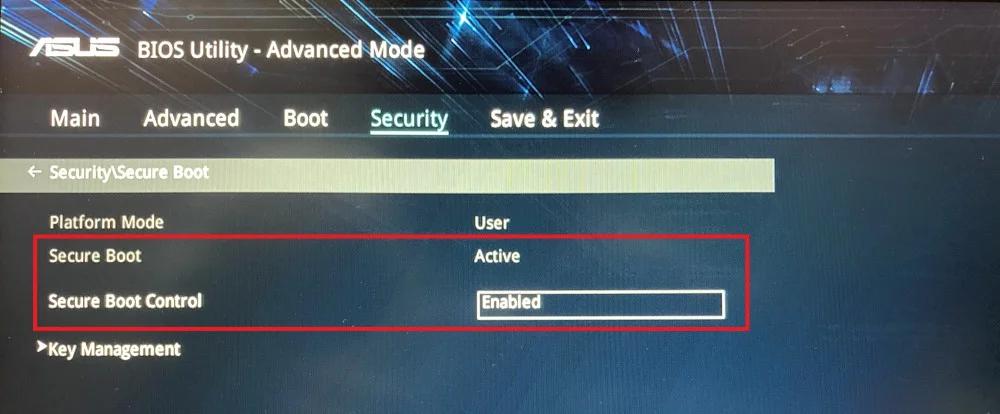
Step 5. Now save and exit the BIOS. Restart your PC.
Step 6. Now open the PC health check app, and check whether you are still getting the error or not.
Bypass Windows 11 Requirements on Unsupported PCs
Even if your PC fails the official compatibility check because of missing TPM 2.0, Secure Boot, or an older processor, you can still install and run Windows 11 with some workarounds. Microsoft does not officially recommend these methods, but many users have successfully upgraded older machines using them.
1. Use the Windows 11 Installation Assistant (2025 Version)
Microsoft has updated its Installation Assistant, which now provides a smoother way to upgrade or clean install Windows 11. If your PC is unsupported, you may still get a warning, but in most cases you can continue the installation if you create bootable media.
- Download the latest Windows 11 Installation Assistant or Media Creation Tool from Microsoft’s official site.
- Create a bootable USB drive.
- When installing, you may see a “This PC Can’t Run Windows 11” message. You can bypass this using the registry fix below.
2. Registry Bypass for TPM and CPU Check
If your system doesn’t have TPM 2.0 or the required CPU, you can edit the registry before installation:
- Press Windows + R, type
regedit, and hit Enter. - Navigate to: HKEY_LOCAL_MACHINE\SYSTEM\Setup\MoSetup
- Right-click in the right pane → New > DWORD (32-bit) Value.
- Name it: AllowUpgradesWithUnsupportedTPMOrCPU
- Double-click it and set the value to 1.
- Close Registry Editor and restart your PC.
Now you can proceed with the installation even if your PC doesn’t officially meet the requirements.
3. Use Third-Party Compatibility Tools
Instead of relying on the outdated PC Health Check App, you can use community tools like WhyNotWin11 or Win11CompChk. These provide a detailed breakdown of what exactly is missing (TPM, Secure Boot, CPU, RAM, etc.) so you can decide whether to enable, upgrade, or bypass.
Important Note
While these bypass methods work, Microsoft has stated that unsupported PCs may not receive important security or feature updates in the future. If you plan to use Windows 11 long-term, enabling TPM and Secure Boot (if available) is still the best option.
READ MORE:
- How To Use Windows 11 System Restore
- How to Start Windows 11 in Safe Mode
- Windows 11 Installation Stuck? Here’s How to Fix
- How to Fix the This PC Can’t Run Windows 11 Error
Final Words
‘This PC can’t run Windows 11’ error is most probably encountered when TPM 2.0 or secure boot is not enabled on your PC. We have already discussed how you can enable them. You can follow the steps above to enable TPM 2.0 and secure boot and fix the error. However, do note that if you are running a PC older than four years, then you won’t be able to run Windows 11 on it.

")


")