- Many users face issues when installing Windows 11, such as the installation getting stuck due to system requirements like TPM 2.0, Secure Boot, or unsupported hardware. To fix this, you need to ensure these settings are enabled in your BIOS and update your PC to meet the requirements.
- You can bypass TPM and Secure Boot checks by using methods like editing the registry during installation or creating a bootable USB with tools like Rufus, which removes these requirements. This is especially useful for older PCs that do not meet the official requirements.
When installing Windows 11, many users still run into the problem where the setup gets stuck — sometimes at the loading screen, sometimes while checking requirements, or even during the actual installation. In 2026, this is still a common issue, especially if you’re upgrading an older PC or using unsupported hardware.
But don’t worry — this guide will help you fix the ‘Windows 11 installation stuck’ issue step-by-step. Whether it’s due to TPM, Secure Boot, unsupported hardware, or something else, we’ve got it all covered.
Why Windows 11 Installation Gets Stuck?
Microsoft has strict system requirements for installing Windows 11. If your PC doesn’t meet those, the installation might freeze, fail, or even restart in a loop. Here are the minimum system requirements for Windows 11 (still valid in 2026):
- A processor with 1GHz or faster, 2 or more cores, and 64-bit compatibility
- 4 GB RAM or more
- 64 GB storage or more
- UEFI firmware with Secure Boot support
- TPM version 2.0
- DirectX 12 compatible graphics with WDDM 2.x driver
- Display larger than 9″ with 720p resolution
- Microsoft account and internet connectivity (mandatory for Home edition)
![Windows 11 Installation Stuck [How to solve]](https://itechhacks.com/wp-content/uploads/2021/06/PC-Health-Check-App-1.jpg)
Most Common Reasons for Installation Stuck in 2026:
TPM 2.0 is not enabled or not available
- Secure Boot is disabled or missing in the BIOS
- Unsupported CPU or motherboard
- Conflicting third-party software (like VirtualBox or Bluestacks)
- Corrupted setup files or outdated ISO
- External devices are interfering with the process
ALSO READ: Windows 11 Media Creation Tool: How To Install/Upgrade
Fixing Windows 11 Installation Stuck Issue
Follow the steps given below to fix Windows 11 Installation stuck.
![Windows 11 Installation Stuck [How to solve]](https://itechhacks.com/wp-content/uploads/2021/06/This-PC-cant-run-Windows-11.png)
Enable TPM 2.0 on Your PC
Even in 2026, TPM 2.0 is still a key requirement to install or upgrade to Windows 11.
Check if TPM is enabled:
- Press Windows + R, type tpm.msc, and press Enter.
- The TPM Management window will open.
- If it says “The TPM is ready for use”, then it’s already enabled.
- If it says “Compatible TPM cannot be found”, you need to enable it from the BIOS.
Enable TPM 2.0 from BIOS:
- Restart your PC and keep pressing the BIOS key (F1, F2, DEL, ESC, or F10) during boot.
- In the BIOS/UEFI menu, go to the Security or Advanced tab.
- Find TPM Device, PTT (Intel), or fTPM (AMD), and enable it.
- Save and exit BIOS.
Enable Secure Boot in BIOS
Secure Boot must be enabled to meet Windows 11 requirements. Here’s how:
- Reboot your PC and enter the BIOS/UEFI settings again.
- Navigate to the Boot or Security section.
- Look for the Secure Boot option.
- Set it to Enabled.
- Save changes and exit BIOS.
🔁 If you changed the boot mode from Legacy to UEFI during this process, make sure your hard drive uses a GPT partition scheme, or the system won’t boot properly.
Install Windows 11 Without TPM or Secure Boot (Bypass Method)
If your PC doesn’t support TPM 2.0 or Secure Boot, you can still install Windows 11 using this registry trick or a tool like Rufus.
Option 1: Registry Bypass (Manual Method)
- Boot into the Windows 11 setup screen.
- When it pauses, press Shift + F10 to open Command Prompt.
- Type regedit and hit Enter.
- Navigate to: HKEY_LOCAL_MACHINE\SYSTEM\Setup
- Right-click on Setup, select New > Key, name it LabConfig.
- In LabConfig, create 2 new DWORD (32-bit) values:
- BypassTPMCheck → Set value to 1
- BypassSecureBootCheck → Set value to 1
- Close Registry Editor and proceed with installation.
Option 2: Rufus Tool (Automatic Method)
- Download the latest Rufus.
- Use it to create a bootable USB using a Windows 11 ISO.
- When prompted, select the option to Remove requirement for TPM 2.0 and Secure Boot.
- Boot from USB and install Windows 11.
Uninstall Incompatible Programs
In some cases, third-party software blocks the upgrade or causes errors during install.
Programs known to conflict in 2026:
- VirtualBox / VMware (older versions)
- Bluestacks, NOX Player
- TeamViewer
- Old Antivirus or VPN software
What to Do:
- Go to Control Panel > Programs > Uninstall a program.
- Remove anything that might interfere with drivers, display, or system-level access.
- Restart your PC after uninstalling them.
Disconnect All Peripherals
Still stuck? Try removing all external devices:
- USB drives
- External hard disks
- Printers
- Game controllers
- HDMI cables
- Bluetooth dongles
Once everything is disconnected, restart the installation.
Restart the Windows Update Service (If Upgrading via Settings)
If you’re stuck during an update from Windows 10 to 11 via Windows Update, the update components themselves might be corrupted.
Here’s how to reset Windows Update:
Stop the Update Services
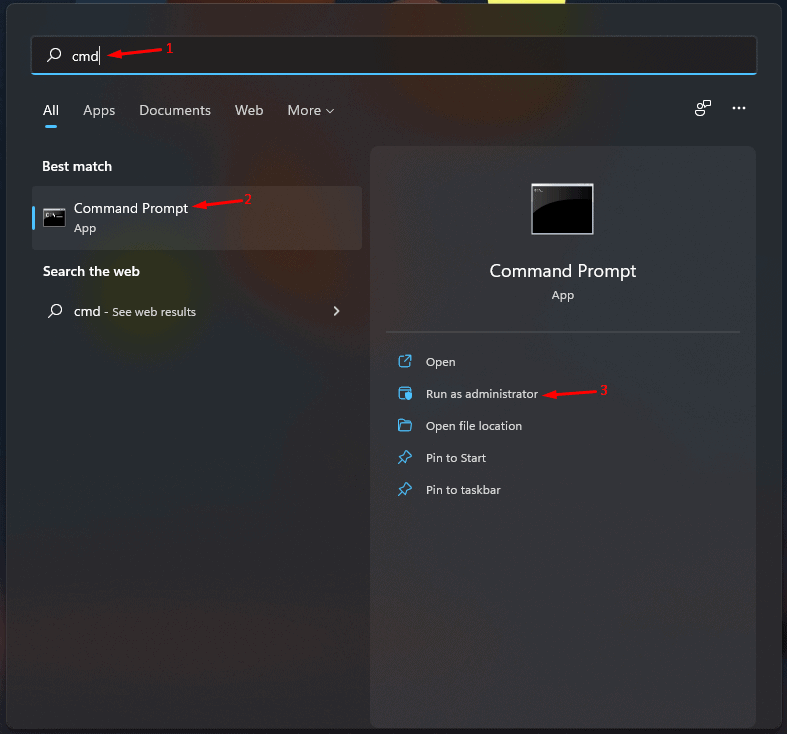
- Search for Command Prompt, right-click, and choose Run as administrator.

- Now type the following commands one by one:
net stop wuauserv
net stop bits
This stops the Windows Update and Background Intelligent Transfer Services.
Delete the SoftwareDistribution Cache
- Press Windows + E to open File Explorer.
- Go to: C:\Windows\SoftwareDistribution
- Select all files (Ctrl + A) and delete them. These are temporary update files and can safely be removed.
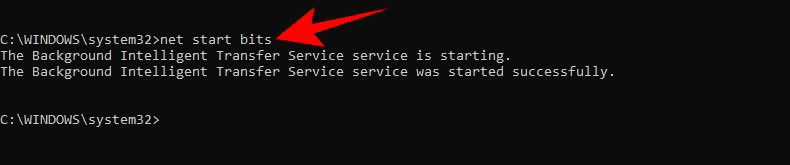
Restart the Services
After deleting, go back to Command Prompt and run:
net start wuauserv
net start bits
Then go to Settings > Update & Security > Windows Update and try checking for updates again.
Fix Disk Errors Before Installation
Corrupted partitions or failing disks can also cause the installation to get stuck or fail midway.
Run CHKDSK and SFC:
Open Command Prompt as Administrator.
chkdsk /f /r
It may ask to schedule the scan for next reboot. Type Y and press Enter.
Next, run:
sfc /scannow
This checks for corrupted system files and repairs them.
Use Latest ISO Image (Clean Install)
If you’re upgrading via Settings and keep getting stuck, the setup files might be damaged or incomplete.
Instead of updating, do a clean install using a bootable USB.
- Visit: https://www.microsoft.com/software-download/windows11
- Download the Media Creation Tool or ISO file.
- Use Rufus to create a bootable USB.
- If you want to install without TPM/Secure Boot, Rufus has built-in bypass options.
- Boot from the USB.
- On the Windows Setup screen, choose Custom Install, delete existing partitions, and proceed with the clean install.
✅ Always back up important files before clean installation, as this wipes the drive.
Intel VMD/NVMe Bug Fix (2026 Specific)
In newer laptops, Windows 11 installation may get stuck due to Intel VMD controllers interfering with NVMe SSD detection.
- Enter BIOS/UEFI settings.
- Look for Intel VMD under Advanced/Storage settings.
- Set it to Disabled.
- Save and exit.
- Retry the installation.
After installation, you can re-enable VMD if required for RAID or OEM recovery features.
Check if You Need GPT Partition (UEFI Mode)
If you’re getting errors like:
- “Windows cannot be installed to this disk. The selected disk has an MBR partition table.”
…it means you’re installing in UEFI mode but your disk is still using MBR.
Convert MBR to GPT (without losing data):
Use MBR2GPT tool (works on Windows 10/11 Pro):
Open Command Prompt as Administrator.
Run: mbr2gpt /convert /allowFullOS
- Reboot and enable UEFI boot in BIOS.
- Alternatively, during clean install:
- Delete all partitions on the target disk.
- Windows setup will auto-convert it to GPT.
ALSO READ: Windows 11 Start Menu Not Working: Here’s How To Fix?
Final Words
If your Windows 11 installation is stuck, don’t panic — it’s usually due to TPM, Secure Boot, or unsupported hardware. In 2026, you can still fix it by enabling settings in BIOS, using Rufus to bypass restrictions, or doing a clean install with the latest ISO.
Whether your PC is supported or not, the steps in this guide should help you get Windows 11 installed smoothly. Just take it one fix at a time, and you’ll be up and running soon.
")


")


