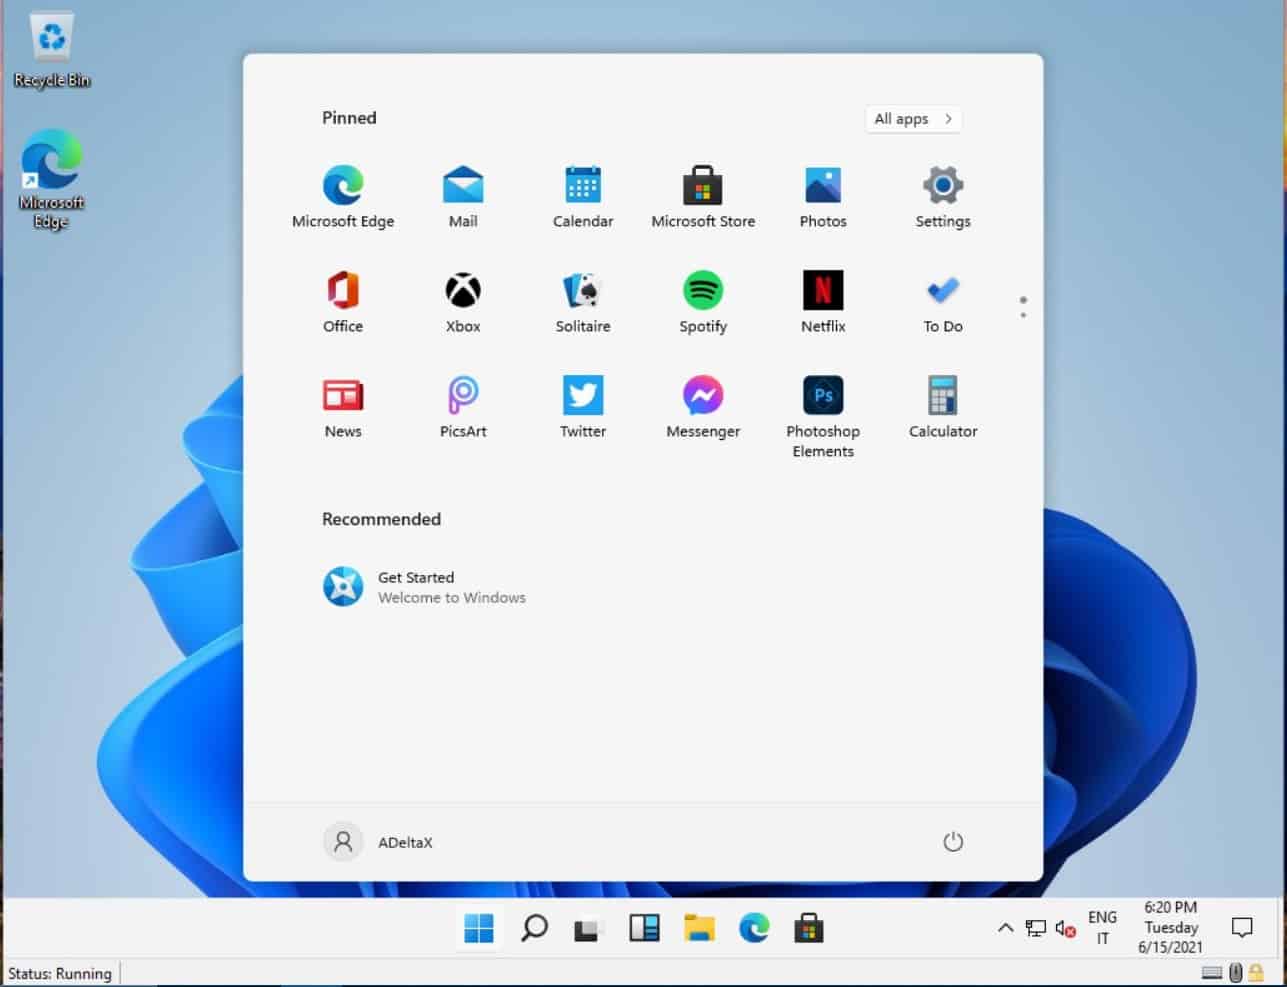
- Windows 11 users may encounter the start menu not working issue, which can also be found in Windows 10.
- To fix the problem, users can restart Windows Explorer, restart their device, check for system updates, sign out of Microsoft account and sign in with a local administrator account, reset their PC, force restart Iris Service, or run Windows in safe mode.
- Following these steps can help resolve the Windows 11 start menu not working problem and ensure a smooth user experience.
A new version of any operating system can have some minor bugs. Users using Windows 11 can face problems like the start menu not working. This issue is not new to Windows 11, but users have reported facing the same issue with Windows 10 as well. Windows 11 start menu not working is not a major problem and can be easily fixed.
If you are unable to open the start menu on your Windows 10 PC, then you are at the right place. In this article, we will be discussing the best possible fixes to troubleshoot the Windows 11 start menu not working problem.
Fix Windows 11 Start Menu Not Working
1. Restart The Windows Explorer
The very first thing that you can try doing is restarting Windows Explorer using the task manager. Windows Explorer or File Explorer is used to browsing and open files on your computer.
Moreover, it also controls the taskbar, starts menu, and various other functionalities of the system. So, if you are facing Windows 11 start menu not working problem, then you can try restarting the Windows Explorer.
To restart the Windows Explorer, follow the steps given below-
- Press Ctrl+Alt+Delete combo on your keyboard. Now on the screen that opens up, select task manager to open task manager on your PC.
- If you are only able to view the applications that you are currently using, then click on the more details button. Now you will be able to see all the apps, background processes, and Windows processes running on your PC.
- Now, you will have to search for Windows Explorer in the list of tasks/processes. Select the Windows Explorer and then click on the restart button that you see at the bottom right corner of the task manager window.

This will restart Windows Explorer on your PC. After doing so, Start Menu should start working in Windows 11.
2. Restart Your Device
If restarting the Windows Explorer didn’t work for you and if you are still facing the issue, then you may try restarting your device. Restarting fixes all the temporary bugs/problems that your system has.
You might be wondering how one can restart their PC if the start menu is not working? Well, you can easily do it without the start menu as well. To restart your PC, follow the steps given below-
- Press Ctrl+Alt+Delete keys together on your keyboard.
- Now on the screen that appears, click on the power icon. You will find the power icon at the bottom right corner of the screen.
- This will give you three options- Shut down, restart, and sleep. Click on the restart to restart your PC.
3. Check For Any System Update
Many times this error might be encountered because of some random bug in Windows, or due to outdated Windows. If this is the reason, then you can try updating your WIndows.
- To update the Windows, press the Windows+I key combo. This will open the settings of your PC.
- Now in the settings, click on the update and security section.
- Click on check for updates. Download and install the updates available.
Similarly, you can try updating the drivers on your PC. You will see the drivers update in the Optional Update section. You can also use third-party apps like Driver Booster and DriverPack Solution to update drivers on your PC.
This will fix the Windows 11 start menu not working issue. However, if the issue is still not solved, then move to the next step.
4. Sign Out Of Microsoft Account And Sign In With Local Administrator Account
You can try signing out of the Microsoft Account on your PC, instead, sign in with a local administrator account.
Given below are the steps to help you sign out of your Microsoft Account-
- Press the Windows+I combo on your keyboard to open the settings of your PC.
- Now in the settings, click on the accounts section.

- In the Your Info section, you will find an option stating ‘Sign in with a local account instead.’ Click on this option, and confirm switching to a local account.
After doing so, you will be able to use the start menu in Windows 11.
5. Reset Your PC
This might be the issue of improper Windows 11 Installation or Upgradtion. If any of the above solutions didn’t work, then the last option will be to reset your PC. You can either reset your PC or install a fresh version on Windows 11. If you want to reset your PC, then follow the steps given below. Before continuing, ensure you have a backup of your data.
- On your keyboard, press the Windows+I key combo. This will open the settings menu on your PC.
- Now in the settings, head to the update and security section.
- In the left sidebar, click on recovery.
- Now under the recovery section, you will see Reset this PC option. Click on get started.

- A new window will open up. You will see two options here- keep my files and remove everything. If you want to keep all your files but remove the apps and settings of your PC, then select the keep my files option. If you want to remove everything from your PC, then click on the remove everything option.
- Follow the instructions, and you will be able to reset your PC.
After your PC has been reset, you will have to set up Windows 11. Once done, you will be able to use your PC without any issues. You will no longer face Windows 11 start menu not working error.
6. Iris Service Force restart
For many users, a recent update to Microsoft’s insider versions has created serious difficulties with the taskbar and Start menu. If you’re a user of the Insider channel and have had problems updating to build number 22449 or above, you can try the fix listed below.
This method will remove the Iris Service’s registry setting, forcing it to be reinstalled when the computer is restarted. For the most part, a reinstall seemed to solve the problem. This repair is worth a shot even if you aren’t on the same builds.
- Search for CMD by pressing Windows + S on your keyboard. Alternatively, press Ctrl + Shift + Enter on your keyboard to run as administrator.
- On your keyboard, type the following command and press Enter.
reg delete HKCU\SOFTWARE\Microsoft\Windows\CurrentVersion\IrisService /f && shutdown -r -t 0
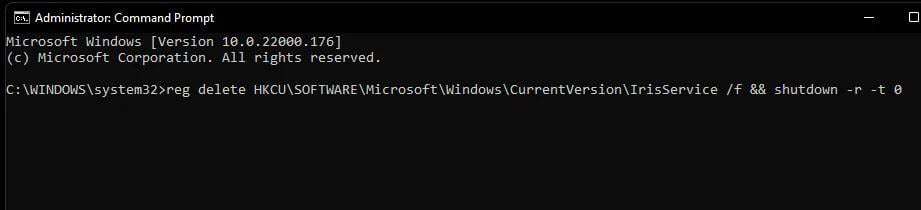
- Your computer will now restart.
7. Run Windows in Safe Mode
You can boot into safe mode if your system crashes after installing a new update. If your Windows 11 system is crashing, you can use Win 11 safe mode to troubleshoot the problem. To get a full guide on the safe mode you can follow How to Start Windows 11 in Safe Mode in multiple ways.
- On the sign-in screen, hold down the shift key on your keyboard, and then click on the power option, and then click on restart. Ensure you do this while holding down the shift key on your keyboard.
- You will be booted to the advanced startup now.
- Here select troubleshoot, and then select advanced options.
- Now in the advanced options, select startup settings, and then select restart to restart your PC.

- You will see a list of options to boot into safe mode. Follow the on-screen instructions to be able to boot into safe mode.
ALSO READ: Windows 11 Media Creation Tool: How To Install/Upgrade
Final Words
These were some troubleshooting methods that you can try, to fix Windows 11 startup menu not working issue. We hope that this article helps solve the problem you were facing with Windows 10. If you are looking for some cool windows 11 wallpapers then you can have it from here.

")


