- A screenshot is a still image of the current window on your PC, useful for sharing and saving important information on Windows 11.
- Various methods include using keyboard shortcuts like PrtSc key or PrtSc + Windows combo to take screenshots directly or copy to clipboard.
- Additionally, tools like Snipping Tool and Snip & Sketch offer advanced features for capturing and editing screenshots on Windows 11.
A screenshot is the still image of the Window that you were currently viewing on your PC. When you want to show someone else what’s on your screen, a screenshot can be useful. This can also help capture important information and get through it later. One can easily take a screenshot on Windows 11, and there are various ways to do so.
If you don’t know how to take a screenshot on Windows 11, then you need not worry about it. Here, We will help you with the process of taking a screenshot in Windows 11 and discuss various ways to take a screenshot on Windows 11 OS.
Ways to Take Screenshots on Windows 11
On Windows 11, there are numerous methods for taking screenshots. There are a number of shortcuts that can be used to quickly take a screenshot. The following are some keyboard shortcuts for taking screenshots in Windows 11.
CHECK: How to Take a Screenshot on a Dell Laptop
Pressing The PrtSc Key
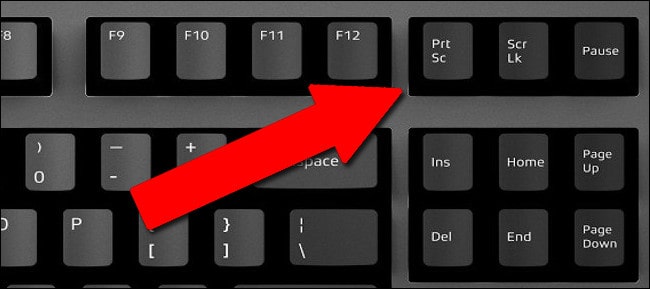
The very first shortcut to help you take a screenshot is pressing PrtSc on your keyboard. Pressing this key will copy the screenshot of the Window you were viewing on the clipboard. Do note that this will not save the screenshot directly. You can paste the screenshot (using Ctrl+V) on Word or Paint and save it from there. The screenshot will only remain on the clipboard until you take another screenshot or copy any text.
Pressing The PrtSc + Windows Combo
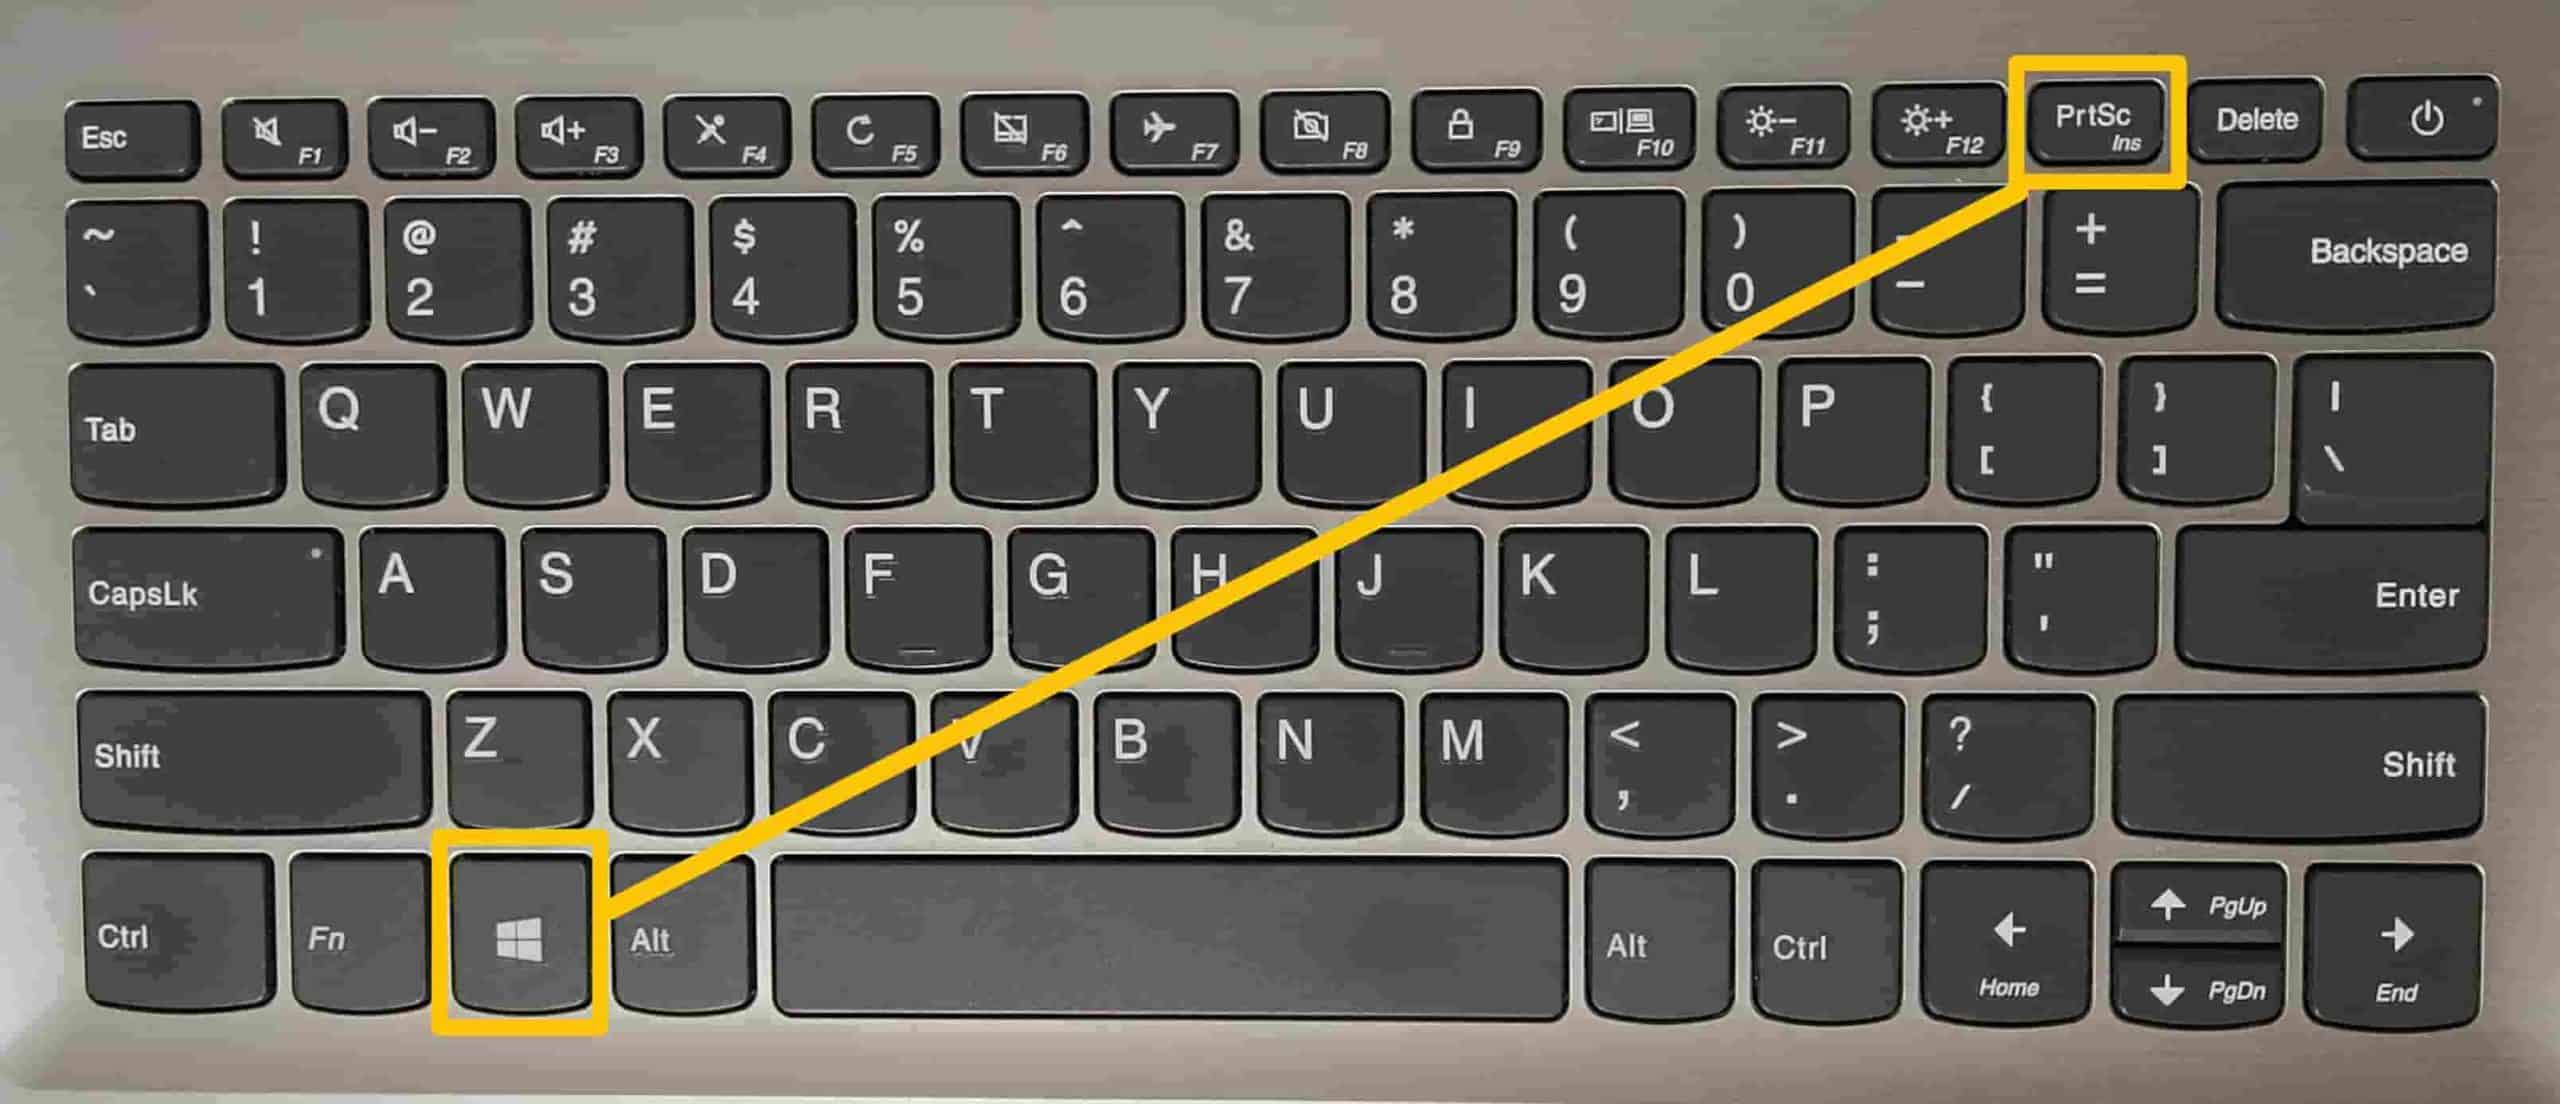
The next way to take a screenshot on Windows 11 is by pressing the PrtSc + Windows key combo on your PC. This will directly save the screenshot to the storage of your PC rather than copying the screenshot to the clipboard.
Pressing PrtSc + ALT Combo

Next, you can take screenshots on Windows 11 by pressing the PrtSc + ALT key combo on your keyboard. This will also copy the screenshot to the clipboard, which you can paste on Paint, Word, and various other areas.
ALSO CHECK: How To Fix Can’t Take Screenshot Due To Security Policy Error
Using Snipping Tool And Snip & Sketch To Take Screenshot
You can either use the Snipping Tool to take a screenshot on Windows 11. You can either use Snip & Sketch, an advanced version of the Snipping tool with more features. This part of the article will discuss how one can take a screenshot using Snipping Tool And Snip & Sketch.
Snipping Tool
To take screenshots using the snipping tool, follow the steps given below.
- Open the start menu by clicking on the Start icon at the bottom left corner of your screen or pressing the Windows key on your keyboard. Now in the start menu, search for the snipping tool and open it.

- Now in the Snipping tool window, click on new. You will not be able to capture the area you want to take a screenshot of.
- Once done, you will be able to view the screenshot you took. You can make any changes you want to make and press the Ctrl+S combo to save the screenshot.
Snip & Sketch
If you want to take a screenshot using the Snip & Sketch tool, follow the below steps.
- Press the Windows key on your keyboard or click on the start icon at the bottom left corner of your screen to open the Start menu. Now in the start menu, search for Snip & sketch and open it.

- Click on new in the Snip & Sketch window, and then take a screenshot of the area you want to. You will have different options to take a screenshot, such as freeform snip, window snip, full-screen snip, and rectangular snip.
- Once you take the screenshot, you will be able to view it before saving it. You can make changes to the screenshot, such as cropping it, highlighting something, or marking something. Once done, press the Ctrl+S key combo to save the screenshot.
You can also press the Windows+Shift+S key combo to open the Snip & Sketch and take screenshots which can easily be saved on your PC.
Final Words
That’s how you can take a screenshot on Windows 11. We hope you didn’t find the process too difficult. If you are still struggling with Windows 11, You can check this How to Upgrade Windows 10 to Windows 11. If you find this article helpful, please, do let us know in the comment section below.


")
