- Screenshot on HP laptops can be taken using the Windows + PrtSc keyboard shortcut, allowing users to capture the entire screen easily.
- The Snipping Tool on HP laptops also facilitates screenshot capture with options for free-form, window, and full-screen snips, offering flexibility in screenshot selection.
- Utilizing the Windows + Shift + S shortcut grants access to the snipping tool for taking screenshots on HP Elitebook, providing various modes for capturing specific areas of the screen.
Taking a screenshot simply means capturing what’s currently showing on your screen. Just like on your phone, you can easily take screenshots on your laptop or desktop too. If you’re using an HP laptop or desktop and don’t know how to do it, don’t worry — this guide covers all the working methods in 2026, including some new ones.
Whether you’re using Windows 10 or the latest Windows 11 build, these methods work perfectly on all HP devices — and even other brands like Dell or Lenovo.
How to Take a Screenshot on an HP Laptop or Desktop
In this article, we will discuss how you can take a screenshot on an HP laptop.
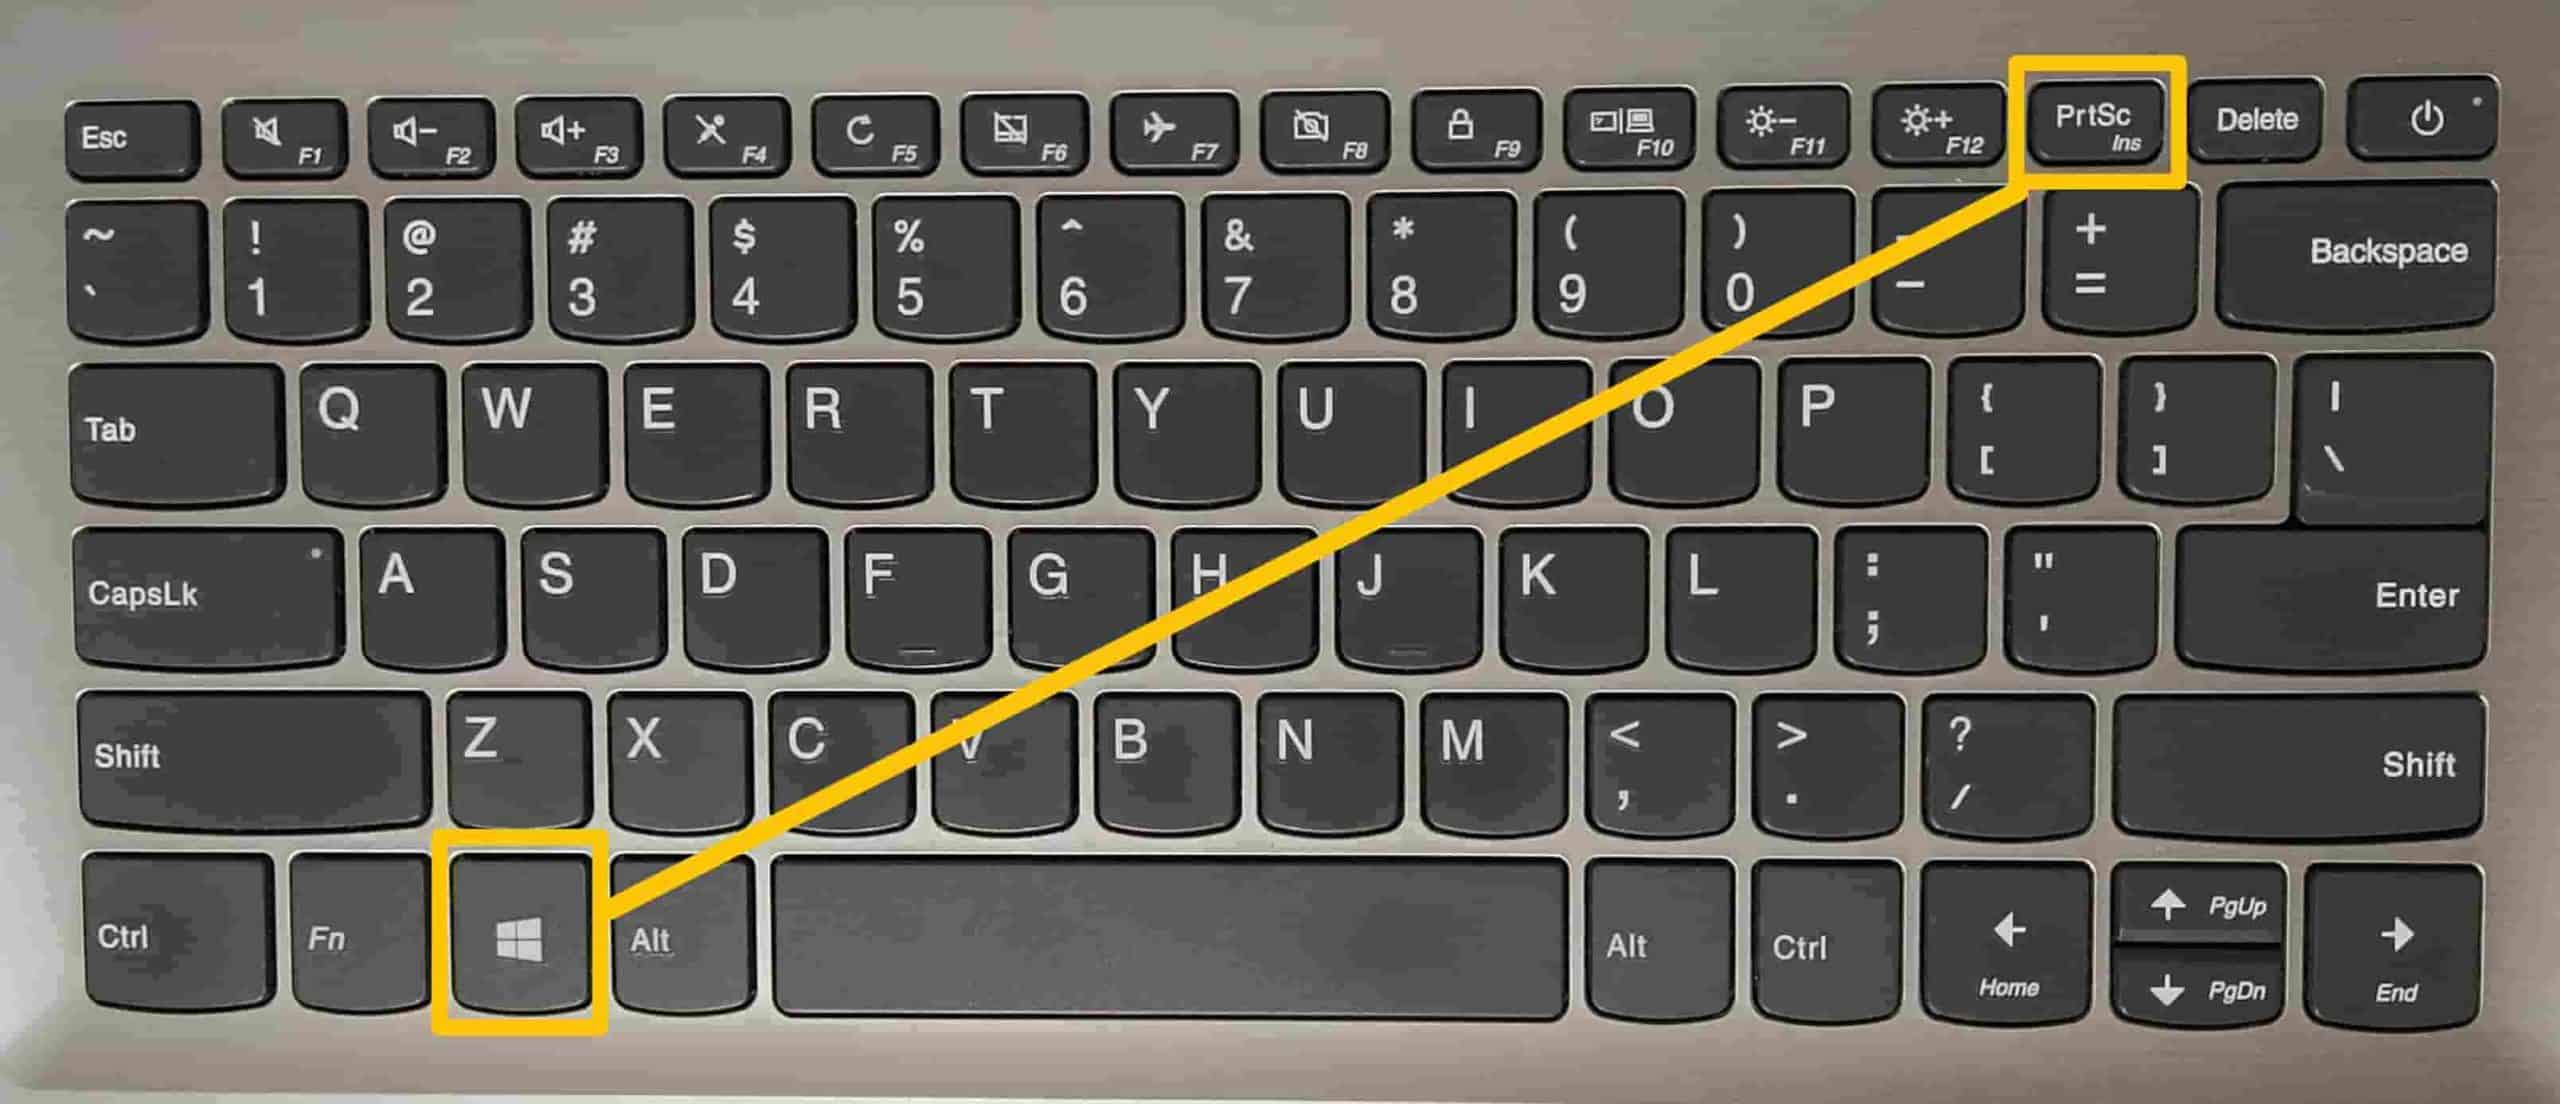
Taking a Screenshot on HP Using Windows + PrtSc
You can take a screenshot on an HP laptop using the Windows + PrtSc keyboard shortcut. To take a screenshot using this shortcut, follow the steps given below-
- Open the screen on which you want to take a screenshot. Press the Windows + PrtSc key combo on your keyboard to capture the entire screen.
- Now, open File Explorer on your PC. To do so, head to the start menu, search for File Explorer, and open it.
- In the File Explorer, head to the Pictures.
- You will see a folder named Screenshots. Open this folder, and you will find the screenshot you saved here.
- If you want to paste the shortcut somewhere, then press Ctrl + V after you take the screenshot to paste it.
Screenshot on HP Using Snipping Tool
The Snipping Tool in 2026 has been upgraded. It now includes features from the old Snip & Sketch tool and supports freeform snips, delayed capture, and even screen recording.
- Firstly, open the screen on which you want to take the screenshot.
- After doing so, open the start menu and search for the Snipping Tool and open.

- Now click on the new icon or press the Ctrl + N key combo.
- Now you will be asked to select the area of which you want to take a screenshot of.
- You can either press the mode button, and this will give you three options to take a screenshot-
- Free-form snip- This allows you to take screenshots in any shape you want to. You can take screenshots in ovular, circular, or any other shape you want.
- Window snip—You can select this option if you want to take a screenshot of your active Windows HP laptop.
- Full-screen snip—This option allows you to capture your entire screen. It is useful if you want to take a screenshot of a multi-monitor setup.
- After taking the screenshot, press the Ctrl + S key combo to save the screenshot.
You can now enable Auto-save in Snipping Tool settings — all screenshots get saved to Pictures > Snips folder without clicking “Save” every time.
Use the Delay Timer Feature (To Capture Menus)
Need to capture a dropdown or right-click menu? Use the delay option:
- Open Snipping Tool from Start Menu.
- Click the Delay dropdown and select 3 seconds or 10 seconds.
- Click New and get ready — the capture will begin after the timer.
Windows + Shift + S for Print Screen on HP Elitebook
After taking a screenshot with Windows + Shift + S, it’s copied to your clipboard — but did you know Windows 11 keeps a history of copied items?
- Press Windows + V to view your clipboard history.
- Find your screenshot and paste it anywhere.
- If clipboard history is off, Windows will prompt you to enable it.
This is super helpful if you’re taking multiple screenshots back-to-back.
Use Snipping Tool for Screen Recording
Windows Snipping Tool now lets you record your screen too — perfect for tutorials, demos, or walkthroughs.
- Open the Snipping Tool.
- Click the camera icon in the toolbar to switch to Record mode.
- Click New, select the area, and start recording.
- Save the video once you’re done.
📌 Note: This is still in beta, but works great for basic screen recordings without third-party apps.
Use the Print Screen (PrtSc) Key Manually
If you just press PrtSc without any other key, it copies your whole screen to the clipboard (but doesn’t save it).
- Press Ctrl + V to paste it into Paint, Word, or any editor.
- Save it manually from there.
Use Third-Party Screenshot Tools
While the built-in tools are great, some users prefer more advanced features like annotations, uploading, or scrolling screenshots. Here are popular tools in 2025:
- ShareX (Free, very powerful)
- Lightshot (Lightweight and easy)
- Snagit (Paid, professional-grade)
These apps give you more flexibility if you work with screenshots often.
FAQs
Are There Built-In Tools to Take Screenshots on HP Laptops?
Yes, all Windows laptops — including those from HP — come with the Snipping Tool, which lets you take screenshots easily. It’s a built-in app that works on both Windows 10 and Windows 11, and you can use it to capture the full screen, a specific window, or a selected area.
Can I Use Third-Party Apps to Take Screenshots on an HP Laptop?
Absolutely. If you want more features like scrolling capture, instant editing, or cloud sharing, there are plenty of third-party screenshot tools available. Popular choices in 2026 include Snagit, ShareX, and Lightshot — all of which work great on HP laptops and desktops.
ALSO CHECK:
- How to Take a Screenshot on a Dell Laptop
- How To Take a Screenshot On Windows 11
- How To Fix Can’t Take Screenshot Due To Security Policy Error
Final Words: How to Screenshot on HP?
Taking screenshots on HP laptops or desktops in 2026 is easier than ever — thanks to powerful built-in tools like Snipping Tool, auto-save, clipboard history, and new features like screen recording.
Whether you’re capturing an error message, saving notes, or recording your screen, these methods have you covered. If you need more advanced options, tools like ShareX or Lightshot are worth trying.


")


