- Users facing 'Windows Can’t Connect To This Network' error in Windows 11 may experience connectivity issues
- Restarting the router, toggling Airplane mode, and forgetting/reconnecting to the network can resolve the error
- Updating network driver, updating Windows, running troubleshooters, disabling IPv6, and resetting network settings are additional troubleshooting steps to fix the issue
Are you facing issues with your PC when connecting to the network on Windows? Many users have reported facing a ‘Windows can’t connect to this network’ error in Windows 11. When this error occurs, you may not be able to connect to the internet. This can be quite frustrating when you cannot connect to your internet and keep on getting this error. If you have been facing a ‘Windows Can’t Connect To This Network’ error in Windows 11, and looking for a way to fix this error, then you are at the right place.
Fix Windows Can’t Connect to this Network in Windows 11
In this article, we will be discussing how you can fix the ‘Windows Can’t Connect To This Network’ error in Windows 11.
Try Restarting The Router
The very first thing that you should try doing is restarting your router. Many times you may face this error due to some problem with the router. In this case, you should try restarting your router. If you are connected to a Wi-Fi network, you can also try turning off the Wi-Fi on your PC and then turn it on again.
This should most probably fix the issue for you, and you should be able to connect to the network now. However, if you still get the ‘Windows Can’t Connect To This Network’ error in Windows 11, then you should try moving to the next troubleshooting step on your PC.
Turn On Airplane Mode And Turn It Off
Airplane mode can often be your workaround for all the network problems you may face with your PC. You should try turning it on once and then turning it off again after a few moments.
- To do so, open the Action Center by clicking on the Wi-Fi icon on the taskbar.
- Now in the Action Center, click on the Airplane Mode icon to turn it on. When turned on, the icon will be highlighted in blue.

- Wait for a few seconds, and then turn it off. To do so, again click on the Airplane mode icon to turn it off. When turned off, the icon will no longer be highlighted.

Forget And Reconnect The Network You Are Trying To Connect
If you can connect to the other networks on your PC, but not that particular network, then it may be because that network may be misconfigured. You can try forgetting the network and then reconnecting to it. To forget and reconnect to the network, follow the steps given below-
- Click on the Wi-Fi icon in the taskbar. This will open the Action Center. Here, click on the arrow on the Wi-Fi icon.
- Select your Wi-Fi network, right-click on it, and then click on Forget Network.
 After you forget the network, connect to it again. You should now be able to use the network without any problem.

Update Network Driver
Another thing that you can try doing is updating Network Driver. Many times you may face this issue due to the outdated network driver on your PC. To update the network driver, follow the steps given below-
- Press the Windows + X key combo. Now on the menu that opens up, click on Device Manager.
- Here, expand the Network Adapters section by double-clicking on it.
- Select your network driver, right-click on it and then click on Update Driver.

- Now, follow the on-screen instructions to update the driver.
- After you have updated the driver, restart your PC, and the issue should be fixed.
If updating the network driver didn’t fix the issue, then you can try reinstalling the driver.
- Select your network driver in the Device Manager.
- Right-click on the network adapter, and then click Uninstall Device.
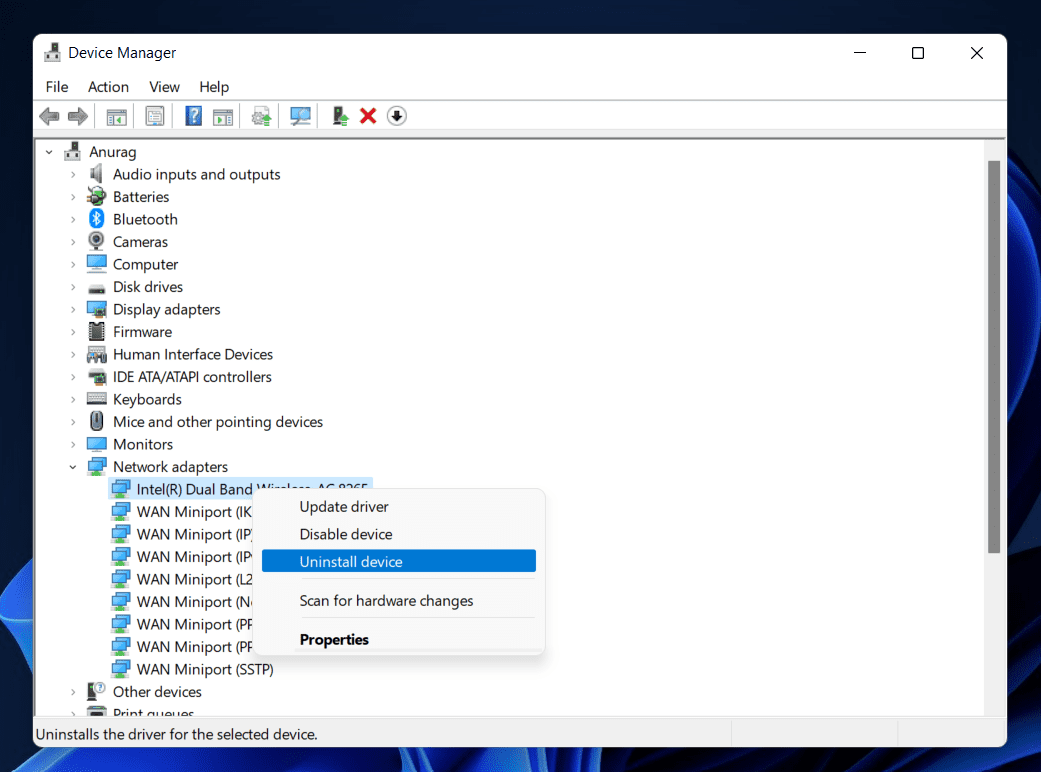
- After doing so, restart your PC, and the driver should be reinstalled.
Try connecting to the network again, and you should be able to use it without any issue now.
Update Windows
Bugs in the system may cause the issue. You can try updating Windows to fix the issue. You can follow the steps given below to update Windows-
- Press the Windows + I key combo to open the Settings app.
- Click on the Windows Update on the left sidebar of the Settings app.
- Now on the right side, click on Check For Updates.
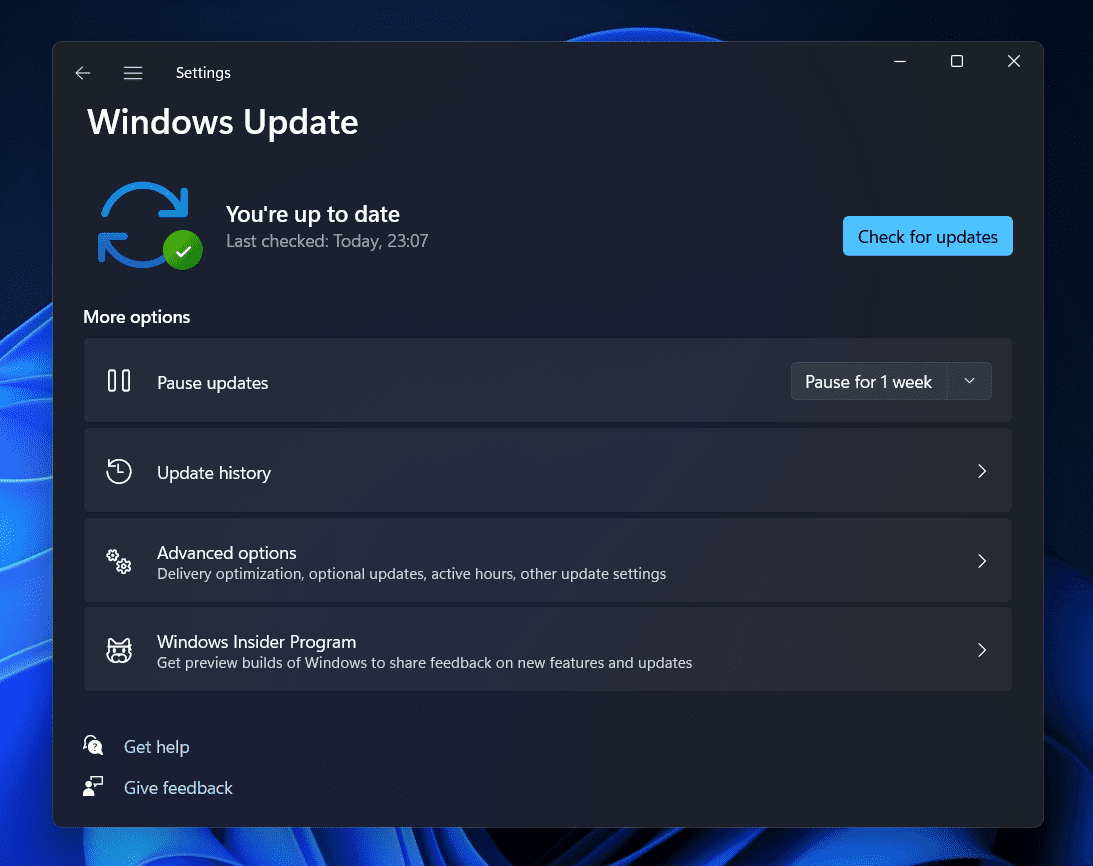
- Download and install the updates you find, and then restart your PC after installing the updates.
Try Internet Connection Troubleshooter
If the above step doesn’t work for you, then you can try the network adapter troubleshooter. To run the network adapter troubleshooter, follow the steps given below-
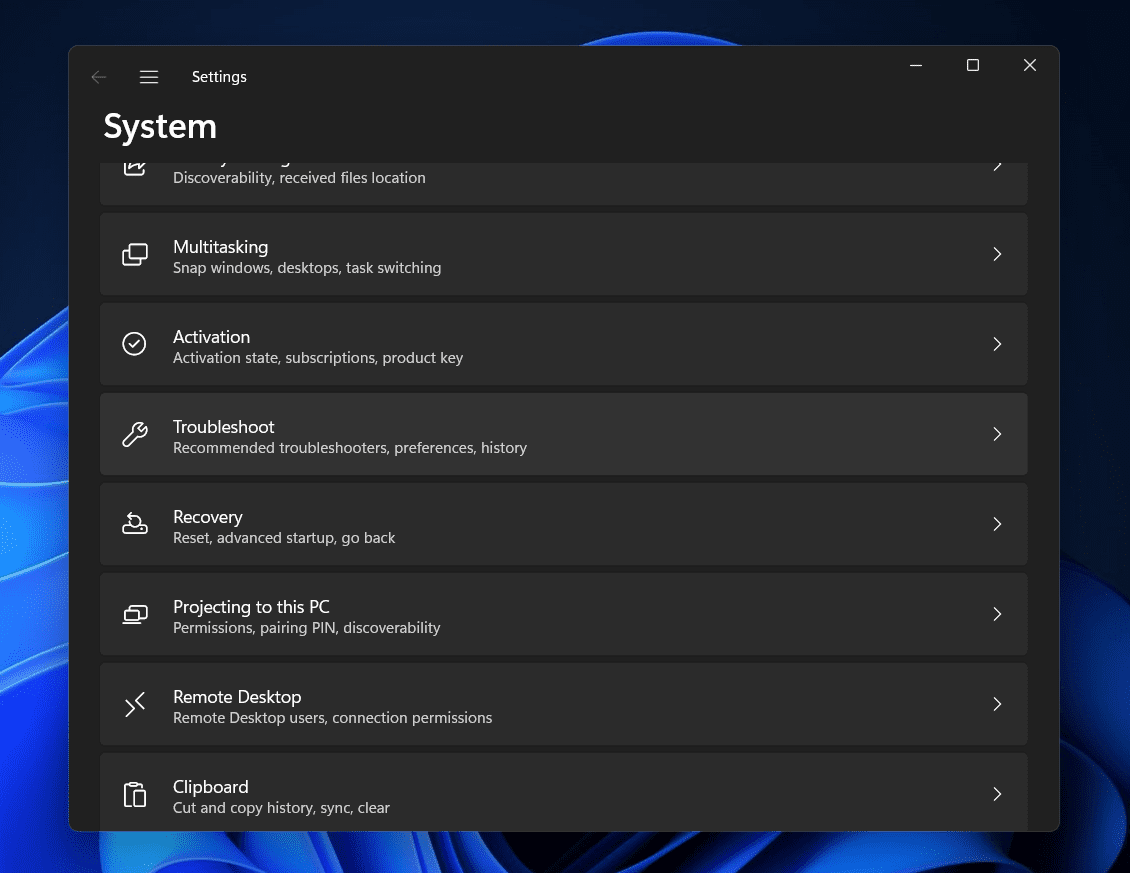
- Press the Windows + I key combo to open up the Settings app on your PC.
- On the right side of the Settings app, click on the Troubleshoot.
- Here, click on the Other Troubleshooters.
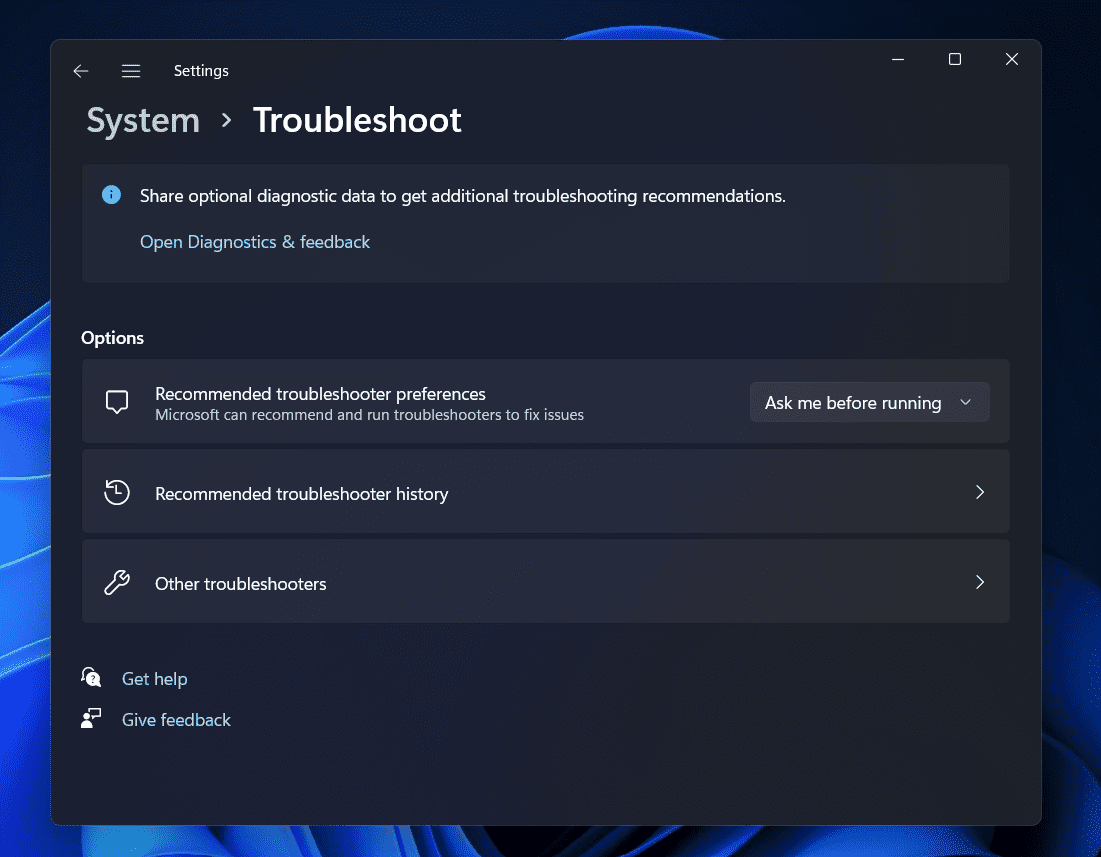
- Now, click on the Run button next to the Internet Connections to run the internet connection troubleshooter.
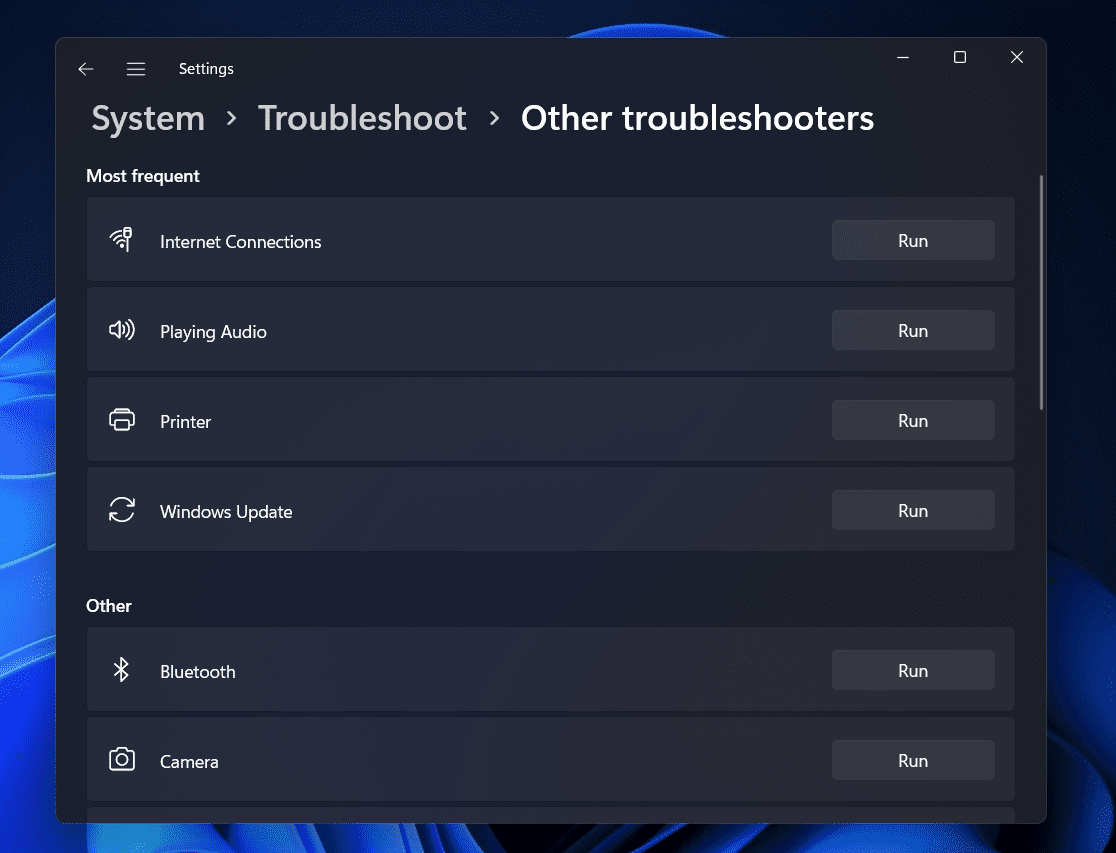
- This will identify the problem for you and fix it.
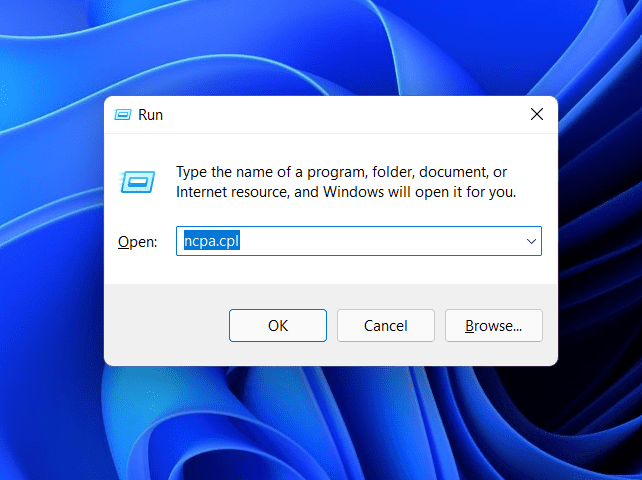
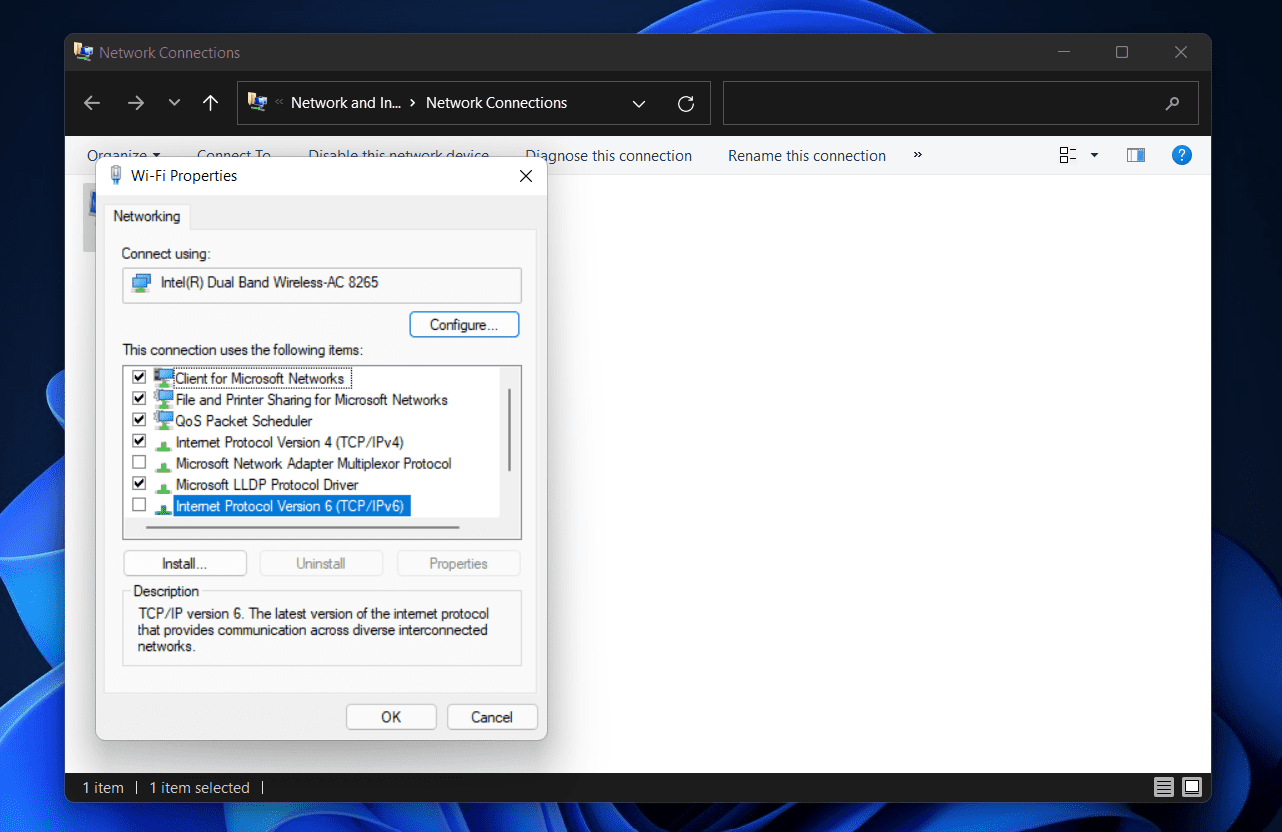
Disable IPv6 Settings
This problem can be caused by IPv6 settings being turned on. Try disabling the IPv6 settings and then check if you face the issue or not. To disable IPv6 settings, follow the steps given below-
- Press the Windows + R key combo, and then in the Run dialog box, type ncpa.cpl and hit Enter to open the Network Connections window.
- On the window that opens up, select your network. Right-click on it and then click on Properties.

- Here, uncheck the checkbox Internet Protocol Version 6 (TCP/IPv6). Click on OK to save the changes.
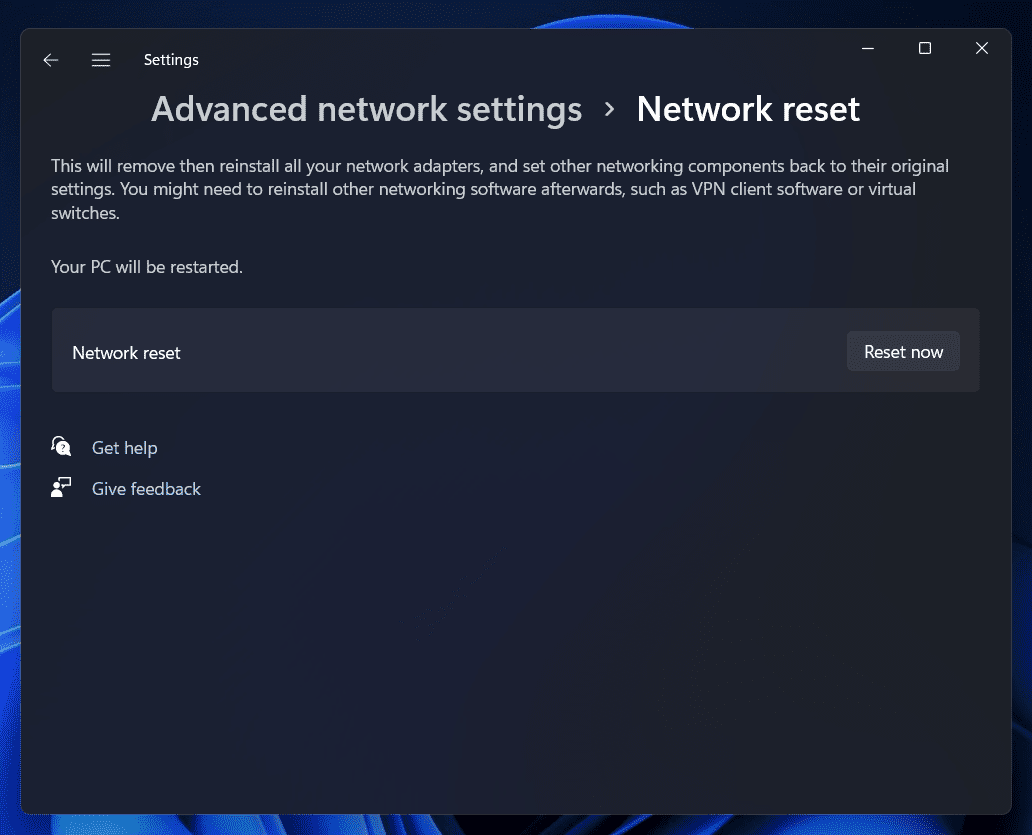
Reset Network Settings
If none of it helps you out, then you will have to reset network settings. To reset the network settings, follow the steps given below-
- Open the Settings by searching for it on the Start Menu.
- On the left sidebar, click on the Network & Internet and click on the Advanced network settings.
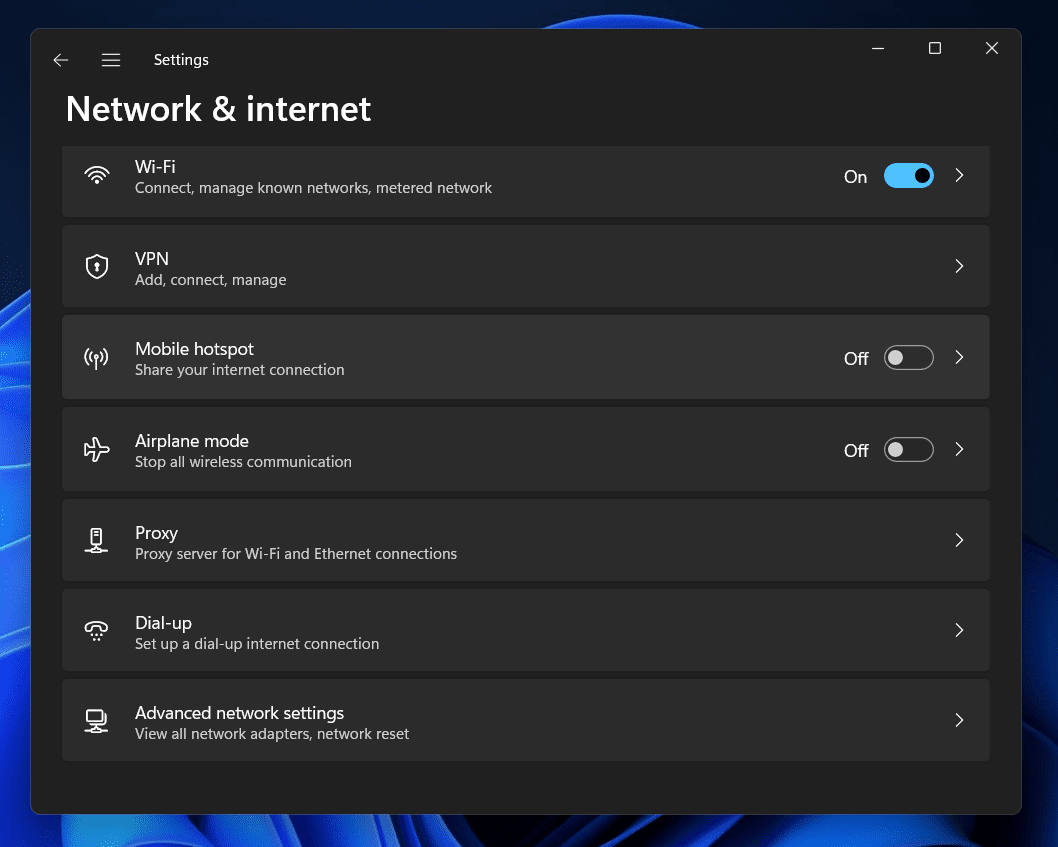
- Click on the Network Reset option under the More Settings.

- Click on the Reset now button right next to the Network Reset option to reset the network settings.
- You will be asked to confirm resetting the network settings; click on Yes.
RELATED GUIDES:
- Fix Windows 11 Blue Screen of Death Errors
- Fix Touchscreen Not Working in Windows 11
- Find Other Computers On A Network In Windows 11
- Fix Mobile Hotspot Not Working In Windows 11
- How to Fix Windows 11 Not Detecting Second Monitor (5 Ways)
Conclusion
This is how you can fix the ‘Windows Can’t Connect To This Network’ error in Windows 11. We have discussed the complete step-by-step guide to fix the network error. You can follow the above steps to fix the issues that you face.


")


