- HP scanner not working in Windows 11 after an upgrade, check for Windows updates as outdated software may be the issue.
- Run Windows Image Acquisition service, update drivers, and use compatibility mode to troubleshoot HP scanner issues.
- Reinstalling HP scanner drivers and running hardware troubleshooter can help resolve the scanner not working problem in Windows 11.
What to do when the HP scanner is not working in Windows 11. After upgrading to Windows 11, many people have the HP scanner not working on Windows 11 problem. The first solution you should always make sure of before trying anything else is to check for Windows updates. HP scanner may not function because of some outdated issues.
To do these, follow these steps:
- Select Windows from the menu.
- After that, click on the settings icon.
- After that, in the setting, the app selects the windows update category from the left pane.
- Here make sure to click for check for updates button.
If there are any updates, windows will automatically install them, and your printer problem might just be fixed.

What should we do if Windows 11 cannot identify the HP scanner?
One useful solution could be running the preliminary troubleshooting
Before starting the real program development, just as with any other external device, there are a few fundamental items you should check.
To begin with, confirm that the scanner or multi-function printer is turned on. To let you know how it is, the printer’s control panel should at the very least have a light on.
Additionally, verify that the wires are securely connected to the PC and scanner. Printing a test sheet on a printer that has a scanner could ensure that it is operating properly.
Another thing you could try if HP scanner is not working is to restart both your computer and your printer/scanner. To see whether the problem persists, try reconnecting the wire once again. Your chances of running into a problem are higher if it has to do with software than it does with the hardware.
Fix HP Scanner Not Working in Windows 11
If you are having trouble connecting to the HP scanner, we will walk you through a few potential fixes in this post.
- To start the Run Command, go to Start, right-click, and then choose Run.

- In the search field, type services.msc and press OK.

- Look for the Windows Image Acquisition (WIA) service in the Names column on the right side of the Service Manager window.

- Double click to bring up the Properties pane.
- To start the service, click Start button and change the Startup type to Automatic.

- To save the changes, click Apply, then click on OK button.
- The Shell Hardware Detection service, Remote Procedure Call, RPC Endpoint Mapper, and DCOM Server Process Launcher should all be done in the same way.
- Once the adjustments have been made, restart your computer to see whether the problem persists.


Run the Hardware Troubleshooter
You should try using the hardware troubleshooter if you face problems with the HP scanner.
- Search for CMD in the Start Menu, right-click it, and choose Run as administrator

- In the Command Prompt, type and execute the command.

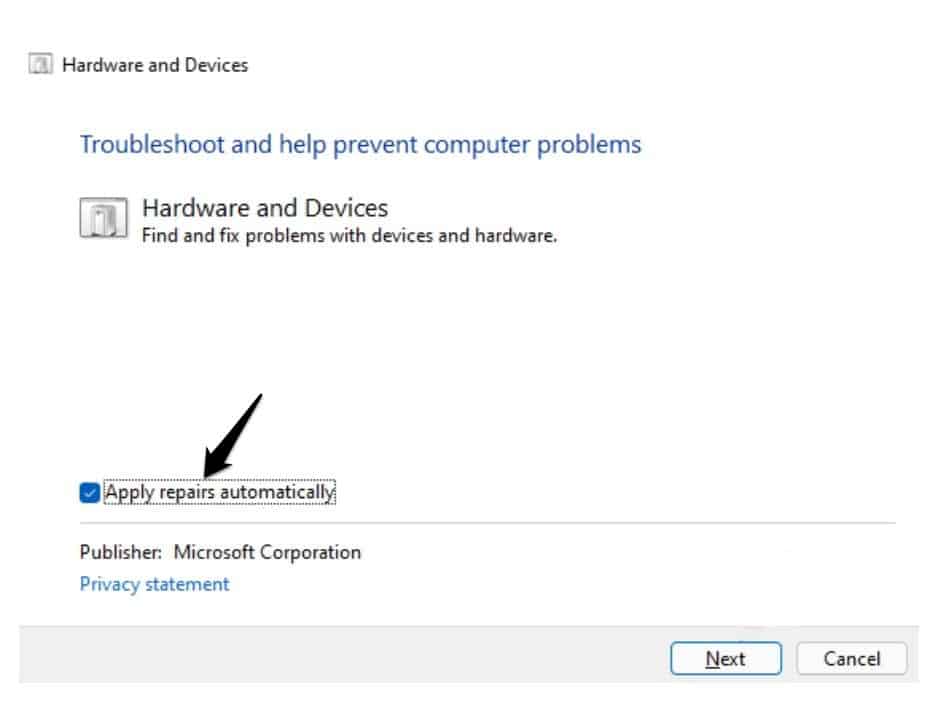
- Click on Advanced in the Hardware and devices troubleshooter window now.

- To run the hardware troubleshooter, first select Apply repairs automatically from the checkbox and then click Next.


Run the scanner in compatibility mode
Running the HP scanner in compatibility mode is another option you might try. You can do this by taking the following actions:
- Press the Windows + R key combo. In the run dialog box type Control Printers and
click OK to open it.

- In the Devices and Printers window, right-click the HP scanner, and then select Properties.

- Go to the Properties window’s Compatibility tab.
- At this point, check the checkbox for Run this program in compatibility mode for
- Now choose any previous version of Windows from the drop-down option, ideally Windows 7 or Windows 8


Update Drivers
Follow these steps to manually update drivers:
- From Start, select Settings.
- Click Windows Update, then choose the Advanced settings option.

- Select Optional updates.

- Check the scanner drivers after expanding the section for driver updates.
- Restart the computer


Make sure to keep the scanner drivers updated at all times because a damaged or outdated scanner driver will prevent your HP scanner from operating on Windows 11.
You can also go to the manufacturer’s website to update the drivers, download the most recent version, and install it on your computer.
Reinstalling the HP Scanner
- Right-click on Start and select Device Manager.

- Expand Imaging devices or Print Queues in the Device Manager window. Click the HP scanner device in this area and then choose Uninstall device.

- Click Uninstall to confirm when the Uninstall Device box appears.
- Restart your computer after it’s completely uninstalled


Next, download and install the latest scanner driver from the HP scanner’s official website.
The HP scanner not working problem should now be resolved as the scanner driver is reinstalled.
As an alternative, you can use the DISM and SFC scans to identify and repair any corrupt system files.
In addition, if you recently installed an update, uninstall it and see if that resolves the HP scanner not working on the Windows 11 issue.
Conclusion
This guide can assist you if your HP scanner is giving you problems. We have covered some troubleshooting techniques to assist in resolving the HP scanner not working issue in Windows 11.
RELATED ARTICLES:
")


")
