- Prefetch and SuperFetch are two features in Windows that preload program files for faster loading, with SuperFetch using more memory.
- Windows services like SuperFetch can consume system resources and affect performance, especially in systems with lower RAM.
- Methods to enable or disable SuperFetch include using the Services app, Registry settings, and Command Prompt, with caution advised due to potential impact on application performance.
Windows is no doubt one of the most futuristic and common operating systems. All Windows upgrades come with lots of new functions and features, and if you are using Windows, then you must have listened to the prefetch of the word and SuperFetch. Basically, prefetch and SuperFetch are two functions that were first introduced in Windows XP and are still used till Windows 10.
Both the features are named similarly, but they actually are not the same. In this article, we have shown you how to enable and disable service host super fetch in Windows 7/8 and Windows 10 in 2023.
In fact, the function of both features is very different. Prefetch is basically a feature or algorithm that runs when you boot up your computer. This function basically loads the program files that are frequently used into the memory so that it can run the program instantly.
SuperFetch is basically an upgrade of Prefetch, but this function actually is programmed so that it can take your whole memory to preload the apps and release the memory when needed which can make your PC slow and laggy.
What is the first operating system you have used on a PC? Let us know in the comments below. If we closely look, most people started using PCs on the Microsoft Windows operating system. Isn’t it? Windows makes the whole computer usage user-friendly and allows everyone to use a computer without any geeky skills. Before Windows, there was DOS which is another operating system by Microsoft which is a completely command-line-based operating system.
We don’t say DOS is worse but every operating system has its own pros and cons. You can still do all the things you are doing on the windows on your Dos too. But it doesn’t have the fancy user Interface and the animations which you are enjoying on the window and many other operating systems which we are using now. Other than that operating systems have come a long way and doing many things that we don’t even know to improve our user experience with it.
Do you know Windows services? Or Heard about it? If you don’t we will explain this to you. If you want to use the application on Windows, there is no application that is fully independent of the operating system.
Each and every application needs some dependency to work on your computer. There are other applications that will need some other background process to work. These background processes are also needed by the operating system which is commonly known as services.
On a daily basis, we are using many services as background processes that are hard to find but it is vital because without these services we cannot able to do all things. If you ever noted that you don’t use any application on your Windows computer your disk usage and some memory are almost full. I’m sure you will be in this situation. It has many reasons but the most common factor for this issue is the service host fetch.
Also Read: Win32 Priority Separation in Windows 10
What is a Service Host?

Host Fetch? Yes! It is a windows service that will learn which applications do you use the most and what time you will open the particular application and learns it over the time you spend with the computer. Later, using this information, this service makes all the files needed to open that particular application which decreases the application loading time significantly.
There are many services like these that are available in the windows which gradually increase the experience of the user. Its main purpose is to speed up the performance of any application you are using. Now you may think, it is a great service to have and what’s wrong with this application. Isn’t it?
I agree this is a great service to have but to have on a computer. But like every other windows service, it has its own set of problems for quite a long time. Really long time and its problem keep on increasing on the further updates. Super fetch was introduced with windows vista and it is present in all the later versions up to the present windows 10.
As I mentioned earlier, it is a background process that can consume our system resources without any user Interface or anything. There is a big problem with it regarding memory management.
In a system that has less than 4GB of ram, many users reported this super fetch spikes the many Ram and CPU usage of the PC. It heavily affects all the intensive tasks like gaming pathetically. It causes shutter and causing frame drops and also causes CPU to continue running on its maximum potential which is not good for any pc.
Also Read: How To Fix PUBG “Servers Are Too Busy” Error?
What is Prefetch and Superfetch?
You can say it can be stopped by the task manager and get rid of this service to improve the performance of the PC. But here is the most tedious thing happening in the windows operating system.
Host fetch is not running on the individual thread where we can simply press the stop button to stop this. Instead, it runs on the collection of many .dll files named Service host. If we force to stop this process, it may cause some other issues in many applications. So, it is impossible to force stop service to fetch completely.
But don’t worry we are here to help you with the 100% disk usage issue of your computer. There are some other ways available from which you can stop this issue. Let us quickly tell you what you need to do for stopping 100% disk usage.
Also Read:
- How To Fix 100% Disk Usage Problem In Windows 8/10?
- How To Fix Yellow Display Tint Issues In Windows Laptops?
- How To Resolve err_connection_reset Issues (5 Methods to Fix)
- How To Fix “Unfortunately TouchWiz has stopped” Error
Fix Superfetch 100% Disk Usage on Windows
Do note disabling service host fetch will reduce the speeds of application openings many times. To disable this only when this service started using most of your memory. If it doesn’t grave your memory, leave it as such. To disable service host fetch, there are two methods to do.
Enable and Disable SuperFetch (2024)
Now when we want to enable or disable SuperFetch there are many ways to do so. Here we will discuss all the methods in detail with a step-by-step guide.
How to Enable or Disable SuperFetch from (Services app)
Step 1. Open the Run tab by pressing (Windows + R) key. Now type services and after finding just double click on “services.msc”.
Step 2. After opening services just manually find out SuperFetch then click on it and now click on stop.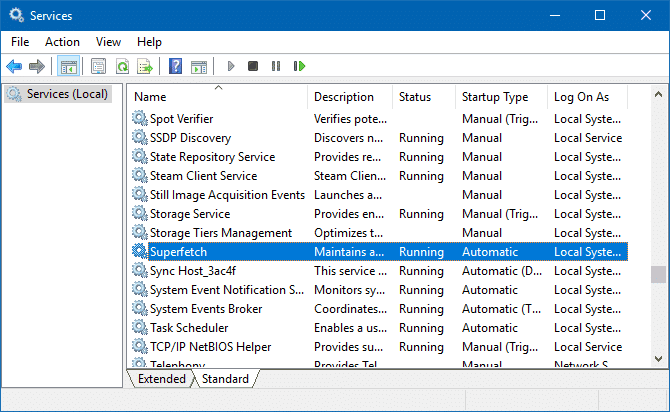
Step 3. SuperFetch is now disabled from your device but you can also restrict it by starting automatically.
Step 4. Now just change the StartUp type to Disabled from automatic and it will disable SuperFetch permanently.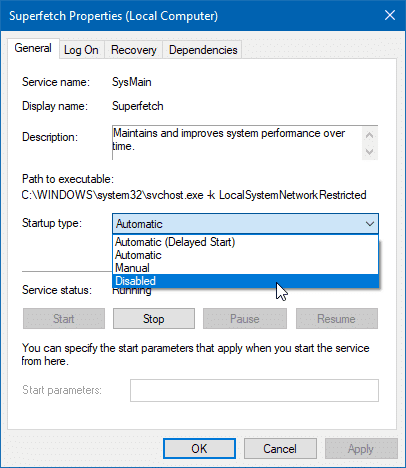
Yeah, that’s it you have successfully disabled SuperFetch in your device. You can Enable SuperFetch just by repeating the step changing the startup type back to automatic and then clicking on start.
How to Enable or Disable SuperFetch from (Registry)
Step 1. On the home screen open the run tab by pressing (Windows + R) keys.
Step 2. Now, search for “Regedit”. Then click on it.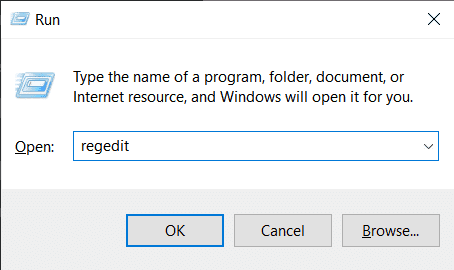
Step 3. Then Registry editing dialogue box will appear. Then scroll down till you find “PrefetchParameters” then click on it.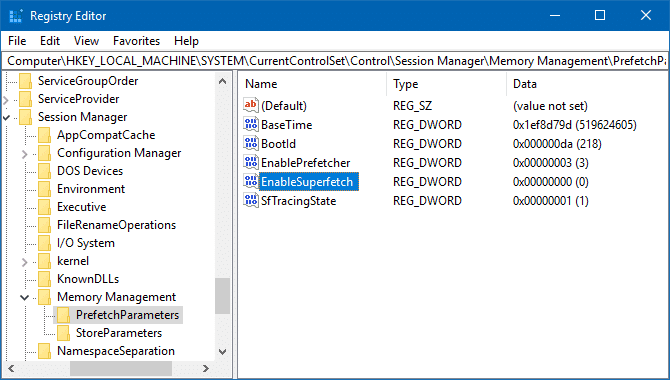
Step 4. Now select “New” > “DWORD Value” and type the new value for disabling the SuperFetch put (value=0) and put (value=3) for enabling the SuperFetch.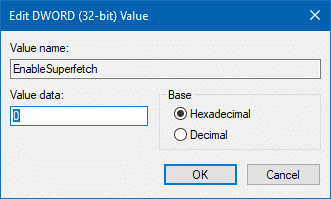
Step 5. You have successfully disabled the SuperFetch and you are ready to go.’
Enable or Disable SuperFetch from (Command Prompt)
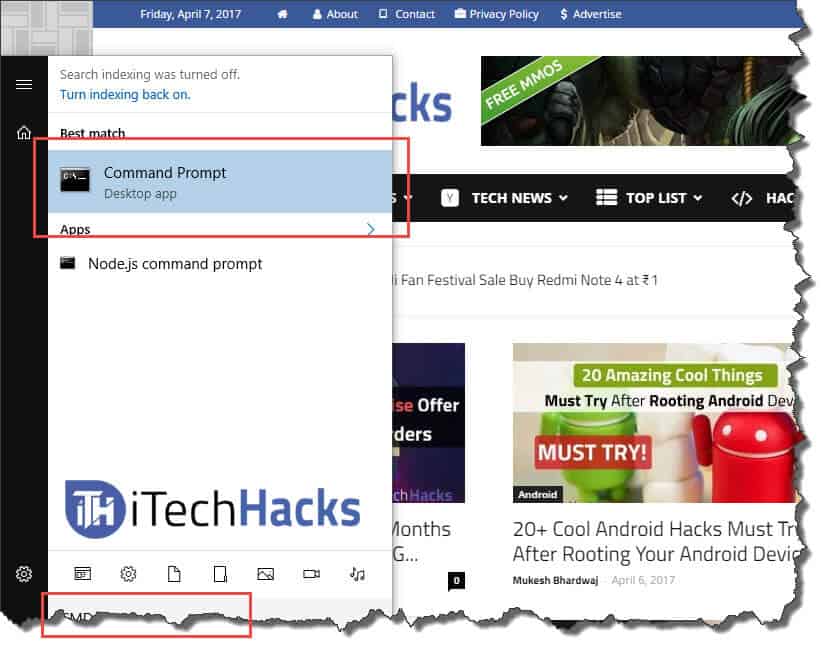
Step 1. First of all, open the command prompt manually or press windows key and type “command”. Now click on the command prompt to open it.
Step 2. Now type or copy this (“net.exe stop superfetch”)then enter it into the command prompt and then click on enter.
Step 3. Now the command prompt will open here type or paste this (“sc config sysmain start=disabled”) and then click on Enter to disable the SuperFetch service.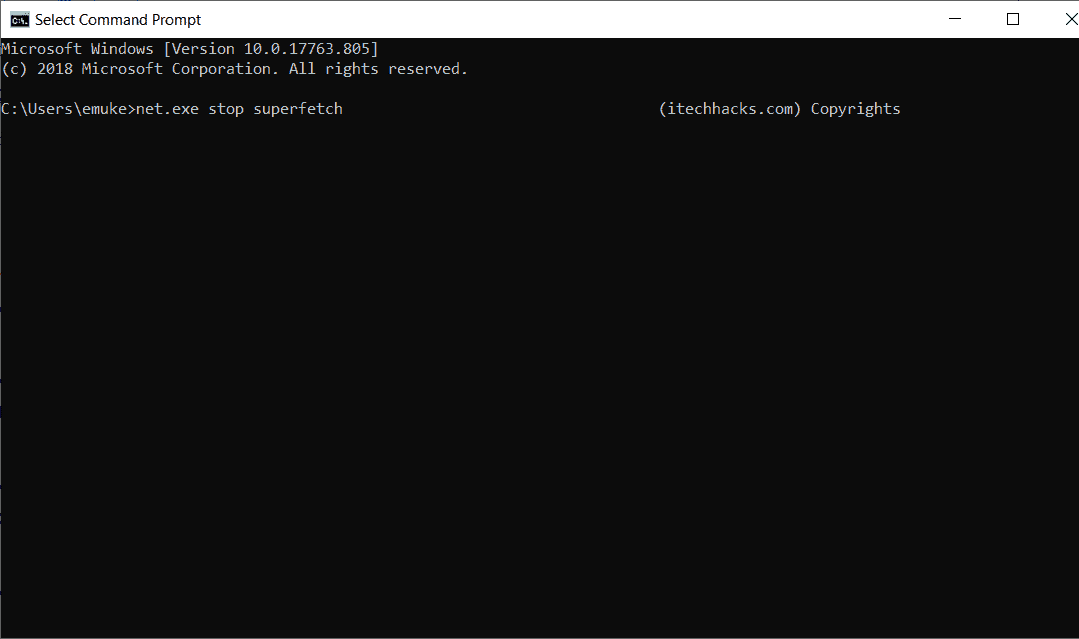
Step 4. Close the command prompt.
To enable back SuperFetch repeat all the steps just in step 3 replace this code (sc config “SysMain” start=auto & sc start “SysMain”).
There are many more methods by which you can disable or enable SuperFetch but I found these methods are the easiest as well as quick. You can choose any method and disable SuperFetch from your Windows.
Frequently Asked Question:
Q1. Is it safe to disable service host Superfetch?
Answer: It is a background process that can consume our system resources without any user Interface or anything. There is a big problem with it regarding memory management.
Q2. Is it okay to disable SysMain?
Answer: Yes, It’s okay to disable SysMain
Q3. Is Service host a virus?
Answer: NO, It’s not a virus. Its a part of your computer program.
Q4. How to disable service host SuperFetch?
Answer: There are two methods to enable and disable this SysMain in your computer.
Q5. What is superfetch called now?
Answer: SysMain – services.msc.
Conclusion:
I hope this article will help you to understand what is service host fetch and how to enable or disable it with all three working methods. it if it starts consuming a lot of memory from your computer. If you like this article share this article with all your friends and help us to grow bigger. Also, comment on what is your thoughts on these kinds of services on your PC. If you have any suggestions, always feel free to let us know in the comment section. Thanks a lot for reading.


Nice and good