- Win32 Priority Separation in Windows 10 allows users to allocate more memory to specific tasks, improving overall performance.
- By tweaking settings in Windows 10 using methods like Regedit or Run Commands, users can optimize processor usage and enhance foreground application performance.
- Implementing Win32 Priority Separation can lead to noticeable performance improvements and a better utilization of hardware resources in Windows 10.
Are you getting a memory underflow Problem in your Windows 10 PC?. Here, in this article we have explained everything about Win32 Priority Separation and How To Use Win32 Priority Separation To Allocate More Memory To A Particular Task in 2023.
Win32 Priority Separation in Windows 10: What operating system you guys are using? Is it windows? Mac? or any Linux distro? Let us know in the comment section below. I know most of you guys are windows users. Isn’t it? Windows become a huge success because of its simple user interface which lets anyone work on a windows machine. Even people with zero education and experience can be familiar with windows at a faster rate than any other operating system.
On the other side, windows have many drawbacks when performance is your main concern. Once you are familiar with Linux, you understand its power and performance. I am not saying Linux is better than windows in all ways but it is better in some ways. If you try using Windows and Linux on the same PC, you will understand the difference in how Linux is effective in utilizing memory when compared with windows 10.
But you can make full use of your hardware just by tweaking some settings in windows. Win32 priority separation is just a tweak in your windows PC you can do, from which your memory utilization of your windows machine got better. Win32 Priority Separation– these words may sound bizarre but the end result in your computer which runs window is mind-blowing.
Also Read: How To Fix 100% Disk Usage Problem In Windows 8/10?
What is Win32 Priority Separation?
This Win32 priority separation gives you nothing but the ability to schedule the process which is in your background or in the foreground. You can set priority to your foreground applications which significantly improve the performance of your PC. Win32 Priority Separation allows you to specify the strategy of optimizing the Processer usage time in the background.
Why do we need to waste our CPU power on some unused background apps? Instead, we can use that extra juice to speed up the applications we are currently working on.
If you are wondering how to do all these things to improve the performance of your Windows PC, don’t worry we got you covered from scratch. To do Win32 priority separation in Windows 10 just read this article completely and you will know how to do without any issues. Without wasting any more time let us actually begin the guide on How to tweak Win32 priority separation in Windows 10?
Also Read: How to Whitelist Googleupdate.exe for Windows 7/8/10
How to Tweak Win32 Priority Separation in Windows 10
How to tweak Win32 priority separation in Windows 10
Method #1: Win32 Priority Separation Using Regedit
STEP 1: Click the start button, type run, and press enter. OR press the windows button and R together to open up the Run box.
STEP 2: Type ‘Regedit’ and hit enter to open up the Registry Editor.
STEP 3: On your left pane, double click on your HKEY_LOCAL_MACHINE icon. 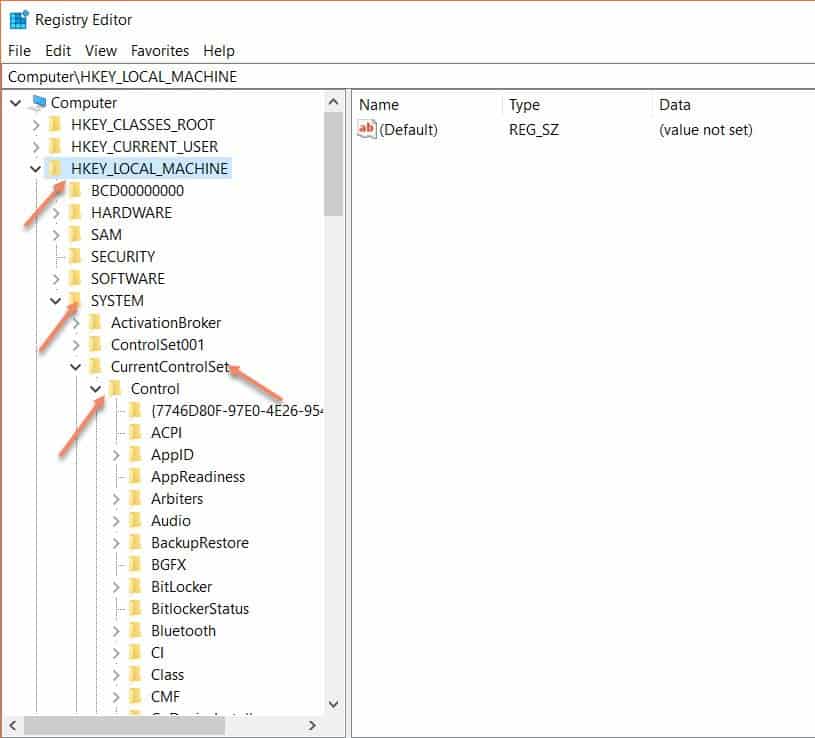
STEP 4: Go to the ‘SYSTEM’ folder and then navigate to ‘CurrentControlSet’.
STEP 5: Now double click on the control button. Navigate to Priority Control and right-click on the Win32priority separation and hit modify button. 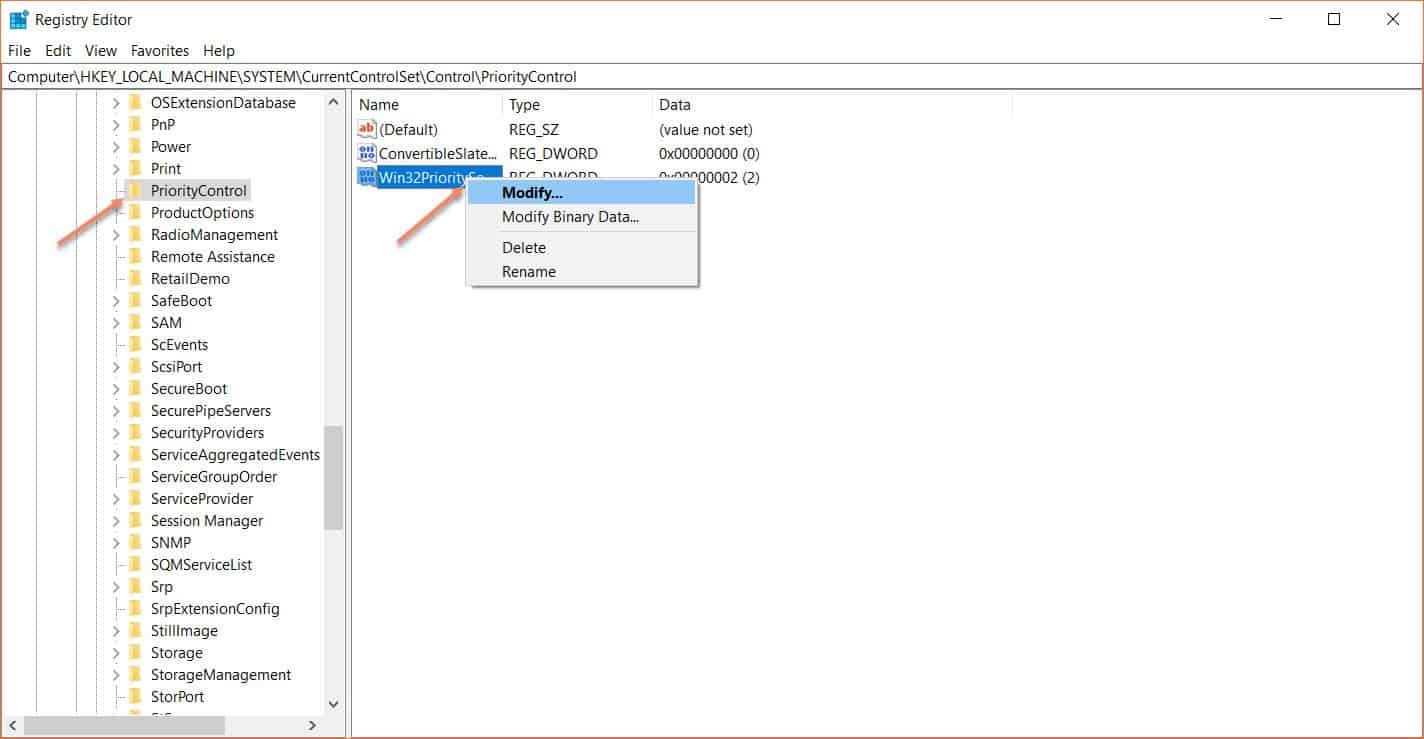
STEP 6: Modify the hexadecimal value to 26 and decimal as 38 and hit the OK button. 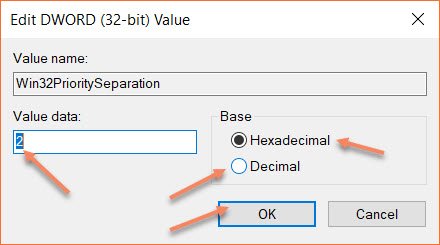
You’re done with the main process of Win32 priority separation in windows 10. Its time to close all the running applications and reboot your computer to experience some better performance. Yes! You will absolutely notice some certain hike in performance of your PC.
Let us look at one more method using we can also improve the performance of our windows computer.
Also Read: How To Dual Boot Windows 10 with Kali Linux (2020) – Complete Guide
Method #2: Win32 Priority Separation Using Run Commands
The first method looks strange for many people. You may think the steps in the first method are tedious and vague. If you are looking for something simple but get the job done, here is the second method for you. Follow the below steps to do Win32 priority separation.
STEP 1: To do using this method, Hold the windows button and R to open the RUN dialog box.
STEP 2: Type “sysdm.cpl” on the run dialog box and hit enter.
STEP 3: On the following screen, go to the advanced tab and click settings that are under the performance category. 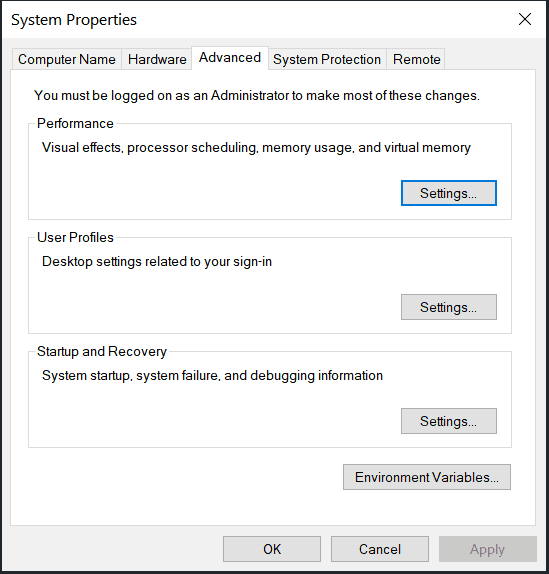
STEP 4: In the next screen you need to change the radio button to the programs from background services in order to improve your foreground application performance. Once you choose this option you can hit the OK button to save the changes. 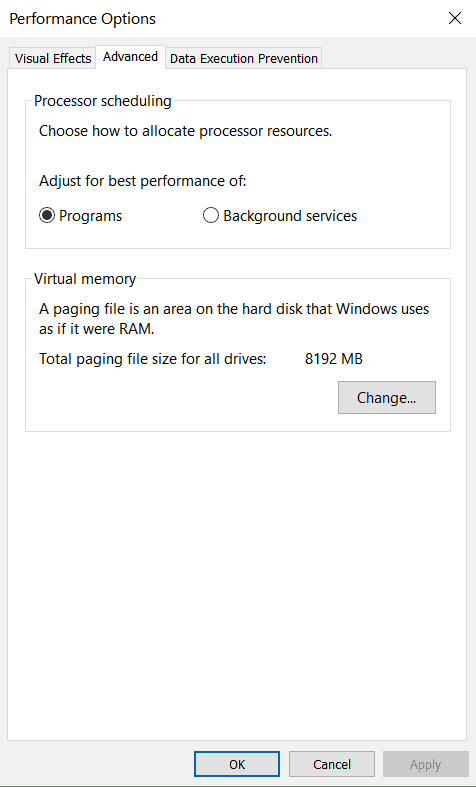
After that, you need to reboot your Windows computer to see some performance changes on your computer. we hope you notice some spikes in the performance of your computer using any of the above-mentioned methods.
Also Read: How To Disable Microsoft Compatibility Telemetry Windows 7/8/10
Conclusion:
That’s pretty much it for the Win32 priority separation in Windows 10 (2023) article. If you have any queries about this article you can always let us know by posting your question in the comment section. We will answer your question as soon as possible. Also, let us know which method you like the most in the comment section.
If you want to help us, share this article with all your friends and family. You can also look at our social media pages and give some support there. If you have any suggestions, always feel free to let us know by using our contact us page. Our team is looking forward to improving our site based on your suggestions. Thanks a lot for reading. Catch you guys on the next one. Cheers!
Subscribe to our e-mail newsletter for instant tech updates on your doorstep. Consider subscribing, It’s Free! We assure you not to spam your inbox.


")


I get the best results from hex 16…but try hex 15, 17, 26 and 2A