- Windows Update Medic Service (WaaSMedicSVC.exe) is a background service in Windows 11 introduced by Microsoft to troubleshoot issues with Windows update components.
- Disabling the Windows Update Medic Service can be done using Registry Editor or by creating a batch file, but attempting to disable it using Service Manager may result in an Access Denied prompt.
- Users can also utilize Windows Update Blocker to block the Windows Update Medic Service by following specific steps outlined in the article.
When you boot your PC, several processes start running in the background. One such service that you might notice is the Windows Update Medic service. This service has been introduced by Microsoft not so long back. If you are wondering what Windows Update Medic service is, then you are at the right place.
WaaSMedicSVC.exe: Windows Update Medic Service
In this article, we will be discussing Windows Update Medic Service in Windows 11, what it does, and how you can disable it.
What Is Windows Update Medic Service?
Microsoft has introduced Windows Update Medic Service to fix any damages suffered by Windows update components. This will allow you to download Windows updates without any problem. This service troubleshoots any problems with Windows Update Components.
When you try updating Windows, several processes run in the background. These processes ensure the safety of your PC while updating Windows. Windows Update Medic Service or WaaSMedicSVC.exe is a service that runs in the background that protects all the Windows Update components.
Disabling Windows Update Medic Service
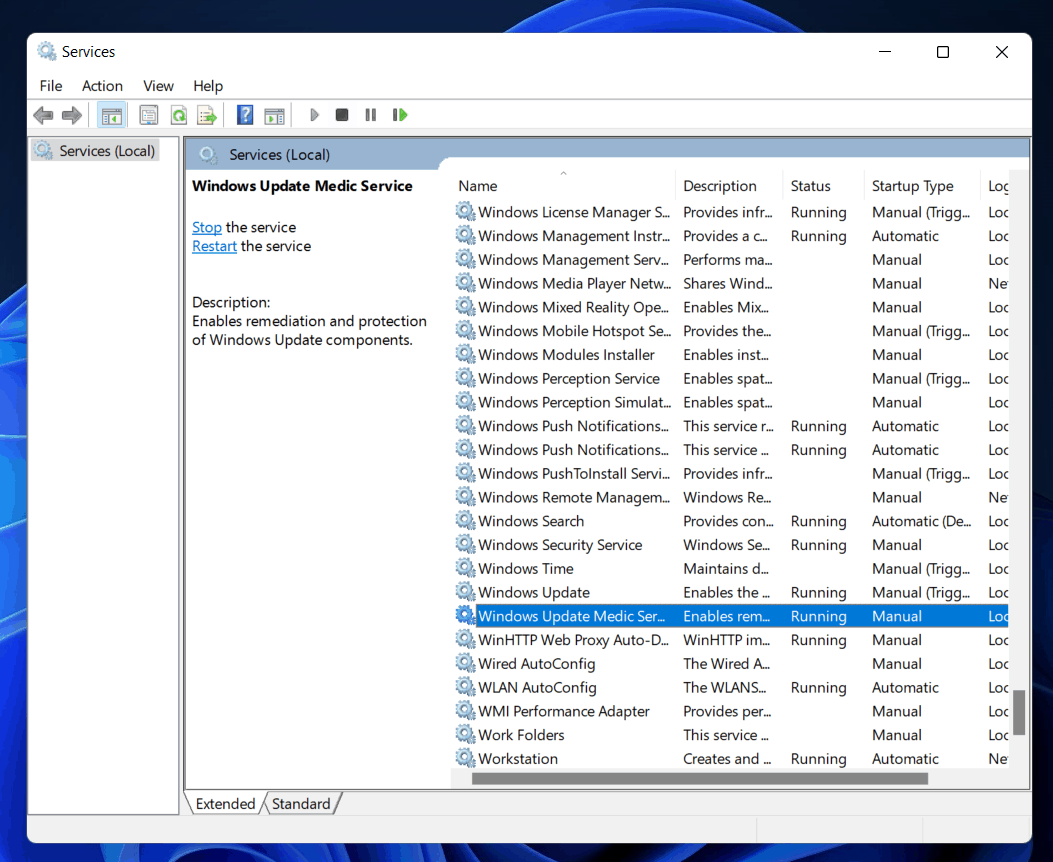
You cannot use Service Manager to disable the Windows Update Medic. You may get an Access Denied prompt when you try disabling Windows Update Medic Service using Service Manager. To disable Windows Update Medic Service, follow the steps given below-
Disabling Using Registry Editor
You can use Registry Editor to disable WaaSMedicSVC.exe. To disable Windows Update Medic Service in Windows 11 using Registry Editor, follow the steps given below-
- In the start menu, search for Registry Editor and open it.
- In the Registry Editor, head to the following location-
HKEY_LOCAL_MACHINE\SYSTEM\CurrentControlSet\Services\WaaSMedicSvc
- On the right side, select start. Double-click on it.
- This will open the Edit DWORD (32-bit) Value dialog box.
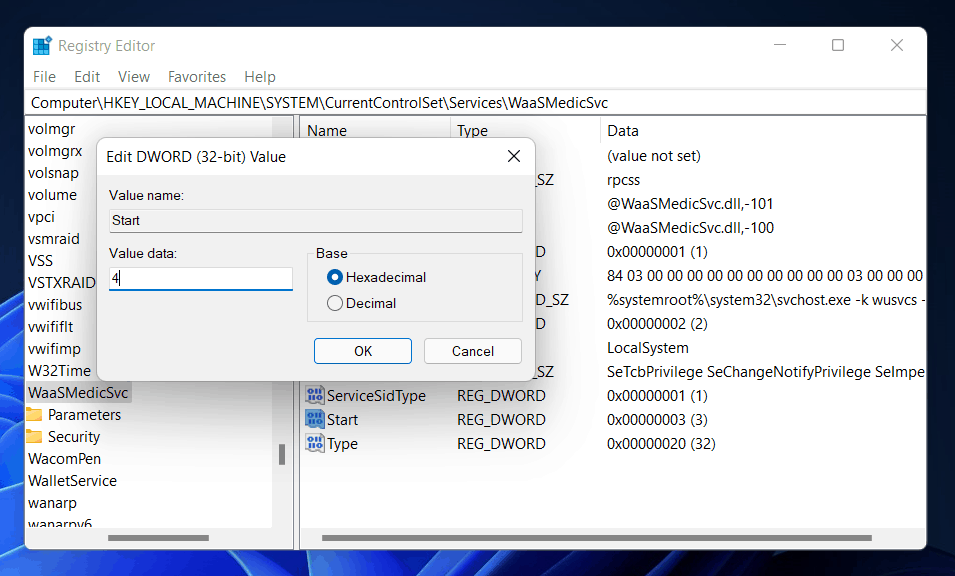
- Here change its value from 3 to 4. Click on OK, and close the Registry Editor.
- Once done, restart your PC, and the Windows Update Medic Service will be disabled.
Create Batch File To Disable Windows Update Medic Service
You can create a Batch file to disable Windows Update Medic Service whenever you want to. This batch file will disable the service quickly. However, the service may start again, and you will have to disable it.
- In the start menu, search for Notepad and open it.
- In the Notepad, paste the following text-
echo Windows Update Medic Service

sc stop WaasMedicSvc

REG ADD HKLM\SYSTEM\CurrentControlSet\Services\WaasMedicSvc /v Start /f /t REG_DWORD /d 4

echo.

echo Servizio Windows Update

sc stop wuauserv

REG ADD HKLM\SYSTEM\CurrentControlSet\Services\wuauserv /v Start /f /t REG_DWORD /d 4

echo.

echo Aggiorna il servizio Orchestrator

sc stop UsoSvc

REG ADD HKLM\SYSTEM\CurrentControlSet\Services\UsoSvc /v Start /f /t REG_DWORD /d 4

echo.
- Paste the text in the Notepad, and press Ctrl + S key combo to save it.
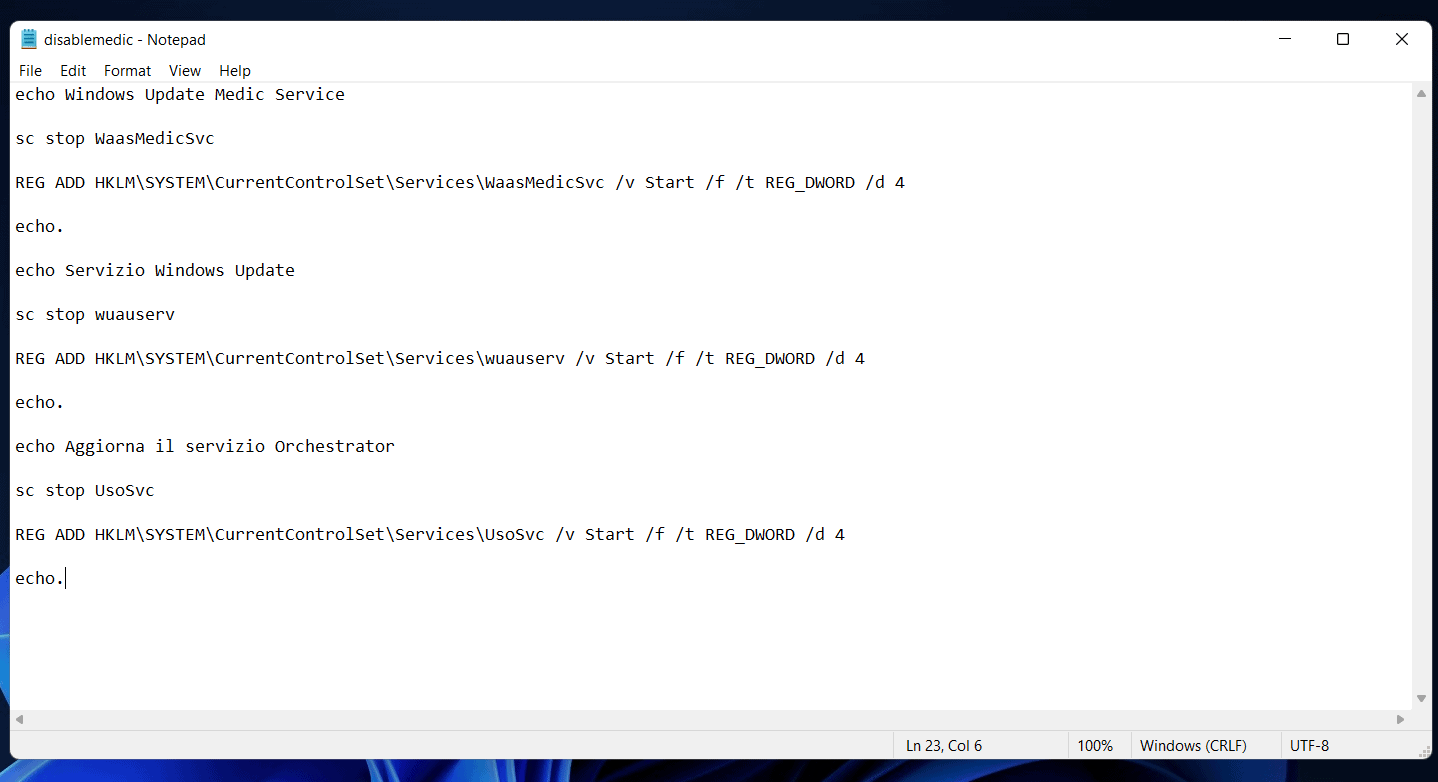
- Save the file as disablemedic.bat
Whenever you want to disable the service, click on this file, and the service will be disabled.
Using Windows Update Blocker
You can also use Windows Update Blocker to block this Windows service. To use Windows Update Blocker to block WaaSMedicSVC.exe, follow the steps given below-
- Firstly, download the Windows Update Blocker.
- Extract the file on your PC, and launch it.
- Head to the menu and select Windows Services. This will open the Services window.
- Here search for Windows Update Medic Service. Select it, and copy the name of the service.
- Now head to the location where you have extracted the Windows Update Blocker.
- There will be an ini file. Open it with Notepad.
- Paste the service name under the dosvc=2,4 and add =3,4 in front of the service name. Save the file.
- Now head back to the Windows Update Blocker and click on Apply to save the changes.
RELATED GUIDES:
- Windows Update Error 0x80070490 in Windows 11
- How To Create BMP File In Windows 11
- Enable Or Disable Windows 11’s Startup Sound
Final Words
That’s what WaaSMedicSVC.exe is. We hope this article helped you know what this service is and what it does. You can also disable the service by following the above steps.


")


If we just want patch to not reboot automatically what do u recommend we can allow patch to apply but control the reboot