- Windows 11 installs updates automatically, causing frustration and potential system issues
- To turn off automatic updates on Windows 11, you can pause updates, disable the update service, set up a metered connection, use the registry editor, or utilize Group Policy
- Carefully follow the steps provided in each method, especially when using risky options like the registry editor, and ensure you have a system backup before making changes
Windows 11 install cumulative updates automatically. This can be frustrating for users because your system needs to be restarted after installing the cumulative update. In fact, several times updates can bring some random bugs to the system, which can interrupt the proper functioning of your PC. Therefore, users don’t want to install automatic updates on Windows 11. If you want to turn off automatic updates on Windows 11, this article will help you with that.
Ways to Turn Off Updates Installing Automatically on Windows 11
Given below are some methods using which you can turn off automatic updates on Windows 11.
Pause Updates on Windows 11
On the update page of Windows 11, users get the option to pause the automatic updates. You can pause the update for up to 7 days, but Windows will automatically download updates after that. This is not a permanent option but can work if you want to pause the updates for a short period.
To pause updates on Windows 11, follow the steps given below-
- Press Windows + I key combo on your keyboard to open the settings of your PC.
- In the settings, click on the Windows update page. Here you will find an option called to pause for 1 week. If you opt for this option, then the automatic updates will be paused for seven days.
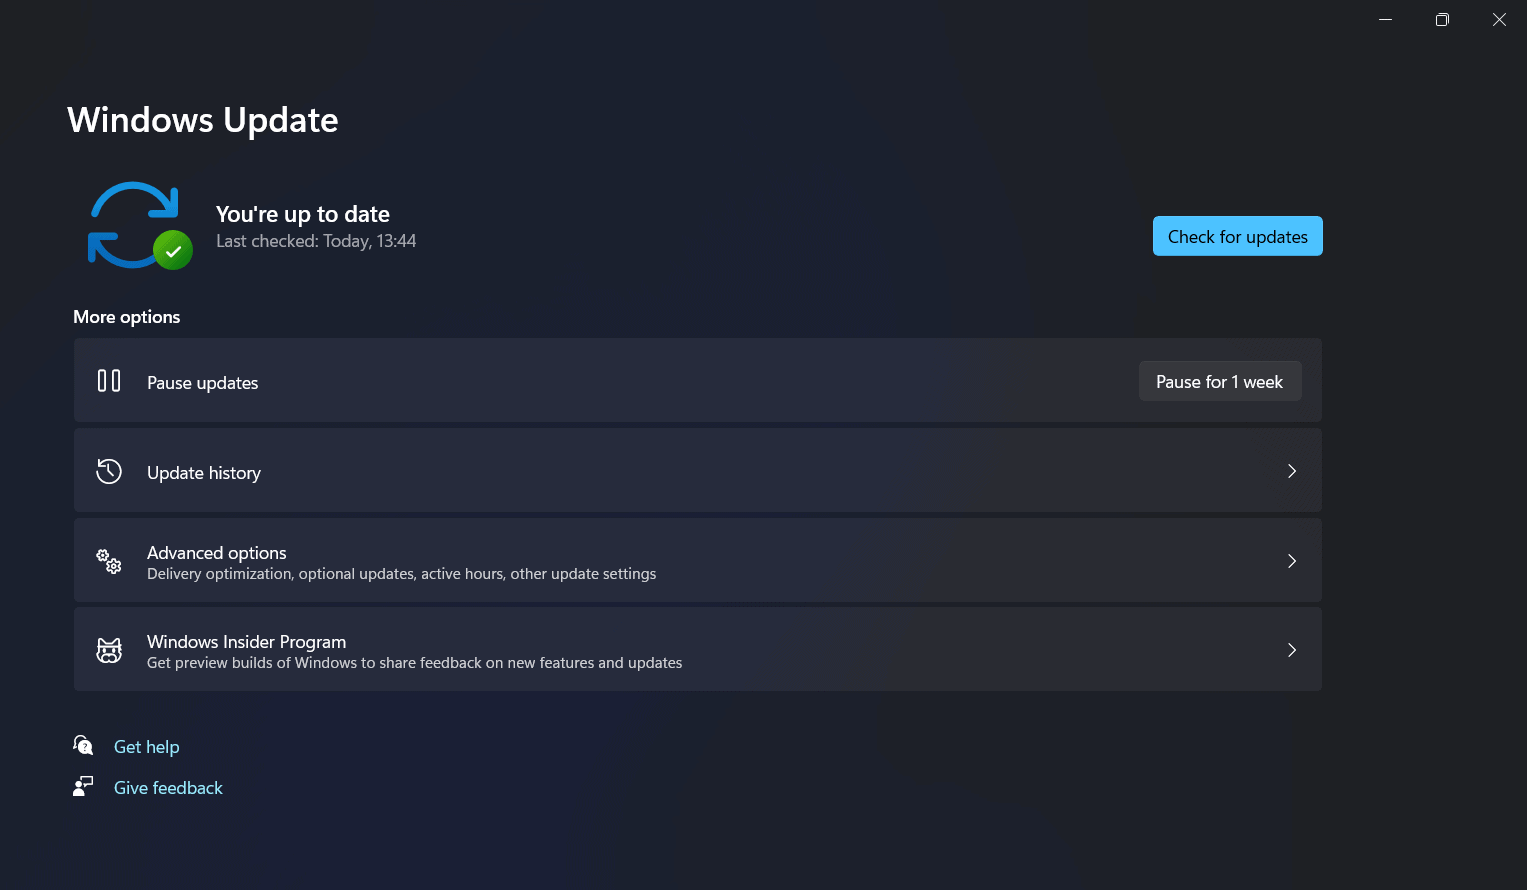
- Once done, the updates will be paused on Windows for a week. You can anytime resume automatic updates whenever you want to.
Disable Windows 11 Update Service
Pausing the updates was a temporary solution to the problem. However, you can disable the update service to turn off automatic updates on Windows 11. You can do that by following the steps given below-
- On your keyboard, press the Windows+R key combo. This will open the run dialog box. In the run dialog box, type the command services.msc and click on OK to open the Services window.
- In this Services window, select the Windows Update service. Right-click on it, and then click on properties to open the properties of the Windows Update service.
- Head to the general tab in the Windows update properties. You will see a drop-down list right beside the Startup type. Select disabled from the list, click on apply. Close the Services window, and then restart your PC to apply the changes.
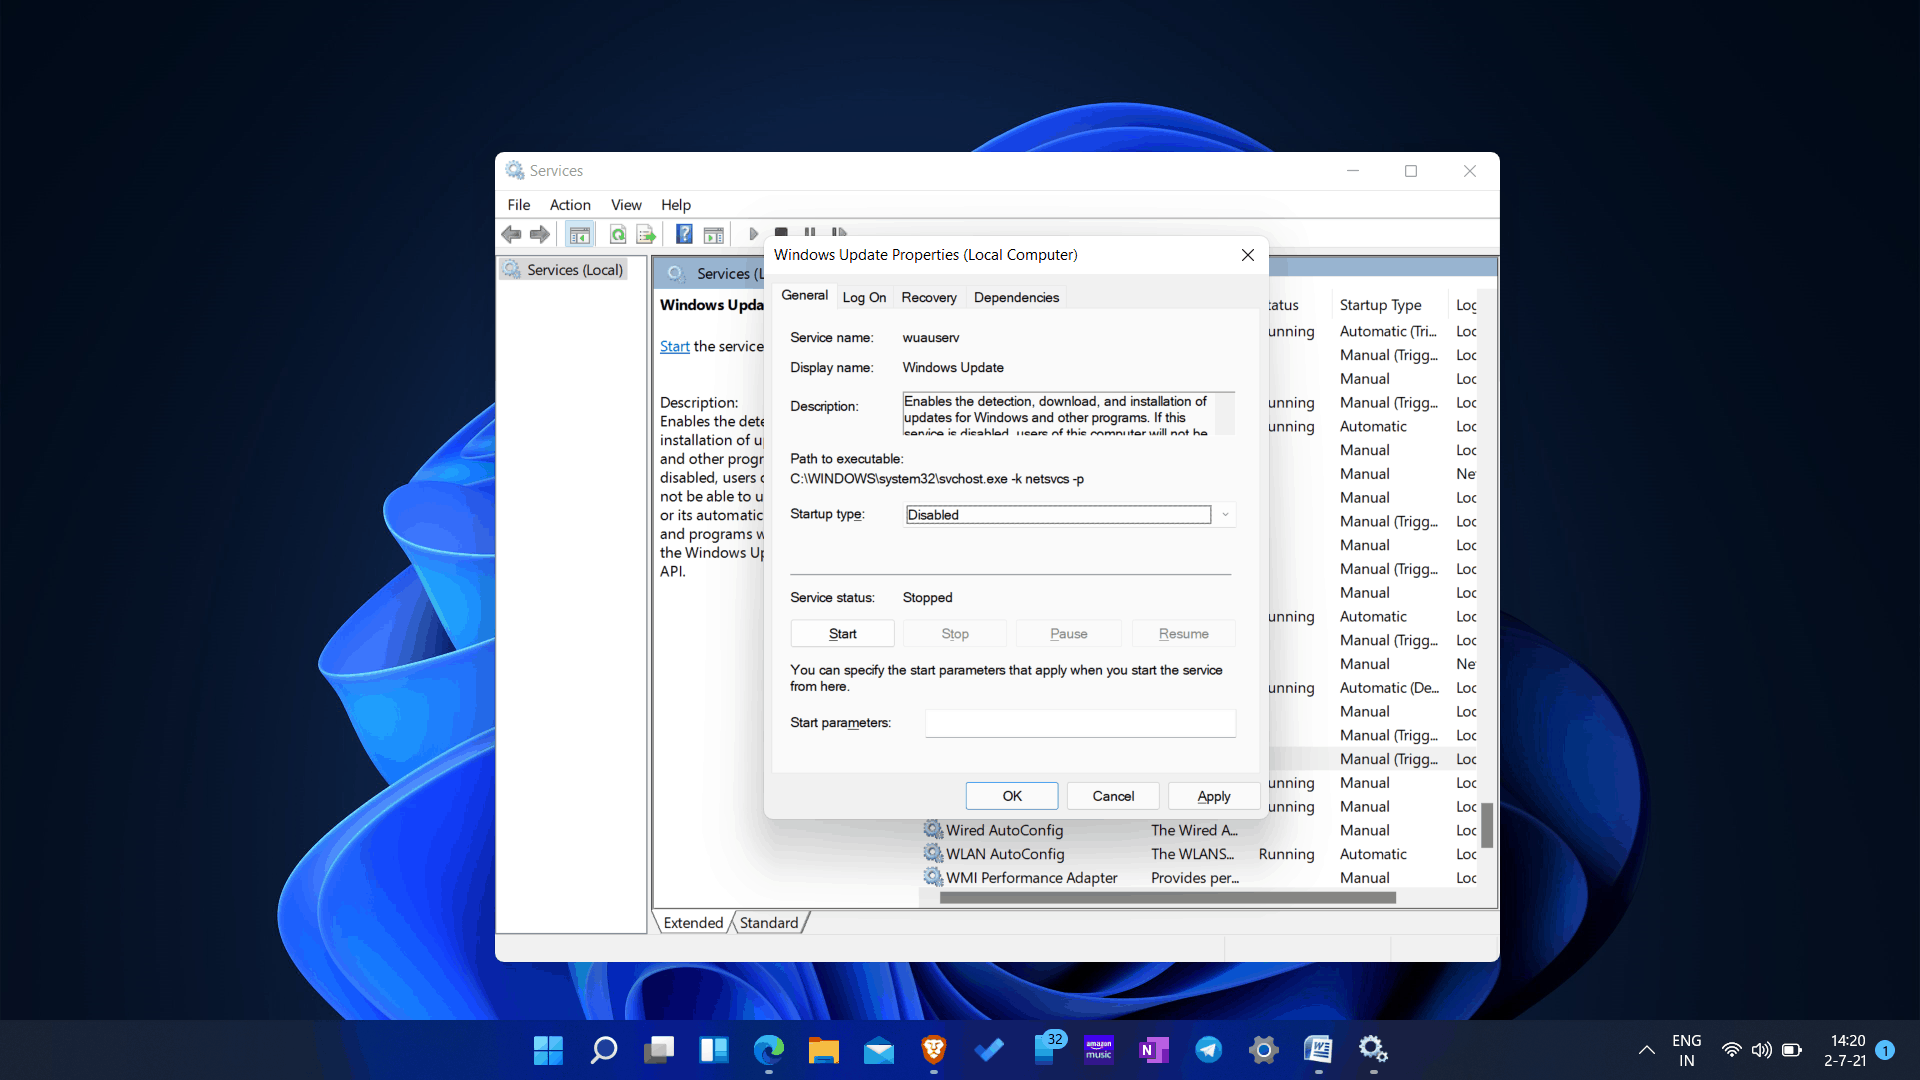
This will permanently turn off automatic updates on Windows 11. However, if you plan to turn it on again, you can follow the above steps and select automatic in the startup type instead of disabled. This will turn on the automatic updates on Windows 11 again.
Set Up Metered Connection: Stop Windows 11 Update
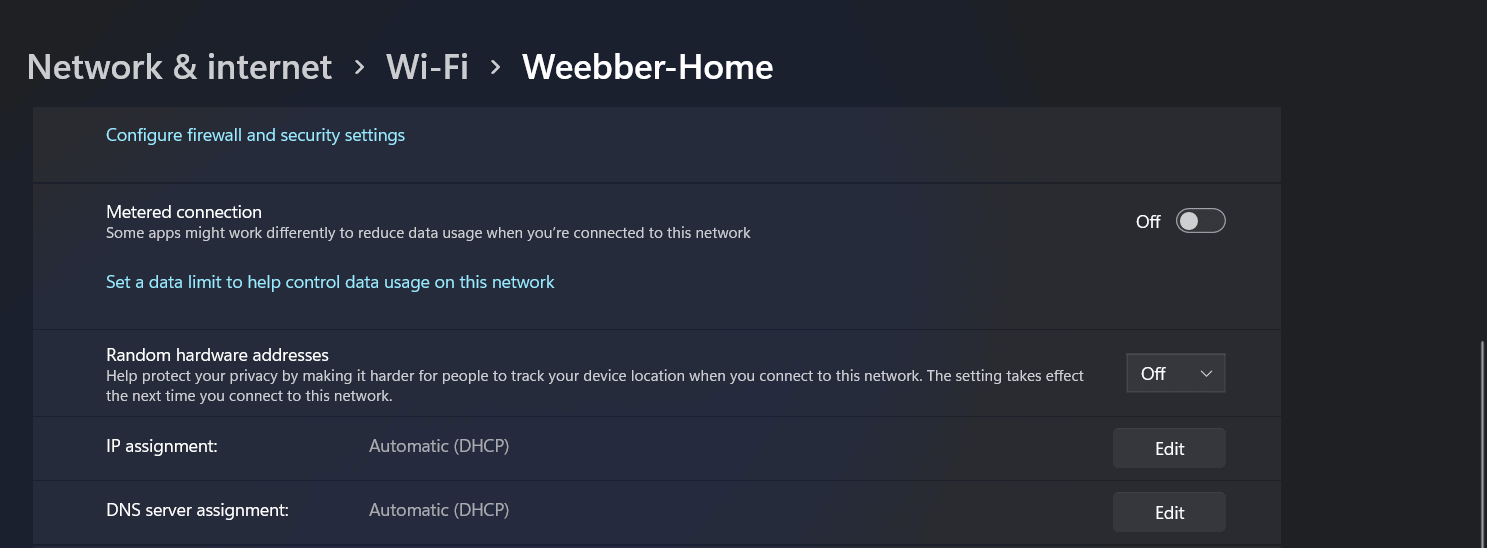
The metered connection also limits downloading updates on Windows 11. If you are using Wi-Fi to connect to your PC, you can set up the metered connection. This will restrict automatic updates on your system.
- To set up the metered connection, open settings on your PC by pressing Windows + I key. In the settings, head to the network & internet section.
- Here you will see the network your PC is connected to. Click on the properties option.
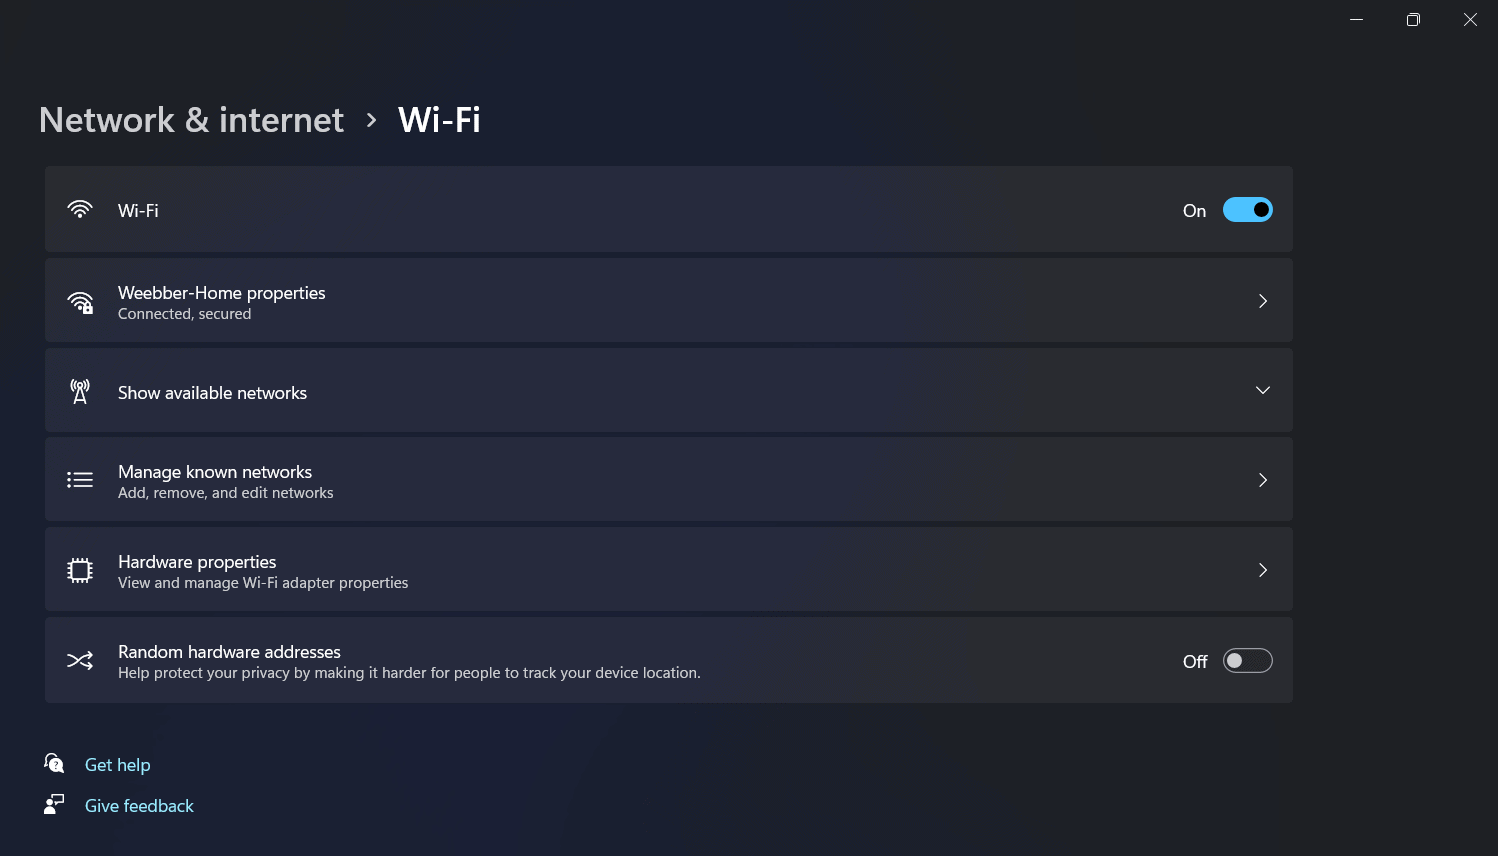
- Scroll down to find metered connection. Now turn on the Set as metered connection toggle to enable metered connection for that network.
Turn Off Automatic Updates On Windows 11 Using Registry
You can turn off automatic updates on Windows 11 using the registry. However, this method can be risky, and it can damage your system restore point, so it is recommended to take a backup before you begin with the process.
- Open the start menu, and then search for Registry Editor, and open it.
- In the Registry Editor, head to the following path- HKEY_LOCAL_MACHINE\SOFTWARE\Policies\Microsoft\Windows
- Now right-click on the Windows folder, and then click on the new and then select key.
- Now name the new key that you created as WindowsUpdate and then press the Enter key.
- Create a new key inside the WindowsUpdate key and name it AU.
- Now, right-click on the AU key and then click on New. Click on the DWORD (32-BIT) Value option.
- Name the DWORD as NoAutoUpdate.
- Now, double-click on the NoAutoUpdate and then change its value to 1 from 0. Click on OK.
- After doing so, restart your PC to apply the changes.
This will turn off automatic updates on your system. Ensure you have a backup of your files before you continue, as it can crash/damage your system. If you want to turn on automatic updates again, delete the WindowsUpdate key, and restart your PC.
Turn Off Automatic Updates With Group Policy
If you have Windows 11 Pro version, you can use the Group Policy method to turn off automatic updates. The registry editor method works on Windows 11 Home version, whereas the group policy method will work on Windows 11 Pro version. Ensure you have a backup of the system before you continue with this method.
- In the start menu, search for Local Group Policy Editor and open it.
- In the Local Group Policy Editor, navigate to the following path-
Computer Configuration > Administrative Templates > Windows Components > Windows Update
- In the Windows Update, double-click on the Configure Automatic Updates.
- In the next window that appears, select the disabled toggle.
- After doing so, click on apply and restart your system to apply all the changes.
If you want to enable automatic updates on Windows 11, then follow the steps given above, and set the configurable automatic updates to not configured instead of disabled. This will allow automatic updates on Windows 11.
READ MORE:
- How to Fix Windows 11 Widgets Not Working Properly
- How To Fix Windows 11 Black Screen Issues
- Windows 11 Themes and Skins to Download
- How To Download and Install Realtek HD Audio Manager
- Download WhatsApp for Windows 11 PC Latest Version Free
Final Words
You can turn off or stop automatic updates on Windows 11 by using the methods outlined above. Follow all of the instructions carefully, and make a backup of your system before using the registry editor or group policy option. Do you still have doubts? Please feel free to post your questions in the comments area below.


