- MySQL is a top database management system for working with databases
- Download and install Microsoft Visual C++ 2019 Redistributable Package before installing MySQL on Windows 11
- Follow step-by-step instructions to download MySQL installer, select installation type, configure server type, and complete the installation on your Windows 11 PC.
When it comes to dealing with databases, MySQL is one of the best options. MySQL is a database management system that can be used to work with databases. To use MySQL, you’ll need to download and install the Microsoft Visual C++ 2019 Redistributable Package. If you want to install MySQL on Windows 11 but don’t know-how, this article will guide you through the process. We’ll talk about how to install MySQL on Windows 11 in this article.
Download And Install Microsoft Visual C++ Redistributable Package
Firstly, you will have to download and install the Microsoft Visual C++ Redistributable Package. To download and install Microsoft Visual C++ Redistributable package on your PC, follow the steps given below-
- Head to the official page of Microsoft Visual C++ Redistributable Package.
- From here, locate the download link for the Microsoft Visual C++ Redistributable Package.
- Download the software and install it on your PC.
Download And Install MySQL
Once you have installed the Microsoft Visual C++ Redistributable Package on your PC, you can get ahead with installing MySQL on your PC with Windows 11. Given below is the step-by-step process to download and install MySQL on your PC-
- Head to the official download page of MySQL. From here, download the MySQL installer.
- Now open the File Explorer by pressing the Windows + E key combo and head to the location where you saved the MySQL installer. Double-click on the file to run it.
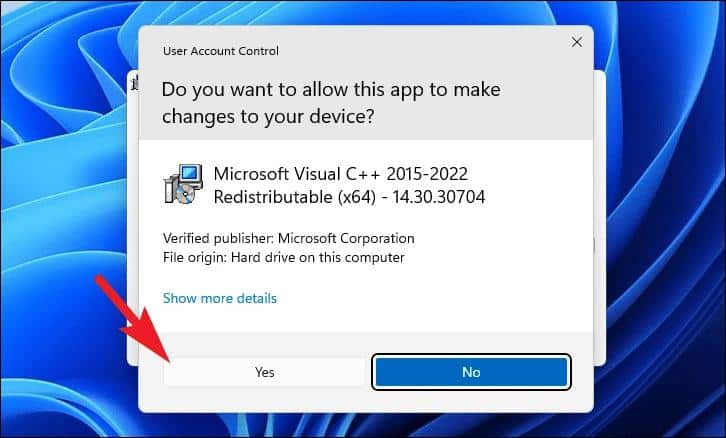
- You will see the installer app window open up on your PC. If you are given UAC, then click on the Yes button to continue.
- You will be asked to select the setup type of installation. You will be given these options-
- Developer Default– In this type of installation setup, tools requirements for MySQL application development will be installed. The tools will include MySQL Shell, MySQL Router, MySQL for Visual Studio, MySQL Workbench, MySQL Server, and MySQL Connectors.
- Client Only- This type of installation setup installs all the tools that are there in the Developer Default setup type, except for the MySQL Server.
- Server Only- This setup type of installation will only install MySQL Server on your PC.
- Full– This type of installation setup installs all the MySQL products including samples, examples, as well as documents of the tools.
- Custom- Choosing this option allows you to select custom products of MySQL.
- Once you have selected the installation type, click on the Next button.
- Next, you will see all the products that will be installed on your PC. Click on Execute button to install the tools.
- After the installation is completed, click on the Next button to continue ahead.
- Next, you will be asked to configure the server type on your PC. To do so, click on the drop-down menu next to the Config type on the Type and Networking. You will be given three server configurations that you can choose.
- Development Computer- This type of server configuration is best if you run several servers and applications on your PC.
- Server Computer- If you run MySQL along with a few other server applications, then you can go for this type of server configuration. The memory usage for this configuration will be moderate.
- Dedicated Computer- If you don’t plan on running any other servers on the machine, then you can go for this type of server configuration.
- If you want to you can also select the TCP/IP ports. If you do not want to select them, then leave them to the default settings. Once done, click on the Next button.
- You will be headed to the Authentication Method tab. You will have to select the authentication method, which can be Use Strong Password Encryption for Authentication or Use Legacy Authentication Method. Once done, click on the Next button.
- Next, you will be headed to the Accounts and Roles tab. You will be asked to create a password for the root account. To do so, you will have to enter the password in the given field.
If you want you can also make a User Account; all you have to do is click on Add User option, and you will be able to create a user account.
- You will have to enter the Username, Role and enter the Password for the account. Once done, click on OK. After doing so, click on the Next button.
- You will now be headed to the Windows Service tab. Here, you will see the Configure MySQL Server as a Windows Service option. In case, if you want to run it as a Windows Service, then check this option, and if you don’t want to run it as a Windows Service, then let this option be unchecked.
- If you want to go for a Windows Service Name, then enter the name. If you want to start MySQL Server when your system starts, simply check the checkbox saying Start the MySQL Server At System Startup. Once done, click on Next.
- You will now be headed to the Apply Configuration tab. Click on the Execute button to get ahead.
- After this, you will have to go for router configuration to bootstrap the MySQL router that is already installed. This will help direct traffic between MySQL apps as well as the InnoDB cluster. Once done, the MySQL Router will run as the Windows Service. If you do not want to go for router configuration, then simply click on the Finish button, and then on the Product Configuration screen, click on the Next button.
- You will now be headed to Connect to server tab. Here enter the Password in given. Once done, click on the Check button. Once you see the status as Connection succeeded, click on the Next button.
- You will be headed to the Apply Configuration window. Here, click on the Execute button.
- Once all the configuration has been applied, click on Finish. Now, click on the Next button on the Product Configuration screen to continue.
- After doing so, the installation process for MySQL will be completed. You will be shown some documentation for the use of the tool. If you want to get ahead with it, then click on the document you want to open. If you don’t want to get ahead with it, then click on Finish.
RELATED:
- How To Download and Install Soap2day On Firestick
- How To Download and Install Safari on Windows 11
- How To Download And Install C++ Compiler In Windows 11
- Windows 11 Media Creation Tool: How To Install/Upgrade
Final Words
This is how you can install MySQL on Windows 11 PC. Given above is the step-by-step process to install MySQL on Windows 11 PC. Following the above steps, you will be able to easily install MySQL on your PC.


")
")

