- Windows 11 camera not working can be fixed easily
- Ensure camera is connected to PC in settings
- Allow camera app access and update camera drivers
Are you unable to use your PC’s webcam with Windows 11? Many users have reported issues such as the camera in Windows 11 not working. This error can occur for a variety of reasons, including a camera problem, a faulty setup, the camera app being powerless to access the camera, and so on. Well, this is a simple error that you can easily fix.
Fix Camera Issues in Windows 11
If your Windows 11 camera isn’t working, don’t worry; this article will show you how to get it working again.

Ensure Your Camera Is Connected To Your PC
The most common reason why you may face this error is that your camera is not connected to your PC. You can ensure whether your camera is connected or not from the settings. If the camera is not connected then you can connect your camera, by following the steps given below-
- Press the Windows + I key combo on your keyboard to open the settings.
- In the settings, head to the Bluetooth & devices section from the left sidebar.
- Scroll down to find the camera option, and then click on it.
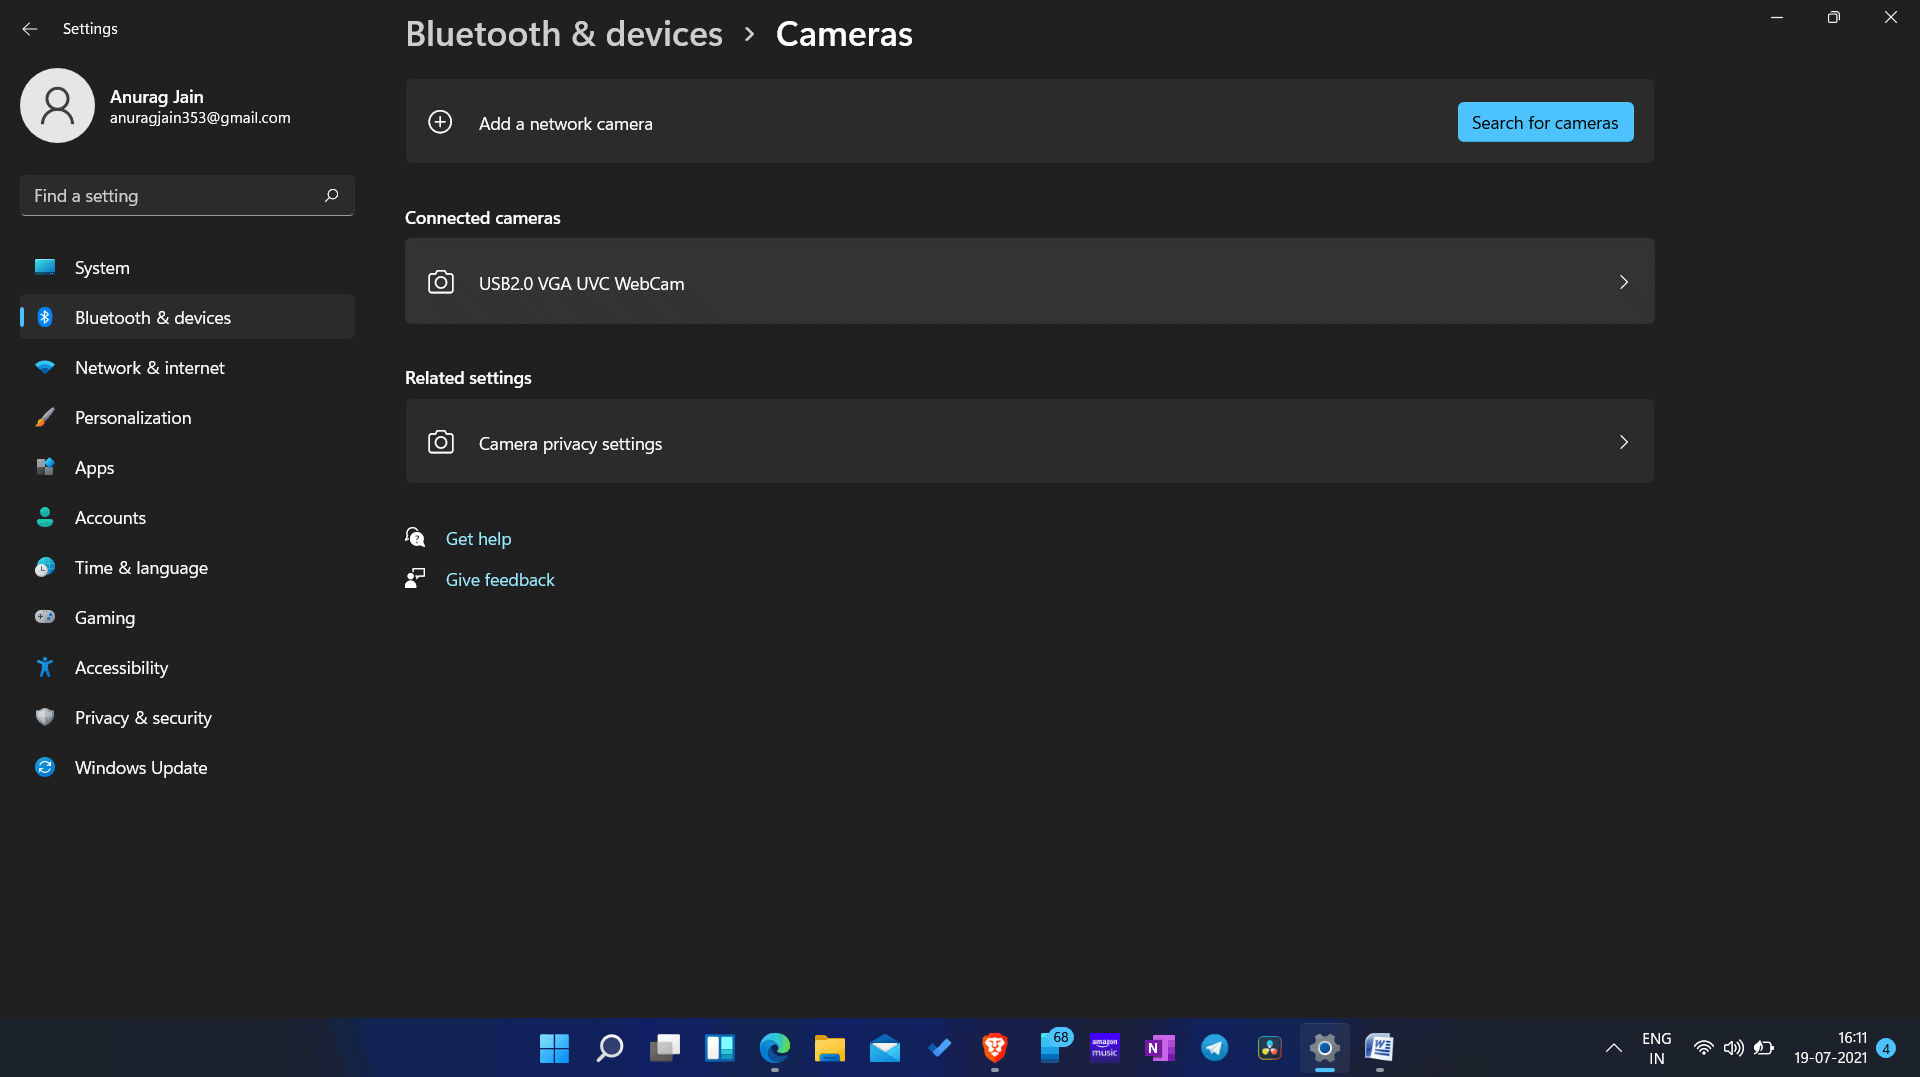
- You should see the connected camera here.
- If your webcam is not connected, then you will have to do it manually. To do so, click on search for cameras. This will search for the camera for your PC. Pair the camera and you will be able to use it now.
Allow Camera App To Access The Camera
If you have not permitted the camera app to access the camera, then probably you may face this problem. You may try giving camera access to the camera app, and all the other apps that use the camera. You can follow the steps given below to allow the camera app to access the camera.
- Open the settings on your PC.
- Head to the privacy and security section in the settings from the left sidebar.
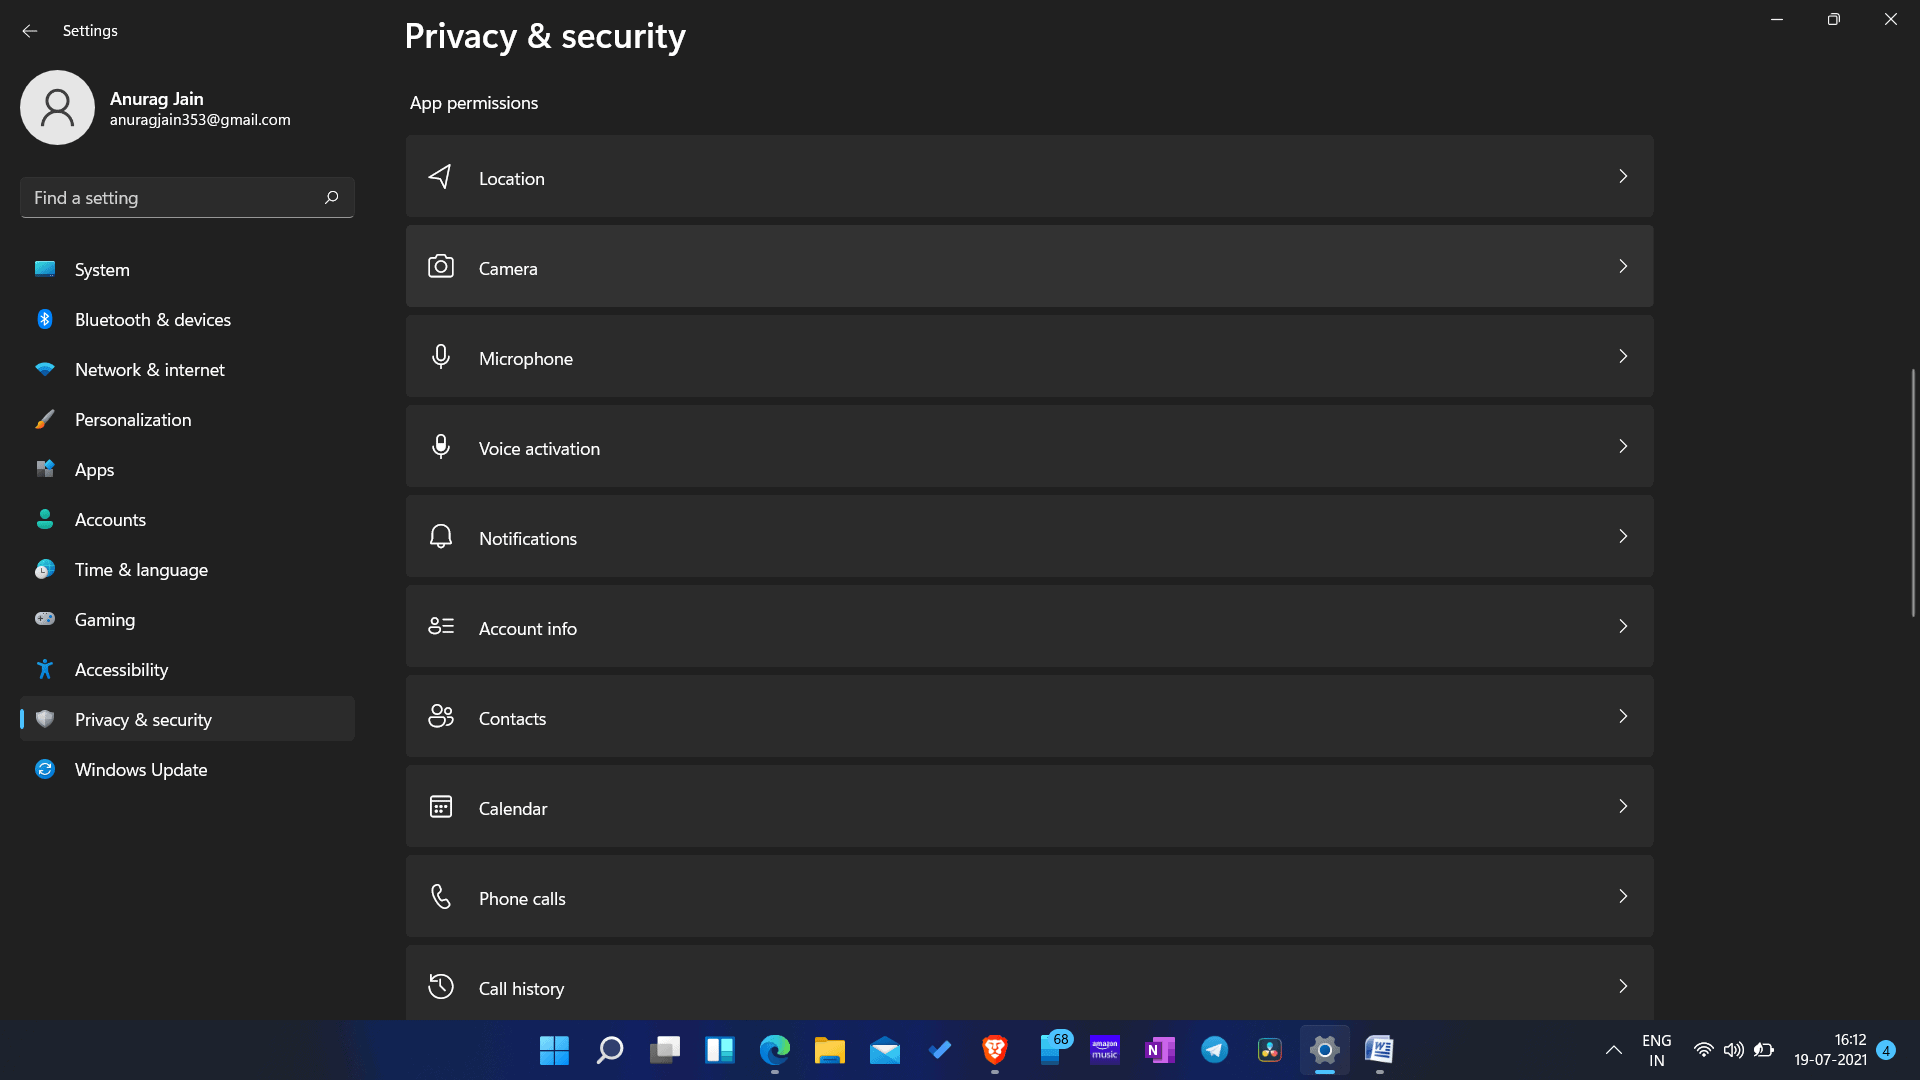
- In the privacy and security, head to the app permissions section.
- Here, click on the camera option.
- Now enable the camera access toggle. Then enable let apps access your camera toggle.
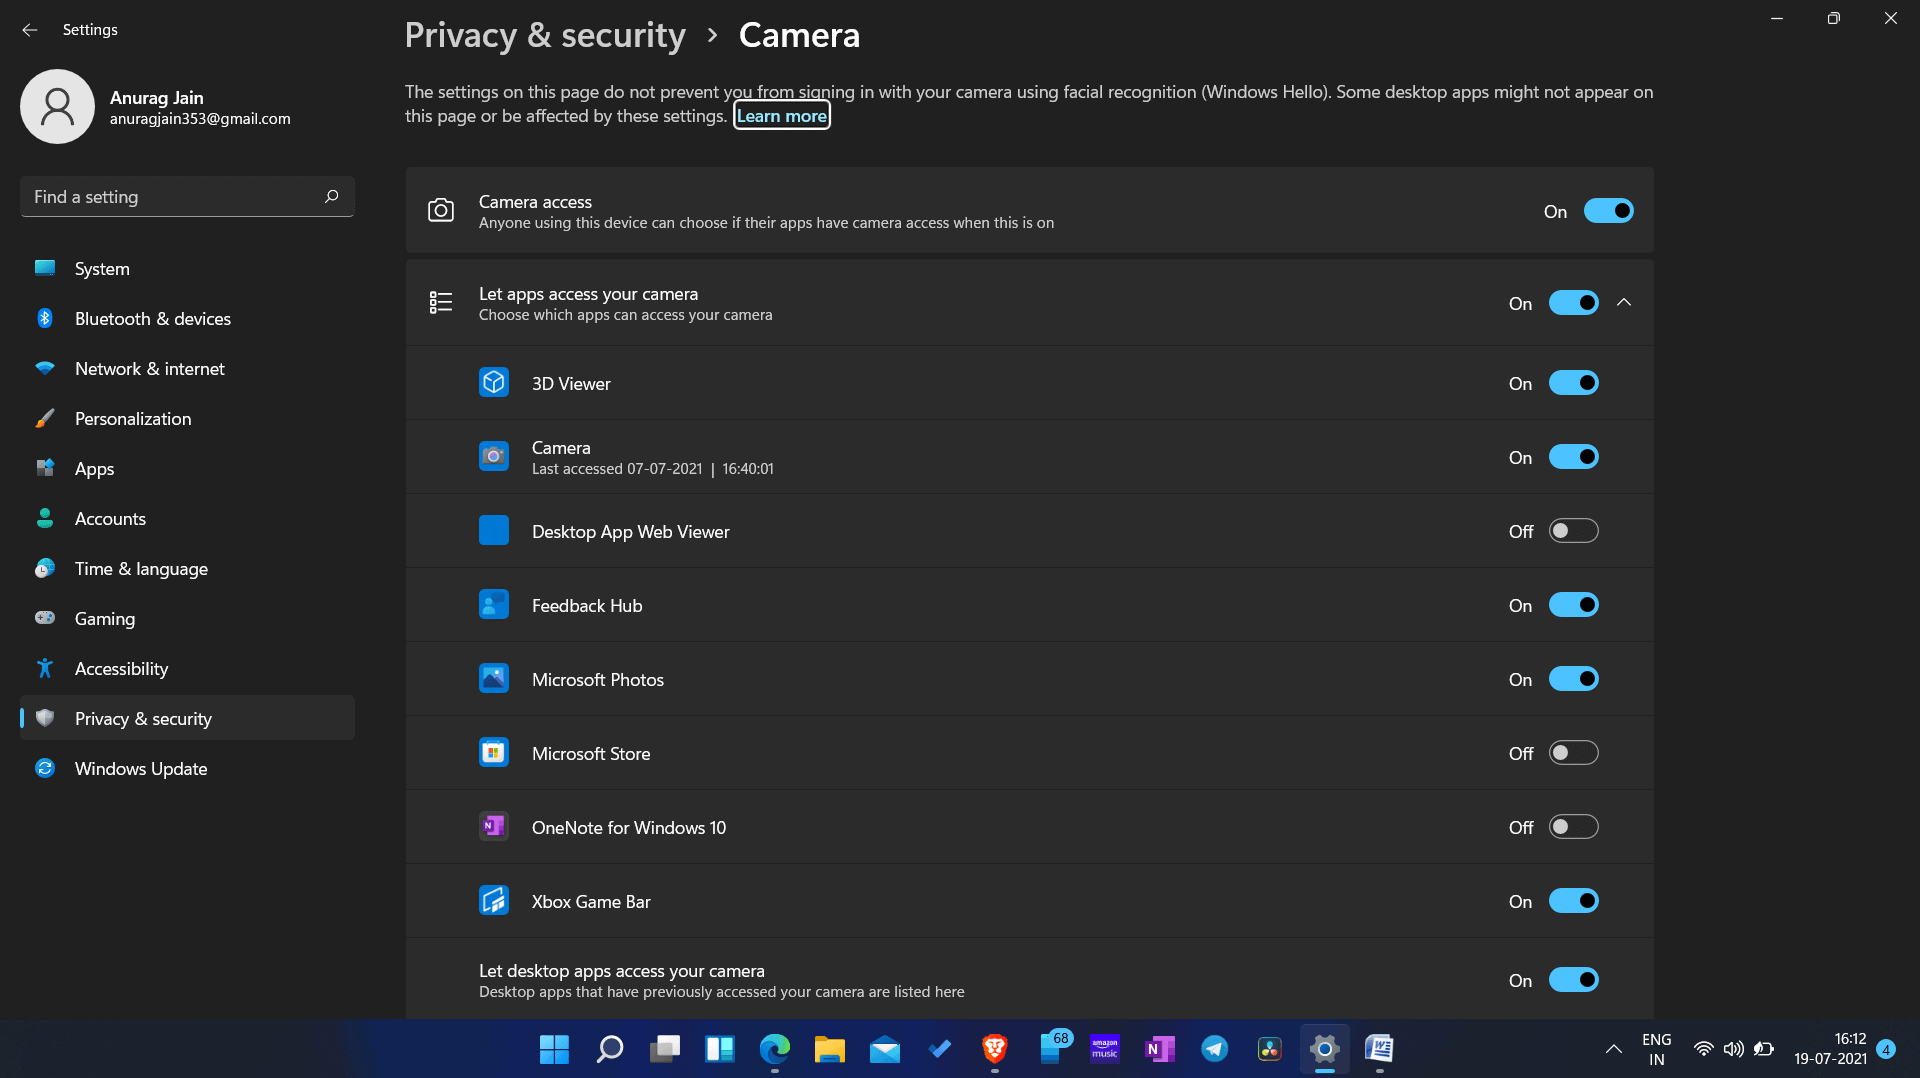
- From the list of apps, select the camera app and enable it. If you want third-party apps on your system to access the camera, then you can give them access as well.
- Once done, close the settings, and run the camera app again. Now you will not face the problem like you were facing earlier.
Reset Windows 11 Camera App
If you are facing the Windows 11 camera not working problem even after trying the above fixes, then you can try resetting the camera app. This will bring the camera app to the factory settings and will remove any corrupted cached data. To factory reset the app, follow the steps given below-
- Head to the settings of your PC.
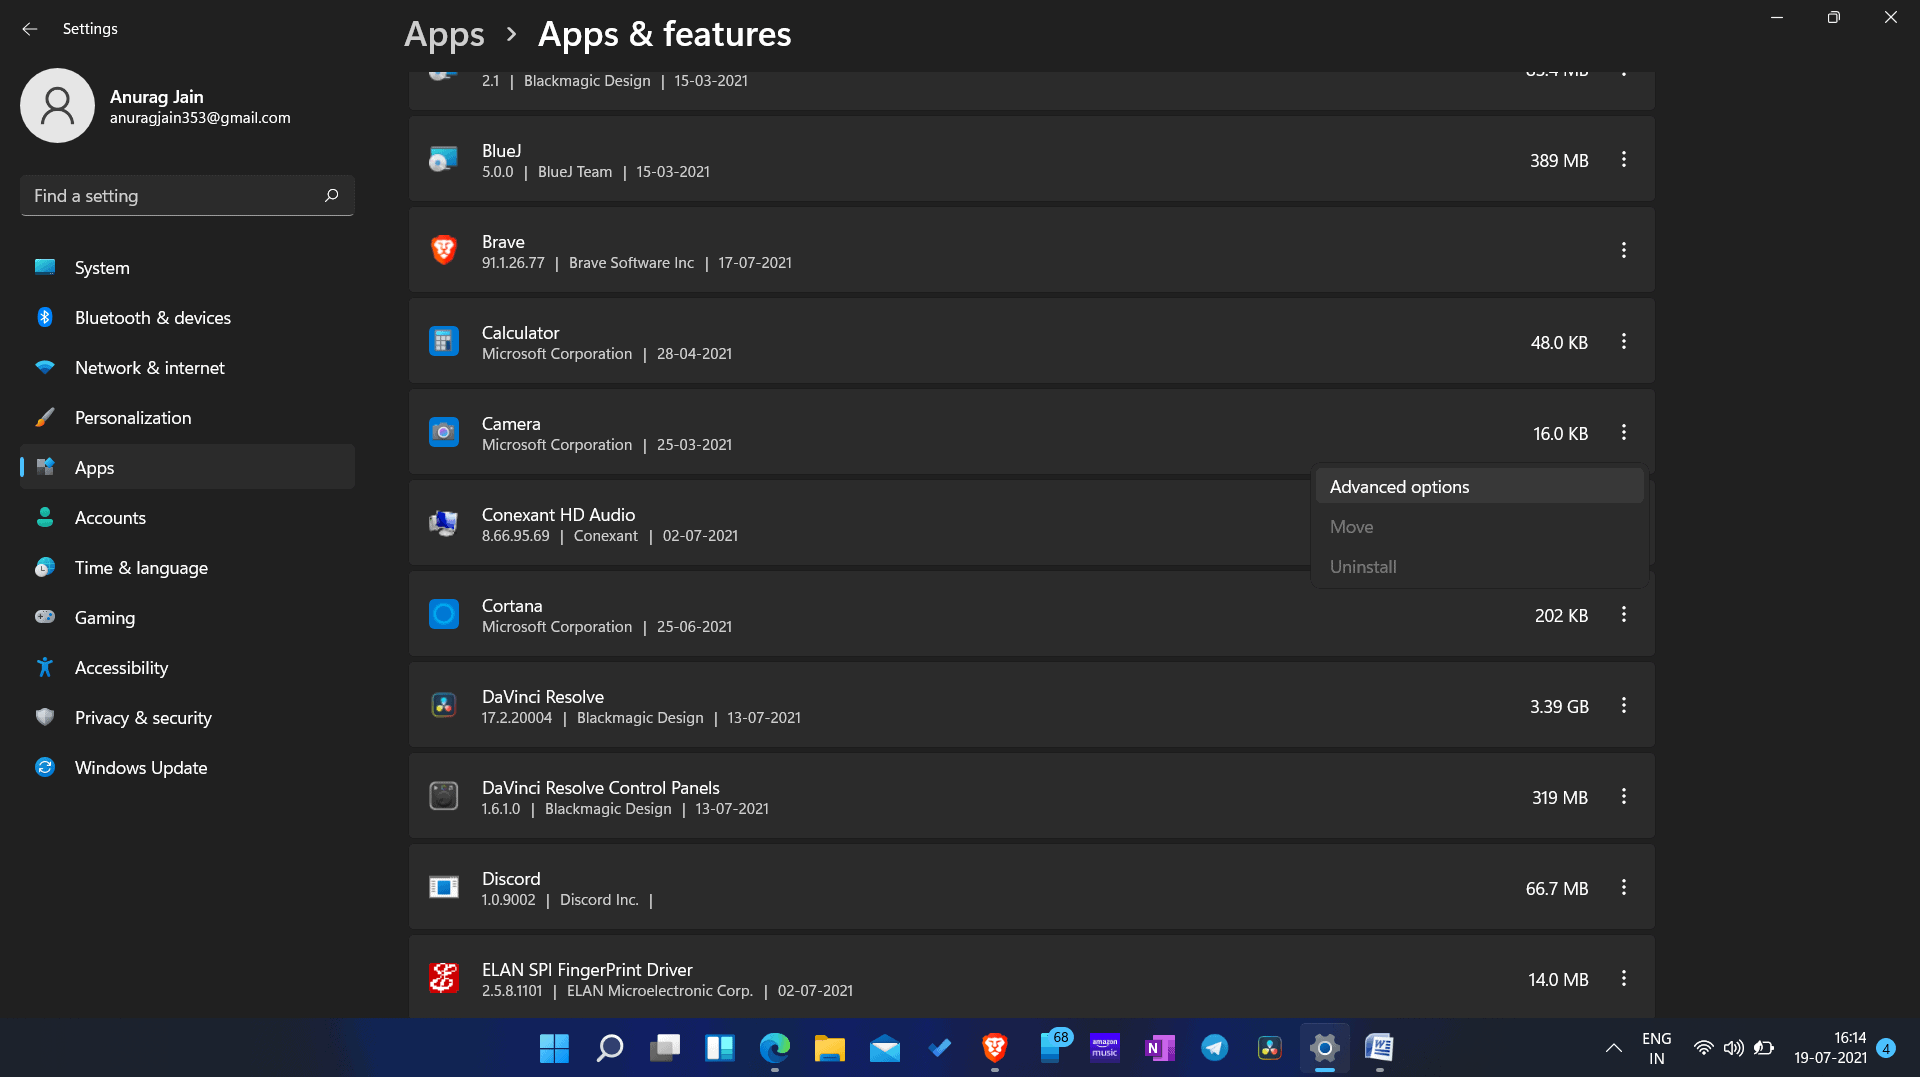
- In the settings, head to the Apps section, and then click on Apps & features.
- Now, find the camera app here, and click on the three ellipses present. Now click on advanced options.
- Here you will find the reset option. Click on it to reset the camera app.
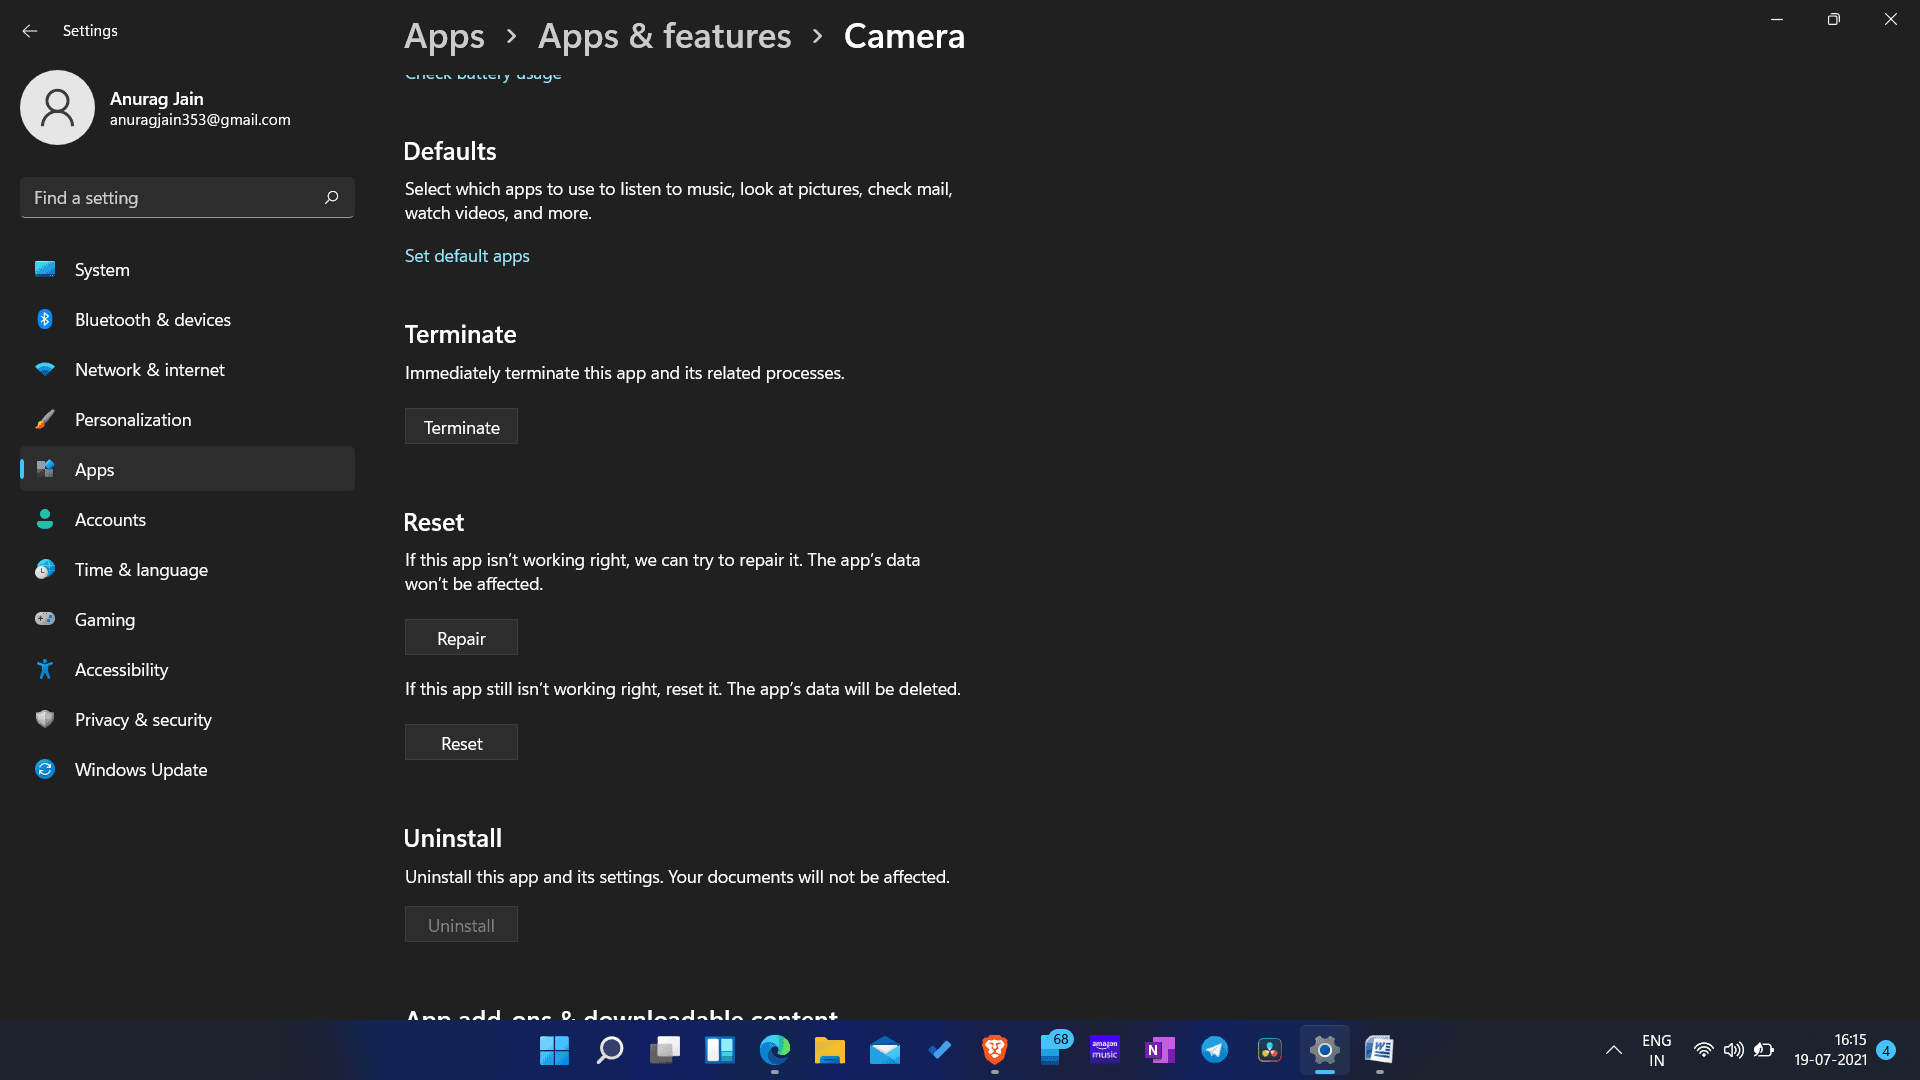
- Once you are done resetting the camera app, open it. You will no longer face the camera not working issue.
Update The Camera Drivers
If your PC has outdated camera drivers, then probably you may face the camera not working in Windows 11. To fix such an issue, you may try updating the drivers of the camera.
- Click on the start icon to open the start menu.
- In the start menu, search for the device manager and open it.
- You will see a list of hardware connected to your device. From here expand the cameras category. You can do so by double-clicking on it.
- Now right-click on your webcam, and then click on update driver.
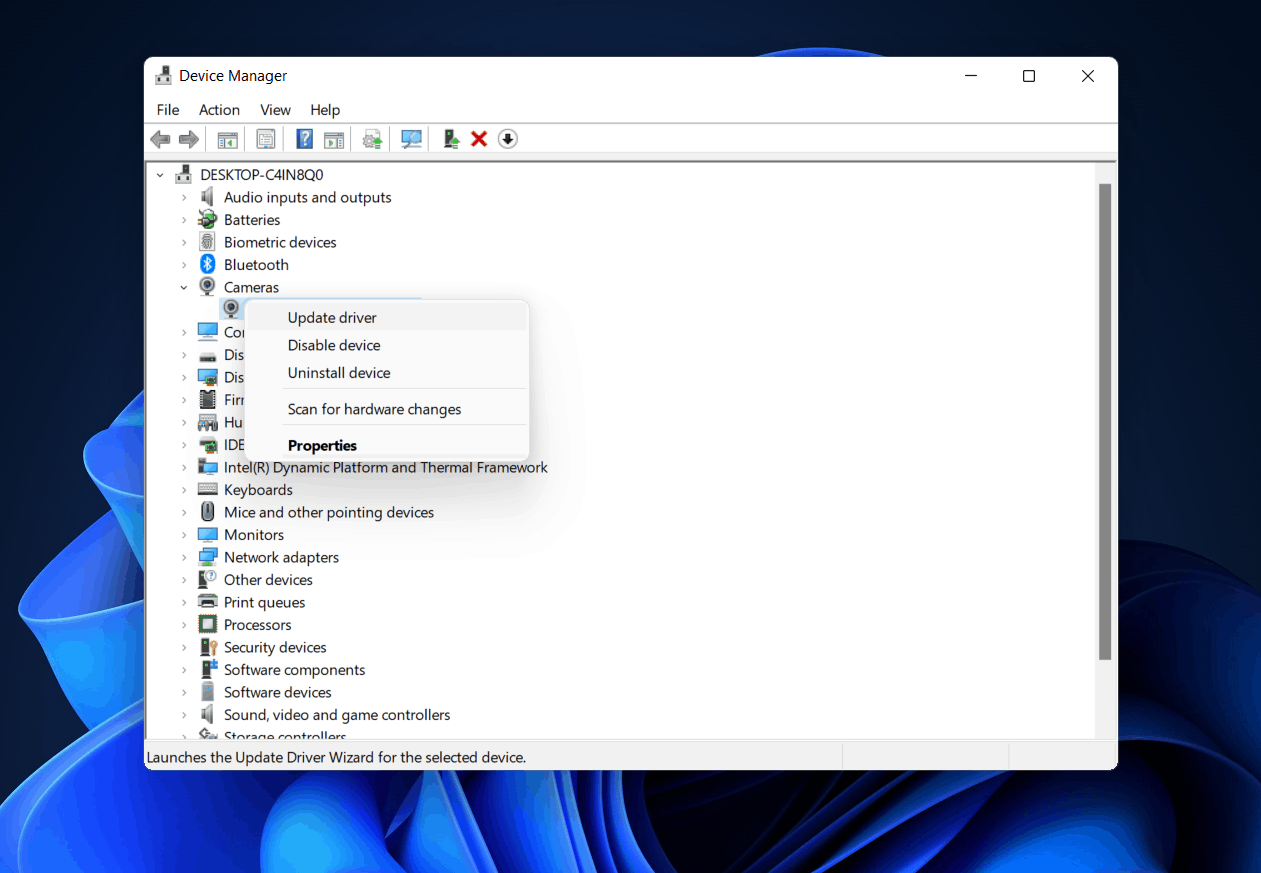
- On the next window that pops up, click on search automatically for drivers. This will search for the camera drivers on the internet.
- Once done, restart your device, and you are good to go
Restarting The Camera
If that doesn’t work for you then you can try restarting the camera.
- Head to the device manager on your PC.
- In the device manager, double-click the cameras option to expand it.
- Now right-click on your webcam, and then click on disable device option. This will disable the webcam on your PC.
- After you have disabled the webcam, you will have to enable it again. To do so, right-click on the webcam again, and then click on enable device. This will enable the camera.
- Once you are done, you can try running the camera application, and you face any problem using it.
Uninstall The Camera from Windows 11
You can try uninstalling the webcam, and then reinstall it, if you still face the Windows 11 camera not working issue. To do so, follow the steps given below-
- Open the device manager on your PC.
- Now from the list of devices, expand the cameras list by double-clicking on it.
- Right-click on the webcam and then click on uninstall device option.
- After uninstalling the camera, restart your PC.
- Once your PC has been turned on, open the device manager again.
- You will find the camera option there. However, if the camera option is not available, then click on the action tab, and then click on scan for hardware changes and the camera option will be brought back.
RELATED GUIDES:
- Windows 11 Sound Not Working? Here’s How To Fix
- How To Enable Wake On LAN in Windows 11
- How To Connect Airpods To Windows 11 PC Laptop
- Fix Hotkeys (Fn Keys) Not Working On Windows 11 Laptop
Final Words
If the camera is not working in Windows 11 then you can follow the steps given above to fix it. We hope this article helped solve the Windows 11 camera not working issue.


Dear, thanks but the solution you have brief here is not working in my case please do help me