- VPNs offer secure internet connections and bypass geo-restrictions, but can cause slow connections and software issues.
- To disable VPN on a Windows PC, access the Network & Internet settings and choose to disconnect or delete the VPN.
- Uninstall a VPN from a PC can be done through the Settings app or Control Panel, depending on the installation source.
Using a VPN is a popular way to keep your online activity private and access websites or streaming content that might be blocked in your region. While VPNs offer better security and anonymity, they can sometimes slow down your internet speed or cause certain websites and apps to stop working properly.
If you’re experiencing issues like slow browsing, blocked services, or connection errors while using a VPN, turning it off can often solve the problem. In this guide, you’ll find easy, step-by-step instructions to disable VPN connections on your Windows PC whether you’re using a built-in VPN, a third-party app, or a browser extension.
Understanding VPNs
What is VPN mean? A VPN, or Virtual Private Network, is a tool that creates a secure, encrypted tunnel for your internet traffic. By using a VPN, you can hide your real IP address, protect your online privacy, and access websites or content that may be restricted in your area. Think of a VPN as a shield that keeps your browsing activity private and helps you stay safe on public Wi-Fi or untrusted networks.
Steps to Disable VPN from Your PC
Whether you’ve set up a built-in VPN connection on Windows or use a third-party VPN app, turning it off is straightforward. If you need to disconnect or remove your VPN for faster internet or to fix software issues, just follow the updated steps below for your Windows PC.
Disable Built-in VPN from Your PC
Given below are the steps to disable the in-build VPN on Windows-
- Open the Settings app by pressing Windows + I.
- On the left sidebar, click on Network & Internet.
- Click on VPN in the menu.
- You’ll see a list of VPN connections you’ve set up.
- Click the arrow (>) next to the VPN you want to disable.
- Choose Disconnect to disconnect for now, or Remove to delete the VPN profile permanently.

Quick tip: On the latest Windows 11, you can also disconnect from VPN quickly. Just click the Wi-Fi or network icon on your taskbar, then click the VPN connection and choose Disconnect.
Disable Third-Party VPN from Your PC
If you are using a third-party VPN like Nord VPN, Proton VPN, Surfshark VPN, etc., then you can follow the steps given below to disable it-
- Open the Start Menu by pressing the Windows key on your keyboard.
- Search for your VPN app and open it from the Start Menu.
- You will see the Disconnect/Stop button on your screen; click on this button to disconnect to disconnect from the VPN.

How to Uninstall VPN from Your PC?
If you want to permanently uninstall the VPN from your PC, then there are two ways to do it, i.e., through Settings and Control Panel.
Uninstall VPN through Settings
This method only works for the VPN installed on a PC through the Microsoft Store. If you have installed a VPN from the Microsoft Store on your Windows PC, then you can uninstall it by following the steps given below-
- Press the Windows + I key combo to launch the Settings app.
- Under the Apps tab, click on Installed Apps.

- Search for the VPN installed on your device.
- Click on the three ellipses next to the VPN and then click on Uninstall. Click on Uninstall again to uninstall the app.

Uninstall VPN through the Control Panel
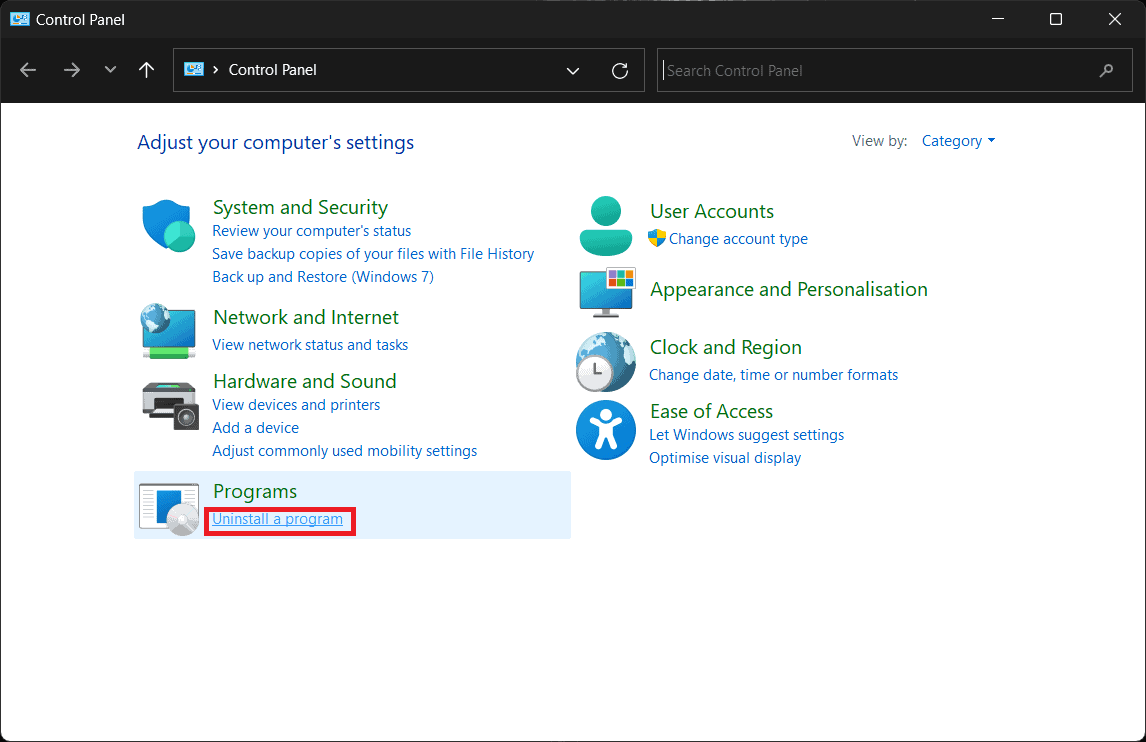
Control Panel method can be used to uninstall apps not installed from the Microsoft Store. For instance, if you downloaded a VPN from the official site and installed it on your PC, then you can uninstall it from the Control Panel. This is how you can do it-
- Open the Control Panel on your PC. You can do it by searching for Control Panel on the Start Menu and then opening it.

- In the Control Panel, click on the Uninstall a program option; this option will be present under the Programs section.
- Select the VPN from the app’s list and click on Uninstall.
- Confirm uninstalling by clicking on Uninstall again.
Should You Disable VPN from Your PC?
Using a VPN is a smart way to protect your privacy and access blocked content online. However, VPNs can also cause slower internet speeds, make some websites or streaming services unavailable, or interfere with certain apps especially when gaming or using secure financial sites.
Whether or not you should disable your VPN depends on your needs. If you’re facing problems like slow browsing, connection issues, or blocked services, it may be helpful to turn off your VPN temporarily. Just remember to reconnect your VPN when you need extra privacy or want to access geo-restricted content.
Final Words
Disabling a VPN on your PC is a simple process, whether you’re using a built-in option, a third-party app, or a browser extension. Just follow the steps above to turn off your VPN whenever you need to restore your regular internet connection. If you ever want to use your VPN again, you can easily reconnect with a few clicks.
READ MORE:


![Fix Phone Screen Unresponsive Touch on Android & iPhone [Step-by-Step]](https://itechhacks.com/wp-content/uploads/2025/10/Fix-Phone-Screen-Unresponsive-Touch-150x150.jpg "Fix Phone Screen Unresponsive Touch on Android & iPhone [Step-by-Step]")


