- Error 0x80070643 in Windows 11 is a common update error reported by many users during patch updates
- Troubleshooting steps include running the Windows Update Troubleshooter, disabling third-party antivirus, running SFC scan, changing SoftwareDistribution subfolder name, installing latest .Net Framework, and cleaning boot Windows 11
- Following these steps should help resolve the error 0x80070643 in Windows 11, providing a comprehensive guide for users to follow.
Update errors in Windows 11 are quite common, and you are expected to see them often. Error 0x80070643 in Windows 11 is an update error that many users have reported facing recently. Users face this issue on their PC when installing new patch updates on Windows 11. Users may face this issue most commonly because of third-party antivirus on your PC, the issue with the .NET Framework, damaged Windows update component, corrupted system files, and various others. There’s nothing to worry about, even if you face the error 0x80070643 in Windows 11.
Fix Update Error 0x80070643 in Windows 11
This article will provide you with a comprehensive step-by-step guide to resolving the 0x80070643 error in Windows 11.
Run Windows Update Troubleshooter
The first thing you can do to fix error 0x80070643 on Windows 11 is run the Windows Update Troubleshooter. To do so, follow the steps given below:
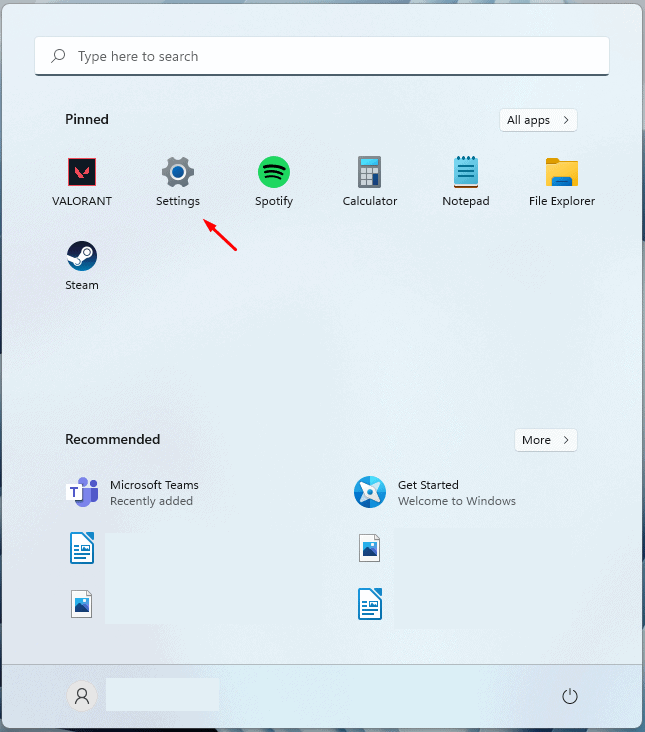
- Open the Settings app on your PC. To do so, press the Windows + I key combo on your keyboard.
- On the right side of the Settings app, in the System tab, click on the Troubleshoot option.
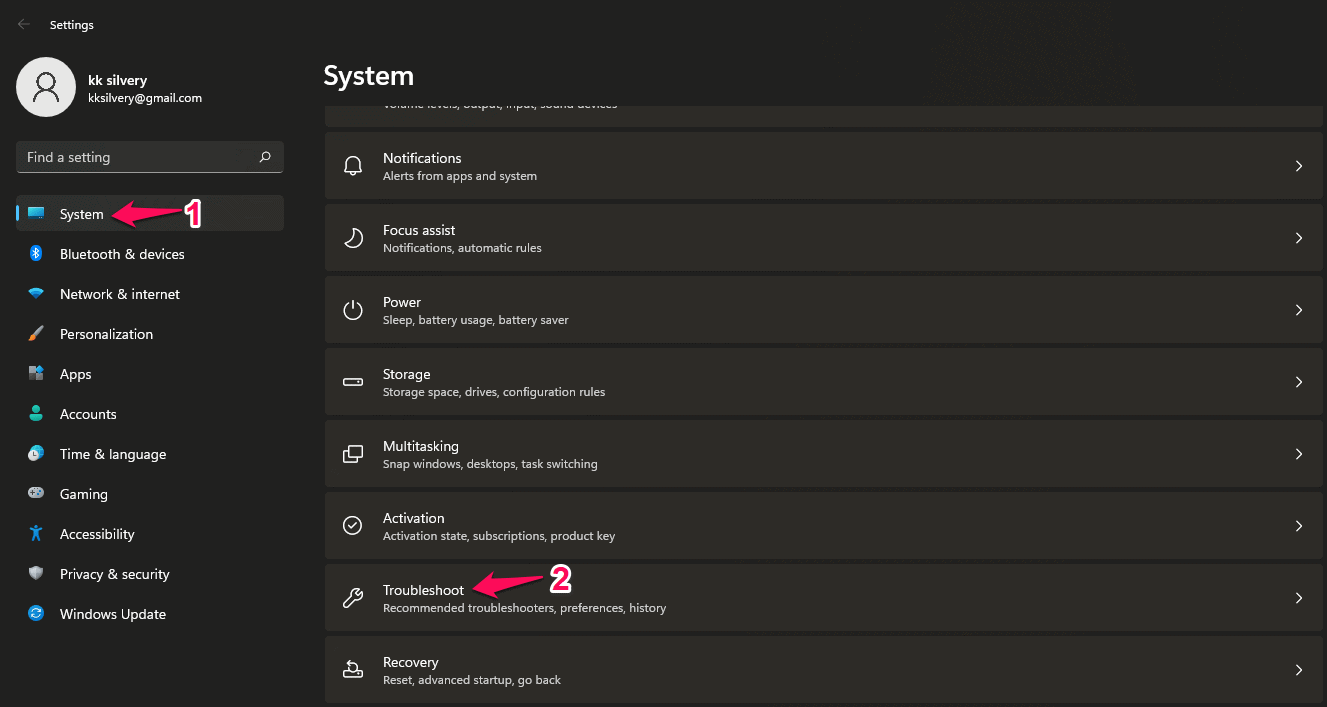
- Next, click on Other Troubleshooters options.
- You will see a list of all the Troubleshooters that you can run on your PC. Here, click on the Run button next to the Windows Update to run the Windows update troubleshooter on your PC.
- Now follow the on-screen instructions to run the Windows update.
Disable Any Third-Party Antivirus On Your PC
If you have any third-party antivirus installed on your PC, this may be the reason behind facing the issue. If you face error 0x80070643 in Windows 11, you should try disabling the third-party antivirus on your PC. If disabling doesn’t work, then temporarily uninstall the antivirus software and then check if you face the issue or not.
Run SFC Scan
If disabling the antivirus or running the Windows update troubleshooter doesn’t help you, you should try running the SFC scan. To run SFC Scan, follow the steps given below-
- Open the Start Menu by pressing the Windows key on your keyboard.
- Search for the Command Prompt in the Start Menu. Right-click on the Command Prompt and then click on Run as administrator.

- Now, in the Command Prompt, type the command SFC /scannow and hit Enter to execute the command.

- The process will begin. Wait for the process to complete, close the command prompt and restart your PC. This should most probably fix the issue you have been facing.
Change The SoftwareDistribution Subfolder Name
Another thing that you can try doing is changing the name of the SoftwareDistribution Subfolder. To do so, follow the steps given below-
- Search for CMD in the Start Menu. Right-click on the Command Prompt in the search result and click on Run as administrator.
- You will first have to disable a few services. To do so, type and execute the following commands in the Command Prompt-
-
- net stop wuauserv
- net stop bits
- Next, you will have to execute the following command to change the name of the SoftwareDistribution folder- rename c:\windows\SoftwareDistribution SoftwareDistribution.bak
- After you have changed the name of the SoftwareDistribution folder, you will have to restart the services which you have stopped. To do so, type and execute the following commands-
- net start wuauserv
- net start bits
By doing so, you will be able to change the name of the SoftwareDistribution subfolder, and the issue should be fixed by now.
Install Latest .Net Framework
Ensure you have the latest .Net Framework on your PC. You can download the latest .Net Framework on your PC by clicking on this link. This link will lead you to Microsoft’s official website, from where you can download the .Net Framework. From here, download the Runtime version of .Net Framework.
After you have downloaded the latest number of .Net Framework on your PC, install it on your PC. Once you are done with installing the latest .Net Framework, you will no longer face the issue.
Repair .Net Framework
If you face the error 0x80070643 in Windows 11, it may be due to some issues with the .Net Framework. You can use the .Net Framework Repair tool to repair .Net Framework. To do so, follow the steps given below-
- Firstly, head to the .Net Framework Repair Tool page. You can do so by clicking on this link.
- Here, click on the Download button to download the repair tool. After downloading the repair tool, run the file and follow the on-screen instructions.
- This should repair the .Net Framework, and you should no longer face the issue now.
Clean Boot Windows 11
If you are still facing the error 0x80070643 in Windows 11, then you can try clean booting Windows 11-
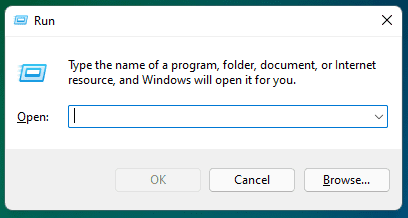
- Press the Windows + R key combo to open the Run Dialog box. Type MSConfig in the Run Dialog box and hit Enter to open the System Configuration.
- On the General tab, ensure you have selected the Selective Startup button and uncheck the Load startup items option. Next, select the option saying Load system services.
- Head to the Services tab in the System Configuration. Here, check the checkbox saying Hide all Microsoft Services.
- Next, click on the Disable all button to disable all the services except for Microsoft.
- Once done, click on Apply and then head to the Startup tab.
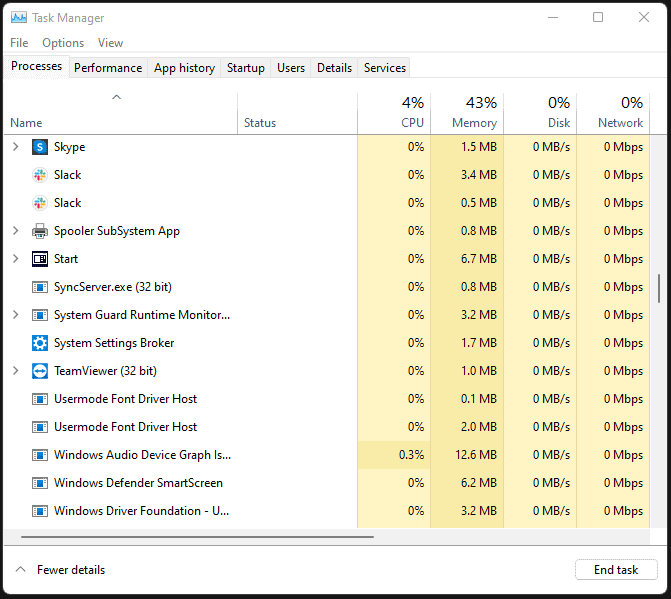
- Here, click on Open Task Manager. You will be headed to the Startup tab in the Task Manager.
- Select the startup applications that are enabled, and then click on Disable button to disable them.
- Once done, restart your PC, and then try applying the updates. You should now no longer face the issue you were facing.
RELATED GUIDES:
- How To Create PDF File in Windows 11
- Fix Mail App Error Code 0x8019019a in Windows 11
- How To Fix Installation Error 0xc1900101 in Windows 11
- How To Fix Error Code 0x8007007f On Windows 11
Final Words
If you have been facing the error 0x80070643 in Windows 11, then you can follow the steps in this article. We have discussed all the troubleshooting steps to fix the error 0x80070643 in Windows 11. We hope this article helps you out, and if it did help you, then do let us know in the comment section.

")


