- PDF is a useful file format for sharing documents easily with others, but not all documents may be in PDF format initially.
- Creating a PDF file in Windows 11 is simple and can be done without the need for third-party apps.
- To create a PDF in Windows 11, open the document, click on File, select Print, choose Microsoft Print to PDF, and then save the file as a PDF.
PDF is one of the best file formats to help create and share documents with everyone. However, the documents you create or use may not be in PDF. In such a case, you may have to convert the document into a PDF file so that you can easily share it with anyone. Creating a PDF file in Windows 11 is easy, and you can easily do it within a few steps. With Windows 11, you don’t need any third-party app to create a PDF file, as you can do it with the help of in-built options available.
If you are looking forward to creating a PDF in Windows 11, this article might prove helpful. In this article, we will be discussing how you can create a PDF in Windows 11 with the in-built option rather than using any third-party app.
How to Create PDF Files in Windows 11
If you want to create a PDF in Windows 11 using the in-built option available, then you can follow the steps given below-
- Firstly open the document that you want to be converted into a PDF. Open the file with the required application. If it is a Word file, you can open it with Microsoft Word; if it is a text file, you can open it with Notepad, and the same goes for all the other file formats.
- Now click on the File button at the top right corner of the app window, and then from the menu that opens up, click on Print.
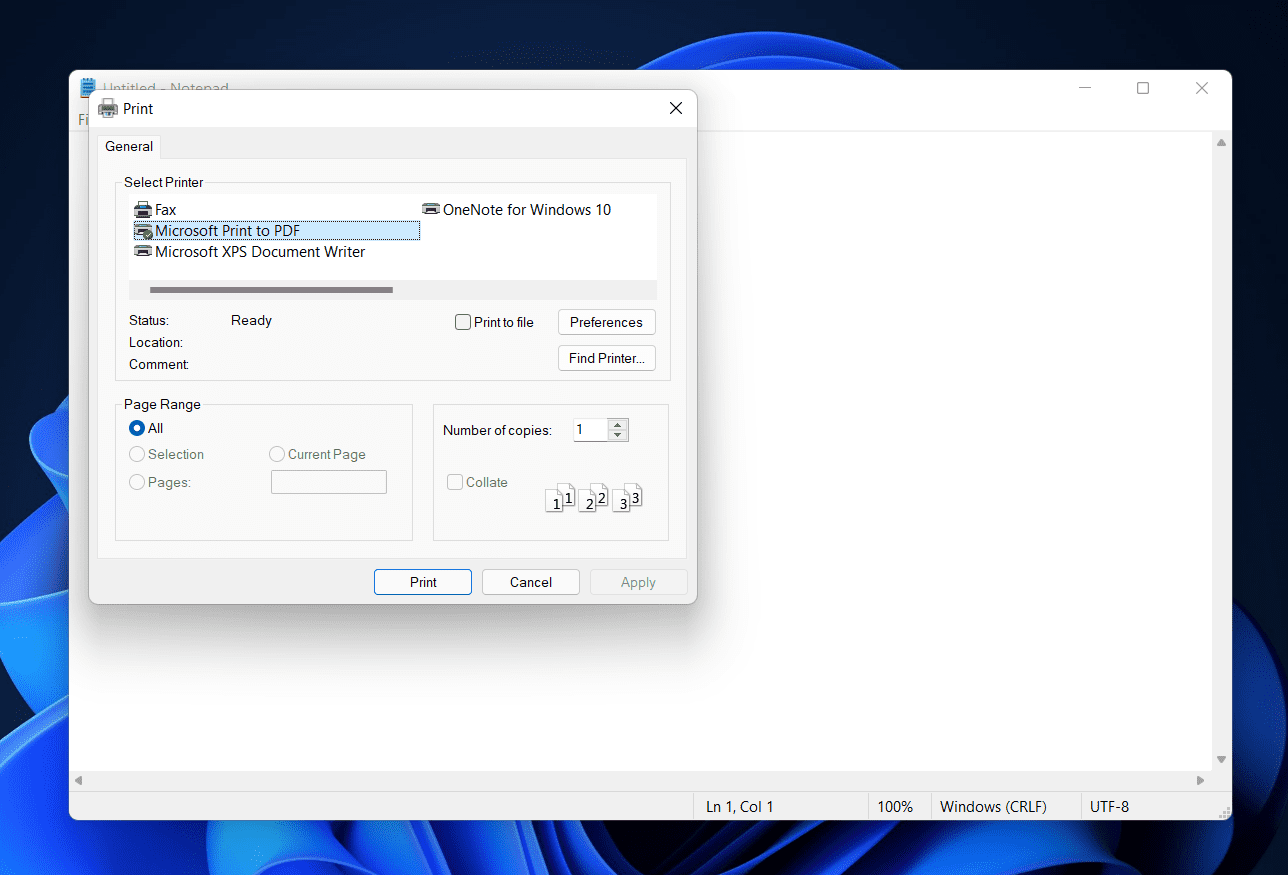
- You will be headed to the Print window, where you can select the printer. From the Select Printer section, select Microsoft Print to PDF option. After selecting the option, click on the Print button.
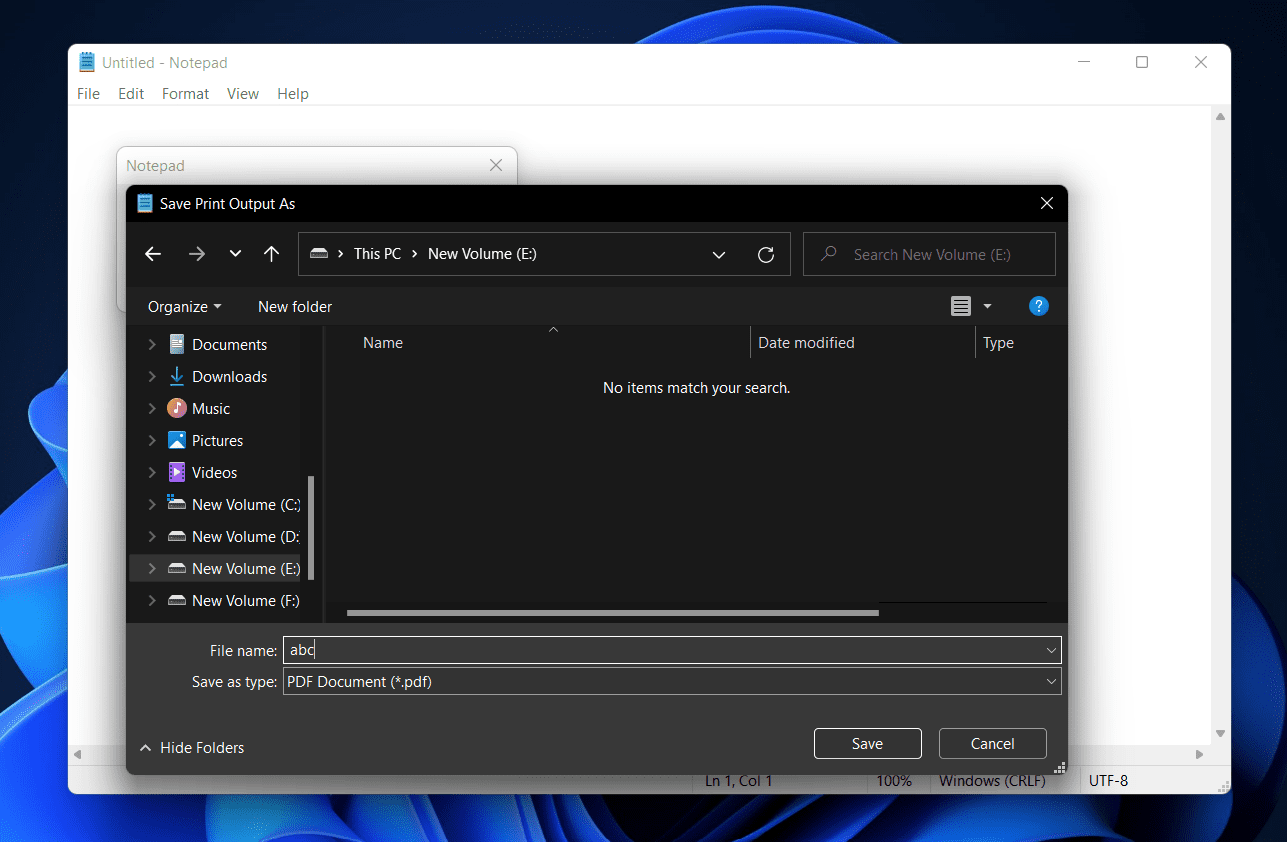
- When you click the Print button, the file will be converted to a PDF, and you will have to save it. On the next screen that opens up, head to the location where you want to save the file.
- Enter the name of the file right beside the File Name section. Ensure the file type is PDF Document. Once done, click on the Save button to save the file as a PDF.
- Next, head to the location where you have saved the file, and you will find that the file has been saved in PDF format.
Conclusion
This is how you can create a PDF in Windows 11. If you want to create a PDF using the default options available in Windows 11, you can follow the steps mentioned in this article. We hope this article helps you with what you are looking for. If it did help you, do let us know in the comment section.
FAQs
Does Windows 11 Have A PDF Creator?
Yes, Windows 11 does have a PDF creator, so you won’t need any third-party PDF creator to create a PDF file.
How Do I Create A PDF In Windows?
You can create a PDF by using the Microsoft Print to PDF option. We have discussed the steps in this article to create a PDF in Windows. You can follow the steps in this article to create a PDF in Windows easily.
RELATED GUIDES:


