- ERR_NAME_NOT_RESOLVED error signifies domain name resolution issue, common on Google Chrome.
- To fix the error, check website status, clear cache, restart router, change DNS settings, use network troubleshooter.
- Follow steps to verify website status, clear cache, update DNS, and disable Chrome Prediction Service to resolve the error on Chrome efficiently.
When using Google Chrome to access the numerous websites on the Internet, you might come across several errors. ERR_NAME_NOT_RESOLVED is one of the most frequently encountered errors by Chrome users.
What is the ERR_NAME_NOT_RESOLVED?
Technically speaking, the ERR_NAME_NOT_RESOLVED error means that the domain name of the website you are trying to access cannot be resolved into an IP address.
This error can be caused due to misconfiguration of your router/computer or if the website you are trying to access is down. Thus, here we are with some of the best methods which you can use to fix the ERR_NAME_NOT_RESOLVED error on the Google Chrome web browser.
Fix ERR_NAME_NOT_RESOLVED Error on Google Chrome
Check if the Website you are trying to access is Working.
Before making any changes to your device to fix this error, make sure that the website you are trying to access is up and running. You can do it by following the steps listed below.
There is a possibility that the website you are trying to access is down for everyone. In such a situation, all you can do is wait till the website is up.
Step 1- On Google Chrome, go to the website listed below.
https://downforeveryoneorjustme.com
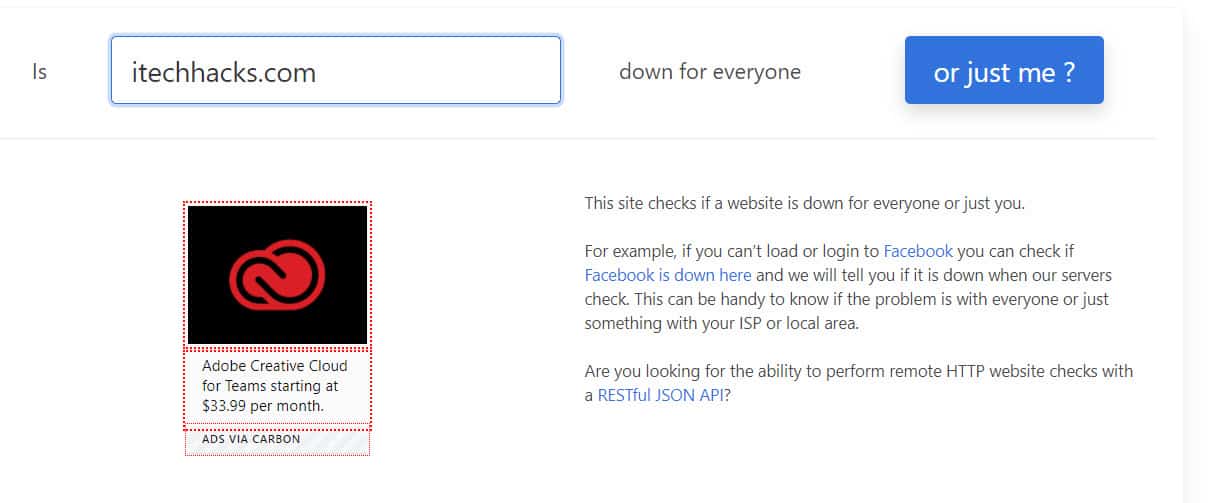
Step 2- Here, enter the link of the website on which you are facing the ERR_NAME_NOT_RESOLVED error.
Step 3- Now, click on the ‘or just me?‘ button below the text box to initiate the process.
If it displays ‘It’s not just you!‘ it means that the website is down for everyone and all you can do is wait. But, if it shows ‘It’s just you!‘ then you need to start executing the methods listed below to fix it.
Check the spelling of the entered URL.
If you are manually entering the URL of any website, make sure that there is no spelling error in it! If you happen to misspell even a single letter, you might come across the ERR_NAME_NOT_RESOLVED error.
Also, you might get redirected to a shady website due to the misspellings of the URL. Thus, you need to be careful with the spelling of the website you are trying to access while typing it in manually.
ALSO READ: Fixed: PDF File Not Opening in Chrome Adobe Reader
Restart your Router.
It has been observed that restarting your router is one of the easiest methods which you can use to fix the ERR_NAME_NOT_RESOLVED error on Google Chrome.
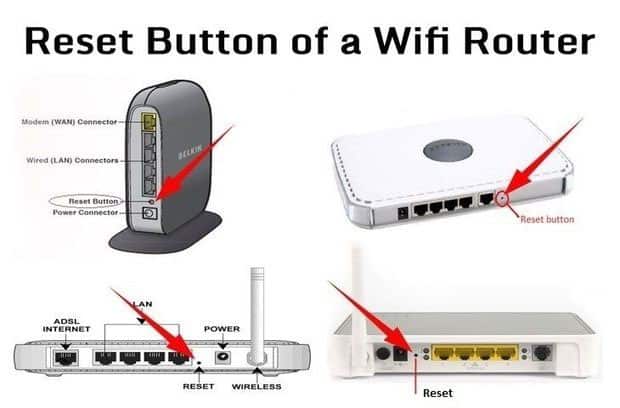
Step 1- Power off your router using the power button on the router or from the power supply.
Step 2- Wait for a couple of minutes before turning it back on. Once the router is completely turned on, check if the website you are trying to access is fixed. If not, go to the next method.
Use Network Connection Troubleshooter.
Step 1- Launch Settings on your Windows PC and navigate to Network & Internet option.

Step 2- In the Status section, click on Network Troubleshooter.
Step 3- Once the diagnosis is complete, check the suggested fixes and apply them.
Now, check if the website you are trying to access is fixed. If not, go to the next method.
Clear Cookies and Cache Memory.
If your Chrome browser is stuffed with cookies and cache, clear them using the steps listed below.
Step 1- Launch Google Chrome and tap on the three vertical dots located at the top-right corner of the web browser.
Step 2- Click on ‘History‘ from the drop-down box which appears on your screen.
Step 3- Now, click on the ‘Clear Browsing History...’ option and then, check all the checkboxes for Browsing history, cookies, and cache images.
Step 4- Click on the drop-down arrow in the Time range section and select ‘All Time‘ from the list of options that appear on your screen.
Step 5- Now, click on the ‘Clear data‘ option to clear the browsing history and cache data from your Google Chrome.
Reset your Network Settings.
Step 1- Launch Command Prompt on your Windows PC as an Administrator.
Step 2- Here, type one command at a time from the commands listed below and hit Enter.
- iconfig /release
- ipconfig /all
- ipconfig /flushdns
- ipconfig /renew
- netsh int ip set dns
- netsh winsock reset
Step 3- Once you are done entering all the commands one after another, restart your PC.
Now, check if the website you are trying to access is fixed. If not, go to the next method.
Clear Google Chrome Host Cache.
Step 1- On Google Chrome, copy and paste the URL mentioned below.
chrome://net-internals/#dns
Step 2- A new window will appear on your screen. Here, click on the ‘Clear host cache‘ option.
Now, check if the website you are trying to access is fixed. If not, go to the next method.
Change DNS Server
Step 1- Launch Control Panel on your Windows PC.
Step 2- Here, navigate to Network & Internet >> Change adapter options.
Step 3- Now, right-click on your Network Adapter and select ‘Properties‘ from the drop-down box.
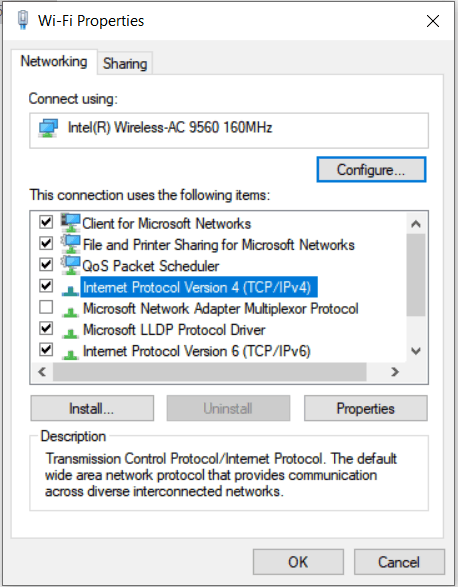
Step 4- Click on the ‘Internet Protocol Version 4 (TCP/IPv4)‘ option from the list to select it and click on the ‘Properties‘ option
Step 5- Enter the following DNS addresses in the mentioned data fields.
Preferred DNS server: 8.8.8.8
Alternate DNS server: 8.8.4.4
Click on ‘OK to save the changes which you have just made. Now, restart Google Chrome and check if the website you are trying to access is fixed.
ALSO READ: How to Fix ERR_SPDY_PROTOCOL_ERROR in Chrome
Disable Chrome Prediction Service
Step 1- Launch Google Chrome and tap on the three vertical dots located at the top-right corner of the web browser.
Step 2- Click on ‘Settings‘ and navigate then, click on the ‘Advanced‘ option.
Step 3- In the ‘Privacy and security section, search for the ‘Preload pages for faster browsing and searching‘ option and disable its toggle if it is turned on.
Now, restart Google Chrome and check if the website you are trying to access is fixed.
Update DNS on Mac OS.
Step 1- Click on the Apple icon from the top left of your desktop and click on ‘System Preferences‘ from the drop-down box.
Step 2- Click on the ‘Network‘ icon from the list of options.
Step 3- Click on ‘Advanced‘ from the new window on your screen.
Step 4- In the new window, go to the DNS tab. Here, click on the ‘+‘ icon under the IPv4/IPv6 Section.
Step 5- Add the following DNS in it and remove any other DNS present here.
- 8.8.8.8
- 8.8.4.4

Now, check if the website you are trying to access is fixed.
ALSO READ: Getting ERR_CACHE_MISS In Google Chrome? Here are the Fixes
Some Frequently Asked Questions:
Q1. What is the ERR_NAME_NOT_RESOLVED error?
ERR_NAME_NOT_RESOLVED error means that the domain name of the website you are trying to access cannot be resolved into an IP address.
Q2. How to fix the ERR_NAME_NOT_RESOLVED error?
You can use several methods to easily fix the ERR_NAME_NOT_RESOLVED error. Above, we have listed some of the most useful methods which can be used to fix this error.
Q3. What causes the ERR_NAME_NOT_RESOLVED error?
Some of the most prominent reasons include DNS server malfunctioning, computer or browser is misconfigured or network issue. Apart from these, there can also be some other reason causing the ERR_NAME_NOT_RESOLVED error on Google Chrome.
Conclusion:
These are some of the most useful methods which you can use to fix the ERR_NAME_NOT_RESOLVED error on your Google Chrome. The steps involved in these methods are easy to understand and execute. If we have missed out on any such method that can be used to fix the ERR_NAME_NOT_RESOLVED error on Google Chrome, then let us know about it in the comments section below.


