- PFN LIST CORRUPT is a common error in Windows 11, indicating data corruption in the Page Frame Number list.
- Update Windows to resolve bugs, update drivers for compatibility, and run SFC and DISM scans to check and fix system issues.
- Check RAM with Windows Memory Diagnostic, HDD with CHKDSK, uninstall incompatible software, consider system restoration, and as a last resort, reset Windows if the issue persists.
Blue screen errors are probable in Windows 11, just as they were in Windows 10. PFN LIST CORRUPT is one of the most common error messages seen in blue screen errors in Windows 11. PFN LIST CORRUPT is a Windows 10 Blue Screen of Death error that shows signals data corruption in the Page Frame Number list (PFN). To protect itself from file damage and data loss, your operating system locks you out. This article will assist you if you have been experiencing the PFN LIST CORRUPT blue screen error in Windows 11 and have been unable to resolve it.
Fix PFN_LIST_CORRUPT Blue Screen Error On Windows 11
In this article, we will be discussing how you can fix the PFN LIST CORRUPT Blue Screen error in Windows 10/11.
Update Your Windows
If you have been facing issues with Windows 11, then you should try updating your Windows. Many times the problem may occur due to bugs, which may be resolved by updating your system. To update your system, follow the steps given below-
- In the Start Menu, search for Check for Updates and click on the first search result.
- This will now open the Settings app. Click on the Check for updates button to begin checking for updates.
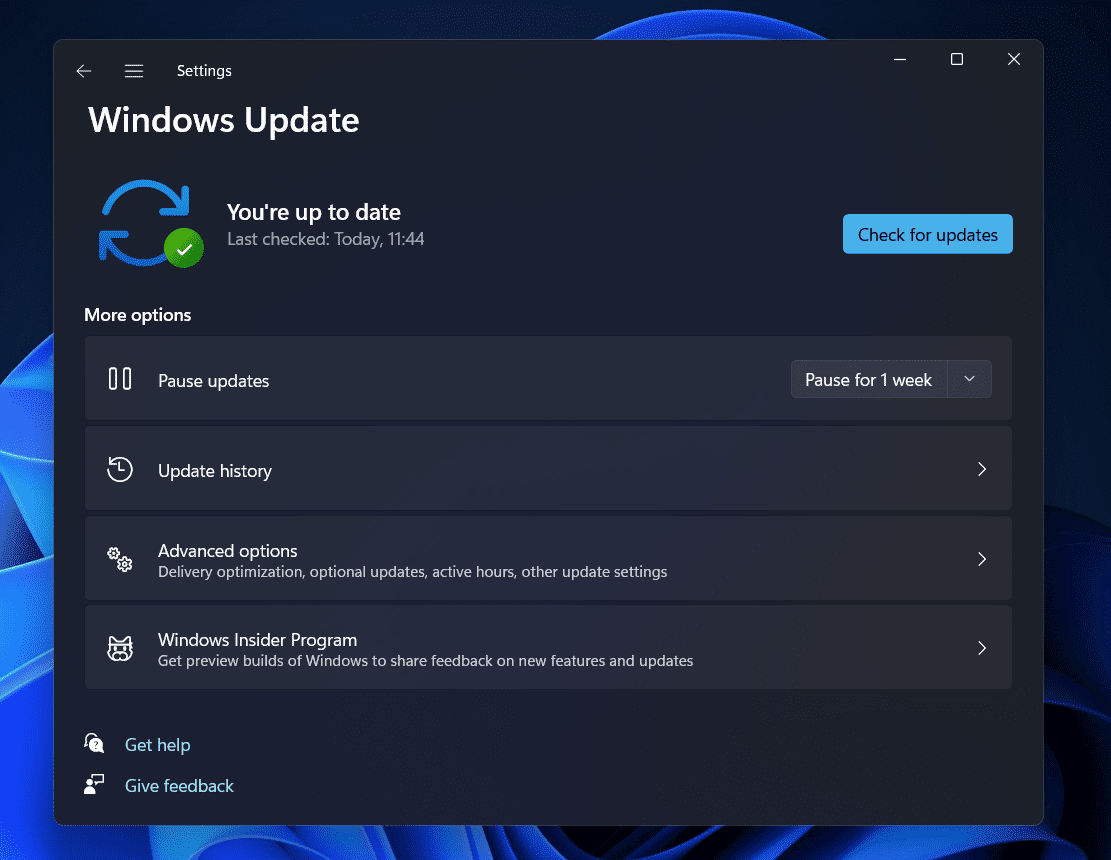
- Now download and install all the updates that your PC finds. After you have installed the updates, restart your PC.
- Doing so should most probably fix the issue for you. If you still face the PFN LIST CORRUPT Blue screen error, you should move to the next troubleshooting step.
Update Your Drivers
Outdated drivers may also be the reason for you to face the PFN LIST CORRUPT blue screen error in Windows 10/11. It would be best if you tried updating your drivers, and that should most probably solve the issue for you. You will find the driver updates in the Optional Updates section when you check for the Windows Update. When you check for the Windows Update, an Optional Updates section appears, which shows all the driver’s updates. Download and install the driver updates you find here.
You can either use a third-party driver updater to update the drivers on your PC. This is the recommended method if you want to update the drivers on your PC. You can use a third-party driver updater like Driver Booster or DriverPack Solution to update the driver on your PC.
Run SFC And DISM Scan
Another thing that you can try doing is running the SFC and DISM scan. SFC means System File Checker, and DISM means Deployment Image Servicing and Management. SFC scans your PC for corrupted files and the issues caused due to them, and it then tries fixing them. DISM fixes the problems in your system using the system image.
To run SFC, follow the steps given below-
- In the Start Menu, search for CMD. Now in the search result, right-click on Command Prompt and then click on Run as Administrator.
- In the Command Prompt, type SFC /scannow and hit Enter to execute the command.
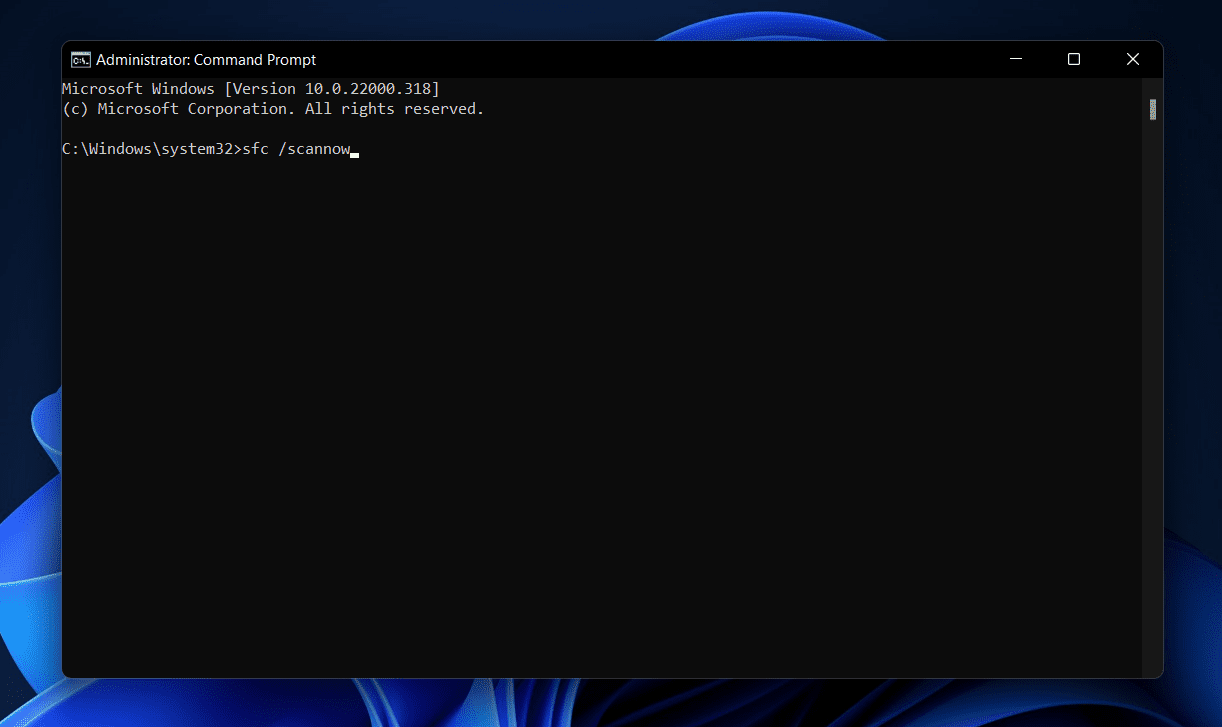
- SFC process will begin. Wait for the process to complete, and then close the Command Prompt and restart your PC.
This should most probably fix the issue for you. However, if you still encounter the same blue screen error, then you should try running DISM. Follow the steps given below to run the DISM-
- Firstly, run the Command Prompt as the administrator. You can follow the above steps to run the command prompt as administrator.
- In the Command Prompt, type DISM /Online /Cleanup-Image /RestoreHealth and hit Enter. This will run the DISM on your PC.
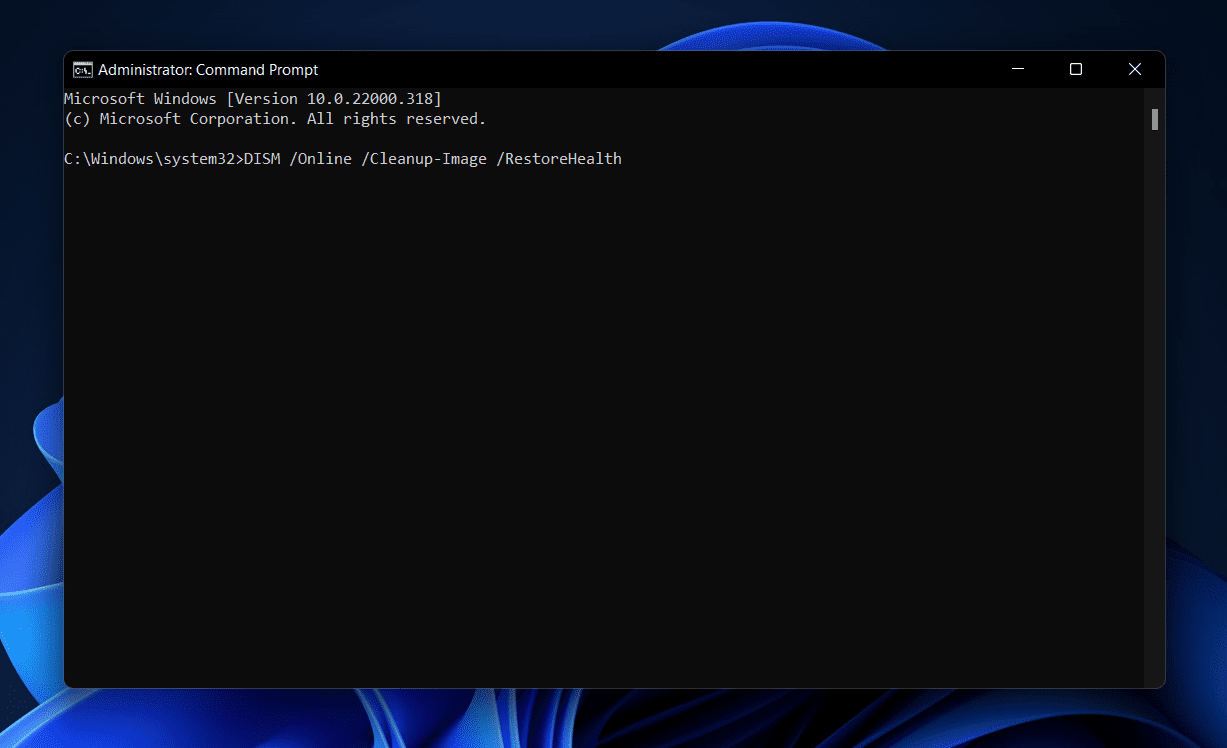
- Wait for the process to complete, and then restart your PC.
Check The System Memory
You may face this issue due to a problem with your RAM as well. You can use Windows Memory Diagnostic to check the issue with the RAM. To check the system memory, follow the steps given below-
- In the Start Menu, search for Windows Memory Diagnostic and open it.
- On the next window that opens up, click on Restart now and check for problems.
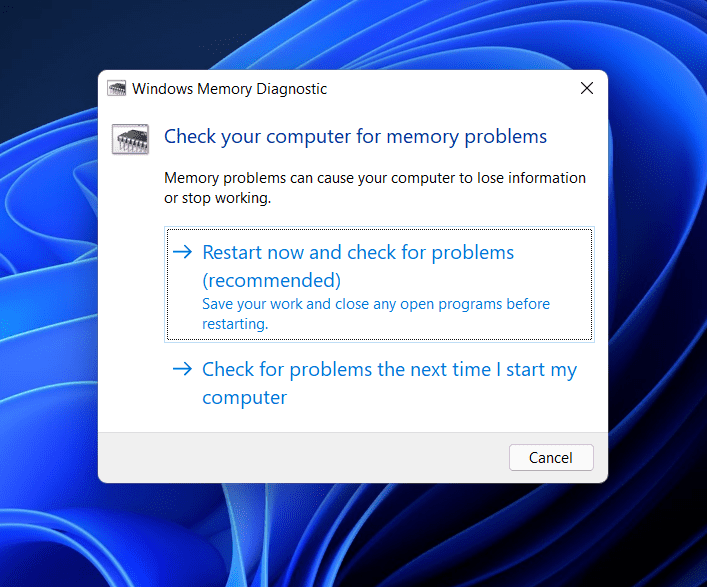
- This will restart your PC, and Windows will check for any problems with the RAM. You will get to know if there are any issues with the RAM which may be causing the BSOD error.
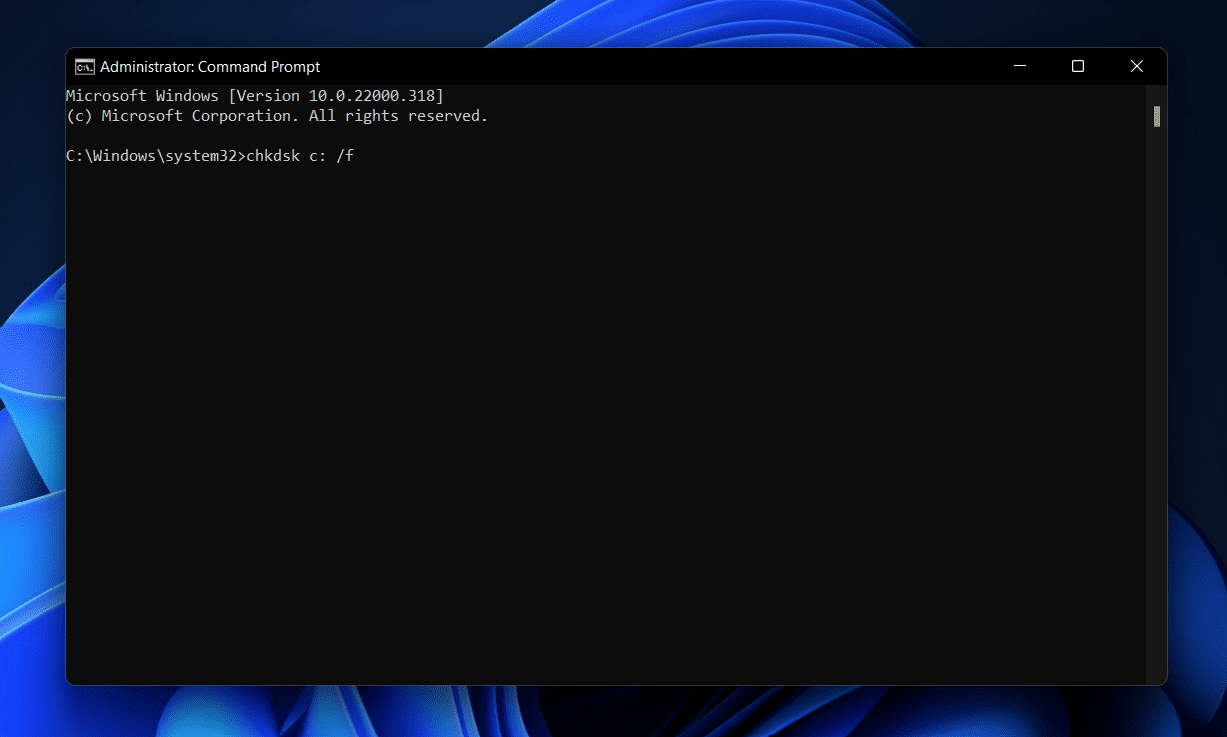
Check Your HDD
You can use CHKDSK to check and fix issues with the hard drive. To check your HDD, follow the steps given below-
- Run the Command Prompt as administrator. To do so, search for CMD in the Start Menu, right-click on the Command Prompt and then click on Run As Administrator.
- In the Command Prompt, type chkdsk c: /f and hit Enter. You will have to replace c: with the drive letter of the driver where the Windows is installed.
Uninstall Software
It would be best if you tried uninstalling the incompatible programs/software. If you are facing the issue after installing new software on your system, that software may be the reason behind it. You should try uninstalling the recently installed software on your PC. To do so, follow the steps given below-
- In the Start Menu, search for Control Panel and open it.
- In the Control Panel, click on Uninstall a program option under the Programs section.
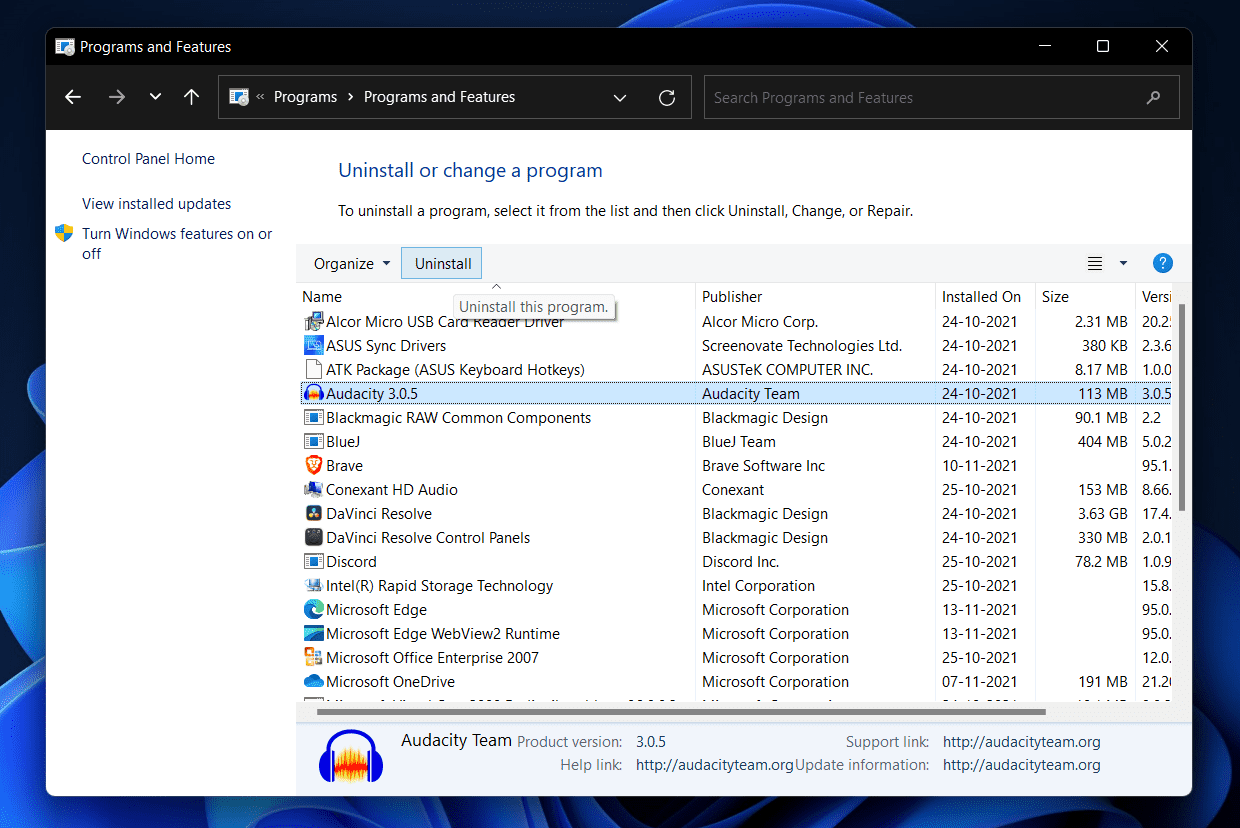
- Here select the program you recently installed, and then click on Uninstall to uninstall it.
This should most probably fix the issue. If you still face the PFN CORRUPTED LIST blue screen error in Windows 11/10, then you should move to the next step.
Perform System Restore
Another thing that you do is perform system restoration. This reverts your system to the working state to the point when you created a system restore point. Do note that this method will only if you have made a restore point earlier.
To perform a system restore, follow the steps given below-
- In the Start Menu, search for Create a Restore Point and click on it.
- You will be headed to the System Protection tab in the System Properties.
- Here click on System Restore.

- You can either select the Recommended Restore. You can either choose the restore point.
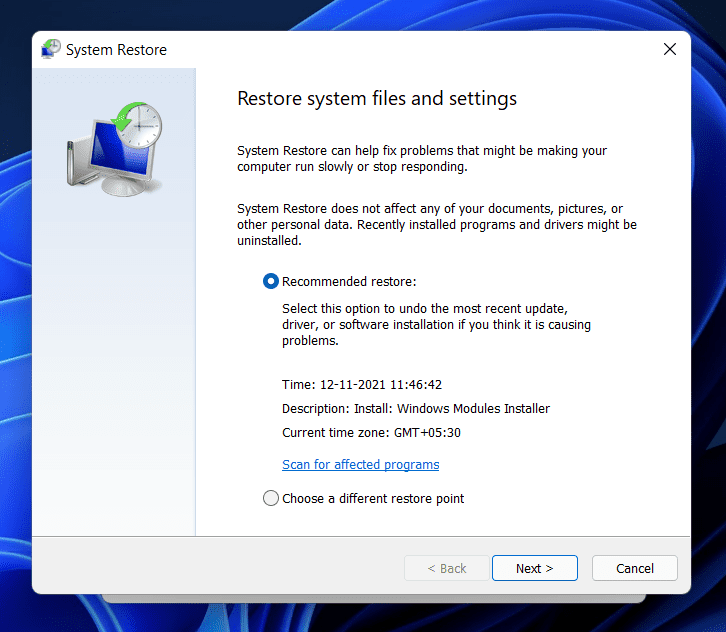
- Now follow the on-screen instructions to restore the system.
Reset Windows
If any of the above steps didn’t help fix the issue, then the last option will be to reset the Windows. This is the last option if the problem is still not fixed. To reset the PC, follow the steps given below-
- In the Start Menu, search for Reset This PC and click on the very first option.
- Now, click on the Reset PC button and then follow the on-screen instructions to reset your PC.
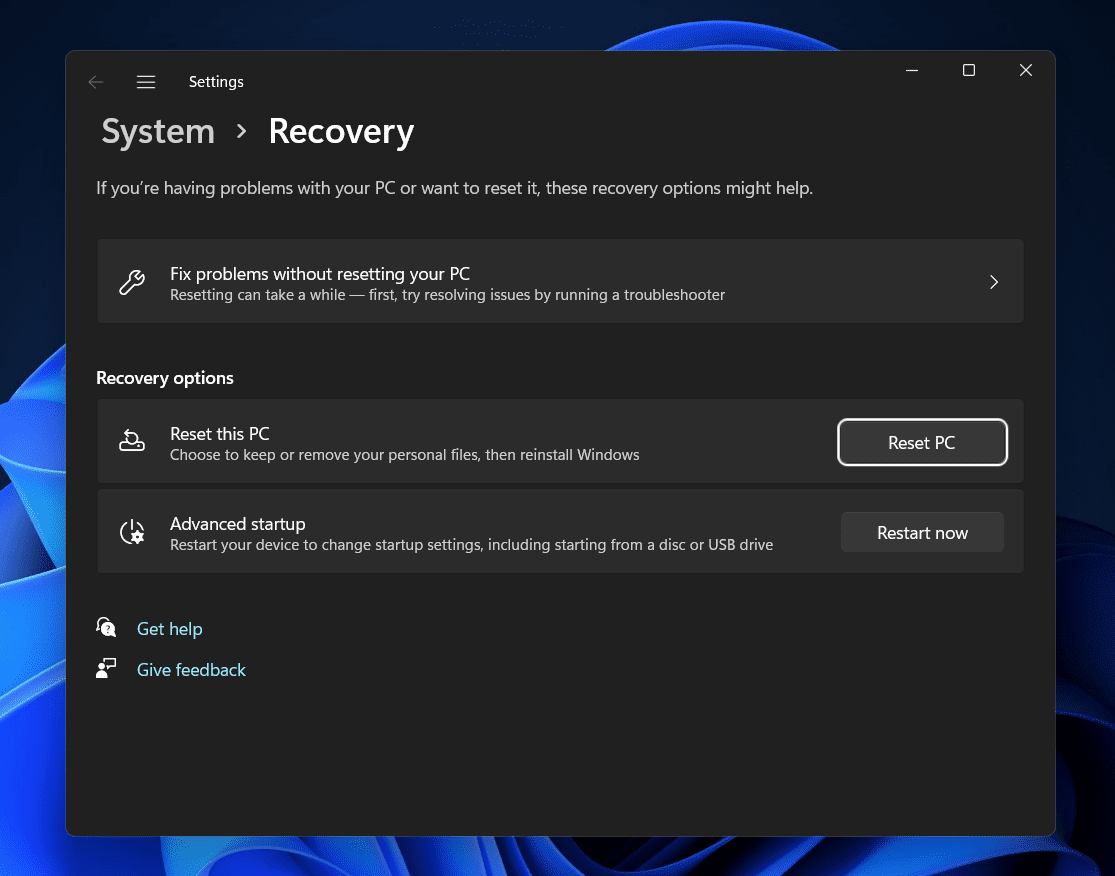
Note that resetting the Windows PC will remove all your data, so ensure you keep a backup of your data before continuing ahead.
RELATED GUIDES:
- How To Fix Snipping Tool Not Working in Windows 11
- How To Fix Windows 11 Green Screen of Death Crash Error
- KMODE EXCEPTION NOT HANDLED Blue Screen Error Windows 11
Final Words
This should fix the issue for you. If the issue is still not resolved, then it may be due to hardware issues. You may face the case due to hardware problems. Often, the issue may be because of hardware issues rather than software issues, and you may not be able to solve them. We hope this article helps you solve the point you were facing.


")

")


