- Disk Management is an advanced Windows application introduced with Windows XP, running on various versions from Windows 2000 to Windows 11.
- Windows Disk Management simplifies advanced storage tasks like creating a new drive, extending volumes, and troubleshooting disk-related issues.
- Ways to access Disk Management in Windows 11 include using the Search Box, Control Panel, Start Menu, Run Window, PowerShell, TaskBar, Quick Access Menu, and Computer Management.
Disk Management, a Microsoft Windows application, was introduced with Windows XP to replace the fdisk command. It runs on most Microsoft Windows versions, including Windows 2000, XP, Vista, 7, 8, 10, and 11. These are advanced-level tasks that cannot be completed with other methods. The precise thing is that it can be used with both internal and external hard drives. Advanced storage tasks including initializing a new drive and expanding or reducing volumes are greatly simplified using Windows Disk Management.
How to Access Disk Management In Windows 11
In this article, we will specifically focus on Disk Management in Windows 11. Here are some of the things you can accomplish with Disk Management:
- Create a new drive.
- Extend the scope of a basic volume.
- Reduce the size of a simple volume.
- Change a drive letter.
- Troubleshoot Disk Management.
- Delete volume.
- Create a Virtual Hard Drive.
- Convert MBR to GPT.
- Covert disk from basic to dynamic.
Let’s take a glance at all the ways you may access Disk Management in Windows 11, now that you have a good knowledge of the application.
Opening Of Disk Management in Windows 11
Windows 11 Disk Management can be accessed:
- Using Search Box.
- Through Control Panel.
- Via Start Menu.
- Opening Run Window.
- Via PowerShell.
- Through TaskBar.
- Using Quick Access Menu.
- By using Computer Management.
You can do so by following the correct procedures outlined below.
Opening of Disk Management through Search Box
The Search box makes it very simple to access Disk Management Windows 11. You only need to take two steps to launch this.
Step 1: To access the Search box, click the Search button on the Windows 11 desktop.
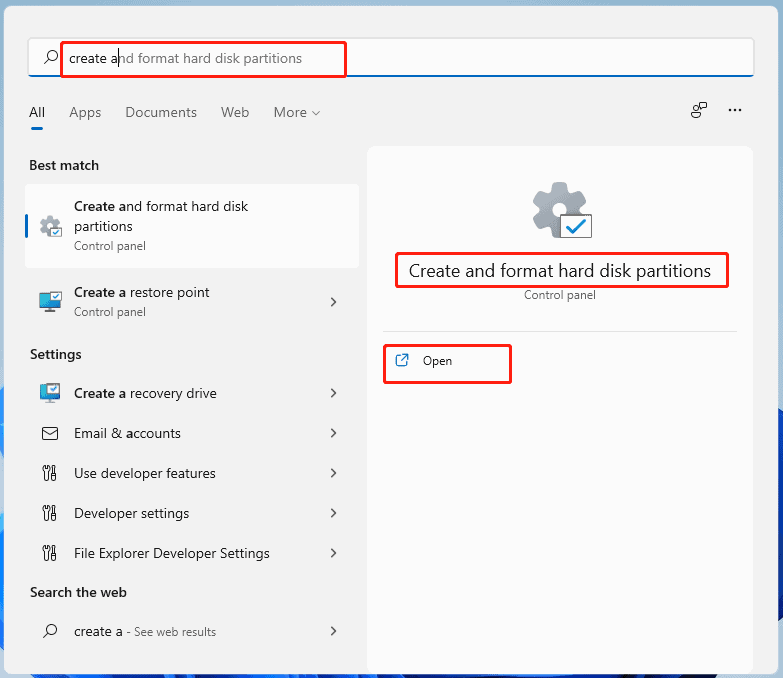
Step 2: In the search field, type ‘creates and format hard disc partitions’ and click Open under this search result. Now the Disk Management Window appears.
Open Disk Management via Control Panel
You may also launch Disk Management from the Control Panel. For your convenience, I’ve included a tutorial.
Step 1: To open the Run dialogue, press Windows + R.
Step 2: To open Control Panel, type control into the Run dialogue box and press Enter.
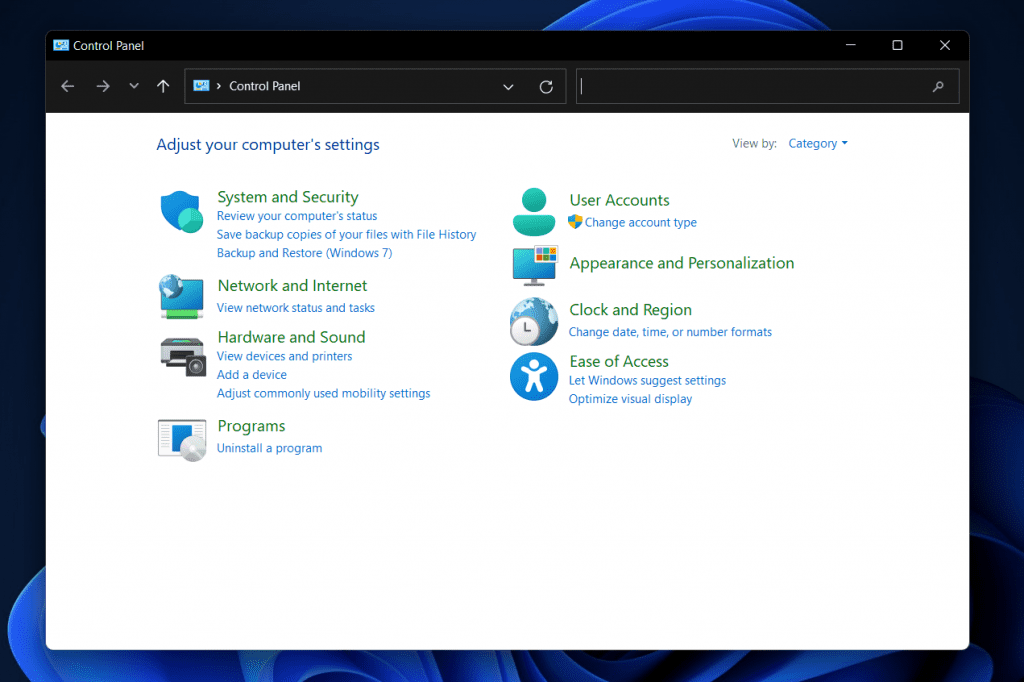
Step 3: Set the View by option to Category in the top right corner of the window.
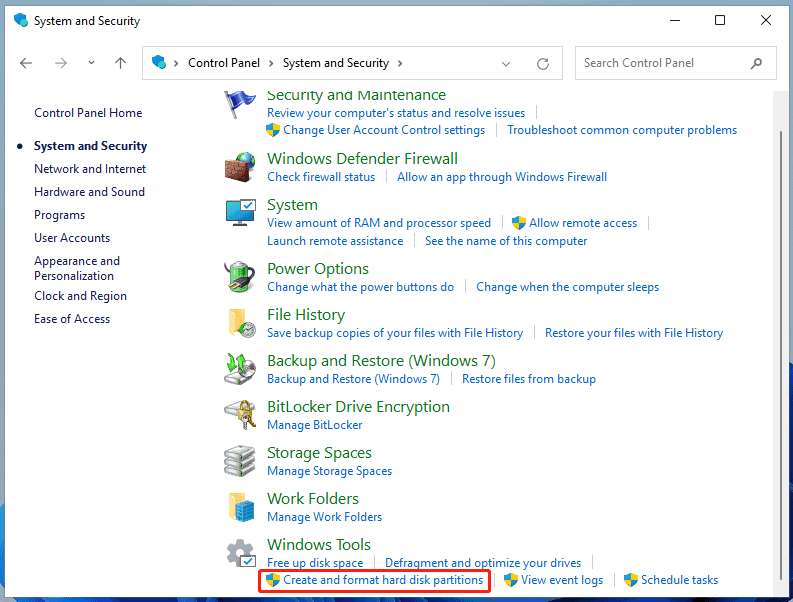
Step 4: Select Security and System.
Step 5: Under the Administrative Tools section, click or touch the Create and format hard disc partitions link.
Access Disk Management via Start Menu
The Start menu also enables you to access the Disk Management window.
Step 1: To access the Start menu, press Windows + S. You may also access this menu by right-clicking on the Windows icon.
Step 2: Choose Disk Management from the dropdown menu.
Through Run Window
You can also use the built-in Run program in Windows to access Windows 11 Disk Management. All you have to do is follow these simple instructions.
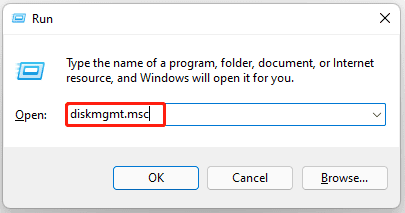
Step 1: To launch the Run dialogue, press the Windows + R key combination.
Step 2: Type diskmgmt.msc into the Run dialogue box and press Enter.
Open Disk Management using PowerShell
PowerShell is also one of the ways to access Disk Management Windows 11.
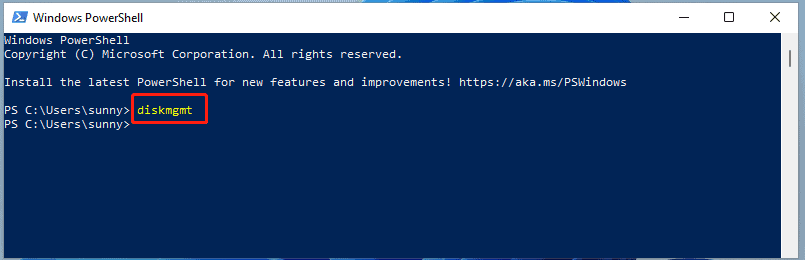
Step 1: On the desktop, tap the Search icon to launch the Search box.
Step 2: In the Top applications area, select Windows PowerShell. If it doesn’t appear in the window, type PowerShell into the search box and click OK.

Step 3: Type diskmgmt into the enabled Windows PowerShell window and press Enter. Disk Management appears on the screen.
Open Disk management via Computer Management
Computer Management also gives you access to Disk Management. The steps for your convenience have been mentioned below.
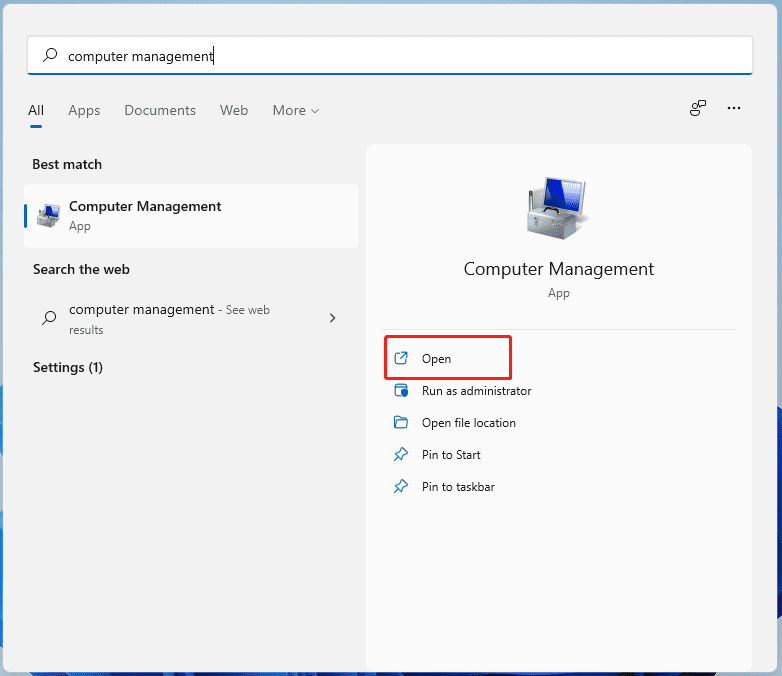
Step 1: Click the Search icon on the computer to access the Search box.
Step 2: Under Computer Management, type computer management and then click the Open option.
Step 3: In the Computer Management window, open the Storage area and choose Disk Management. This window will then display Disk Management.
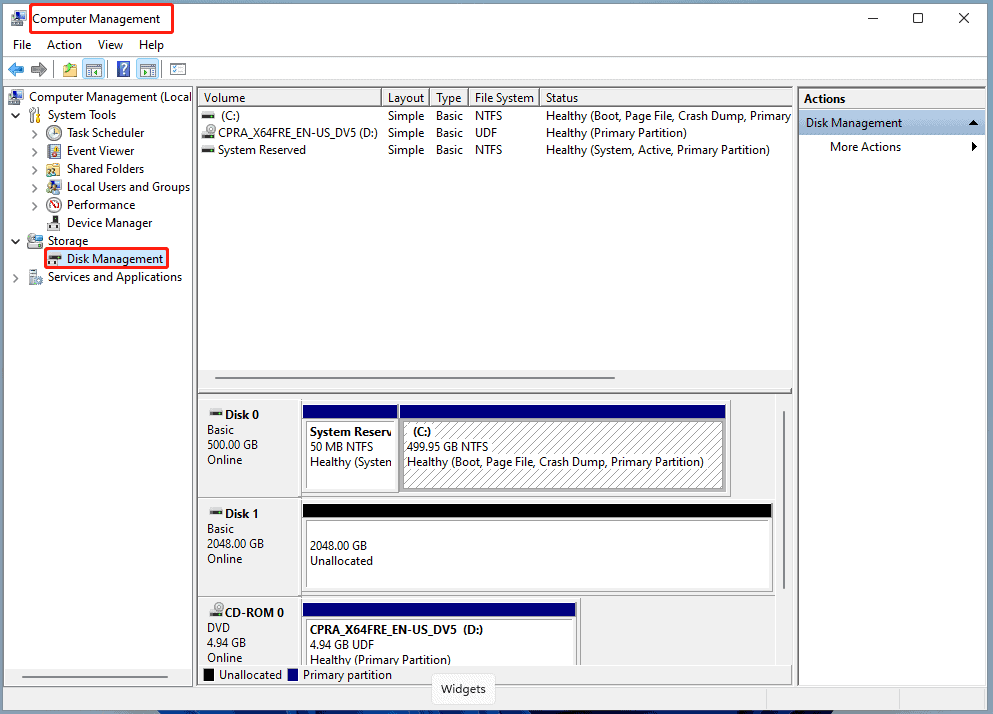
Step 4: After that, under the Disk Management window, you may manage discs and partitions. To complete the procedure, simply right-click on the target drives or partitions, select a feature based on your preferences, and then follow the on-screen instructions.
Access Disk Management via Quick Access Menu
In Windows 11, there are no changes to the basic quick access. That implies that in Windows 10, you can access anything you want by pressing “Windows + X,” In Windows 11, the same operations are available to wake the disc management.
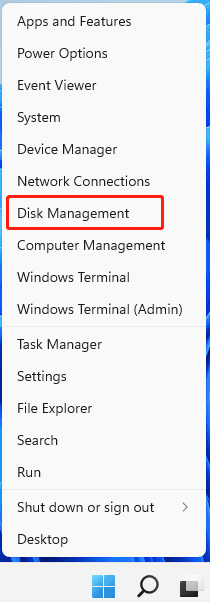
Step 1: On the user menu, right-click the Windows symbol to reveal a list of options.
Step 2: Here click on the option of Disk Management from the dropdown menu.
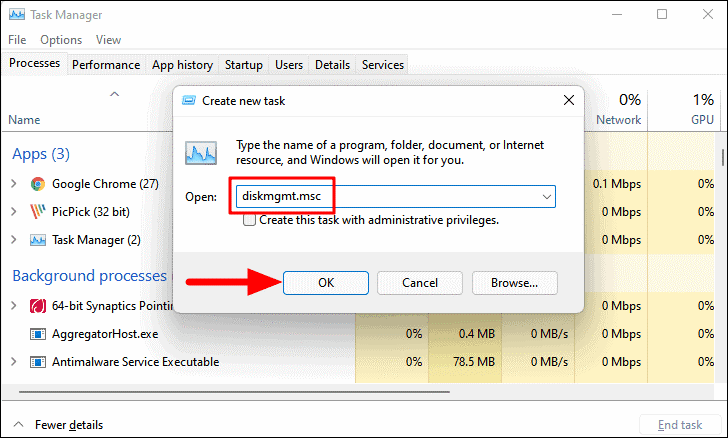
Open Disk Management via Taskbar
Another relevant and simple way to access the Disk Management Window.
Step 1: Select Task Manager from the menu by right-clicking the Windows icon.
Step 2: Select “Run new task” from the File tab.
Step 3: The “Create new task” dialogue box will appear. Click the OK button after typing diskmgmt.msc.
To summarize, this article covers everything you need to know about Windows 11 Disk Management, including its basics, primary features, and opening ways.
RELATED ARTICLES:


