- Enabling Dark Mode on Mac improves effectiveness in low light, easing eye strain for night owls.
- Dark Mode can be activated through System Preferences on Mac, offering a black background with white writing.
- Other methods like Siri or Control Center can also be used to switch to Dark Mode on Mac, offering flexibility in customization.
You can work more effectively at night and in low light with the help of the dark mode on your Apple Mac or MacBook. Once you enable dark mode, supported programs and websites instantaneously switch to a black background with white writing. Dark Mode greatly eases eye strain, especially if you’re a night owl. Dark Mode uses a dark color scheme throughout the entire operating system, including the apps on your device.
How to Make Mac Dark Mode | Turn on Dark Mode on Mac
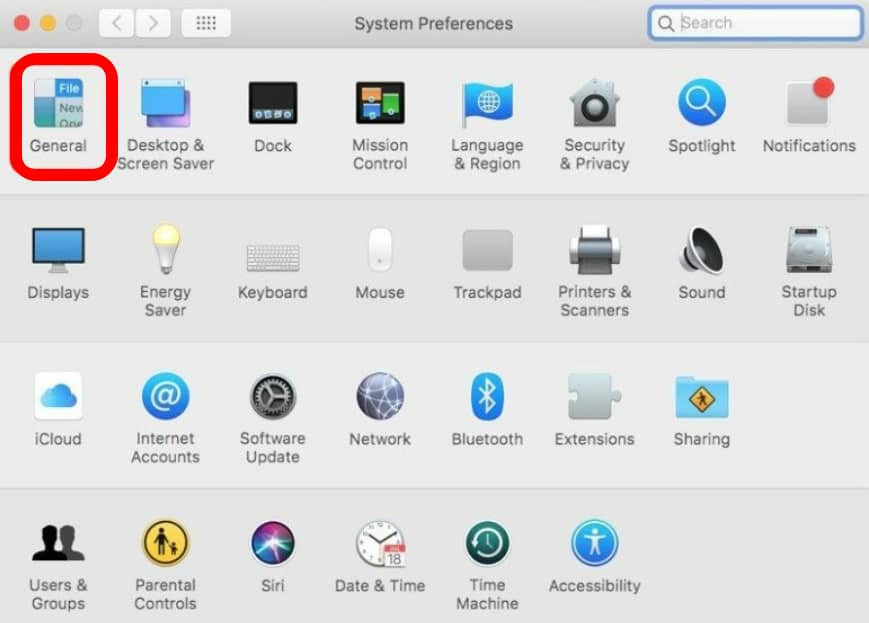
Enabling Dark Mode on a Mac is quite easy and simple. There are several options for how to do that. The most straightforward method, though, is through System Preferences. Here, we’ve explained. Take the following actions:
- Select “System Preferences” from the menu bar after turning on your Mac.
- Now select “General“
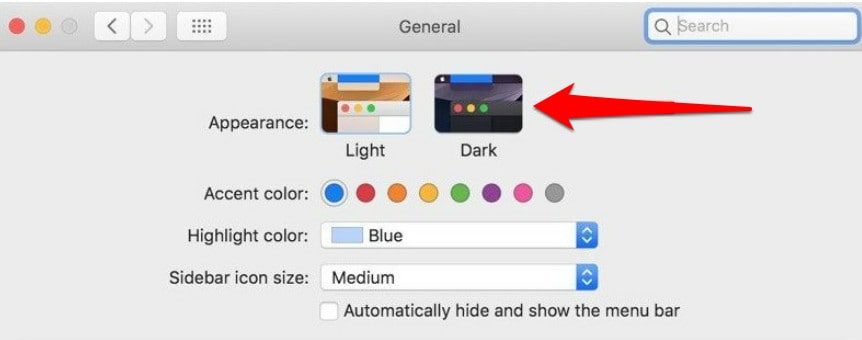
- Choose the “Dark” option under the “Appearance” tab.
- Lastly, shut the window.
All you have to do to enable dark mode on Mac is that. Everything on your Mac changes to a dark theme when you activate the dark mode, including the dock, menu bar, and all applications, including those from third parties.
Enable Dark Mode Using Siri
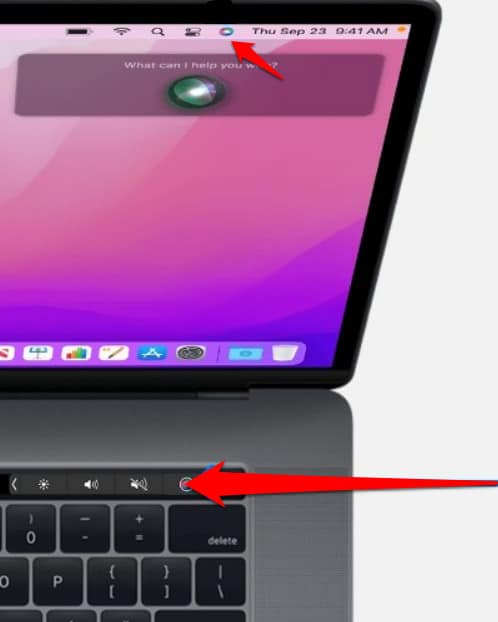
On your Mac or MacBook, Activate Night Mode. Using a different approach, you can also enable and use Dark Mode on your Mac or MacBook. Ask Siri for assistance if you need it. Follow these steps:
- Start your Mac, then select the Siri symbol from the Apple menu bar at the top.
- Say to Siri, “Turn on Dark Mode.”
enable dark mode
Now your device will immediately display a darker UI after Siri activates the dark mode. This is a really simple method for making your MacBook darker. But keep in mind that only macOS Sierra and later support it.
Enable Dark Mode From The Control Center
At first, Apple’s Dark Mode for the Mac was released with macOS Mojave. Users can enable Dark Mode on Mac by using the slide-out Notifications panel in Catalina. The release of macOS Big Sur, that was moved to the new Control Center.
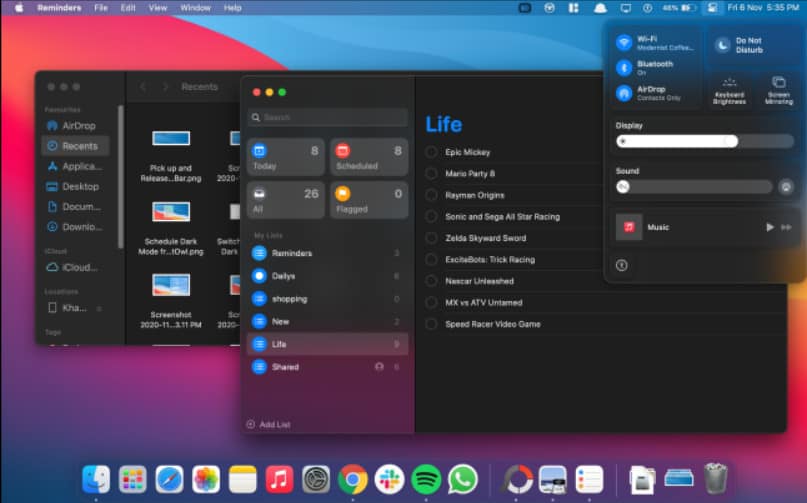
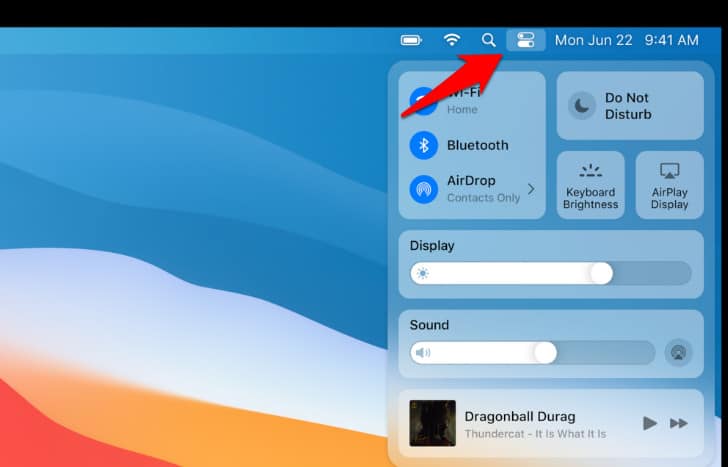
- In the top-right screen corner, select the “Control Center” icon.
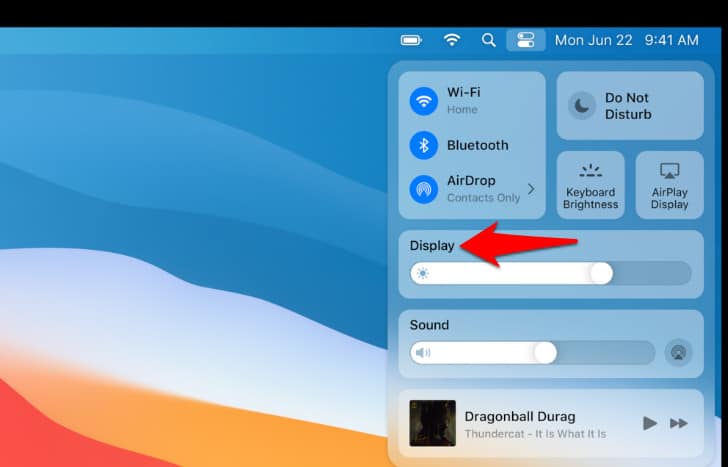
- Select “Display” from the Control Center drop-down menu.
enable dark mode - It will now enlarge the Display module.
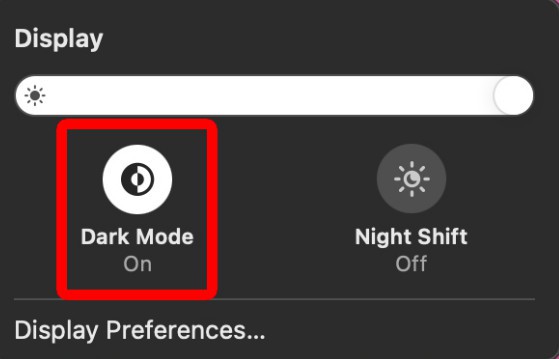
- It will now enlarge the Display module. Toggle the feature on or off by selecting the “Dark Mode” option.
Create a Keyboard Shortcut to Enable Dark Mode on Mac
On a Mac, you can also create a keyboard shortcut to enable Dark Mode. In this manner, you can quickly turn off your Mac by pressing a few buttons. Take these actions:
- Select “System Preferences” on the Apple menu bar.
- Now click on “Keyboard.“
- Next, select “Shortcuts.“
- Then click twice on the “Dark Mode shortcut” in “Services.”
- Now add a shortcut command to switch between light and dark modes. Make sure not to assign an existing key combination to a different function.
- A permanent display panel icon will appear in your Mac’s menu bar. To open a larger window, select “Display.” You can instantly enable or disable the visual feature from here by choosing the “Dark Mode” option.
enable dark mode - The “Display” symbol can be moved around or removed from the menu bar. Drag and drop the Display icon to the desired location while holding down the “Command” key.
- Drag the “Display” icon to the “Desktop” and then release the mouse button to remove it.
enable dark mode
How to Make Your Mac Even Darker
In the top-right corner of your screen, click Control Center, then choose Display to make your Mac darker. In order to activate both of them, click on Dark Mode and Night Shift. Night Shift makes your screen appear less blue and more yellow, while Dark Mode flips the colours of some programs.

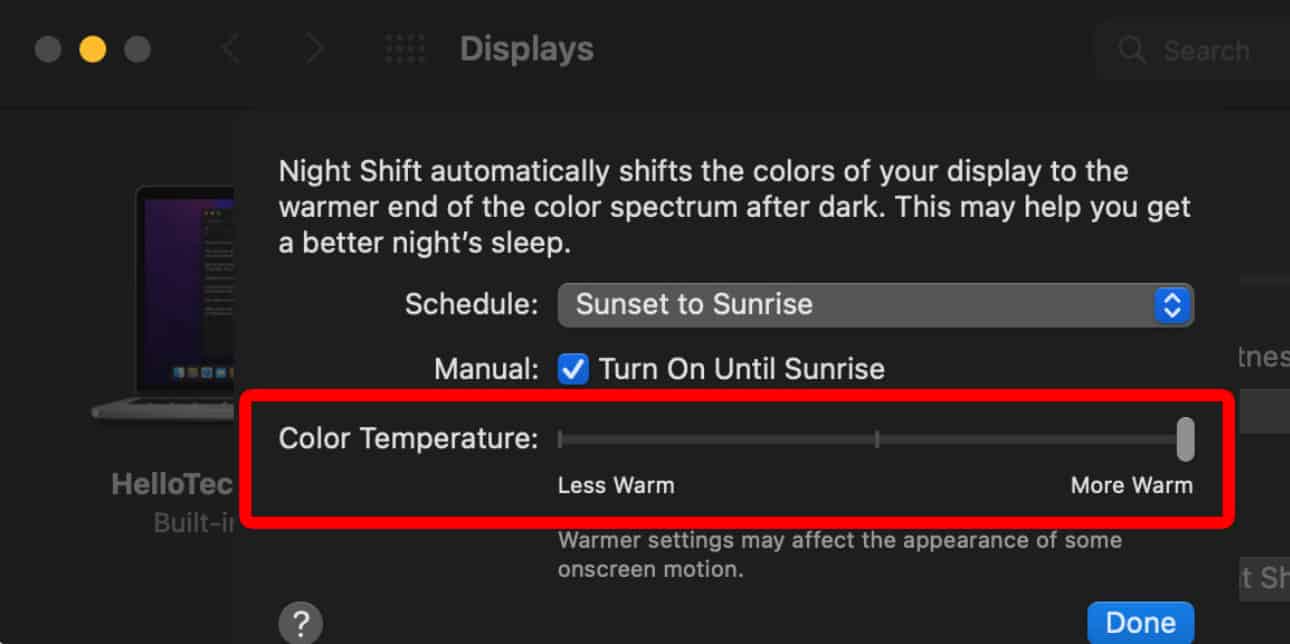
At the bottom of the pop-up box, you can also select Display Preferences. Next, select Night Shift next, and last, move the Color Temperature slider all the way to More Warm. This will lessen the quantity of blue light coming from your screen even more, which will help prevent eye fatigue, especially if you read text at night.
You can schedule when Night Shift turn on and off.
How to Schedule Dark Mode on Mac

macOS can also enable or disable dark mode automatically based on the time of the day. Go to System Preferences > General, and from the “Appearance” section, choose the “Auto” option.
When this option is turned on, macOS will automatically activate dark mode at night. Additionally, macOS will return to light mode when you turn on your Mac in the morning.
How to Enable Dark Mode on Mac
There may be times when using your Mac’s Dark Mode is unnecessary. If you switch it on, you can quickly turn it off. Simply select “Light” under “Appearance” in the “General” section of System Preferences after clicking on “General.”
All done. Your Mac’s interface will then return to its default (standard) state. However, using the techniques described here, you can always set or disable the dark mode.
The methods we’ve covered here will assist you in enabling dark mode on your Mac or MacBook. Now, focusing will be easier and less stressful for your eyes. We hope this article helped you to find straightforward steps to turn on the dark mode.
RELATED GUIDES:


