- Compressing files saves space and makes sharing easier, requiring extraction to access contents using Windows tools.
- Error message "Windows Cannot Complete The Extraction" may occur during extraction.
- Troubleshooting steps include restarting the PC, renaming the file, moving it to a different location, running an SFC scan, and using third-party extraction tools to fix the issue.
People often compress large files so that they can save some space and easily share it with someone. Compressed files are easy to store as they require less space. However, to access the contents of the compressed file, you will have to extract it. You can use the Windows in-built extraction feature to extract the file.
Sometimes, you might face issues while extracting the file with the in-built extraction tool in Windows. When this happens, you will get a ‘Windows Cannot Complete The Extraction‘ error message on your screen.

Fix Windows Cannot Complete The Extraction Error
If you are facing the same issue, this article will guide you in troubleshooting it; let’s discuss how.
Restart Your PC
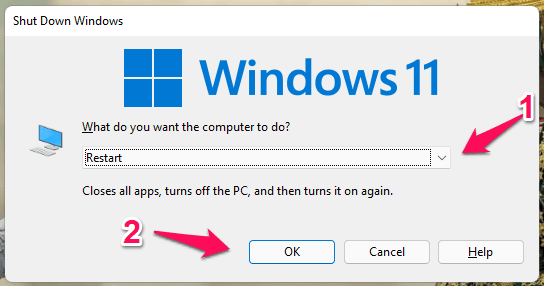
As we all know, bugs are common in Windows, and you might face this error due to random bugs and technical glitches. Generally, such issues can be solved by simply restarting your PC. Restart your PC, and then try extracting the file again. This should extract the file without any issue, but if you still face the error, try the next step in this article.
Rename The File
Another troubleshooting step that might solve this issue is renaming the file and then extracting it again. To do so, follow the steps given below-
- Right-click on the file you are trying to extract, and then from the context menu that opens up, click on Rename icon.

- Now, rename the file to some other name and save it.
- After renaming the file, extract it and see if you still face the issue.
Move The File To Another Location
If renaming the file doesn’t work, you can try moving it to another location and then extract it. This issue might occur when the location where the file is saved is protected. To continue with it, follow the steps given below-
- Click on the file you are trying to extract.
- Press Ctrl + X key combo to cut the file.
- Now, head to another location, and press Ctrl + V key combo to paste the file.
- After moving the file, try extracting it.
Download The File Again
Many times the file you have downloaded might be corrupted. This happens when the network gets interrupted during the download and remains incomplete. You can download the file again and then extract it. If you get the file from your friend, you can ask them to share it with you again.
Run SFC Scan
Corrupted system files can also cause this issue. SFC scan (System File Checker) is an in-built tool to scan for corrupted files and fix them. You can run the SFC scan to fix corrupted system files that might be causing the ‘Windows Cannot Complete The Extraction’ error. To do so, follow the steps given below-
- Firstly, run the Command Prompt as administrator on your PC.
- In the Command Prompt window, type the following command and hit Enter to execute it-
- SFC /scannow

- You will see SFC scan has started now.
- Once the process reaches 100%, close the Command Prompt and restart your PC.
- Now, try extracting the file again, and you should no longer face the issue with it.
Clean Boot Your PC
You might also face this issue due to third-party apps and services on your PC. You can boot your PC and then try extracting the file again. When you boot your PC in safe mode, it won’t start with third-party apps and services, just the essential Windows services. To do so, follow the steps given below-
- Press the Windows key on your keyboard, search for msconfig, and click on the first option. This will open System Configuration on your PC.

- Head to the Services tab in the System Configurations.
- Here, check the checkbox for Hide all Microsoft Services, and then click on Disable All button.

- Head to the Startup tab, and then click on Open Task Manager. This will open the Task Manager on your PC.

- Under the Startup tab, you will see all the programs that start when you boot your PC.
- Select a program, and then click on Disable button to disable the program at the startup.

- Do this for all the programs, and then close the Task Manager and the System Configuration window.
- Now, restart your PC, and it will start without any third-party services and programs.
- Try extracting the file now, and you should be able to do it without facing any issues.
Use Third-Party Application
To extract the file, you can use third-party free Zip software like PeaZip and 7-Zip. To do so, follow the steps given below-
- Download PeaZip or 7-Zip on your system. You can download any other extracting software as well.
- Once the application has been downloaded, install it on your PC.
- Now, right-click on the file you want to extract.
- You will get the option to extract the file using the software you installed; click on it and follow the on-screen instructions to extract the file.
You can either launch the app directly on your PC and extract the file here. This should help extract the file without facing the ‘Windows Cannot Complete The Extraction’ error.
Final Words
Your PC might prompt you with the ‘Windows Cannot Complete The Extraction‘ error. When this error is encountered, the file will not get extracted, and the process will stop. You can follow the above troubleshooting steps to fix this issue and extract the file.
RELATED GUIDES:
- How to Change Default Webcam to External Webcam in Windows 11/10
- Top 7 Best Home Server OS in 2024 For Windows/Linux
- How To Fix This Copy of Windows is not Genuine
- Fix System Error 67 Has Occurred in Windows 11
- Fix OR-RWE-03 & OR-RWE-02 Google Play Store Payment Issue
- How To Enable gpedit.msc On Windows 11


")
