- Windows 11 Search issues: Users may experience problems with Windows 11 Search, such as the search bar not responding or files not appearing in results.
- Rebuild search index: To fix indexing issues, users can rebuild the search index by accessing Control Panel, navigating to Indexing Options, and selecting the Rebuild option.
- Troubleshooting steps: Other fixes include running the Search and Indexing troubleshooter, clearing the TxR folder, ensuring the Windows Search Service is enabled, and resorting to system restore if necessary.
There are various signs that you may encounter when Windows 11 Search isn’t working. It’s possible that you can’t type in the Windows 11 search bar, or that your files or apps aren’t appearing in the results. It’s even possible that the search button won’t respond at all, in which case you won’t be able to conduct a search at all. The search menu in Windows 11 is identical to that in Windows 10. This feature is extremely useful because it allows you to search your files, applications, and the internet. However, Users have reported problems with Windows 11 indexing, claiming that it is not working properly.
Fix Windows 11 Indexing Not Running or Working
If indexing in Windows 11 isn’t working on your PC, the troubleshooting methods outlined in this article will help you in resolving the problem.
Rebuild Search Index
If the problem persists, you should try rebuilding the search index. The steps to rebuild the search index on your Windows 11 PC are listed below.
- Press the Windows + R key combo, and in the Run Dialog Box, search for Control Panel. Hit Enter to open the Control Panel on your PC.
- In the Control Panel, search for Indexing Options and open it.
- In the Indexing Options window, click on Advanced.
- Next, click on the Rebuild button to rebuild the search index. Once done, click on OK and you are good to go.
Run Search And Indexing Troubleshooter
If the indexing in Windows 11 isn’t working, try running the search and indexing troubleshooter on your computer. Follow the steps below to run the Search and Indexing troubleshooter:
- Open the Settings app on your PC by pressing the Windows + I key combo.
- In the System section of the Settings app, click on the Troubleshoot option.
- Now on the next window, click on the Other troubleshooter’s option.
- Search for Search and Indexing troubleshooter, and click on the Run button next to it.
- When you see a screen asking for what problem you are experiencing, select My problem isn’t listed above and then click on Next.
- Now, on the next screen describe your issue, and then click on Next to continue. Follow the on-screen instructions to run the troubleshooter, and fix the issue you are facing.
Clear TxR Folder
Another thing that you can try doing is clearing the TxR folder. Given below are the steps to clear the TxR folder on your Windows 11 PC-
- Press the Windows + E key combo to open the File Explorer on your PC.
- In the File Explorer, click on the Three Ellipses at the top, and then from the menu that opens up, click on the Options.
- In the Folder Options window that opens up, head to the View tab.
- Here, under the Advanced Settings section, select Show hidden files, folders, and drives. Click on Apply and then on OK.
- Now, head to the following address in the File Explorer-
- C:\windows\system32\config\TxR
- Select all the files in the TxR with BLF and REGTRANS-MS extensions, and then delete them.
Ensure Windows Search Service Is Enabled
To begin, make sure your computer’s Windows Search Service is turned on. If you don’t enable this service, you might have problems with Windows 11 search indexing. Follow the steps below to enable the service:
- Press the Windows + R to open the Run Dialog Box. In the Run Dialog Box, type services.msc and hit Enter. This will open the Services app window on your PC.
- In the Services app window, search for Windows Search Service and double-click on it to open its properties.
- Select Startup Type as Automatic, and then click on the Start button.
- Now, click on Apply and then on OK.
- Do the same for Background Task Infrastructure Service as well as for the Remote Procedure Call services.
- After doing so, restart your PC, and you should no longer face the issue.
However, if these services were already enabled, then you should move to the next troubleshooting step in this article.
Reset Your Windows
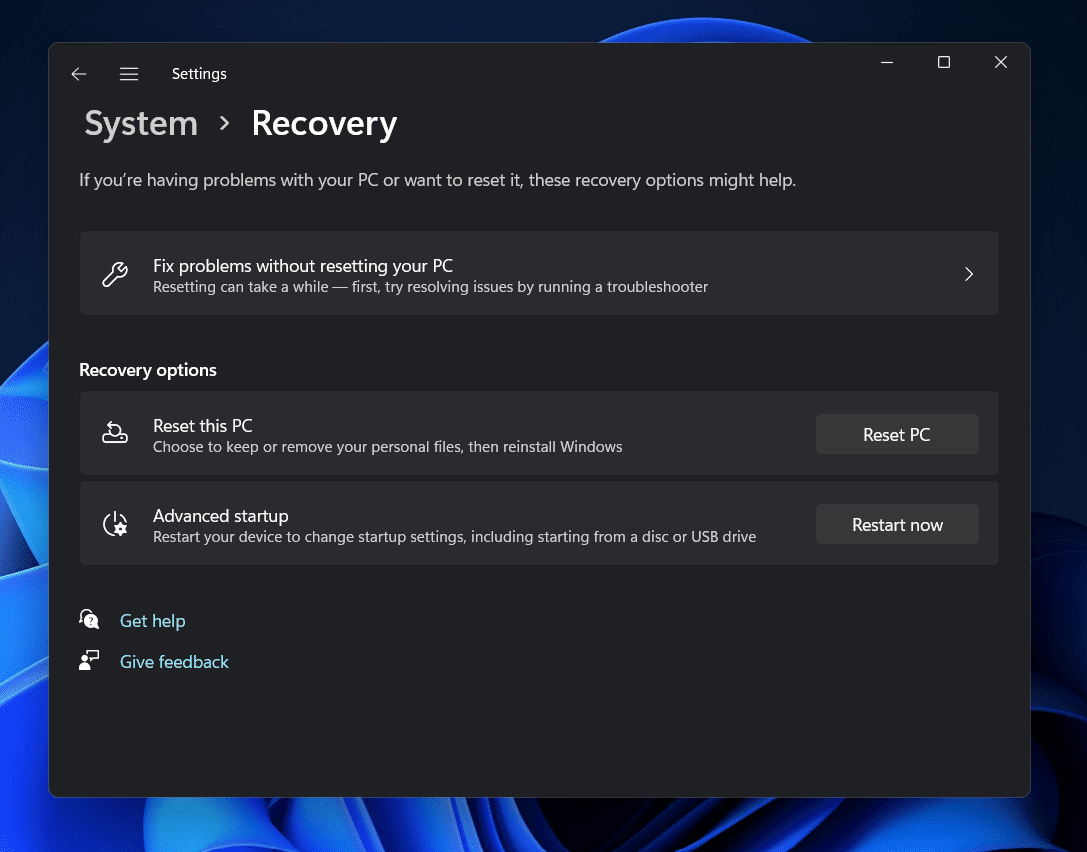
If none of this helps you, then the last option will be to reset your Windows. To reset your Windows, follow the steps given below-
- Press the Windows + I key to open the Settings app.
- In the Settings app, head to the Recovery option on the System tab.
- Here, click on the Reset PC button, and then follow the on-screen instructions to reset your PC.
Restore Your System
The next thing that you can try doing is restoring the system. Do note that this method will only work if you have created a restore point earlier. To restore your system, follow the steps given below-
- Press the Windows + R key combo to open the Run Dialog box. In the Run Dialog box, search for rstrui and hit Enter.
- Now in the System Restore window, select Choose a different restore point.
- Now, select the recent restore point. If you want to see what programs will be affected, then click on Scan for affected programs, and click on Next.
- Now follow the on-screen instructions to restore your system.
Editor’s Recommendations:


