The win32kfull.sys error causes the blue screen. It mostly happens when you upgrade to the latest build of Windows 11 from Windows 10. In that case, you may be able to resolve the issue simply by uninstalling the update that generated the problem. Your computer can also be corrupted as a result of system-level corruption if you haven’t recently installed any security patch.
Fix win32kfull BSOD Error Windows 11
In any case, we’ve found solutions to the problem in this article on How To fix win32kfull.sys Error in Windows 10.
How To fix win32kfull.sys Error in Windows 10
Usually, this error is caused by another problem on the computer. Therefore, if you find either of these, you may also find win32kfull.sys.
Make sure all your Drivers are Updated
It is likely that the driver software is responsible for the win32kfull.sys error. Update your device drivers to resolve this issue. Two methods are available for updating your device drivers.
Manual driver update: Visit the manufacturer’s website for your device and update the drivers manually. Look for the latest, correct driver. Ensure that only compatible drivers are chosen for your variant of Windows. This will require you to check each update one by one.
Automatic driver update: To update drivers automatically, you can use any driver software if you don’t have time to do so manually. Using this software, your system will automatically identify the correct drivers available for your system. They’ll be downloaded and installed correctly:
Uninstall Recent Applications or Updates
If the win32kfull.sys error happens after a recent Windows 11 update, the update might have been corrupted. The only way to fix this is to uninstall the latest update.
You should also undo any actions you have taken if you have installed any new applications. You can check if your software is corrupted by booting Windows 11 in Safe Mode.
If your blue screen error does not appear while you are in a Clean boot state, this indicates that one of your apps has gone corrupt. Because all third-party apps do not start in the Clean boot state, this happens. We recommend attempting the next set of solutions if the error persists here as well
Install the latest Windows Update
Every now and then, Microsoft attempts to repair and improve the Windows system file. Windows updates bring these improvements. You can resolve the nagging win32kfull.sys error by installing the latest Windows update. Here are the steps:
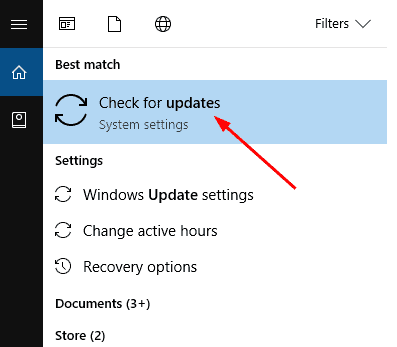
1. From the Start menu, type update. From the results, click Check for updates.
2. Click on Check for updates.
3. Updates should now be checked by Windows. They will be installed if they are found.
4. Restart Windows 10. Make sure the error win32kfull.sys is no longer present.
Run the Blue Screen Troubleshooter
By far, this is the most effective tool for finding and fixing reasons for blue screen errors in Windows 11. You can use the tool as follows:
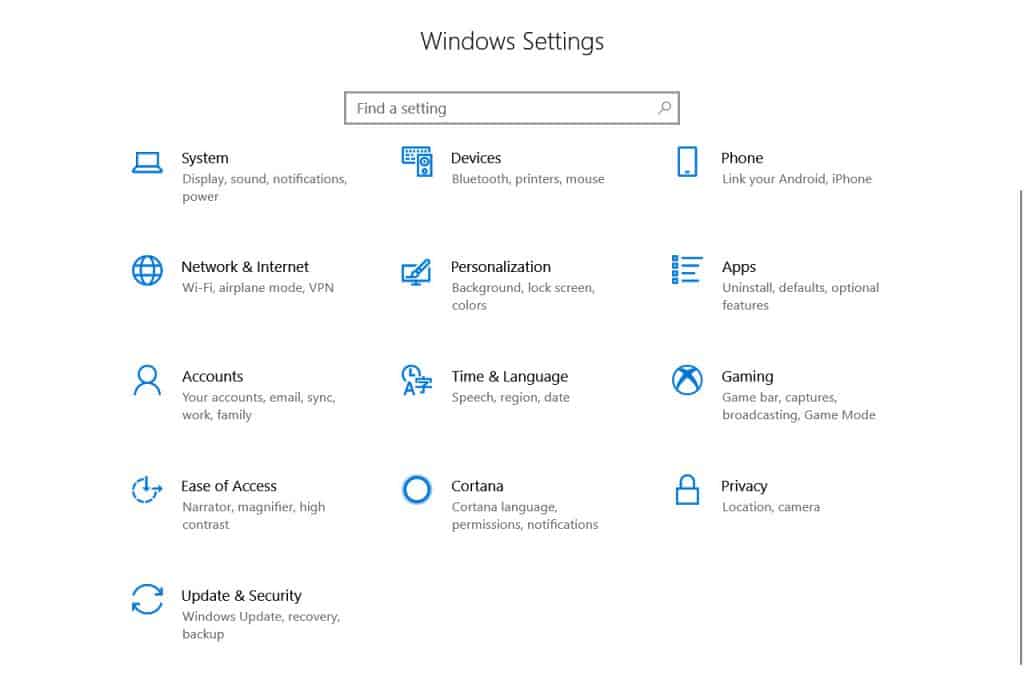
1. Open the Settings app by pressing Win + I.
2. Click Update & Security. Select Troubleshoot.
3. On the right side, turn around. Select “Additional troubleshooters“.
4. Click the Blue Screen section to expand it. Then click Run the troubleshooter.
Finding and resolving the cause of the issue may take a few minutes using this tool. Please be patient. Restart your PC after it has been resolved.
Run the System File Checker in Windows 11
The system file checker in Windows is an effective tool for detecting and repairing corruption in system files. This also applies to win32kfull.sys.
You can run System File Checker by following these steps:
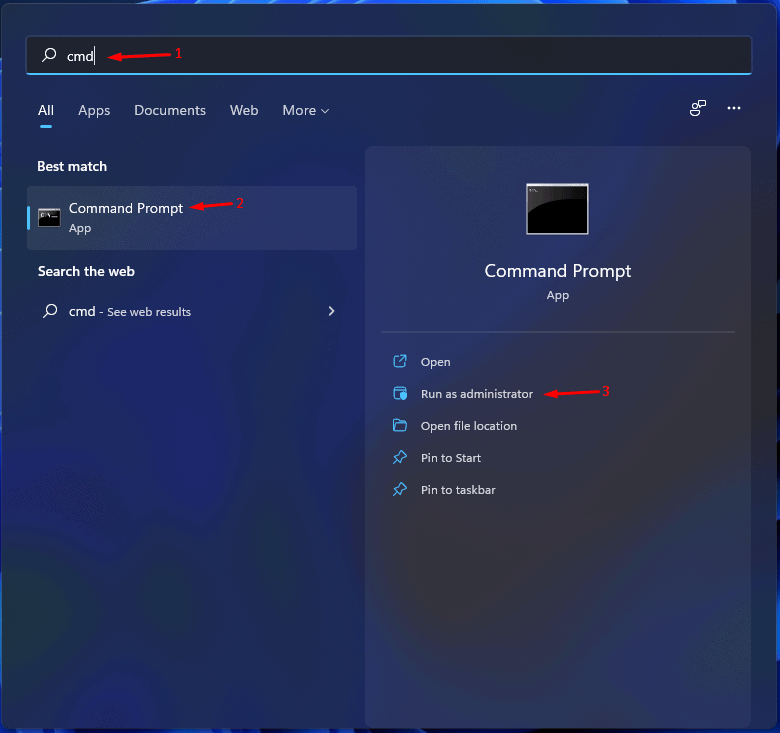
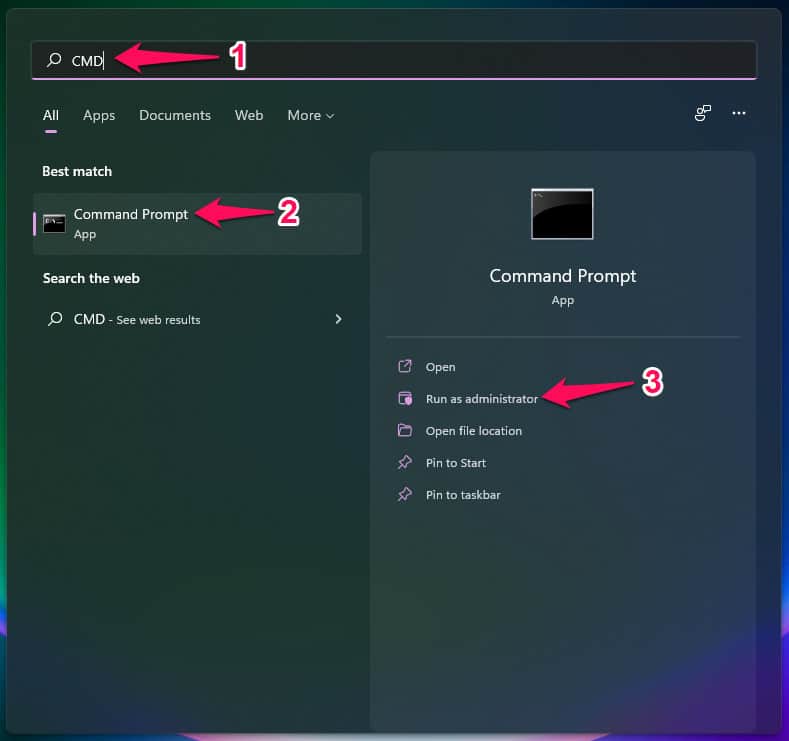
1. From the Start menu, type cmd. Next, hold Ctrl + shift while using your keyboard. Now click on Command Prompt in the result.
2. If User Account Control prompts you, click Yes.
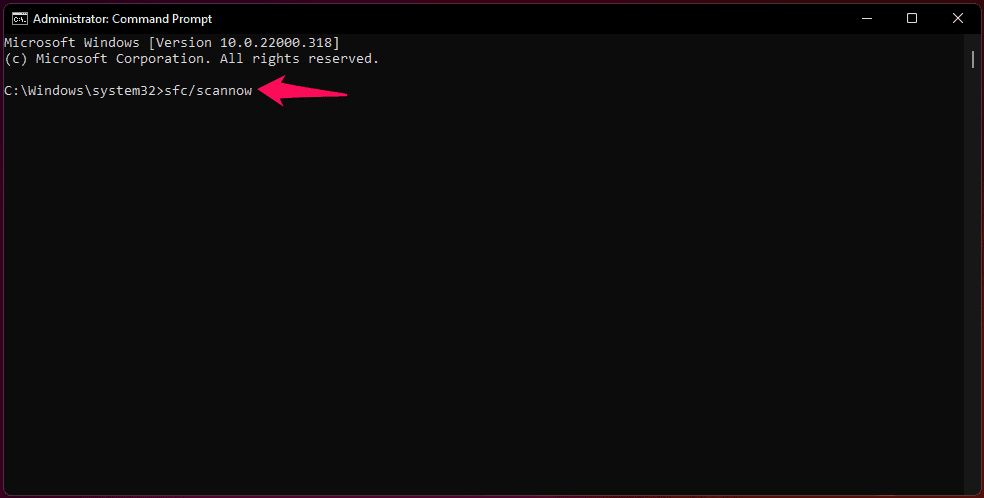
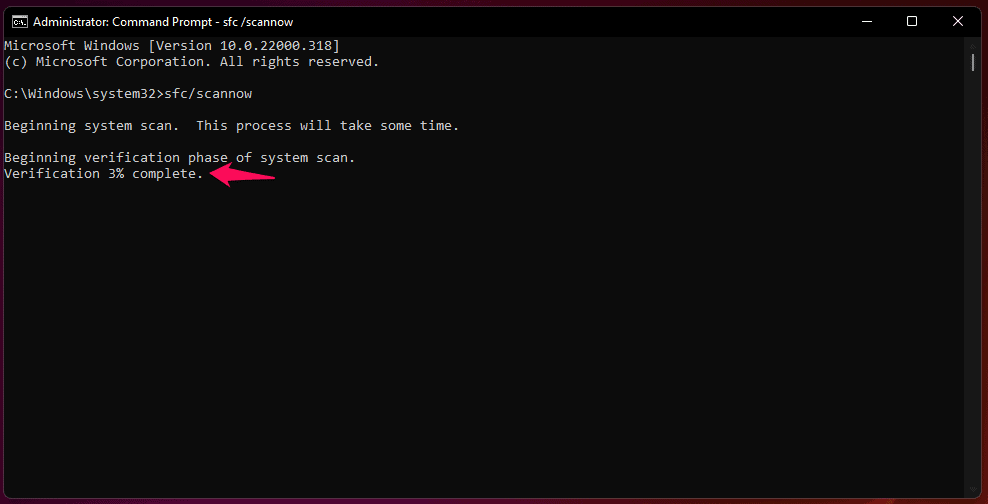
3. Type sfc /scannow in the open black window. Click OK.
4. Your system files will then be scanned for and repaired automatically by Windows. The process usually takes around 15 minutes. If the Verification is not 100% complete, wait for it to finish.
5. After the installation is complete, restart your computer. Verify that the win32kfull.sys error has disappeared.
Check the RAM on your Computer
Blue screen errors, such as win32kfull.sys, can also be caused by compromised RAM. Therefore, it would be best to check whether your device has any memory problems. You can check this by performing the following steps:
1. On the taskbar, click the search icon. Enter “memory“.
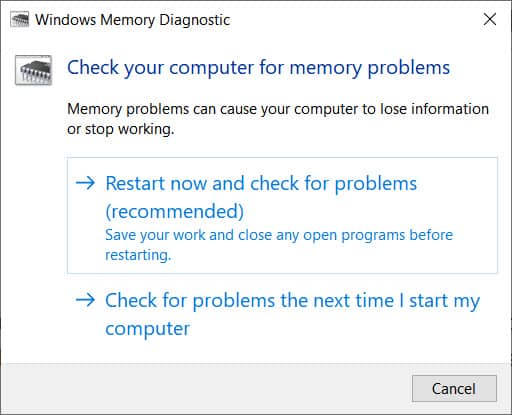
2. Click on the “Windows Memory Diagnostic”
3. Select the first option.
4. You’ll be able to see the memory failures on your computer by running a memory test. A corrupt memory can be rectified by replacing it with a new one if the test results indicate it.
Install your newly Installed Program again
It’s very likely that there is an error in the program if you receive the win32kfull.sys blue screen error after installing a new program on Windows. Here’s how to uninstall and reinstall the program you just installed.
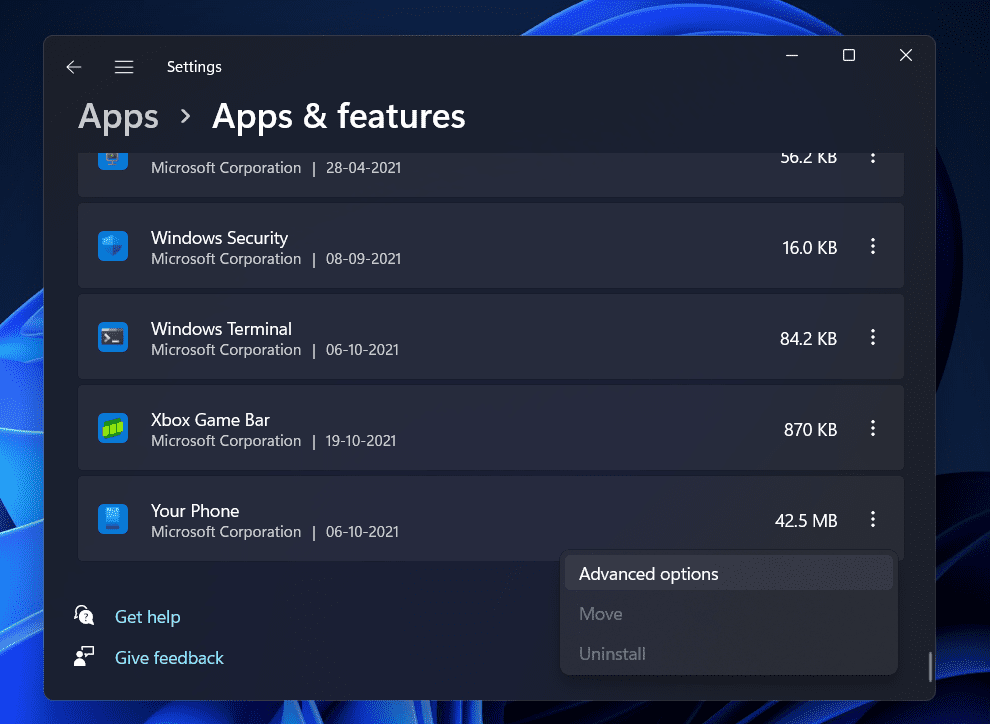
1. Search for features from the Start menu. Click on Apps & Features.
2. Click on the newly installed program. Select Uninstall.
3. Complete the uninstall by following the on-screen instructions.
From its official website or the Microsoft store, you can get the installation file. Be careful when downloading programs from unreliable sources. Download the program and reinstall it on your computer.
Start your computer again. Make sure there is no longer an error with win32kfull.sys.
CHKDSK can be used to Fix win32kfull.sys
Windows 11 is prone to a variety of problems caused by hardware. Thus, you should check if the existing HDD has any problems. Here are the steps you need to follow:
1. To open the Run dialog, press Win + R.
2. Enter “cmd” in the text field. Hold down the ctrl key and Shift key simultaneously while pressing Enter.
3. If you do this, an Admin-level Command Prompt will be launched.
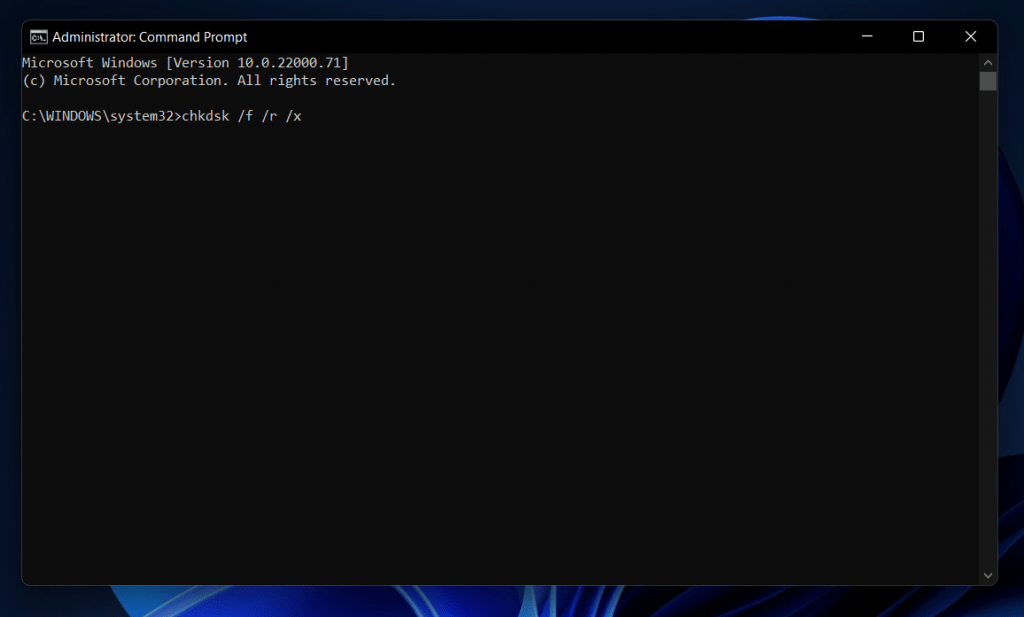
4. Copy and paste the code below into the elevated console. Hit Enter.
chkdsk C: /f /r /x
5. After that, scanning will not begin immediately. Instead, a message will appear.
6. Nevertheless, as this suggests scheduling the hardware test for the next time the system restarts, select “Y“. Hit Enter once more.
7. Windows 10 should be restarted so that scanning can begin.
This tool will provide you with a report once it has finished checking your computer for corruption, and you can determine whether you need to replace your HDD or not.
RELATED GUIDES:
- Fix Mail App Error Code 0x8019019a in Windows 11
- Fix Halo Infinite Not Working or Crashing On Windows 11
- How To Fix Windows 11 Screenshot Not Working
- How To Fix WHEA_UNCORRECTABLE_ERROR In Windows 11
This was all about How To fix win32kfull.sys Error in Windows 11/10. You can easily fix this error by following any of the steps mentioned above.


