- When you face boot issues, Windows tries to run Automatic Startup Repair, which may fail to resolve the problem. In such cases, you can follow several troubleshooting steps to fix the error.
- You can start by repairing the Master Boot Record (MBR) and Boot Configuration Data (BCD), running System File Checker (SFC) and DISM scans, checking the disk for errors, and disabling Early Launch Anti-Malware Protection.
- If these steps don't work, you can try restoring the registry, disabling Automatic Startup Repair, performing a System Restore, uninstalling recent updates, or finally resetting your PC, which deletes all apps, settings, and files.
If your PC runs into some boot issue then Windows will start the Automatic Startup Repair. This scan checks your PC for faulty areas that can cause problems with your PC’s boot process and fix them. This can help fix boot issues due to corrupted system files, registry file misconfiguration, or even issues due to boot configuration data.
Though this can help fix most of the boot issues, some errors are still beyond its capability. You will often see the error message ‘Automatic startup repair couldn’t repair your PC’ error when the startup repair fails to fix the boot issue.
If you are unable to boot into your PC then you might get stuck on this screen forever, even though you try restarting your PC multiple times. So what to do to fix it? Here’s a troubleshooting guide that you can follow to fix the ‘Automatic startup repair couldn’t repair your PC’ error.
Fix Automatic Startup Repair Couldn’t Repair Your PC
Before we go on to discuss the actual troubleshooting steps, try restarting your PC. Sometimes a simple reboot can do the job and save you all the trouble that you might have to go through. In case, that doesn’t work, then continue with the steps we have mentioned below.
1. Repair MBR and BCD
If you are facing boot issues, then probably it’s due to Boot Configuration Data and Master Boot Record, i.e., they are corrupted or misconfigured. You can rebuild them and that should fix this error.
- On the Automatic Repair screen, click on Advanced Options.
- After this click on Troubleshoot and then Advanced Options.
- Launch the terminal by selecting Command Prompt.
- Now, execute the following commands one after another:
- bootrec.exe /rebuildbcd
- bootrec.exe /fixmbr
- bootrec.exe /fixboot
- Once done, restart your PC and check if the issue still persists.
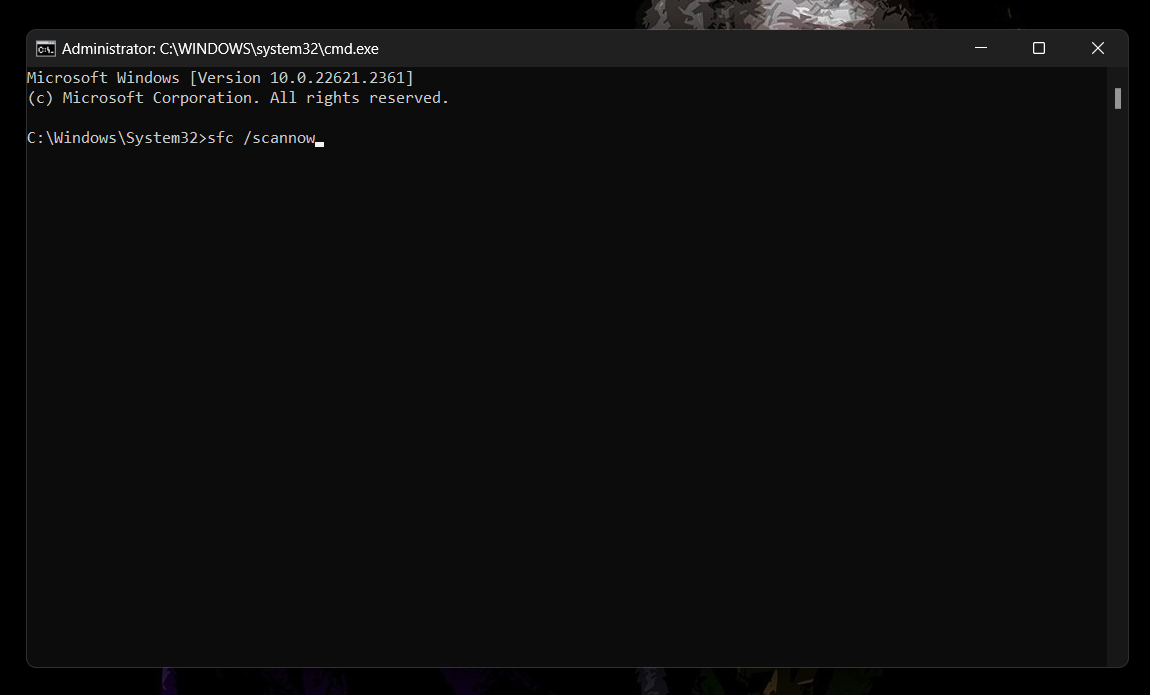
2. Run System File Checker
SFC is a command-line tool to scan and fix corrupted system files. SFC scan should most probably fix this issue with the system if caused due to corrupted files.
- Click on Advanced Options on the error screen.
- Click on Troubleshoot
- Now, click on Advanced Options again, and then select Command Prompt.
- In the Command Prompt window, execute the following command to run the SFC scan:
- sfc /scannow

- sfc /scannow
- Wait for the process to go from 0 to 100, and then reboot your PC.
3. Run DISM Scan
DISM scan is the next step to follow if SFC fails to do its job. This repairs the system image and fixes issues caused due to it. You can run the DISM scan, by following the steps given below:
- First, click on Advanced Options.
- After this, head over to Troubleshoot> Advanced Options> Command Prompt.
- Now, execute the following commands one-by-one:
- DISM /Online /Cleanup-Image /CheckHealth
- DISM /Online /Cleanup-Image /ScanHealth
- DISM /Online /Cleanup-Image /RestoreHealth

- After executing the last command, close the Command Prompt and restart your system.
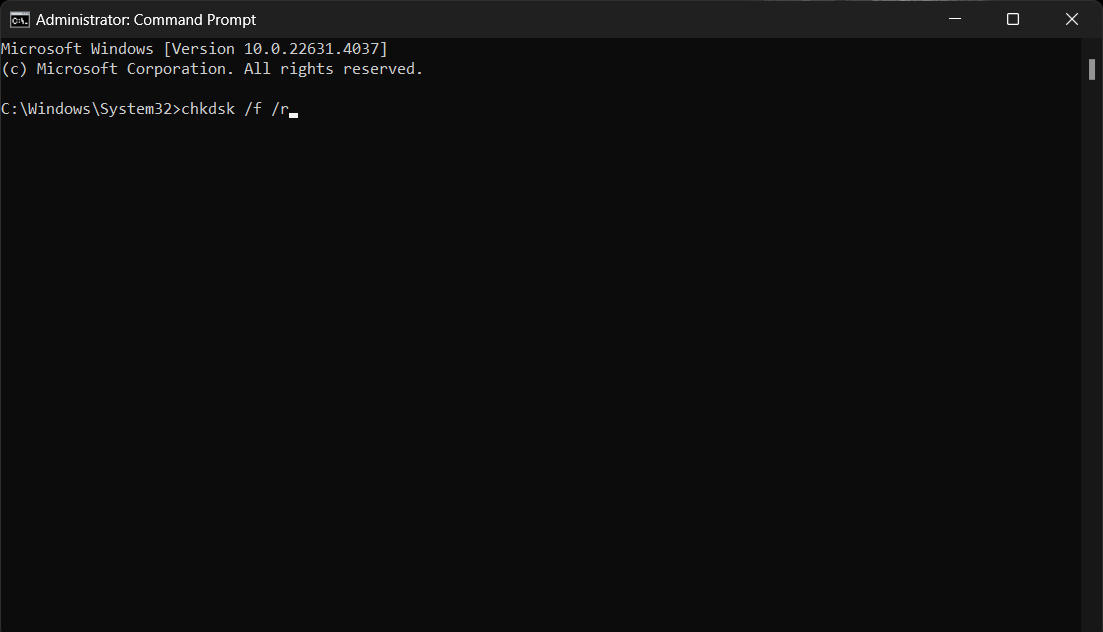
4. Check Disk for Errors
Issues with the hard drive can also be a reason behind the ‘Automatic startup repair couldn’t repair your PC’ error. You can run the CHKDSK command to fix this issue.
- Launch the Command Prompt like we did for the previous three troubleshooting steps.
- Execute the command given below:
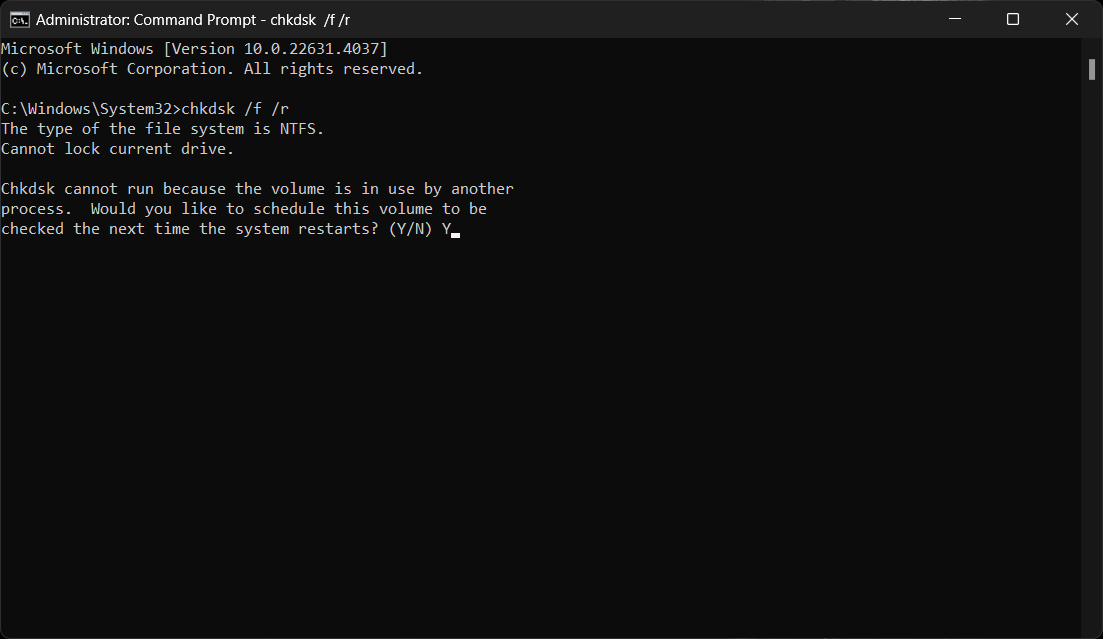
- chkdsk /f /r
- You will be asked to confirm whether you want to schedule the scan when the system restarts; press Y on your keyboard to confirm.

- Now, restart your PC to run the disk scan.
5. Disable Early Launch Anti-Malware Protection
Early launch anti-malware protection is enabled by default on all Windows systems. However, this can sometimes cause issues with the automatic startup repair and you might get stuck on the automatic repair screen. You can try disabling the early launch anti-malware protection and that should fix this error.
- Click on the Advanced Options.
- Now, click on Troubleshoot and then on Advanced Options.
- Finally, click on Startup Settings.
- On the Startup Settings screen, select Restart
- You should see Disable Early Launch Anti-Malware Protection on number 8. Press 8 or F8 on your keyboard.
6. Restore Registry
Misconfigured or missing registry files are also one of the reasons behind this issue. You can restore the Registry through the steps given below and that should fix this issue:
- Launch the Command Prompt as specified in the previous methods.
- Copy and execute the command given below-
- copy c:\windows\system32\config\RegBack\* c:\windows\system32\config
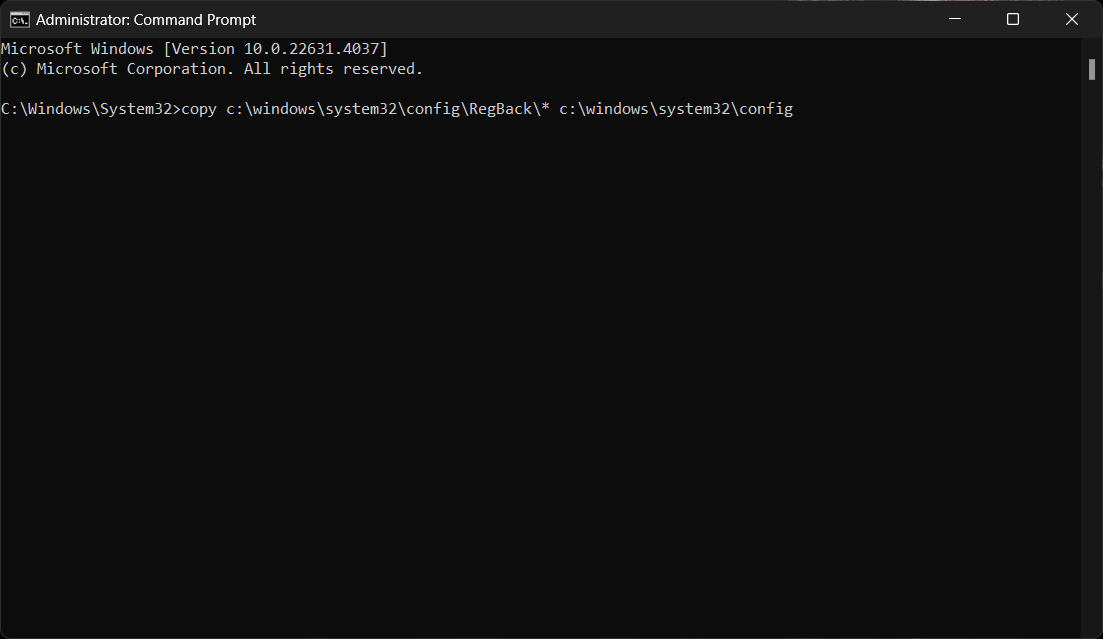
- Type All and press Enter to overwrite all the files.
- After this, restart your PC.
7. Disable Automatic Startup Repair
Startup Repair will automatically start if Windows detects some issue with your system. Even though it can be a false warning, you might not be able to get past it. In that case, you can disable automatic startup repair and Windows will boot normally.
- Click Advanced Options.
- Now, click Troubleshoot> Advanced Options and then select Command Prompt.
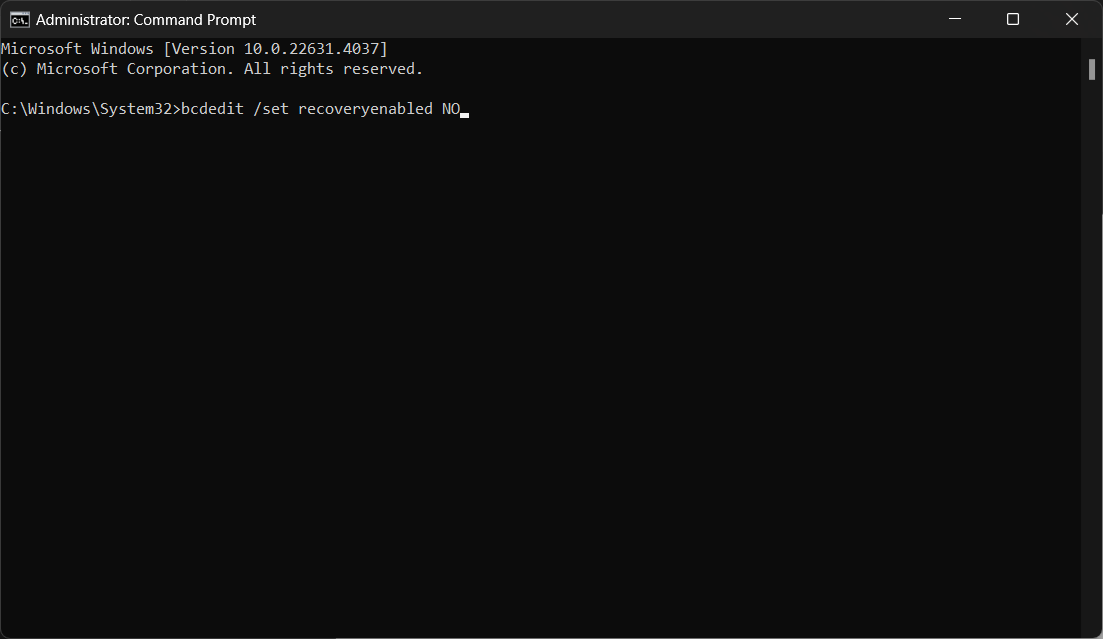
- Execute the following command to disable automatic startup repair:
- bcdedit /set recoveryenabled NO
- Restart your PC and it should boot normally now.
If that doesn’t help, then you can re-enable the startup repair by running the command- bcdedit /set recoveryenabled YES
8. Perform System Restore
The next thing to do is perform the system restore. This will revert your system to the previous working start, but this method only works if you have created a restore point earlier. Here’s how to do it:
- On the startup repair screen, click Advanced Options.
- Select Troubleshoot and then select Advanced Options.
- Click on System Restore and then continue with the on-screen instructions.
9. Uninstall Recent Update
If you started facing this issue after installing an update recently then you should uninstall it. System restore also does the same job, so if you have already performed a system restore as discussed in the previous step then no need to continue with this method. This step should only be done if you fail to perform the system restore.
- Click on the Advanced Options.
- Select Troubleshoot and then Advanced Options
- Head over to the Startup Settings, and then click Restart.
- Now, press 5 or F5 to boot into Safe Mode with Networking.
- Once your PC boots into safe mode, launch the Settings app through the Windows + I key combo.
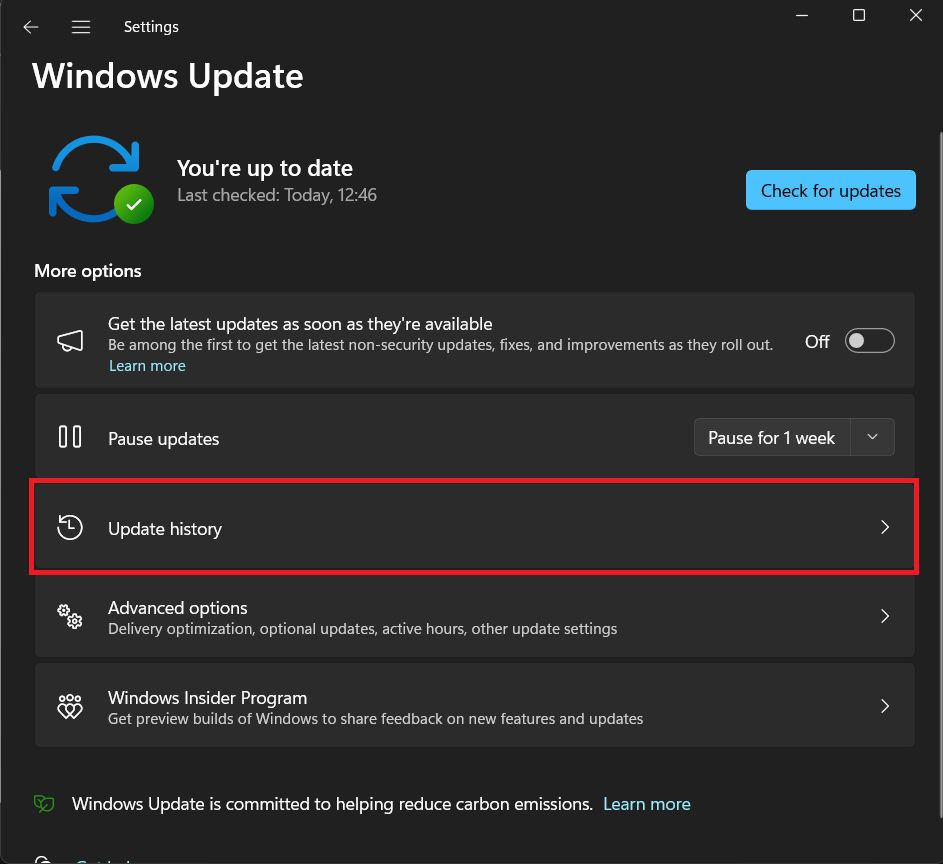
- Click on Windows Update on the left pane, and then on Update History.

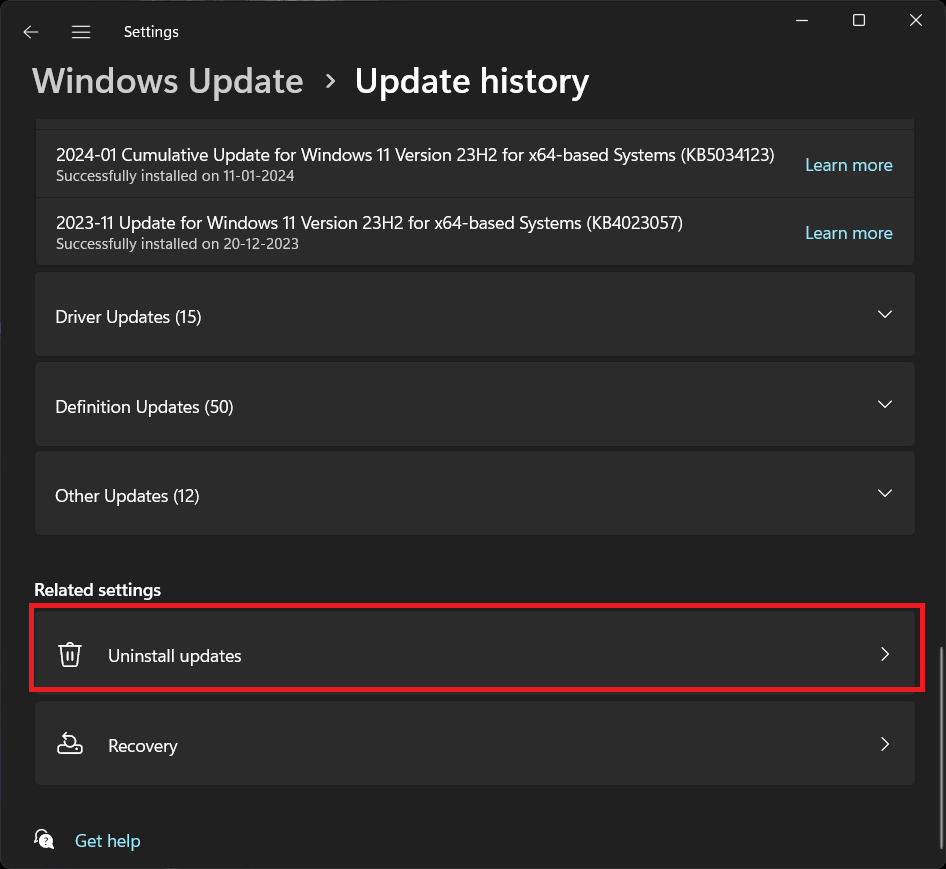
- Scroll down to Related Settings and click on Uninstall Updates.

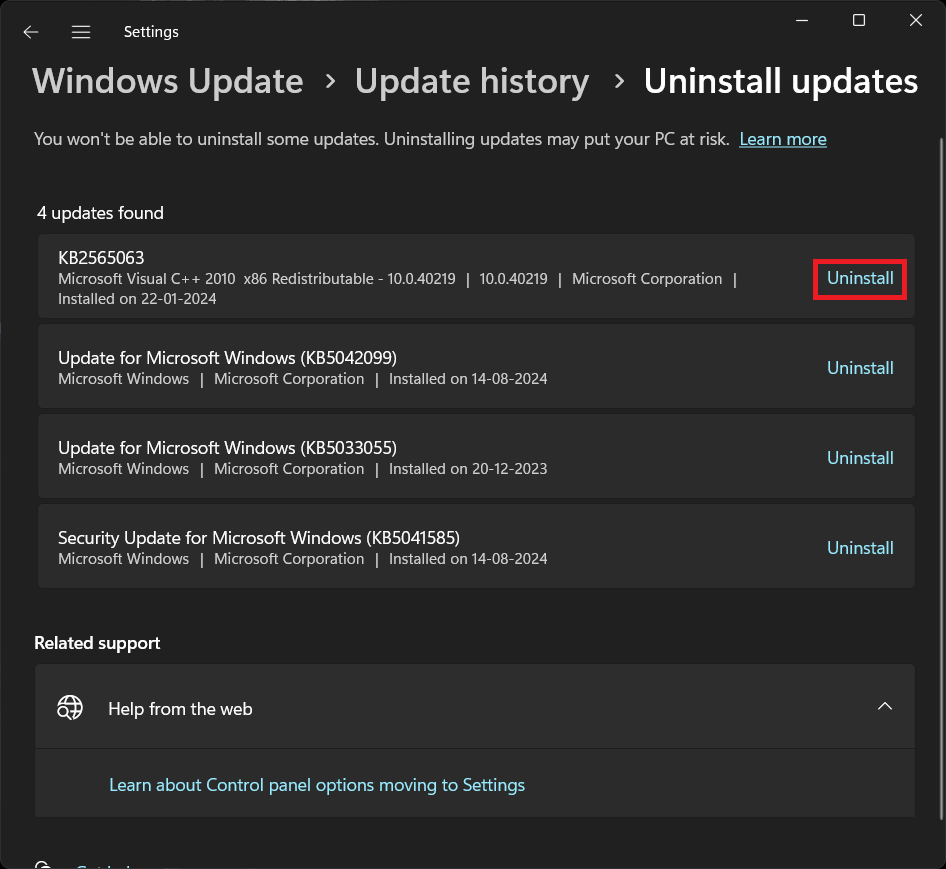
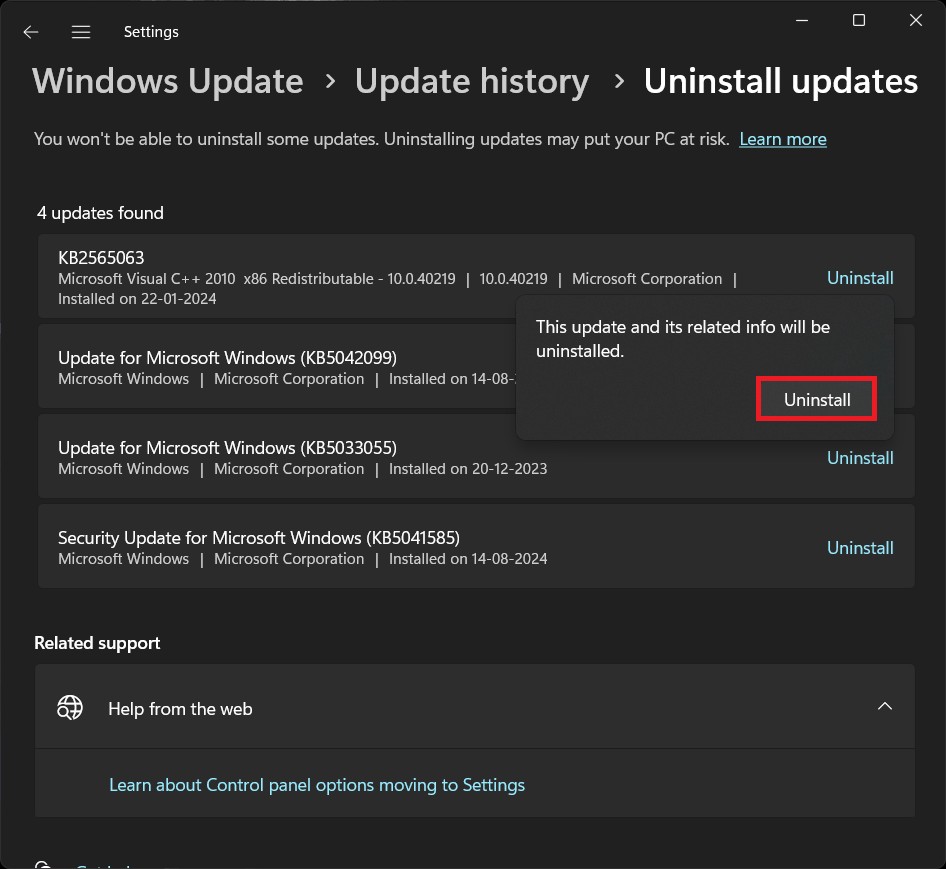
- Look for the recently installed update, and click on Uninstall next to it.
- Click on Uninstall again to confirm uninstalling the update.
- Once done, restart your PC and see if you still face the issue.
10. Reset PC
If nothing helps and the issue is still encountered then you are left with no other option than resetting your PC. You can do that by following the steps given below. However, before you continue you should know that this will delete all of your apps, settings, and even the files.
- Click on Advanced Options on the startup repair screen.
- Now, click on Troubleshoot
- After this, click on Reset this PC.
- You will be given two options-
- Keep My Files– To keep the files but delete apps and settings.
- Remove Everything- This will delete apps, settings, and even files.
- Follow the on-screen instructions to reset your PC.
Bottom Line
Startup Repair works to solve boot issues on your system. However, some issues cannot be solved by it and you will keep on getting the ‘Automatic Startup Repair couldn’t repair your PC’ error. You can follow all the troubleshooting methods mentioned above and that should help solve the issue.
ALSO READ:


