- Minecraft server performance is enhanced by allocating more RAM to manage player actions, mods, and world mechanics efficiently.
- Adequate RAM allocation improves server stability, gameplay smoothness, and overall player experience, especially with large player counts or mods.
- Methods to allocate more RAM include adjusting JVM arguments in Minecraft launcher, creating a new launcher in the server directory, and using external launchers like ATLauncher.
Minecraft, a game known for its vast, open-world sandbox environment, offers endless possibilities for creativity and exploration. However, to fully enjoy its potential, especially when running a server, adequate RAM allocation is crucial. This comprehensive guide delves into the nuances of allocating more RAM to your Minecraft server, ensuring a smooth and enjoyable gaming experience for all players.

Allocating more RAM to your Minecraft server is not just about boosting performance; it’s about creating a seamless, lag-free environment where creativity and adventure know no bounds. Let’s explore three effective methods to achieve this.
What is RAM in Minecraft?
RAM (Random Access Memory) in Minecraft refers to the temporary storage used by the server to handle all the ongoing activities and processes. The more RAM allocated, the more resources the server has to manage player actions, world mechanics, and mods.
Importance of Adequate RAM for Server Performance
Allocating sufficient RAM is vital for server stability and performance. It ensures smoother gameplay, faster load times, and a better overall experience for players, especially when dealing with large player counts or extensive mods.
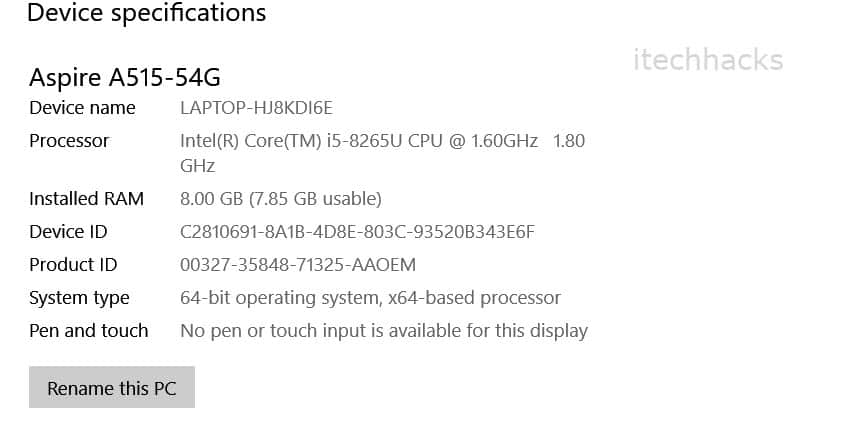
How to Check Your PC RAM?
Step 1- Click the start button and go to Settings.

Step 2- Here, click on the ‘About’ option.
Step 3- Search for ‘Device Specifications’ and look for Installed RAM. You will see your PC RAM listed next to it.
ALSO READ: How to Download & Install OptiFine 1.14/1.15/1.16 Minecraft
How to Allocate more RAM to Minecraft Server
There are several methods that you can use to allocate more RAM to your Minecraft server. Below, we have listed some of the easiest methods to do so!
Method 1: Using the Default Browser.
The steps involved in this method are explained below in detail.
Step 1- Open Minecraft launcher on your PC and select the game version.
Step 2- From the tabs, click on the ‘Installations’ option to view the list of game releases. If you haven’t set up any specific version, you will see the most recent version.
Step 3- Then, click on the three white dots on the right and click on the ‘Edit’ option from the drop-down box.
Step 4- You will get a screen with all the details of the installation. Click on the ‘More Options’ option.
Step 5- Search for ‘JVM Arguments’ with a long code. Search for ‘-Xmx2G’ in that code. The number 2 in this code is the RAM used by the Minecraft server on your PC. Change this number to allocate more RAM to your Minecraft server.
Step 6– Click on ‘Save’ and launch the game.
This is all you need to do for allocating more RAM to your Minecraft server.
Method 2: Using Directory.
Follow the steps listed below to execute this method.
Step 1- Download the Minecraft server in which you wish to allocate more RAM.
Step 2- Locate that Minecraft Server in your computer’s directory. You can easily do it by searching for ‘Minecraft_Server‘ or the name of the server on your computer.
Step 3- Create a new text document on your server directory.
Step 4- Open the Text Document which you have just created and paste the following command in it.
java -Xmx****M -Xms****M -exe Minecraft_Server.exe -o true
PAUSE
Step 5- All the * symbols in the above-listed command should be replaced by the amount of RAM you wish to allocate to your Minecraft server in MB.
Thus, if you wish to allocate 4GB of RAM, you should replace **** by 4096 as 1GB = 1024 MB.
Step 6- Now, click on ‘File‘ at the top left corner and click on ‘Save as‘ option.
Step 7- Modify the save type to ‘All Files‘ and make sure to change the file’s extension from .txt to .bat only.
Step 8- This file will be the new launcher for your Minecraft server. Double click on it to run your server with higher RAM usage.
Note: You need to use this file whenever you wish to play on the server now.
ALSO READ: How To Unban Someone on Minecraft Servers
Method 3: Using ATLauncher.
In this method, we will be making use of an external launcher ATLauncher.
Step 1- Open ATLauncher on your PC.
Step 2- Click on ‘Settings’ from the bottom of the Menu bar.
Step 3- Select ‘Java/Minecraft’ which you will find at the top of your screen.
Step 4- Search for ‘Maximum Memory RAM’ and type in the amount of RAM you wish to allocate to your Minecraft server.
You can also use the up and down arrows to change the RAM by 0.5 GB.
Step 5- Once you have entered the final value, click on ‘Save‘ to apply the changes.
Similarly, you can use other launchers such as Twitch/Curse Launcher available on the internet. The steps remain the same for most of the launchers.
ALSO READ: How To Install & Use Shaders in Minecraft (2 Methods)
Conclusion:
These are some of the best methods you can use to allocate more RAM to your Minecraft servers 2024. The steps involved in these methods are easy to understand and execute. We do not recommend you to assign more, or the exact amount of RAM you have on PC, as it needs RAM to manage other programs as well.
If you know of any better method to allocate more RAM to your Minecraft server, then please let us know about it in the comments section below.


