- Wake On LAN allows remote booting from a low-power state, acting as a remote power button for your computer, reducing power consumption when not in use, and enabling you to access files/apps remotely.
- To enable Wake On LAN in Windows 11, access BIOS settings by pressing Windows + I, navigate to Update & Recovery > Recovery, select advanced startup, and enable Wake On LAN in the power settings section.
- Configure Wake On LAN by accessing Control Panel > Network & Internet > Network & Sharing Center, enabling Wake On LAN functionality, and setting specific values for optimal performance.
Wake On LAN is a feature that allows you to set your computer to boot from a low-power state. This serves as a computer’s remote power button. You can use this feature to access your computer’s files and applications while reducing power consumption when the computer is not in use. This feature (WoL) can even be used to wake up your Windows 11 PC from across the house via the Internet.
How to Configure Wake On LAN on Windows 11
If you don’t know how to remotely wake up your Windows 11 PC with the Wake On LAN feature, this article will help you. We’ll go over how to enable and turn on the Wake On LAN feature, as well as how to configure and use it to remotely wake up your Windows 11 PC.
Enable Wake On LAN in Windows 11
First, you will have to enable the Wake On LAN feature. You can enable Wake On LAN from the BIOS menu. To enable Wake On LAN on your Windows 11 PC, follow the steps given below-
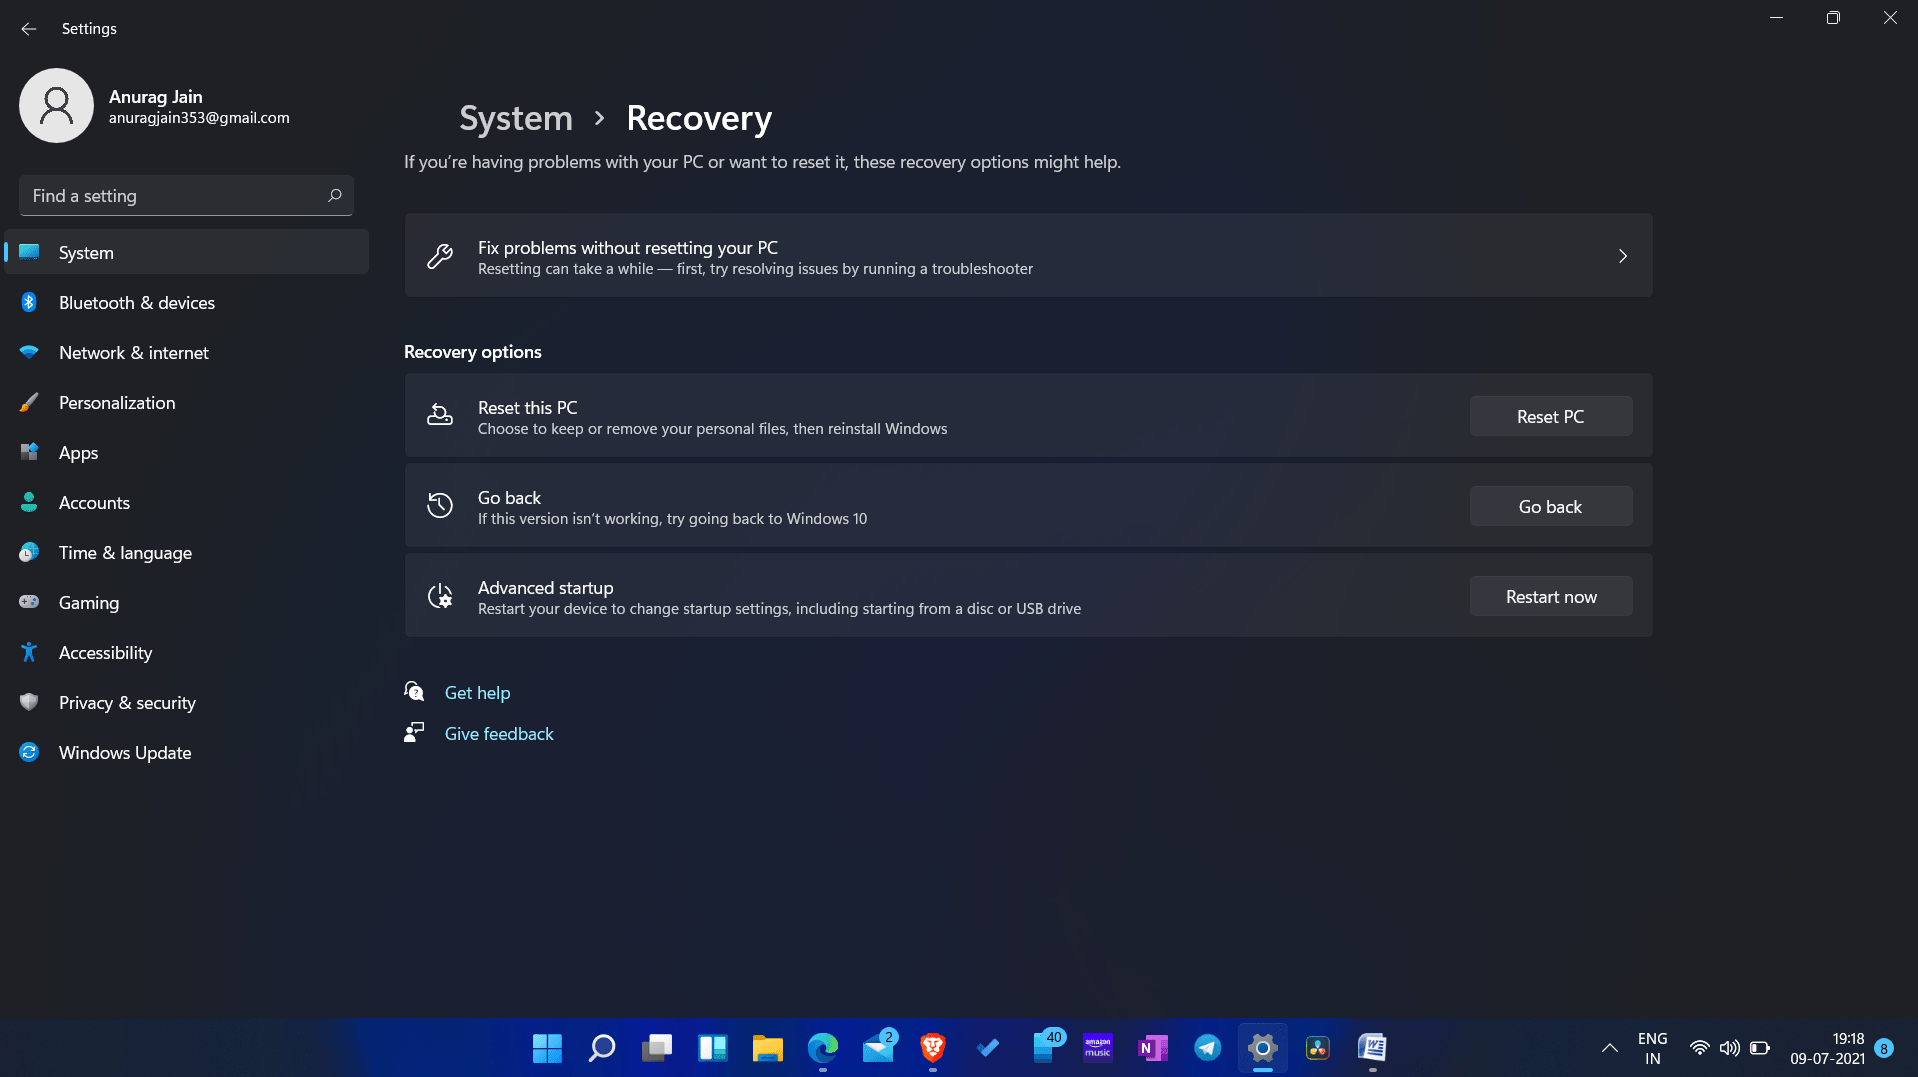
- Press the Windows + I to open the settings of your PC.
- In the settings, go to the Windows Update section from the left sidebar.
- Click on recovery in the Windows update section.
- Here you will find advanced startups. Click on the restart now button beside the advanced startup option.
- Your PC will restart. On the next screen that opens up, select troubleshoot. Next, select advanced options, and then select the UEFI Firmware settings option.
- Select the Restart option, and you will be headed to the BIOS.
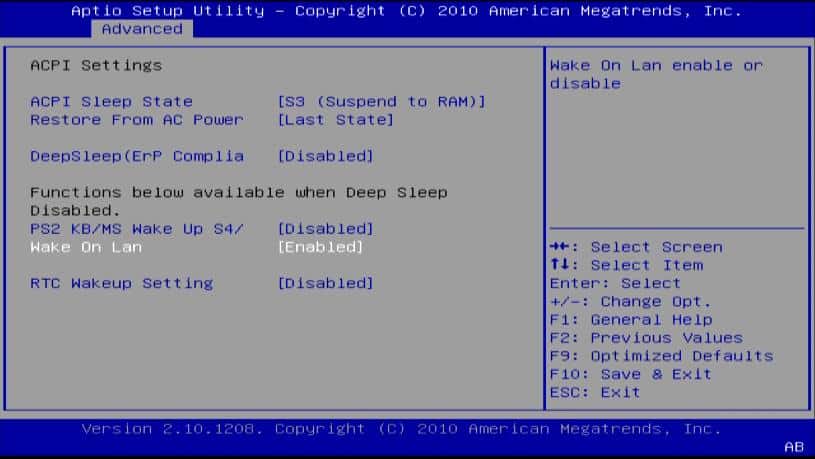
- In the BIOS, head to the power settings section.
- Here you will find Wake On LAN option; enable it.
If your PC does not have an Ethernet port, your PC won’t support Wake On LAN. However, you can get a USB A 3.0 to RJ45 Gigabit Ethernet LAN adapter to give your PC the Wake On LAN functionality.
Configuring Wake On LAN
Next, you will have to configure the Wake On LAN feature on your PC. To configure it, follow the steps given below-
- In the start menu, search for the control panel and open it.
- In the control panel, head to the network and internet section.
- Now click on the network and sharing center and open it.
- On the left sidebar, click on Change adapter settings.
- This will show you all the networks you have connected to.
- Now select the active network adapter and right-click on it. Click on the properties option.
- In the network adapter properties, click on the configure button.
- Now click on the advanced tab, and then select wake on the magic packet.
- Now on the right sidebar, you will see a value drop-down menu. From here, select enabled.
- Next, select wake on magic pattern and enable it. Although this step is optional, you can do it.
- Now select WOL and Shutdown Link speed and set the value to 10 MBps.
- Next, head to the power management tab.
- Here check the allow the device to wake the computer option, and then check the Only allow a magic packet to wake the computer.
- Once done, click on the OK button.
That’s how you can configure Wake On LAN feature. However, if you don’t want to use it, you can disable the wake on the magic packet as you enabled it earlier.
Waking Up Windows 11 PC Remotely
Now that you have enabled Wake On LAN feature, and configured it, let’s discuss how you can remotely wake up Windows 10 PC. Follow the steps given below to remotely wake up Windows 10 PC.
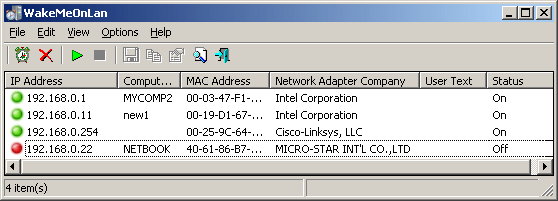
- Download the NirSoft application and install it on your PC.
- After installing the application on your PC, open it, and click on the Play button to discover all the devices in the network.
- Now right-click on the remote computer. Select the Wake Up Selected Computers option.
- Now click on the yes button. That’s it, and you are done with the process.
Now the tool will start sending the magic packet to the wake-up device.
RELATED GUIDES:
- How To Check CPU Temperature In Windows 11
- Connect Airpods To Windows 11 PC Laptop
- How To Turn Off S Mode on Windows 11
- Change Windows 11 Virtual Memory Size
Final Words
That’s how you can remotely wake up Windows 11 PC. We hope this article helped you setup up the wake on LAN feature and remotely wake up Windows 11 PC.


Have you tested this? For many, WOL has been broken since upgrading from Win10
I have Win11 and this works as advertised. However, if I wake my computer remotely, it boots up to the login screen where I have to enter my password. At this point I have no way of entering the password, so this does not help.