- Purgeable space on Mac is temporary storage created by the system. It includes synced iCloud files, old files, local snapshots, cache files, and trash files.
- To check purgeable space, use System Settings (for macOS Monterey and earlier) or Disk Utility (for macOS Venture and later).
- To manually clear purgeable space, you can empty the Bin, restart your Mac, use the Terminal with specific commands, delete cache and unnecessary files, or use third-party tools.
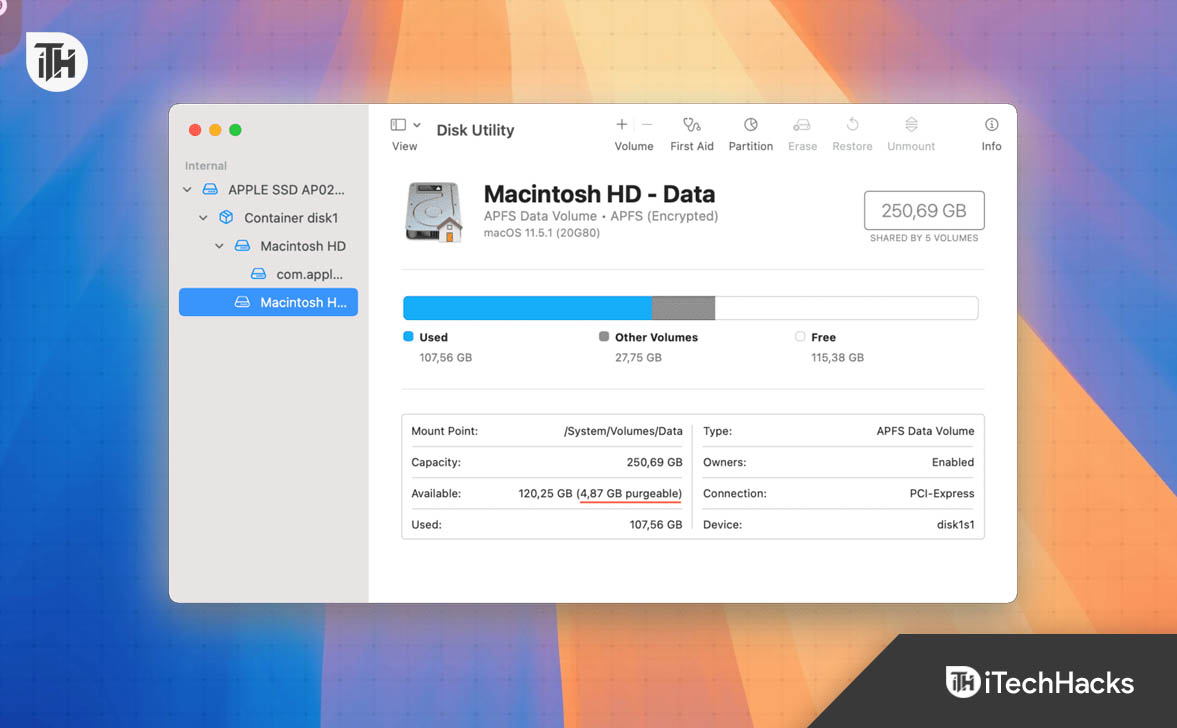
Disk Utility is a great tool for managing your disk on Mac. With Disk Utility you can see the total capacity of your storage, available storage, used storage, and even the purgeable storage. Mac calculates available storage as actual available storage + total purgeable storage.
Purgeable space may sometimes hold a major chunk of your storage, even 40% of the storage occupied. If you are worried about this purgeable space and how it can be cleared then you have come to the right place. In this article, we will be guiding you with how you can remove the purgeable space on Mac.
What is Purgeable Space?
Your Mac is smart, and it manages the storage automatically, and this is done by creating purgeable space. But what is this purgeable space and how is it created? When you head over to the Disk Utility, you will see some part of available storage marked as purgeable storage.
Purgeable space is the part of the storage that will be cleared automatically when your Mac runs out of storage. Consider this as some kind of temporary storage created by your Mac, which you can manually remove, or your Mac will do it automatically when storage is required.
But how is it created? Here’s what creates purgeable space on your Mac:
- Image of files synced with iCloud
- Old files that you haven’t used
- Local snapshots of system images from time machine
- Cache files created by macOS
- Trash files
How to Check Purgeable Space on Mac?
There are two ways to check purgeable space on Mac, i.e., through System Settings, or Disk Utility.
1. System Settings
The first way to view purgeable space is from the storage page in System Settings. However, this method only works on macOS Monterey and earlier versions. To check purgeable space in System Settings, follow the steps given below:
- Press Command + Spacebar, type System Settings and press the Return key.
- Under the General tab, click on Storage.
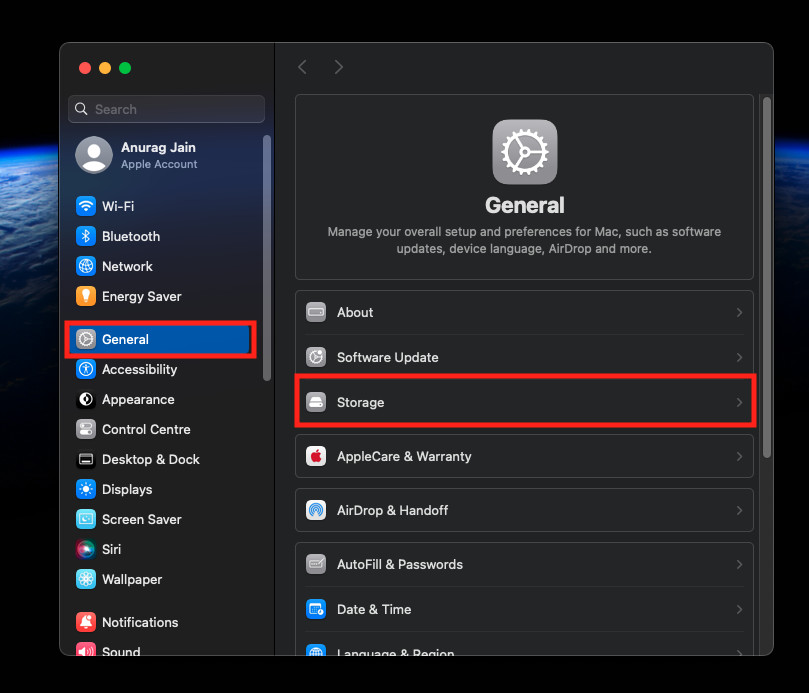
- Here, you will see a white-gray striped section, which will be marked as Purgeable Space.
2. Disk Utility
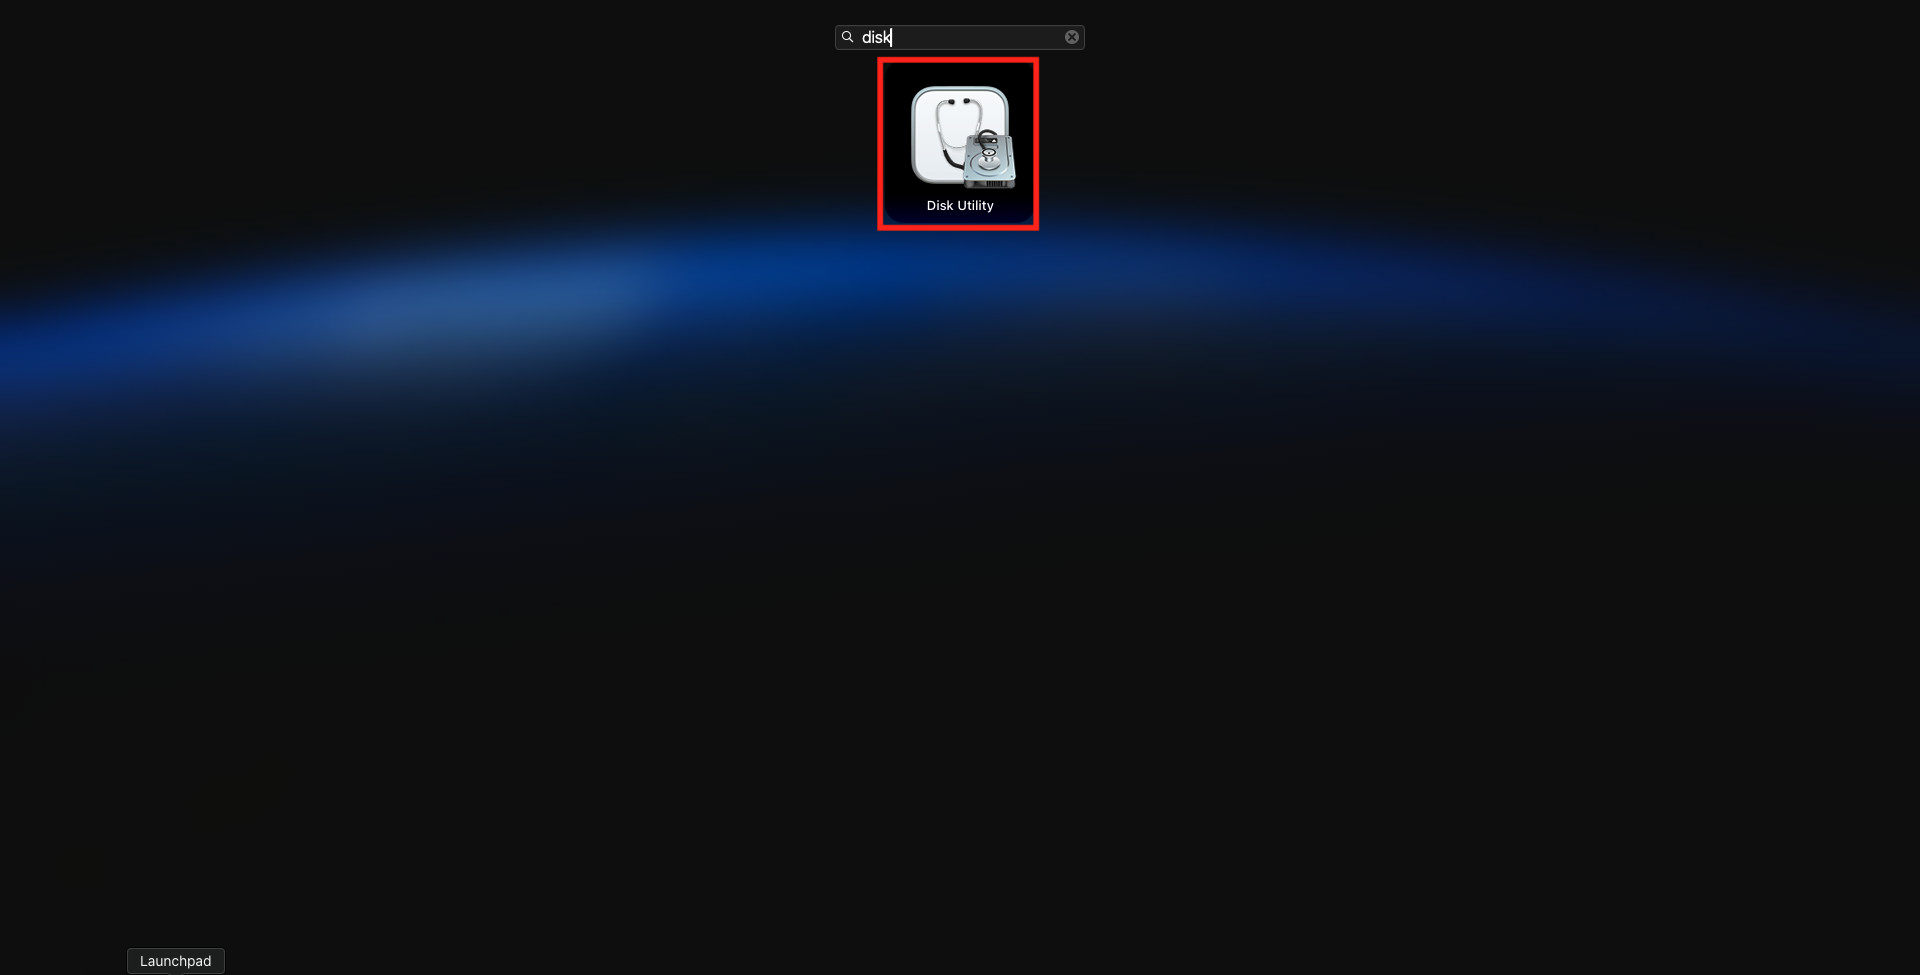
If you have macOS Venture or higher version installed on your Mac, then the above method will not work. You will have to use the Disk Utility to check purgeable space. Here’s how you can do that:
- Click on the Launchpad icon, search for Disk Utility, and open it.
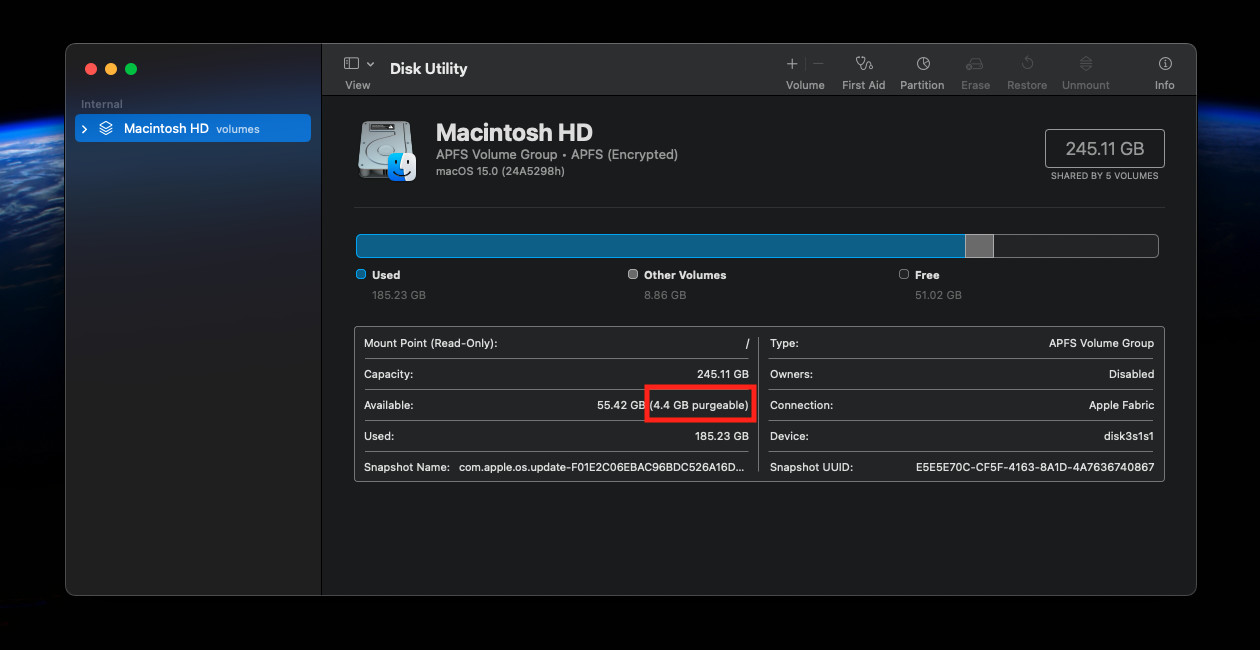
- On the left pane, select the disk with macOS (only if you have multiple disks).
- You will see purgeable storage next to Available.
Ways to Remove Purgeable Space on Mac
Purgeable space is there to be removed when extra storage is needed. Though Mac removes it automatically, you can do it yourself as well. Given below are some ways to remove purgeable space on Mac:
1. Clear Bin
The first thing that you must do is clear the files in your Bin. Your files in the Bin are a part of the purgeable space on your Mac, clearing the Bin should clear a bit of purgeable space as well. To do so, follow the steps given below:
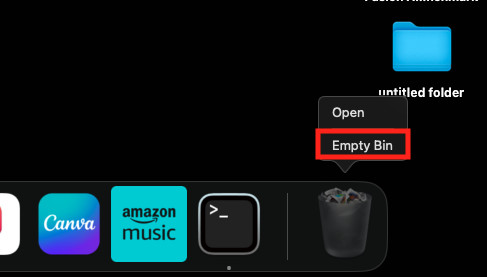
- Right-click on the Bin on the dock and then click on Empty Bin.
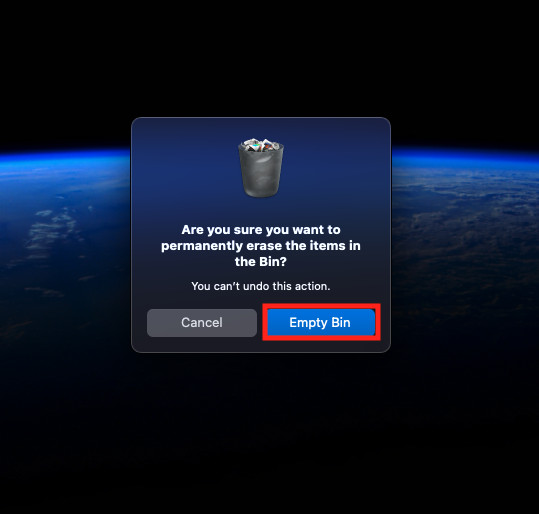
- Click on Empty Bin again to clear the files from Bin.
2. Restart Your Mac
A part of purgeable space also includes the temporary files required by your Mac. Restarting your Mac will clear these temporary files and also free up the purgeable space.
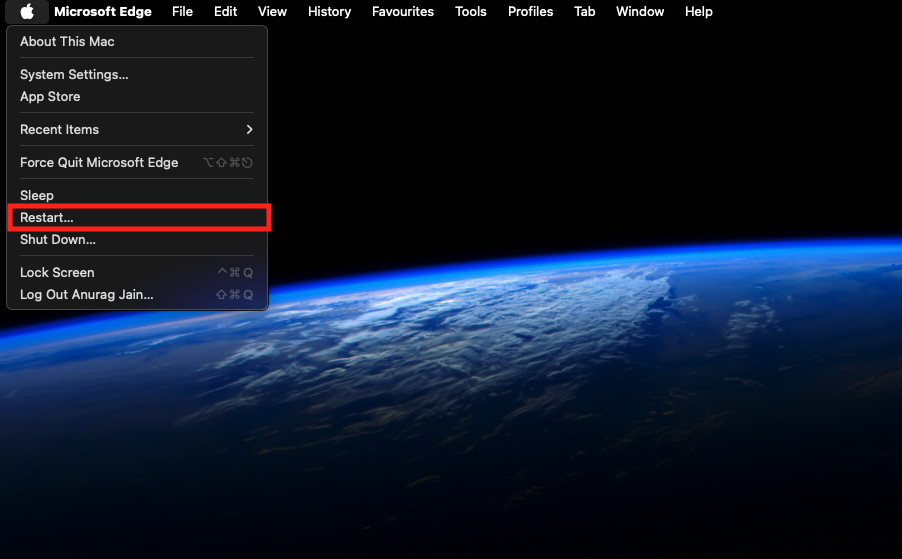
- Click on the Apple icon at the top left corner, and click on Restart.
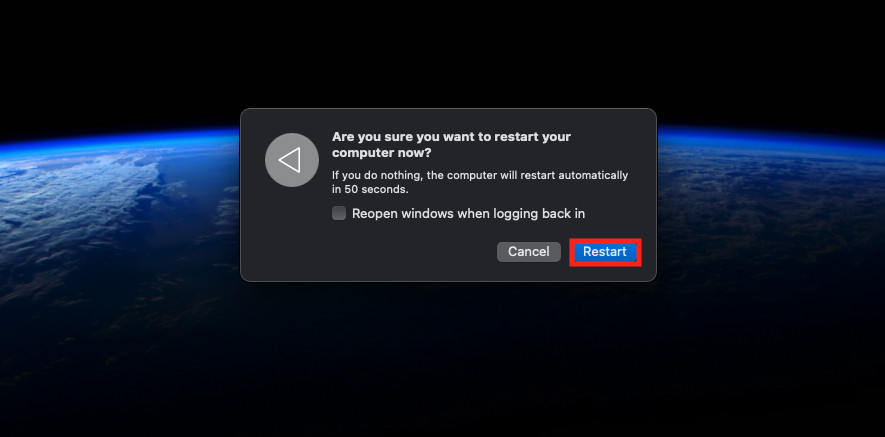
- Click Restart again to reboot your PC.
3. Use the Terminal to Clear Purgeable Space
There are a few commands that you can run in the Terminal and that should clear purgeable space. Below are the steps to do so:
- Press Command + Spacebar, type Terminal, and press Return.
- First, you will have to create a directory named largefiles in the Home Directory. For this, execute the following command-
- mkdir ~/largefiles
- Now, create a file with the name largefile in the largefiles folder. You can do this by executing the command given below-
- dd if=/dev/random of=~/largefiles/largefile bs=15m
- Wait a few minutes and then press Ctrl + C to stop the previous command.
- Now, execute the following command-
- cp ~/largefiles/largefile ~/largefiles/largefile2
Note- Continue running the above command repeatedly, but change largefile2 to largefile3, largefile4, and so on, as you go ahead with the command. You need to keep executing the command until you get a message saying ‘Disk is critically low.’
- After this, execute the last command-
- rm -rf ~/largefiles/
- Now, close the Terminal.
- Right-click on the Bin and then select Empty Bin.
- Click Empty Bin again.
- That’s it, the purgeable space should be cleared now.
4. Delete the Cache Files
Cache files are also a part of the purgeable files. The cache is stored on Mac whenever you install or launch some application. Over time, cache files grow in size and might take up a lot of space in your storage. If you want to clear the purgeable space, then try clearing the cache files on your Mac.
5. Delete Unnecessary Files
The next thing to do is clear the unnecessary files. There might be some files on your Mac that you no longer need or haven’t used for a while now but are just taking up a chunk of your storage. It’s better to delete them to clear up the purgeable space. You can either delete them permanently even from the Bin, or move them to some external storage or iCloud.
6. Use Third-Party Tools to Clear Purgeable Space
It is much easier to clear purgeable space using third-party tools. There are many third-party tools that you can use for this, but what I personally suggest is CleanMyMac X.
CleanMyMac X gives you the option to clear purgeable space in one clean, but this option is paid. Here’s how you can use this tool:
- Head over to the CleanMyMac X website, and download and install the software.
Note-You need to buy the paid plan to clear purgeable space using this tool.
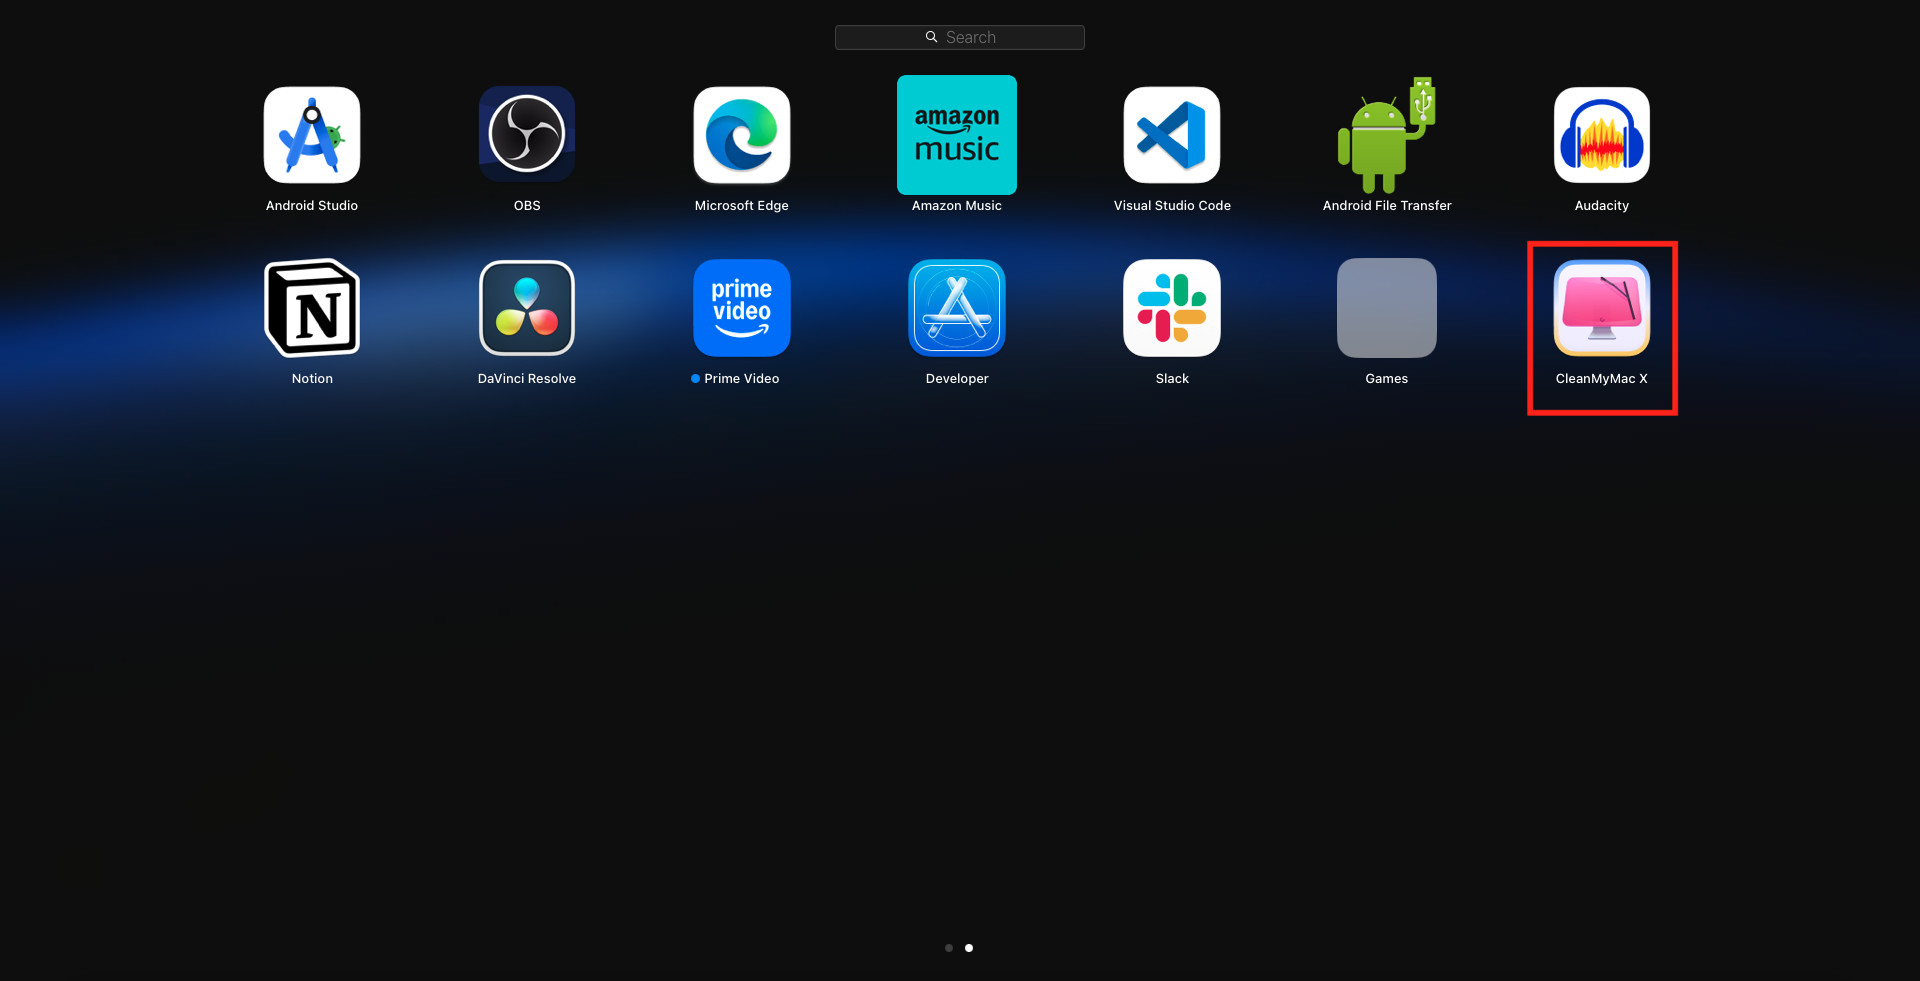
- Click on the Launchpad icon, and launch CleanMyMac X from here.
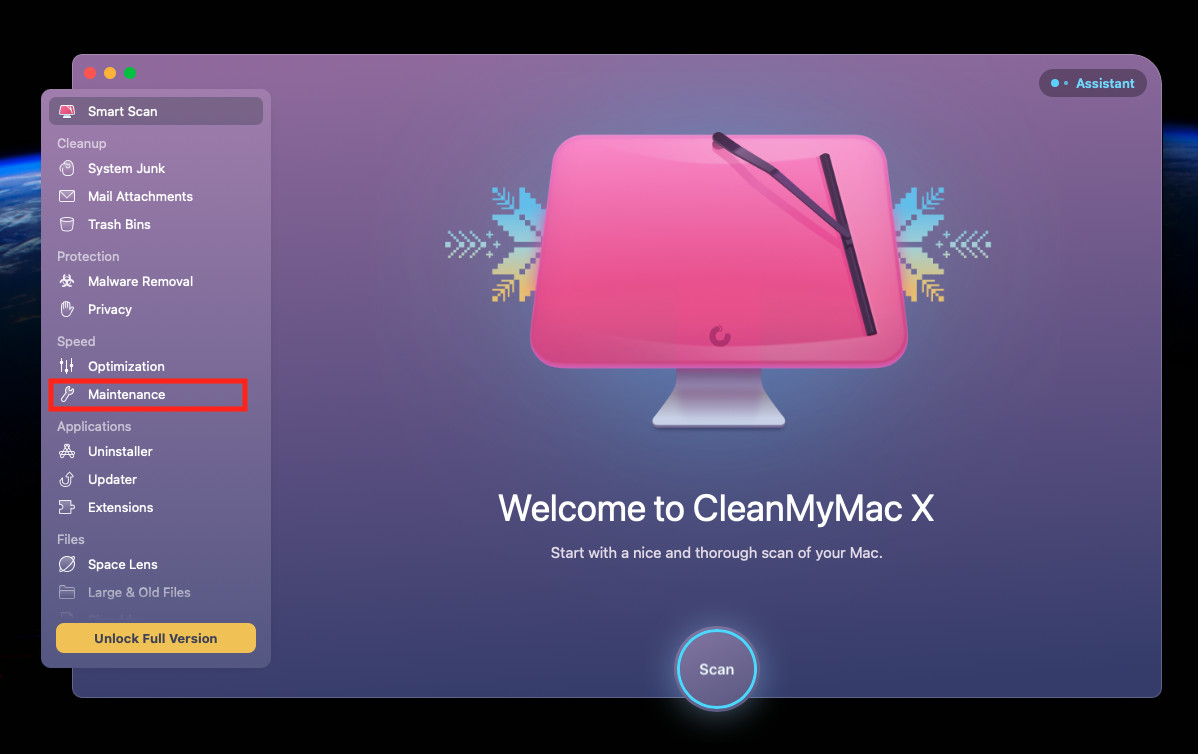
- Now, click on the Maintenance option on the left pane.
- Select the Free Up Purgeable Space option, and click on Run.
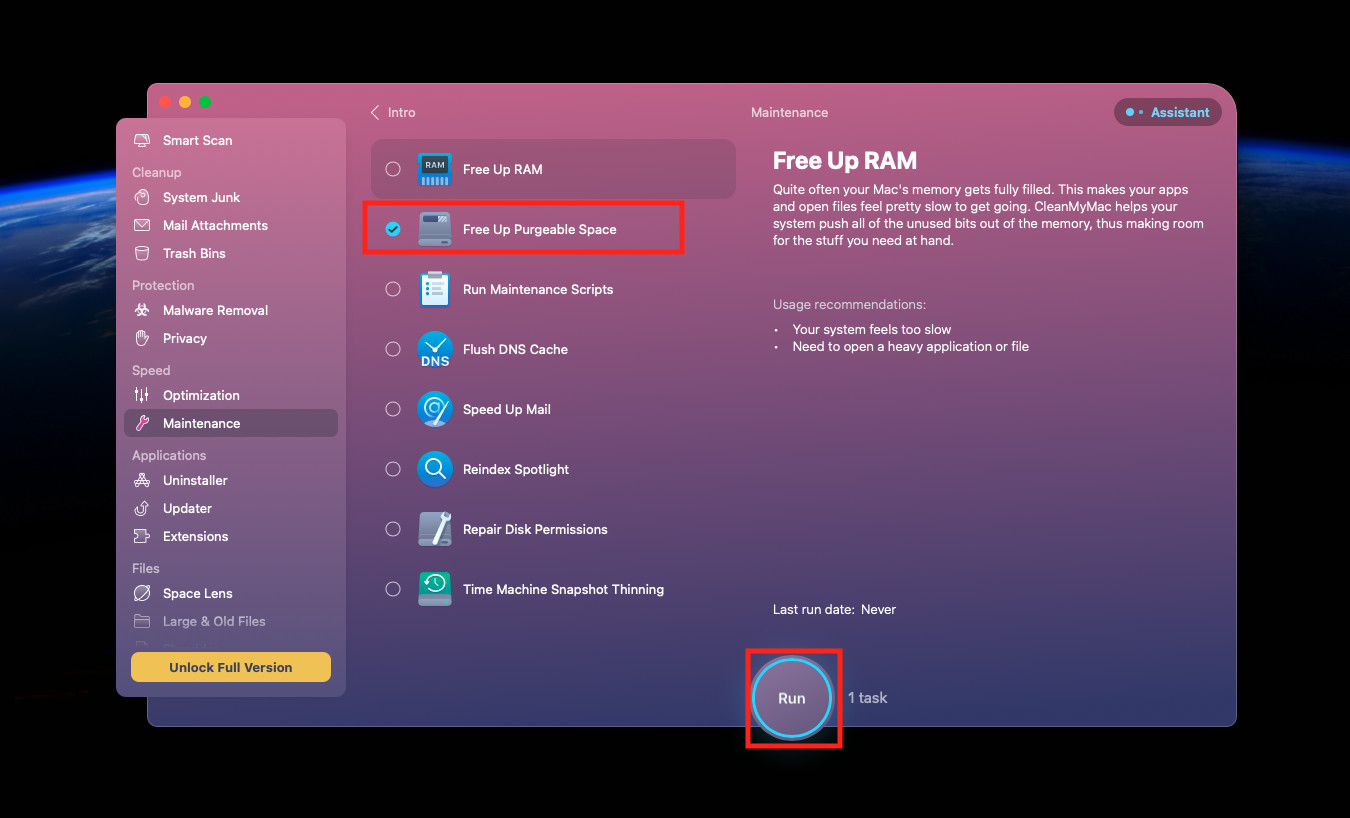
- Now, follow the on-screen instructions and this should clear the purgeable space on your Mac.
Bottom Line
Purgeable space can sometimes take a whopping amount of storage on your Mac. Your Mac will automatically delete the purgeable files when your system is running out of storage. If you feel like purgeable space is taking up a lot of your Mac’s storage then you can manually remove purgeable space on Mac by following the above guide.
We hope this article answers all your queries. If you are still facing some problems or have some other queries, then feel free to comment below.
ALSO READ:

