- Adding audio to Google Slides makes presentations more engaging and accessible, and can provide a personal touch with enhanced professionalism.
- To start, ensure you have a Google account, an audio recording tool, supported audio files, and stable internet; upload audio files to Google Drive before inserting them into slides.
- If issues arise with audio playback, checking internet connection, ensuring correct file formats, and clearing browser cache are effective troubleshooting steps.
Adding audio to Google Slides can elevate your presentations from basic to extraordinary. Whether you’re creating a lesson plan, business pitch, or a personal slideshow, audio can help make your content more engaging, memorable, and interactive.
In this comprehensive guide, we’ll walk you through the entire process of adding audio to your Google Slides presentations. From recording audio to troubleshooting issues, this guide will provide you with everything you need to know.
Why Add Audio to Google Slides?
Before we dive into the technical details, let’s explore why adding audio to your Google Slides is worth your time:
- Enhanced Engagement: Audio helps capture your audience’s attention and keep them engaged.
- Improved Accessibility: Audio elements make your slides accessible to a wider audience, including those who prefer auditory content.
- Personal Touch: Adding your voice to a presentation can make it feel more personal and relatable.
- Professional Quality: Background music or sound effects can give your presentations a polished, professional feel.
Prerequisites: What You Need to Get Started
Before you begin, ensure you have the following:
- A Google account to access Google Slides and Google Drive.
- An audio recording tool or app (e.g., your PC’s built-in recorder or a third-party app).
- Supported audio file formats: MP3, WAV, or OGG.
- A stable internet connection.
ALSO READ: How To Use Your Laptop As Monitor [Multiple Screen]
Step 1: Record or Download Your Audio File
The first step in adding audio to Google Slides is to prepare your audio file. Here’s how:
Recording Your Audio
If you’re adding a voiceover or personalized audio:
- Use your computer’s built-in voice recorder (available on Windows and macOS) or download a third-party recording app.
- Find a quiet environment to ensure high-quality sound.
- Record your audio, keeping it concise and relevant to the slide content.
- Save the file in a compatible format (MP3 is recommended for smaller file sizes).
Downloading Pre-Recorded Audio
If you prefer to use existing audio files (e.g., music or sound effects):
- Search for royalty-free audio on platforms like Free Music Archive or Pixabay.
- Ensure the file is in a compatible format and meets your presentation’s requirements.
- Download the file to your computer.
Step 2: Upload Your Audio File to Google Drive
Google Slides requires your audio files to be stored in Google Drive. Here’s how to upload them:
- Open Google Drive on your computer.
- Click the New button in the top-left corner.
- Select File Upload from the dropdown menu.
- Locate and select your audio file to upload it.
- Wait for the upload to complete.
Set Sharing Permissions
To ensure the audio works correctly in Google Slides:
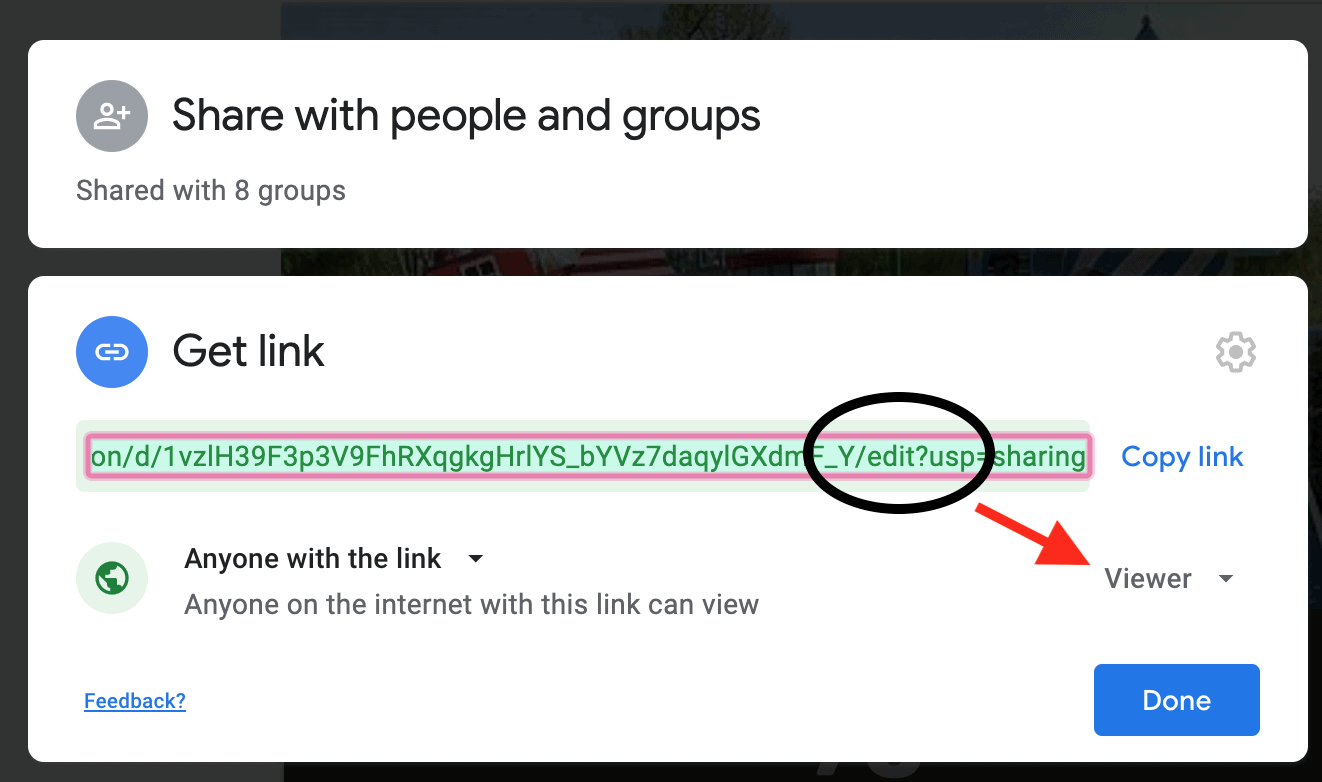
- Right-click on the uploaded file in Google Drive.
- Select Get Link from the menu.
- Set the sharing option to Anyone with the link > Viewer to ensure accessibility.
- Click Copy Link and then Done.
Step 3: Insert Audio into Google Slides
With your audio file uploaded to Google Drive, you’re ready to add it to your presentation:
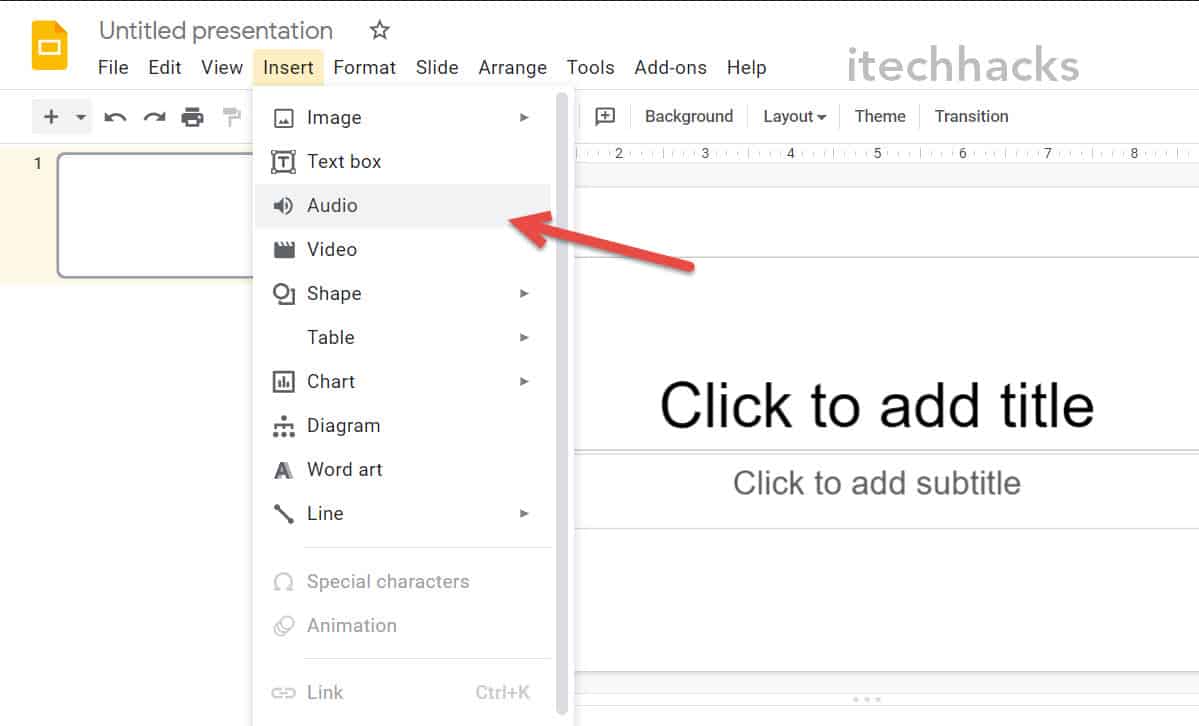
- Open Google Slides and navigate to the presentation you want to enhance.
- Click on the slide where you want to add audio.
- Go to the Insert menu and select Audio from the dropdown.
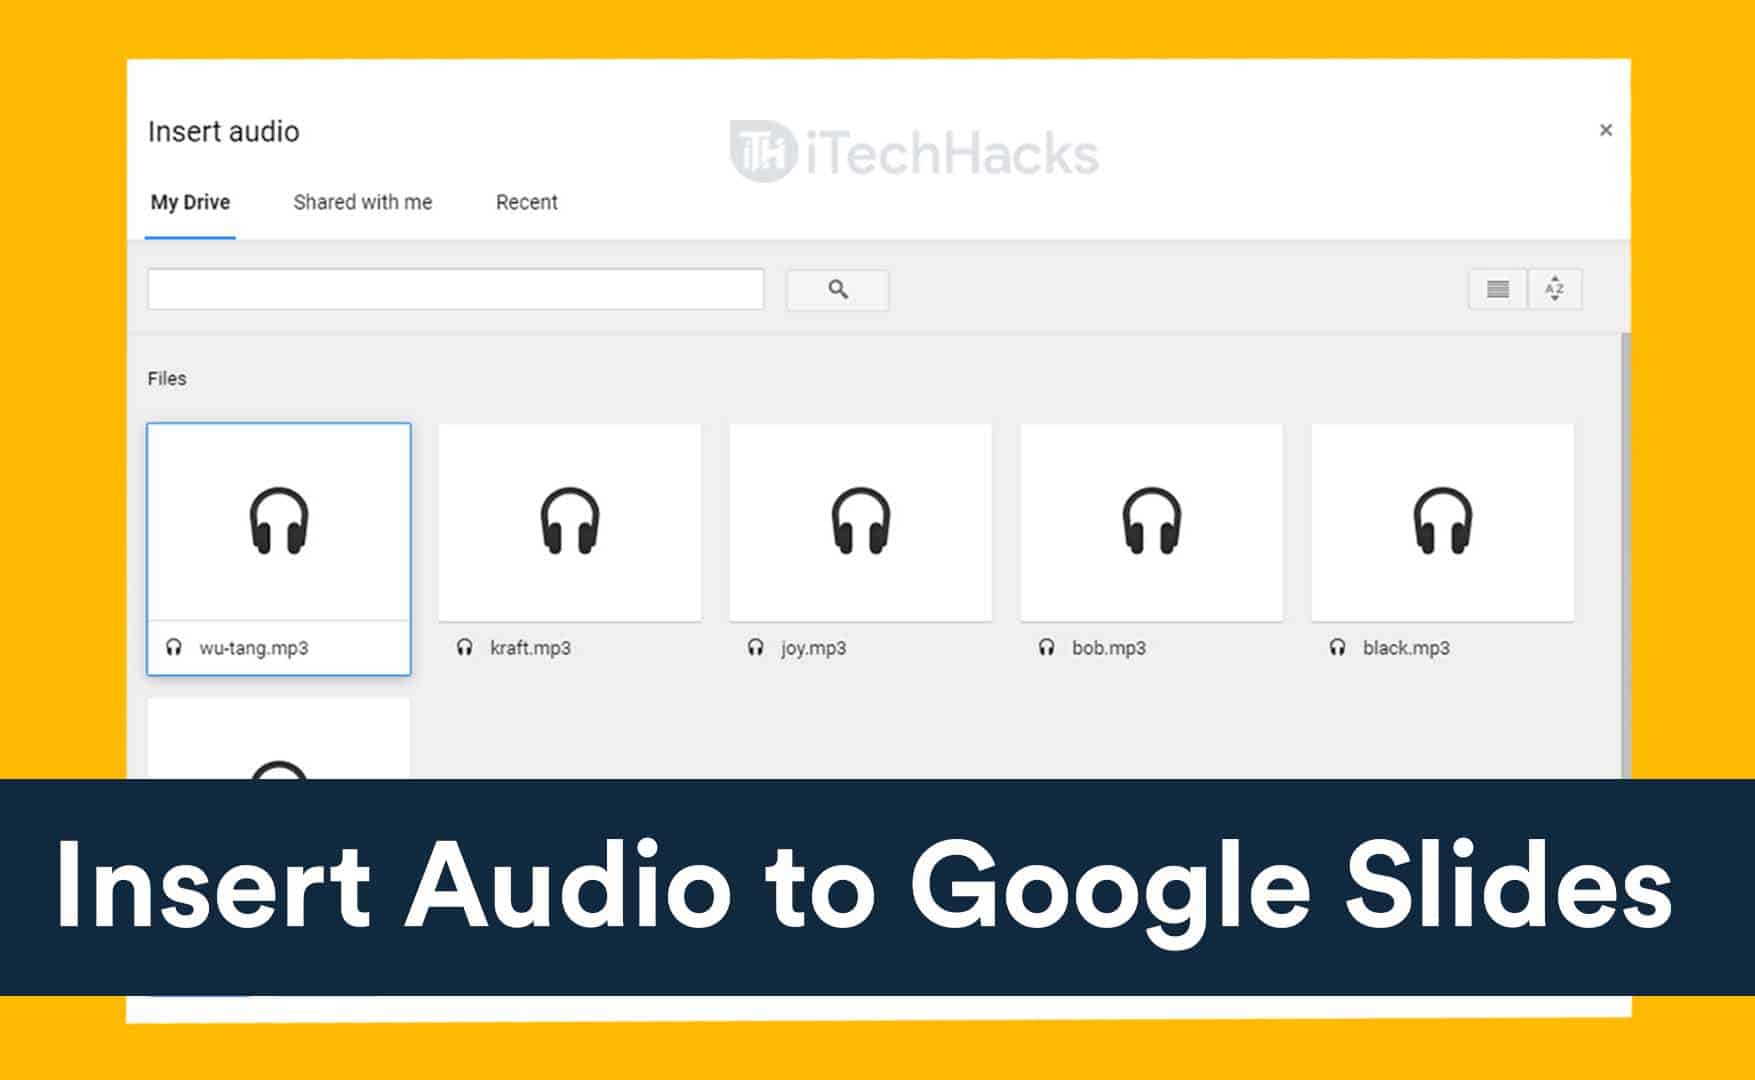
- A window will open displaying your Google Drive files. Locate your audio file (it may appear under the My Drive or Recent tab).
- Select the audio file and click Insert.
Once inserted, an audio icon will appear on your slide. This icon can be moved, resized, and formatted as needed.
Step 4: Format the Audio for Better Presentation
Customizing your audio playback settings can improve your audience’s experience. Here’s how to format the audio:
Adjust Playback Settings
- Click on the audio icon to reveal the Format Options sidebar.
- Under Audio Playback, you can:
- Play on Click: The audio will play when clicked.
- Play Automatically: The audio starts playing when the slide appears.
- Loop Audio: Enable looping for continuous playback.
- Stop on Slide Change: Stops audio when transitioning to the next slide.
Customize the Audio Icon
- Size and Rotation: Resize or rotate the audio icon for better placement.
- Positioning: Drag the icon to your desired location on the slide.
- Recolor & Adjustments: Change the icon’s color, transparency, and brightness to match your slide theme.
- Add Effects: Apply shadow or reflection effects to make the icon visually appealing.
ALSO READ: How to Save/Download GIF from Twitter (GIF Downloader)
Step 5: Troubleshoot Common Issues
If you face issues while adding or playing audio, here are some quick fixes:
Audio Doesn’t Play
- Ensure your internet connection is stable.
- Confirm that the file is in a supported format (MP3, WAV, or OGG).
- Check the file permissions in Google Drive.
Audio Playback Delays
- Clear your browser’s cache and cookies.
- Use an updated version of your browser.
- Try a different browser if the issue persists.
Audio File Not Found
- Re-upload the audio file to Google Drive.
- Double-check that you’re signed into the correct Google account.
Pro Tips for Using Audio in Google Slides
- Keep It Short and Relevant: Avoid long audio clips that may distract your audience.
- Use Background Music Wisely: Ensure the music complements the presentation and doesn’t overpower your voice.
- Test Before Presenting: Always preview your slides with audio to ensure everything works as intended.
- Use Captions: For accessibility, consider adding captions or transcripts for your audio.
- Optimize File Size: Large audio files can slow down your presentation. Compress files if necessary.
Advanced Features: Beyond Basic Audio
If you want to take your presentations to the next level, explore these advanced options:
Embed Videos with Audio
Google Slides doesn’t support direct audio recording, but you can embed videos with sound:
- Use tools like Zoom or Loom to record video presentations with audio.
- Upload the video to Google Drive and insert it into your slides via the Insert > Video option.
Interactive Audio Elements
Create clickable buttons or links that play audio:
- Insert an image or shape.
- Link it to an audio file stored in Google Drive.
- Customize the icon for a seamless design.
Combine Audio with Animations
Sync animations and transitions with your audio for a polished, professional look. Use the Animations tab to control timings and effects.
Fixing Audio Recording Insertion Issues in Google Slides
- Check Internet Connection: Ensure a stable internet connection.
- Supported Audio Formats: Use MP3, WAV, or OGG formats.
- Clear Browser Cache: Clear cache and cookies.
- Try Different Browser: Test with another browser.
- Update Browser and Google Slides: Ensure both are up to date.
- Disable Extensions: Temporarily disable browser extensions.
- Check File Size: Ensure audio file size is within limits.
- Re-upload Audio: Try re-uploading the audio file.
- Autoplay Setting: Check if autoplay is enabled.
- Preview in Presentation Mode: Test in Presentation Mode.
Final Words
Adding audio to Google Slides is a powerful way to create more engaging, dynamic, and impactful presentations. By following this guide, you can seamlessly incorporate audio, troubleshoot common issues, and explore advanced features to elevate your presentation game.
Start experimenting today and take your presentations to the next level. If you found this guide helpful, share it with your network or drop a comment below with your thoughts or questions!


