- Turning off automatic downloads and macOS installation in System Settings is the most effective way to stop recurring Tahoe upgrade prompts.
- If the 12GB Install macOS Tahoe file already exists in the Applications folder, macOS will keep prompting you to upgrade until the installer is deleted.
- Commands that reset notification badges or ignore the Tahoe update can permanently stop the upgrade message from reappearing.
Are you constantly seeing the “Upgrade to macOS Tahoe” notification on your Mac? You try to swipe it away, but it bounces back tomorrow. Or you try to click it away,but it opens a massive installer that demands your attention. If you are reading this, you are likely stuck in this frustrating loop where your computer seems to have forgotten who is in charge.
Updating an operating system is a major change that you should choose to do on your own time. Moving to macOS 26 Tahoe changes core system functions. This nagging usually stems from the system automatically downloading the 12GB installer in the background and constantly handshaking with Apple servers. The system gets stuck in a warning state to ensure everyone uses the newest software.
If you want your desktop back, this guide is for you. Below, we will walk you through how to disable macOS 26 Tahoe upgrade notifications, ranging from simple system toggles to resetting specific terminal dictionaries.
Fix “Upgrade to macOS Tahoe” Stuck Notification
This article will list various troubleshooting steps to help resolve the constant upgrade prompts that won’t disappear, focusing on system settings, hidden installer files, and terminal resets.
1. Turn Off Automatic Updates in System Settings (The Root Cause)
The most common reason for this constant nagging is that your Mac is permitted to look for new software in the background. This often happens after you buy a new computer, where permissions are set to automatic for convenience. If you want to successfully disable macOS 26 Tahoe upgrade notifications, you must verify the update layers first and shut off background access.
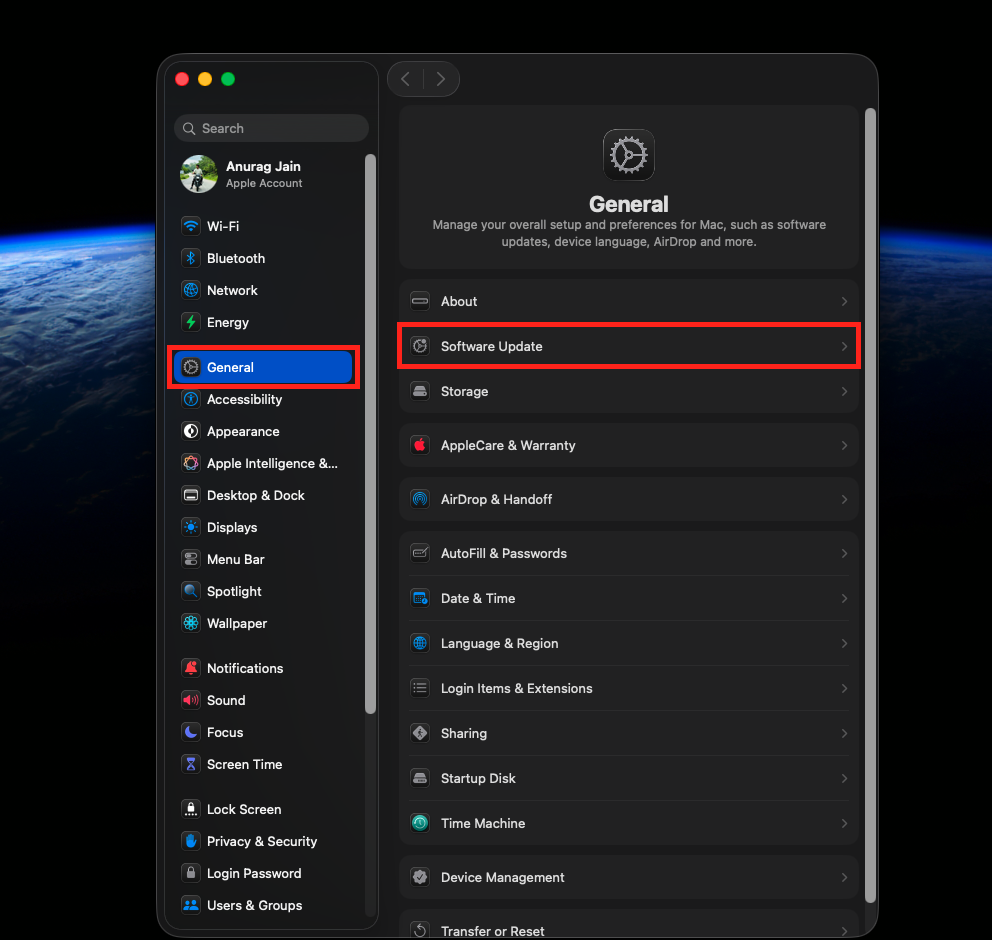
- Open the System Settings application.
- Scroll down the left sidebar and tap on General.
- Look for Software Update on the right side of the window and tap on it.

- Wait for the page to finish checking for current software.
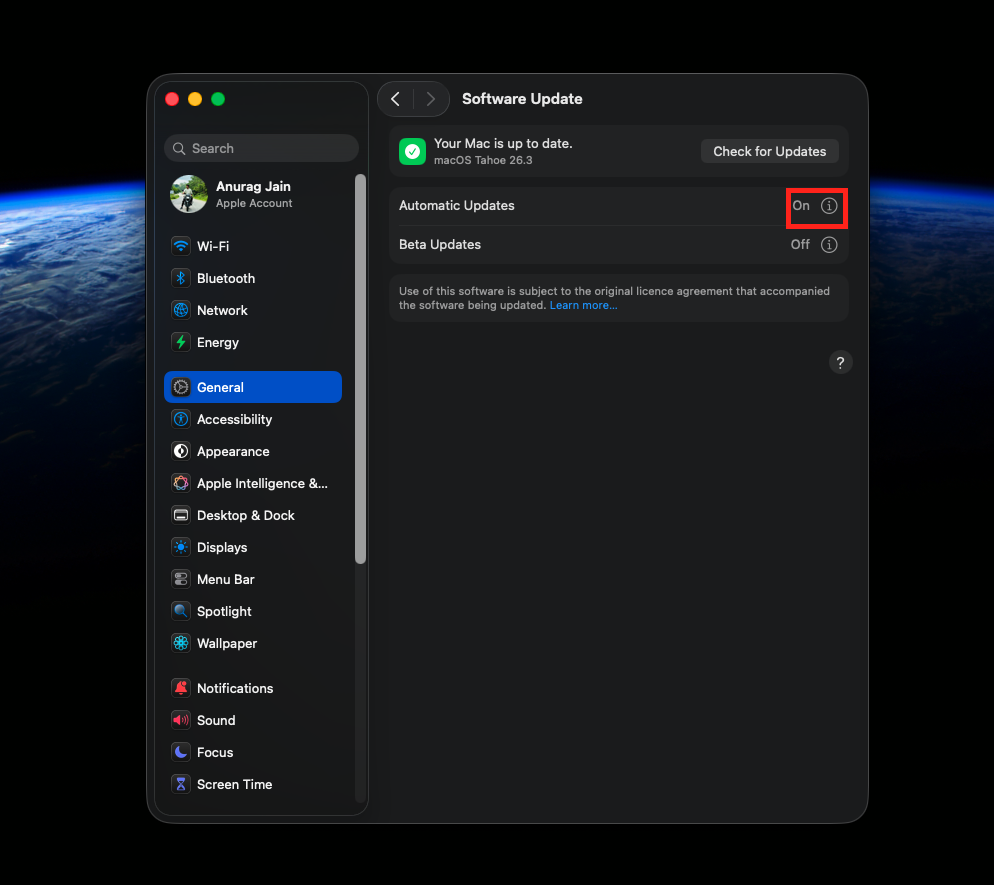
- Tap the small (i) info icon next to the Automatic Updates section.

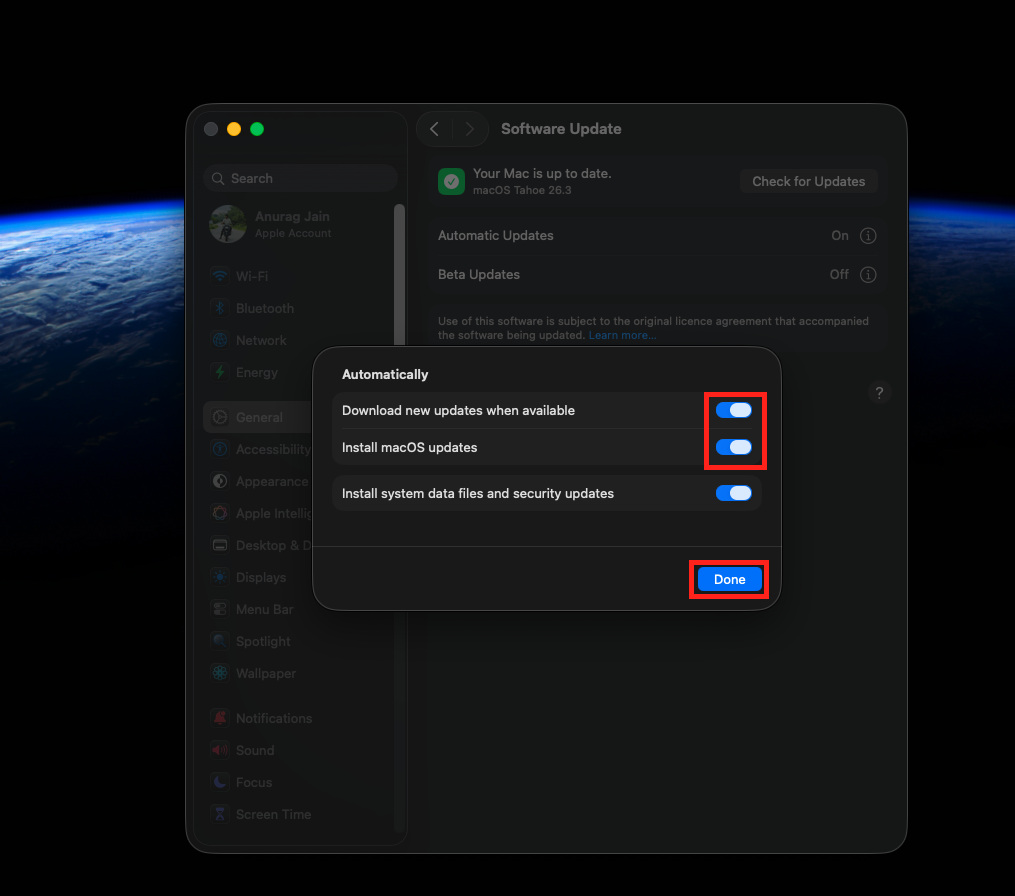
- Toggle OFF Download new updates when available to stop large files from filling your drive.
- Toggle OFF Install macOS updates to prevent midnight reboots.

- Crucial Step: Leave Install Security Responses and system files toggled ON. This ensures you still get small background patches to keep your computer safe without installing the massive Tahoe upgrade.
- Tap Done to save your new preferences.
2. Delete the Downloaded Tahoe Installer
The integration between the update servers and your local storage is the number one suspect for daily alerts. The Mac tries to sync your current version with the new one by downloading the files ahead of time. If the massive 12GB installer file is sitting on your hard drive, it triggers the persistent message every single day.
- Open a new Finder window on your desktop.
- Tap on the Applications folder in the left sidebar.
- Scroll down through your installed apps to find the file.
- Look for an application explicitly named Install macOS Tahoe.
- Right-click on the application icon and select Move to Trash.
- Wait for the file to move out of the folder.
- Look at the Dock at the bottom of your screen and find the Trash icon.
- Right-click the Trash icon and select Empty Trash.
- Confirm the deletion to permanently remove the files from your system.
- Restart your Mac. This forces the system to re-read your storage and stops the immediate prompt from appearing.
3. Clear the Red Notification Badge via Terminal (Clear the Cache)
Sometimes, the red alert is simply a “UI Ghost”—a graphical element that the system thinks it has already dismissed, but the display driver is still rendering a bright red “1” on your System Settings icon. A simple reboot might not clear this cache, but a core terminal command will wipe it out and successfully disable macOS 26 tahoe upgrade notifications completely.
- Press the Command key and the Space bar at the same time to open Spotlight.
- Type Terminal and hit the Return key to launch the application.
- Click inside the black or white terminal window so you can type.
- Type defaults write com.apple.systempreferences AttentionPrefBundleIDs 0 exactly as written.
- Press the Return key to process the command.
- Type killall Dock on the next line.
- Press the Return key again.
- Your screen will flash briefly, and the Dock will disappear and reappear.
- This cuts power to the visual badge logic and forces the operating system to reload all UI elements from scratch, which is highly effective if you see the red dot not disappearing from your dock.
4. Use the Ignore Command for System Updates
macOS uses a background service to suggest major upgrades based on Apple’s release schedule. If this service is allowed to run freely, it will throw an update banner when it detects the new version online. You can use a direct text command to force the system to ignore this specific software package entirely.
- Open the Terminal application again from your Applications folder or Spotlight search.
- Type sudo softwareupdate –reset-ignored and press the Return key.
- Enter your Mac administrator password when the screen asks for it. The letters will not show up as you type, but the computer is recording them.
- Press the Return key after typing the password.
- Type sudo softwareupdate –ignore “macOS Tahoe” and press the Return key.
- Wait for the system to confirm that it has added the software to the ignore list.
- Close the Terminal application.
- If the message disappears, you have successfully blocked the recommendation engine.
5. Suppress Alerts with Focus Modes
Are you using your Mac for intense video editing, audio production, or coding? These workflows require total concentration. If you updated the system recently, alert permissions might be reset, causing the system to spam you with upgrade banners. You can use Focus modes to silence these pop-ups while you work.
- Open System Settings and tap on Focus in the sidebar.
- Select your primary work profile, such as Do Not Disturb or Work.
- Tap on Allowed Notifications to see what is permitted to interrupt you.
- Navigate to the Apps section of the menu.
- Ensure that System Settings and Software Update are completely removed from the allowed list.
- Turn on this Focus mode from the Control Center in the top right corner of your screen.
- The system will now catch the upgrade banners and hide them silently in your Notification Center instead of sliding them across your screen.
6. Block Apple Update Servers in the Hosts File
Sometimes, this error is a genuine conflict between your router and the Apple servers trying to push the 12GB file. You can patch this connection manually by editing a hidden text file on your computer. This file tells your Mac exactly which web addresses it is allowed to visit, stopping the handshake permanently.
- Open the Terminal application.
- Type sudo nano /etc/hosts and press the Return key.
- Enter your administrator password and press Return.
- A simple text editor will open inside the Terminal window.
- Use the down arrow key on your keyboard to move the cursor to the bottom of the text.
- Type 127.0.0.1 swscan.apple.com on a new empty line.
- Type 127.0.0.1 swquery.apple.com on the next line.
- Type 127.0.0.1 gdmf.apple.com on the next line.
- Press the Control key and the letter O key at the same time to save the file.
- Press the Return key to confirm the file name.
- Press the Control key and the letter X key to exit the text editor.
- Restart your Mac for these changes to take effect. Your Mac will no longer be able to talk to the update servers.
7. Implement an MDM Configuration Profile
If the message persists despite all the above steps, the update rules in your macOS installation are likely too aggressive. You need to apply an enterprise-level block to effectively disable macOS 26 Tahoe upgrade notifications. This will not delete your files or apps, but it will force the computer to act like a managed work machine that is not allowed to upgrade for 90 days.
- Open your web browser and search for a macOS update delay configuration profile.
- Download the trusted .mobileconfig file to your computer.
- Double-click the file in your Downloads folder to open it.
- Go to System Settings and tap on Privacy & Security.
- Scroll down to the bottom and tap on Profiles.
- Review the profile details to ensure it only targets software update delays.
- Tap Install and enter your Mac administrator password.
- After the profile loads, open the Software Update menu. You will see a message stating that your Mac is up to date, successfully hiding the Tahoe upgrade.
8. Disable App Store Auto-Updates
The Mac App Store is heavily integrated with the system’s software update mechanism. If the App Store is left unchecked, it can occasionally override your system preferences to prompt you for major version jumps, especially if your installed applications demand the newer macOS to function.
- Open the App Store application from your Dock or Applications folder.
- Tap on the App Store text in the top left menu bar of your screen.
- Select Settings from the drop-down menu that appears.
- A preferences window will open.
- Uncheck the box labeled Automatic Updates.
- Uncheck the box labeled Download apps purchased on other devices.
- Close the preferences window.
- You will now have to update your apps manually. This gives you the opportunity to verify that an app update does not secretly require macOS 26 Tahoe before you click install.
Final Words
The “Upgrade to macOS Tahoe” message is more than just a visual annoyance; it is a sign that the delicate web of permissions between your local storage, Apple’s servers, and system preferences has tangled. It is rarely a hardware issue. By methodically resetting the privacy permissions, stopping the automatic downloads, and clearing the cache via a Force Restart of the Dock, you can usually banish this ghost from your screen.
Remember, modern macOS is designed to protect your data, and sometimes it gets too protective, locking you out of the decision-making process for your own machine. The steps above are designed to force the system to re-verify those handshakes on your terms. Once you disable macOS 26 Tahoe upgrade notifications, you can go back to working soundly, knowing your computer will actually run the software you want when it’s supposed to.
ALSO READ:


