- Adding subtitles to VLC Media Player enhances the movie-watching experience, making dialogue clearer, especially for foreign films.
- Two methods are outlined for adding subtitles: the first involves downloading subtitles and selecting them within VLC, while the second method uses the VLSub plugin to automatically search for and apply subtitles.
- Additionally, tips on adjusting subtitle settings include synchronizing subtitles with audio and customizing appearance in VLC preferences for font, size, and color.
Ever found yourself squinting at the screen, trying to make sense of a movie’s dialogue? Or maybe you’re diving into a foreign film but alas, you’re not quite fluent in French. Fear not! Adding subtitles to VLC Media Player is a game-changer, and it’s super easy. In this guide, we’ll walk you through the simple steps to make your movie-watching experience a breeze. So, grab your popcorn, and let’s get those subtitles rolling!
If you have subtitles on whichever movie or video you are watching, you can easily make out what is being said in that particular movie or video. But, the only problem to have these subtitles added to any video or movie in the VLC media player is the method which one needs to follow to get these subtitles.
Most of the people are not familiar with the techniques required to do so. Hence, here we are going to discuss with you the proper methods along with their steps which will assist you in adding subtitles in VLC media player. In our previous article, we have listed the methods which you can use to create your own subtitles hence, if you are hoping to add subtitles to your self-made videos, you won’t find the subtitles anywhere but, you will have to create your own.
Also Read: How To Download Using Torrent – Movies & Any Files
How To Add Subtitles On VLC Media Player For Movies/Videos
The 2 methods are quite easy to understand as well as execute. So let’s take a look at these methods and the steps listed below.
Method #1: Download The Subtitles

In this method, you just need to click on some options and you need to download the subtitles if you don’t have them.
Step 1: Play the video or movie you want to watch on the VLC media player.
Step 2: Then from the menu bar click on the option which reads ‘Video‘.
Step 3: A Dropbox will now be visible on your screen with many more options. Here, select the option that reads as ‘subtitles track‘ and then click on the ‘Open file‘ option.
Step 4: Now, a dialogue will appear from which you still have to select the subtitle file for that movie or video that you had downloaded.
Step 5: After you have selected the appropriate file, click on the ‘Open‘ option which you will find at the bottom of the dialogue box.
That’s it! The subtitles for the video or movie you are watching will be added to the VLC media player if you have downloaded the proper subtitles.
Method #2: Using VLSub Subtitles

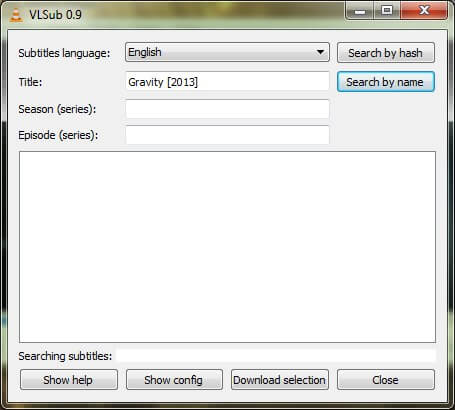
In the method, we are going to use a very useful, highly rated VLC add-on known as VLSub to download and apply the required subtitles. When this plugin is downloaded and installed, it automatically searches for the subtitles for the current movie or video you are watching and shows the best results fur you to choose from. However, this plugin works only with the VLC 2.2 version so, if your VLC player is not updated then, please do it before you proceed any further. The steps required in this process are listed below.
Step 1: Install the VLSub plugin from here.
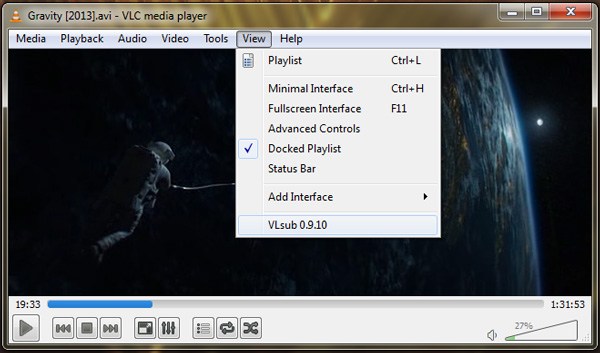
Step 2: A new menu will be added which is ‘View > VLSub‘. Click on this newly added option and specify your search criteria which is either by hash or by name. Once you select an option, the search results will be displayed.
 Step 3: Select the most appropriate search for the movie or video that you are watching.
Now, when you play the video, you will notice that the subtitles are successfully added in the VLC media player.


")
")

")