- Machine Check Exception is a common BSOD error in Windows 11 caused by various reasons like corrupted system files, problematic RAM, and outdated drivers.
- To fix this issue, try unplugging incompatible accessories, undoing overclocking, running SFC Scan and CHKDSK command, using Windows Memory Diagnostic Tool, updating drivers, and running Startup Repair.
- If these steps do not resolve the issue, check hardware for faults, and consult a service center if needed.
BSOD errors in Windows 11 are of so many types. Machine Check Exception is another common BSOD error that many users have reported facing recently while using Windows 11. You may face this issue on your PC due to various reasons, including corrupted system files, problematic RAM, overclocking CPU, problems with hardware, and outdated or buggy drivers. If you have been facing the Machine Check Exception issue in Windows 11, it may be because of the reasons above. If you have been facing Machine Check Exception in Windows 11, and looking for a way to fix it, then you have made your way to the right place.
Fix Machine Check Exception In Windows 11
This troubleshooting article for Windows 11 will show you how to fix Machine Check Exception in Windows 11.
Unplug Accessories
You may face the issue if you try to run accessories that are incompatible with your device. You should try unplugging all the accessories that are not required for your PC to work properly. Check whether you still get the same issue or not. If you still get the issue, then you should try moving to the next step in this article.
Undo Overclocking
If you have overclocked your PC, then this may be another reason as to why you are facing the machine check exception issue in Windows 11. Overclocking allows you to boost your PC to get more out of it. However, this may increase the voltage input required and may cause an issue with the hardware, thus causing the Machine Check Exception in Windows 11.
You should therefore try undoing overclocking your PC and see if that fixes the issue or not. After undoing overclocking, check if the issue persists or not. If you still face the issue, then you should move to the next step in this article.
Run SFC Scan And CHKDSK Command
Another thing that you can try doing is running the SFC scan. SFC or System File Checker is the in-built system tool to let you scan your PC for issues caused due to corrupted system files. To run SFC Scan, follow the steps given below-
- Open the Start Menu by pressing the Windows key. In the Start Menu, search for CMD.
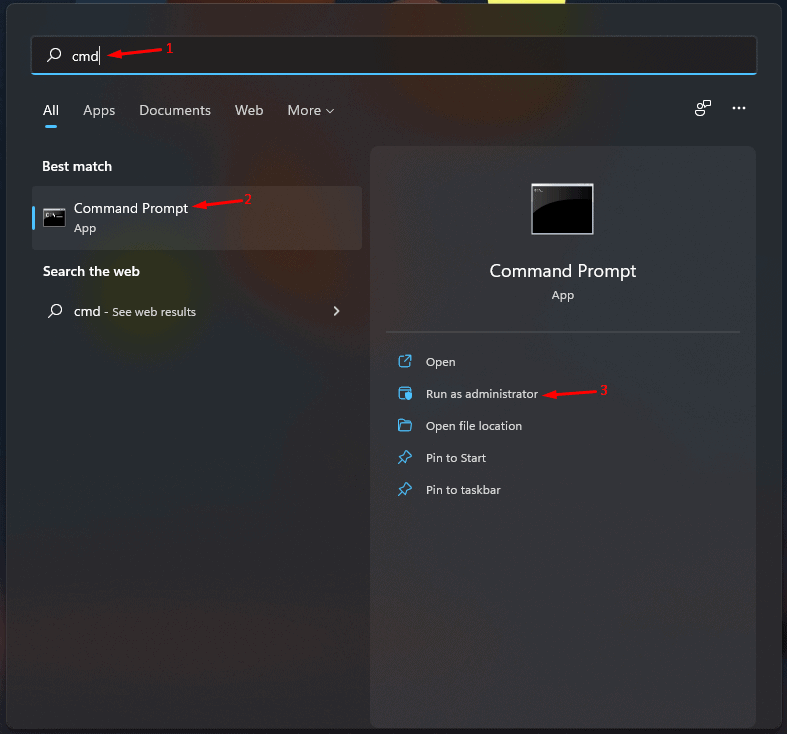
- Now right-click on the Command Prompt on the Start Menu, and then click on the Run as administrator. When you get UAC, click on Yes to run the Command Prompt with administrative privileges.
- In the Command Prompt, type the command sfc /scannow and hit Enter to execute the command.

- Wait for the process to complete. Once done, close the Command Prompt and restart your PC, and then the issue should be fixed.
If running the SFC command didn’t fix the issue for you, then you should try using the CHKDSK command. This command checks the issue with the disk and fixes it. To do so follow the steps given below-
- Open the Command Prompt with administrative privileges like you did in the steps above.
- In the Command Prompt, type the command chkdsk C: /f /r /x and hit Enter to execute it.
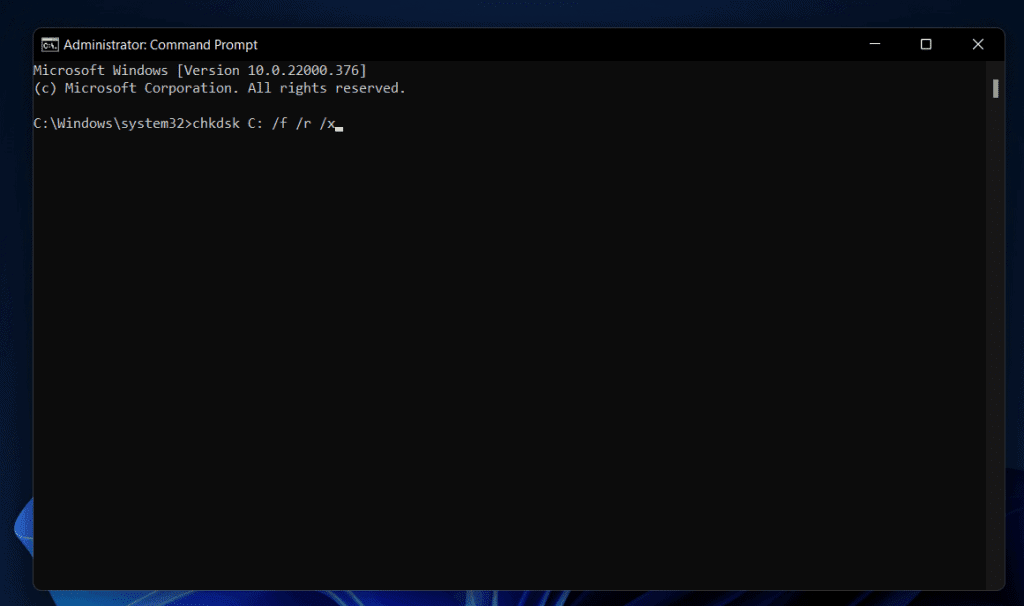
- Wait for the process to complete, and then restart your PC.
This should most probably fix the issue. If the issue is not fixed, then move to the steps given ahead.
Run Windows Memory Diagnostic Tool
You may face this issue due to problematic RAM. You should try running Windows Memory Diagnostic Tool and analyze the memory for all the issues, and fix them. To run the Windows Memory Diagnostic Tool, follow the steps given below-
- Press the Windows key to open the Start Menu. In the Start Menu, search for Windows Memory Diagnostic and hit enter to open the app.
- In the Windows Memory Diagnostic app window, click on the Restart now and check for problems option.

This will restart your PC, and check your PC for all the problems with the RAM. Check if any issues with the RAM are found and fix them. If no issue is found in the memory, then probably you are facing the machine check exception in Windows 11 due to some other reasons.
Update Drivers
You may face this issue due to outdated drivers. You should try updating the drivers on your PC, and that may be your fix to the machine check exception error in Windows 11. There are various ways to update drivers. You can download the drivers from the official website of the hardware you are using. If you are using a laptop, then you can head to the official page of your laptop and download the drivers from there.
Another way to update drivers is by using the Windows Update method. To do so, follow the steps given below-
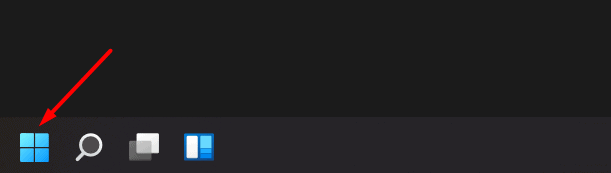
- Open the Settings app on your Windows 11 PC by pressing the Windows + I key combo.

- Head to the Windows Update section on the left sidebar of the Settings app.
- Now on the right side, click on Check for updates button.

- Once your PC finds the update, you will see an Optional updates section. Click on it, and you will find all the drivers updates.
- Download and install the drivers, and then restart your PC.
You can either use third-party driver updater apps to update the drivers on your PC. You can use apps like Driver Booster or DriverPack Solution to update drivers on your PC. These apps help you automatically update the drivers on your PC.
Run Startup Repair
Another thing that you can try doing is running the Startup Repair. To run Start Repair, follow the steps given below-
- Press the Windows + I key combo to open the Settings app on your PC.
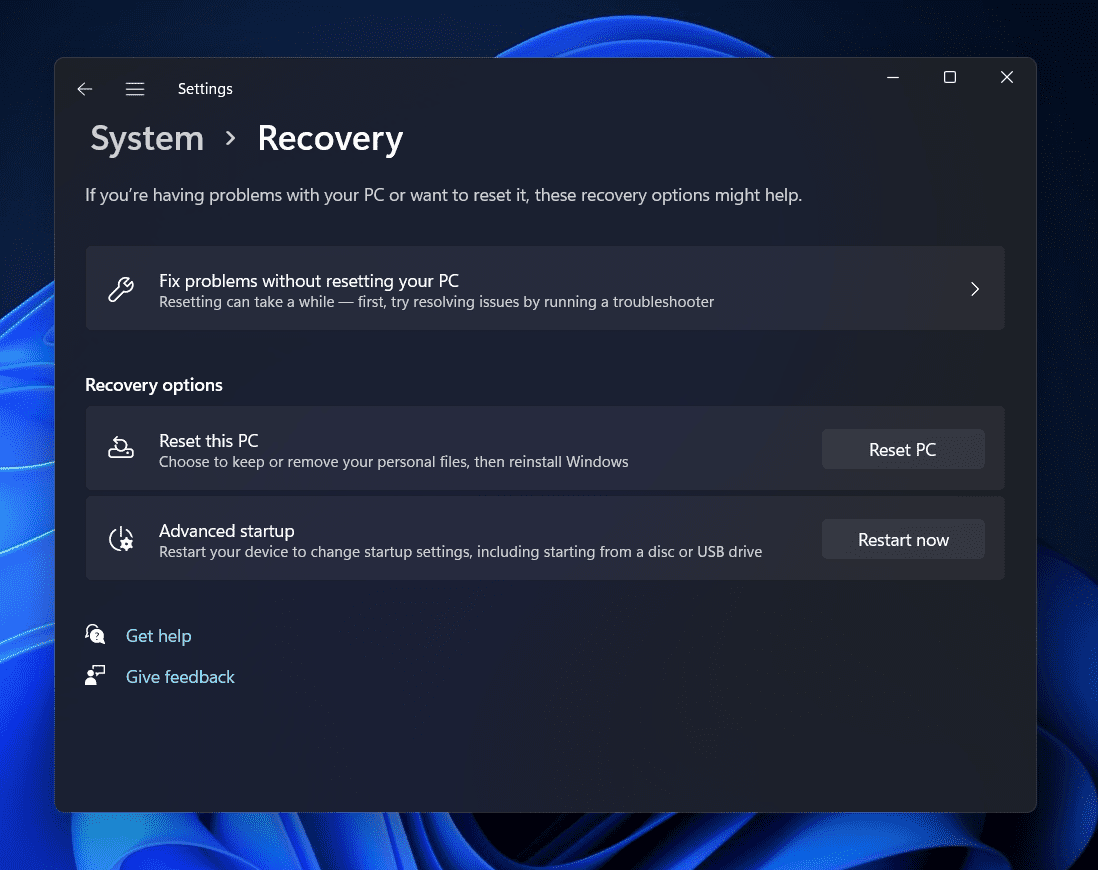
- Click on the Recovery option on the right side of the Settings app.

- Here, click on the Restart now button right next to the Advanced Startup.
- Your PC will start and it will open in Windows Recovery Environment. Here, click on Troubleshoot.
- On the next window, click on Advanced Options.
- Next, click on Startup Repair. Startup Repair will now start, and the issue should be fixed by now.
Check Hardware
If none of it helps you, then you should check the hardware. Faulty hardware may also be the reason behind facing the issue. Therefore, you should try checking your hardware. You can visit your nearest service center and get your PC analyzed for faulty hardware. Get the hardware fixed, and you will no longer face the issue.
RELATED GUIDES:
- How To Fix Screen Flickering Issues In Windows 11
- How To Fix Kernel Security Check Failure In Windows 11
- How To Fix Update Error 0x80070643 in Windows 11
- How To Fix 0x0000007c (ERROR_INVALID_LEVEL) On Windows 11
Final Words
If you have been facing a Machine Check Exception issue in Windows 11, you can try following the steps given above. We have discussed all the troubleshooting steps to fix the machine check exception issue in Windows 11.

")


