- When you move to a new country, some apps might not be available to download due to regional restrictions. To fix this, you need to change your Apple ID's country/region, but you must first clear any credit balances and cancel active subscriptions.
- Before changing your country on your Apple ID, ensure all store credits are spent, subscriptions are canceled at the end of their billing cycles, and any pre-orders or rentals are completed. Leaving Family Sharing or preparing a valid local payment method is also necessary.
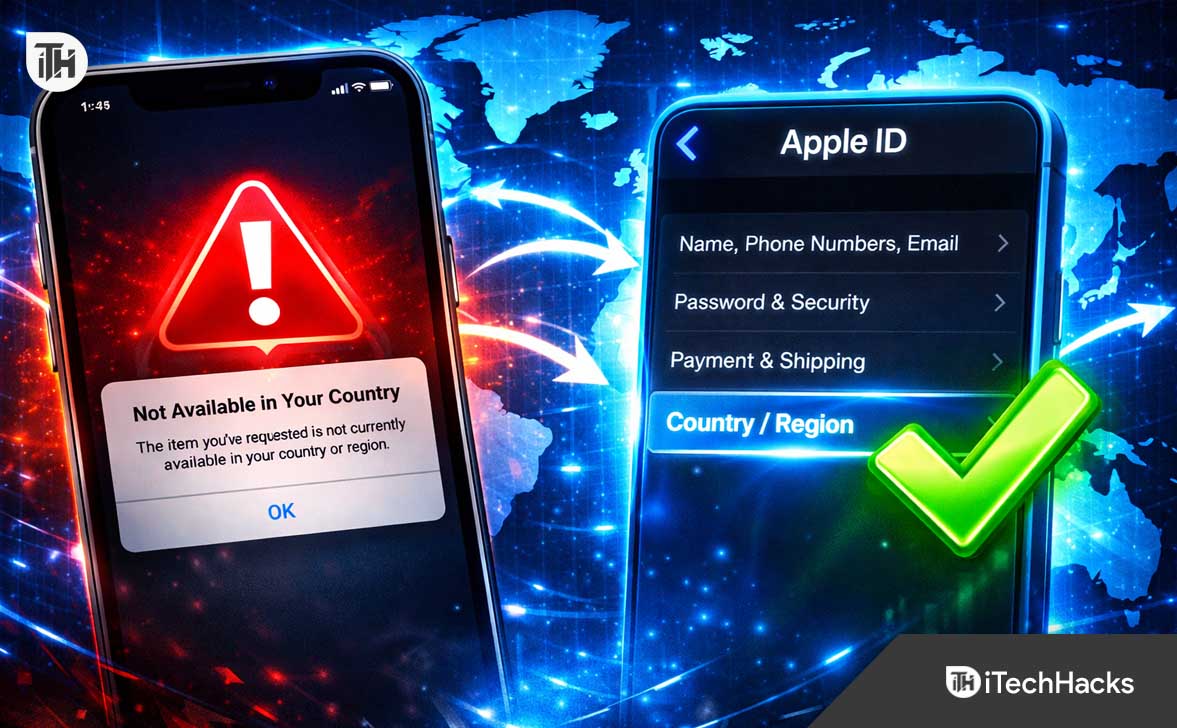
You just moved to a new country, or perhaps you are trying to download an essential app that is exclusively available in another region. You open the App Store, search for the app, and hit a frustrating wall: “This item is not available in your country.” The Apple ecosystem is heavily segmented by geography, locking vital banking apps, local streaming services, and region-exclusive games behind invisible digital borders. If you are stuck wondering how to Change Your Country/Region on your Apple ID Account, you are not alone in this frustrating loop.
Unlocking a new region gives you immediate access to a massive library of local applications and digital content. However, Apple does not make this transition as simple as flipping a switch in your settings menu. You have to navigate through subscription cancellations, store credit balances, and active pre-orders before the system finally allows you to cross the digital border. If you are ready to update your digital residency, keep reading. This guide will walk you through the exact steps to smoothly Change Your Country/Region on Your Apple ID Account across all your Apple devices, ensuring you do not lose your purchased data in the process.
Essential Steps to Take Before Changing Your Region
Before you can migrate your Apple ID to a new country, Apple’s servers perform a strict audit of your account. If you have any financial ties to your current region, the system will block the transfer. You must complete these prerequisite steps to ensure a smooth transition.
1. Spend All Remaining Store Credit
Apple does not convert currency across regions. If you have a $1.50 balance in your US account, you cannot transfer it to a UK or India-based account. You must spend your Apple ID balance down to absolutely zero.
- Open the App Store and check your profile to see your current balance.
- If your balance is too low to buy a single item, you cannot clear it on your own.
- In this specific edge case, you must contact Apple Support.
- Request that they zero out your remaining balance. They will permanently delete the remaining few cents so your account is technically empty.
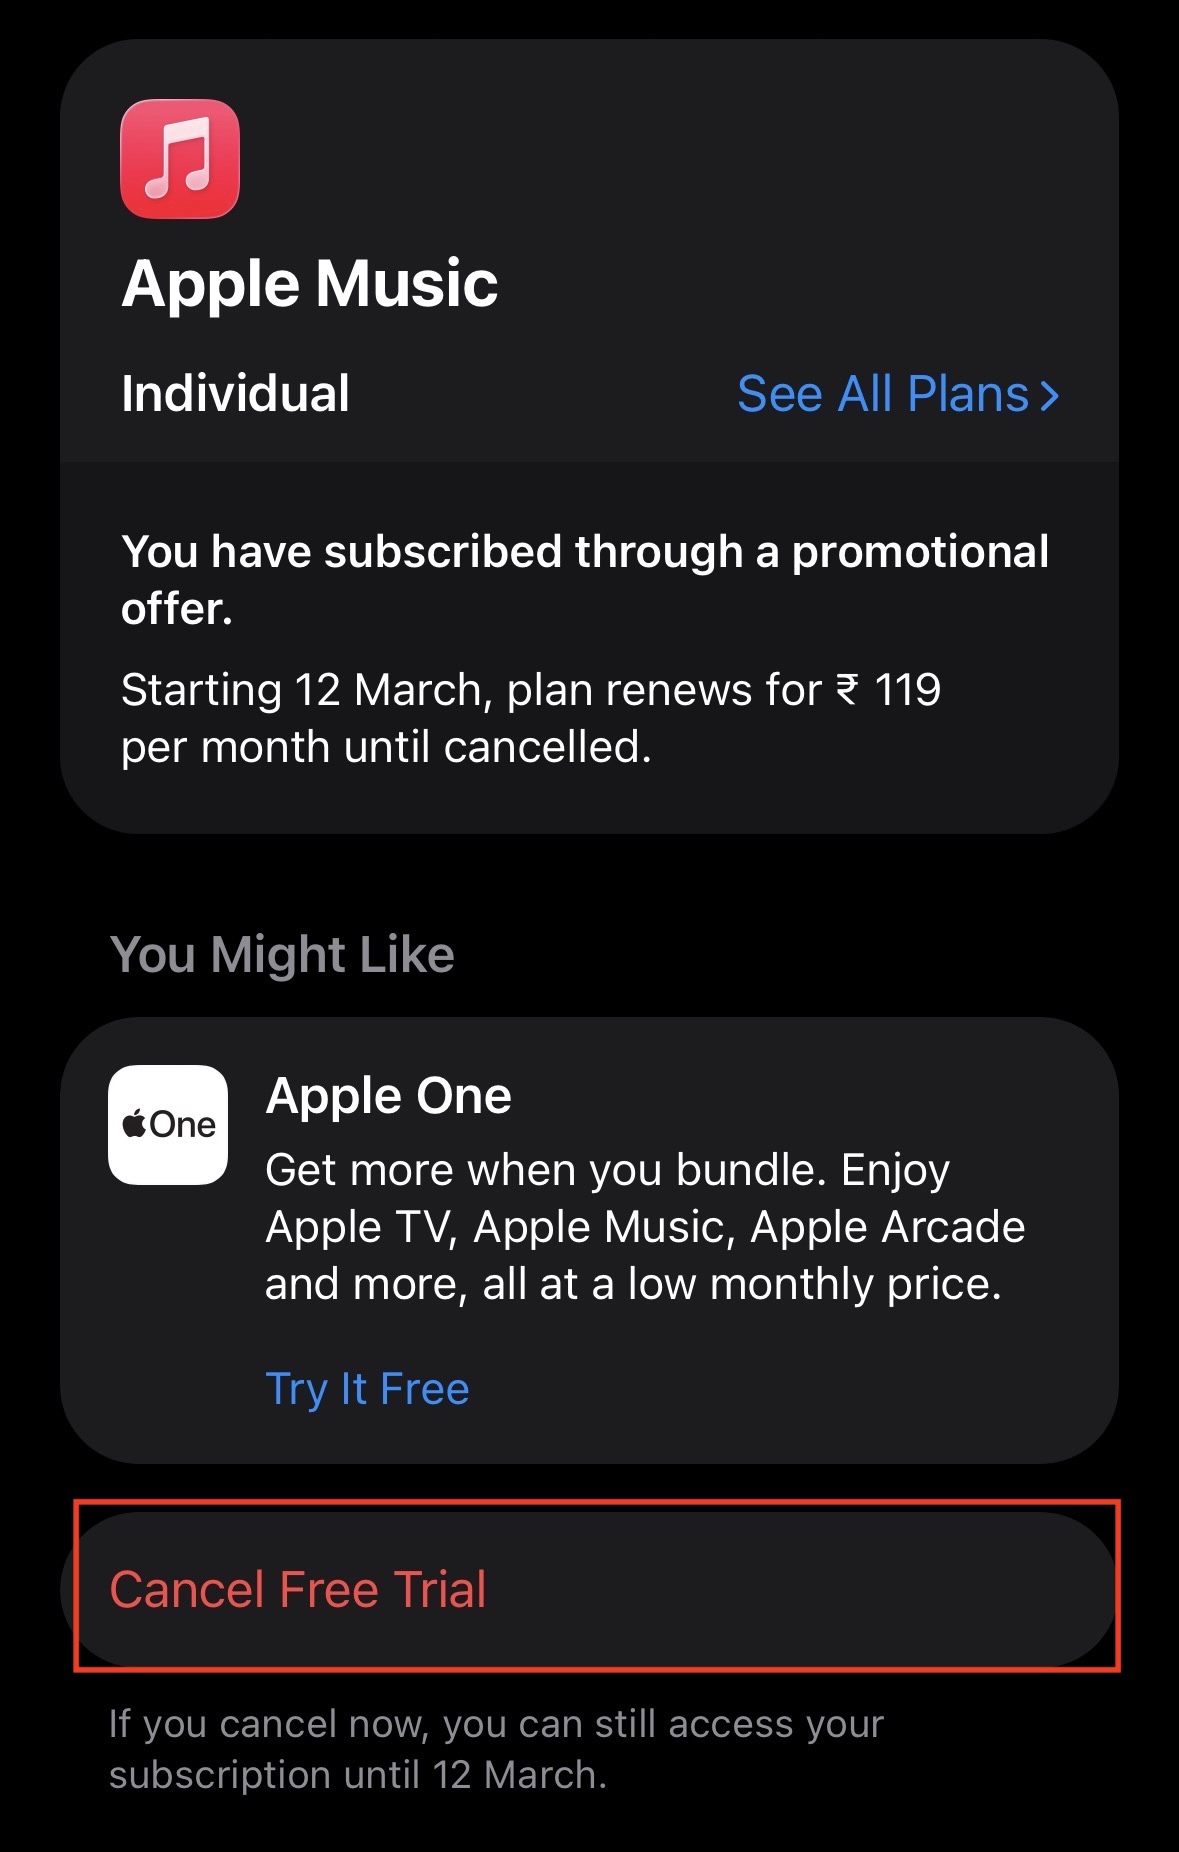
2. Cancel All Active Subscriptions
Subscriptions are tied to the currency and region where they were initiated. You cannot carry an active subscription across a border.
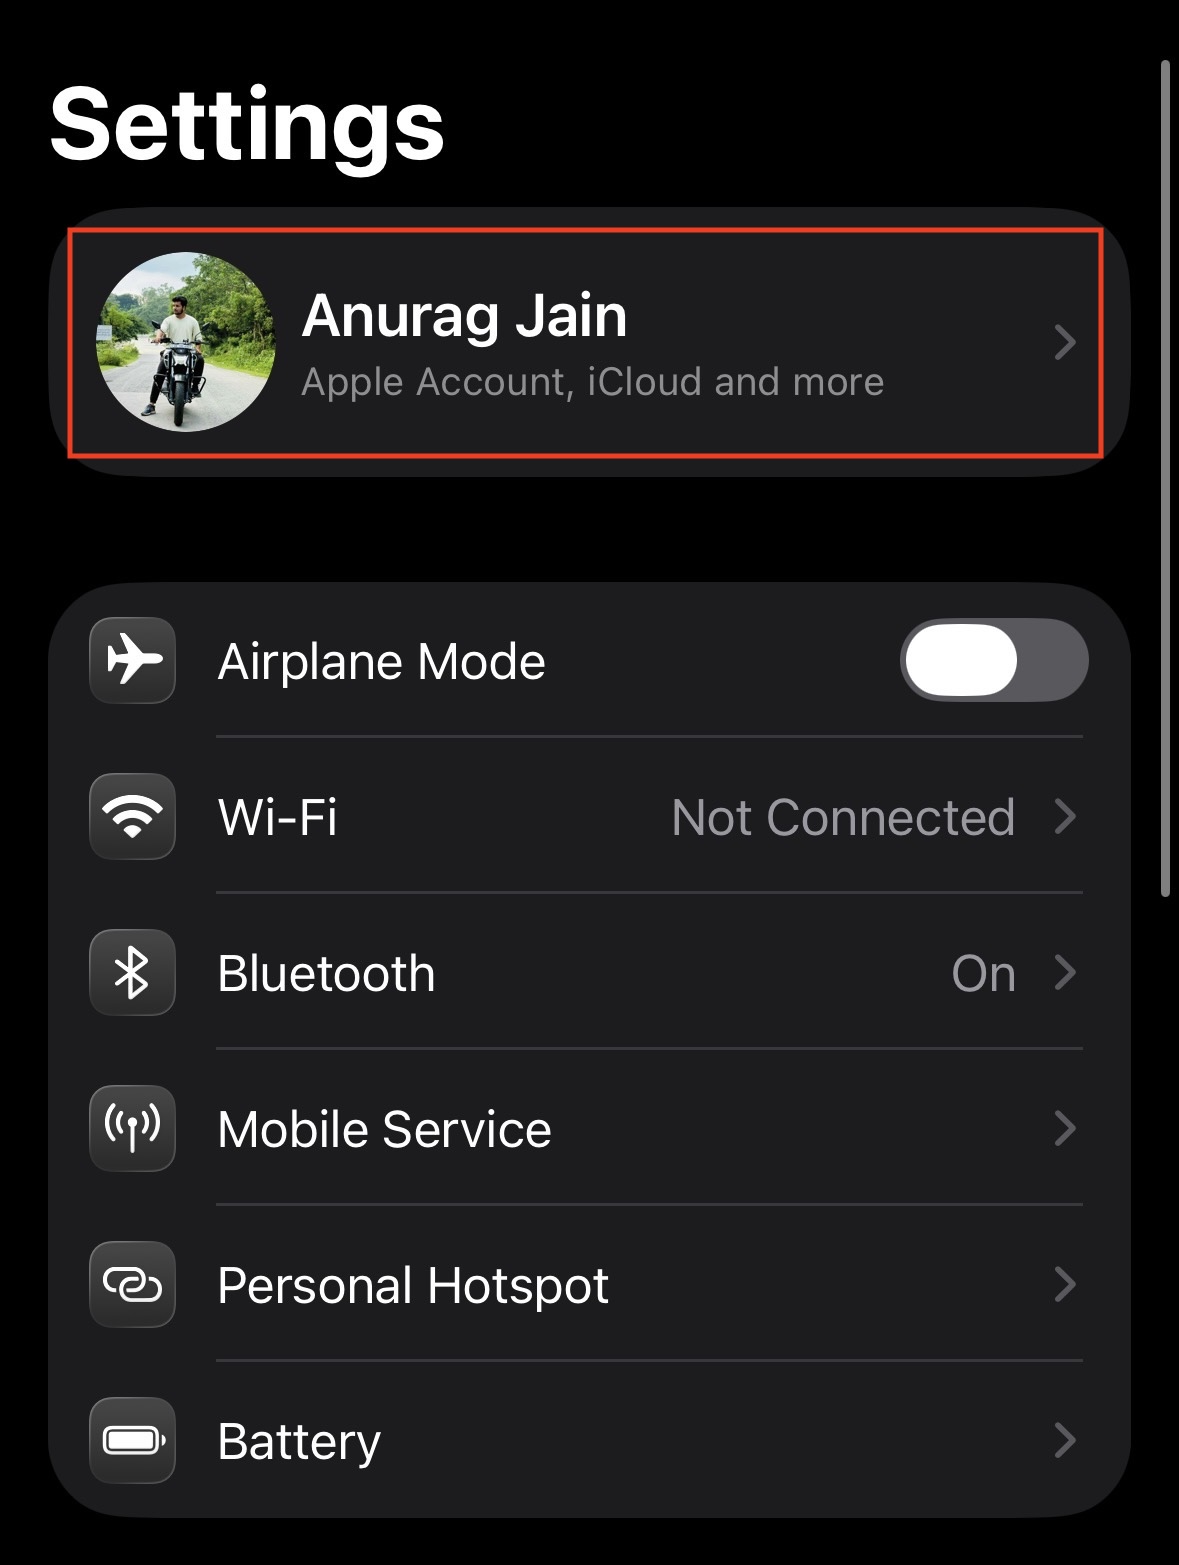
- Open the Settings app on your iPhone or iPad.
- Tap on your Apple ID Name at the very top of the screen.

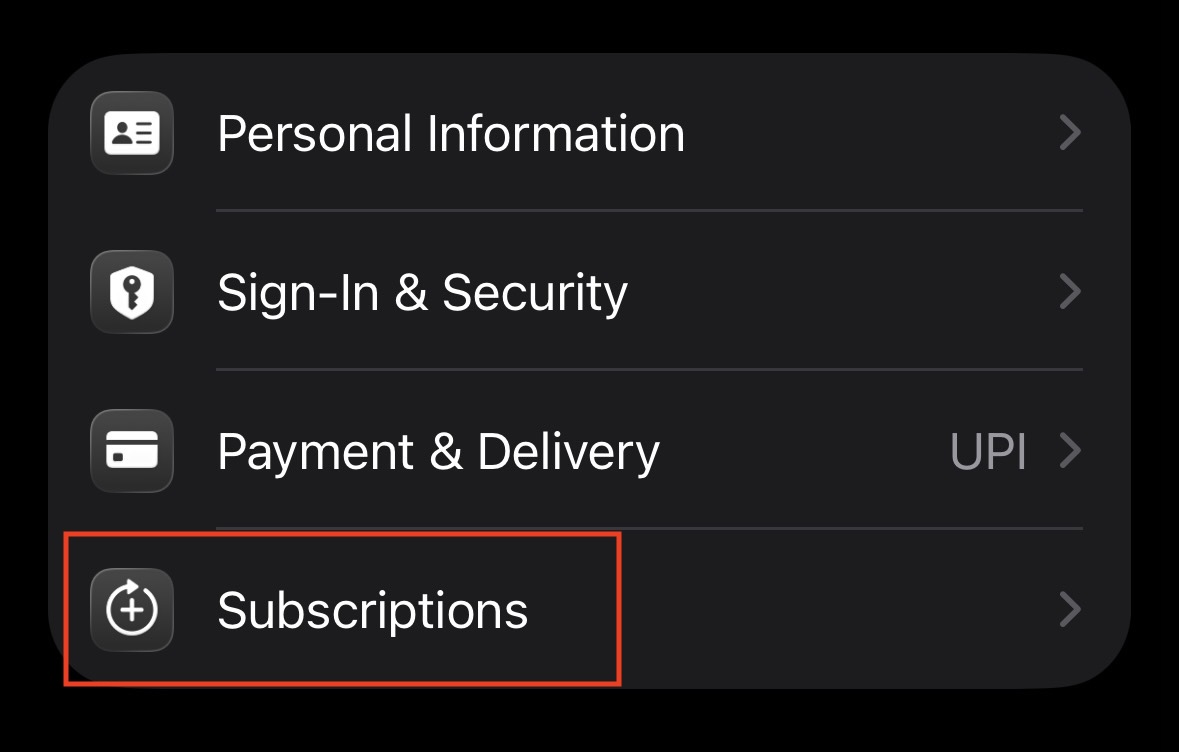
- Tap on Subscriptions.

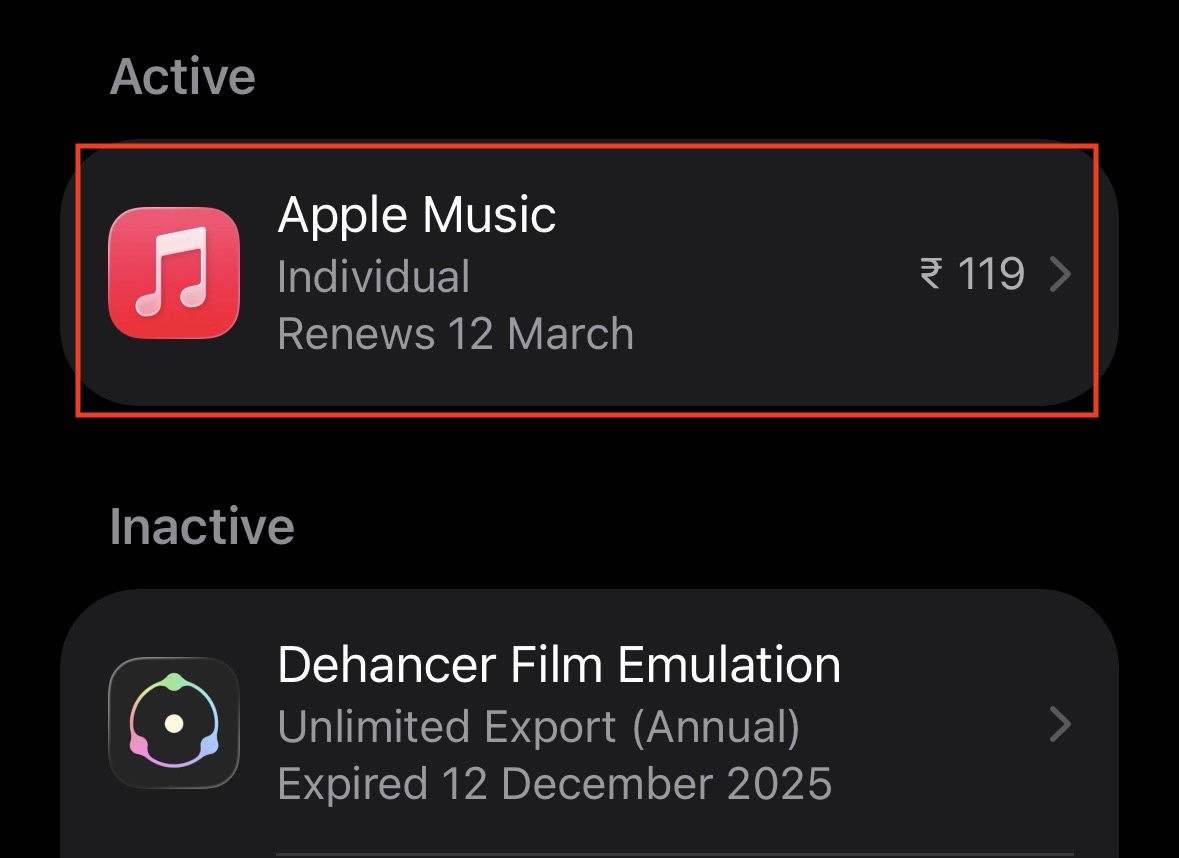
- Look through your list of Active subscriptions.

- Tap on each one and select Cancel Subscription.

- Crucial Step: You must wait until the end of the subscription period. If you cancel Apple Music on the 5th, but your billing cycle ends on the 20th, the system will not let you change your region until the 21st.
3. Wait for Pre-orders and Rentals to Complete
If you have any pending digital transactions, Apple will freeze your region status to prevent delivery failures.
- Check if you have pre-ordered any upcoming movies, music albums, or video games.
- You must either cancel these pre-orders or wait for them to be officially released and charged to your account.
- If you have rented a movie on Apple TV, you must wait for the rental period to expire (usually 48 hours after you press play, or 30 days if unwatched).
- Check if you have any pending refunds for apps. The region change will be blocked until the refund is fully processed and returned to your bank.
4. Leave Your Family Sharing Group
Family Sharing groups are geographically locked. Every member of a Family Sharing group must have their Apple ID set to the exact same country or region.
- If you are the Family Organizer, you must disband the group entirely.
- If you are a standard member, you must leave the group.
- Go to Settings, tap your Apple ID Name, and tap Family Sharing.
- Tap your name in the list of members.
- Select Stop Using Family Sharing to remove yourself from the group.
5. Prepare a Valid Payment Method
You cannot switch to a new country unless you have a regionally approved way to pay for things.
- You will need a credit card, debit card, or verified PayPal account that is physically registered in your new country.
- The billing address for this payment method must exactly match the new region.
- If you are moving to a new country and do not have a local bank account yet, you may need to purchase a local App Store Gift Card to bypass the initial payment method requirement.
Fix “Cannot Change Country or Region” Blockers
This section will list the various troubleshooting methods to actually execute the region change now that your account is prepped and cleared of all financial obligations.
1. Update Your Region via iPhone or iPad
The most straightforward way to update your account is directly through your primary mobile device. This updates the underlying OS settings and refreshes the App Store cache simultaneously.
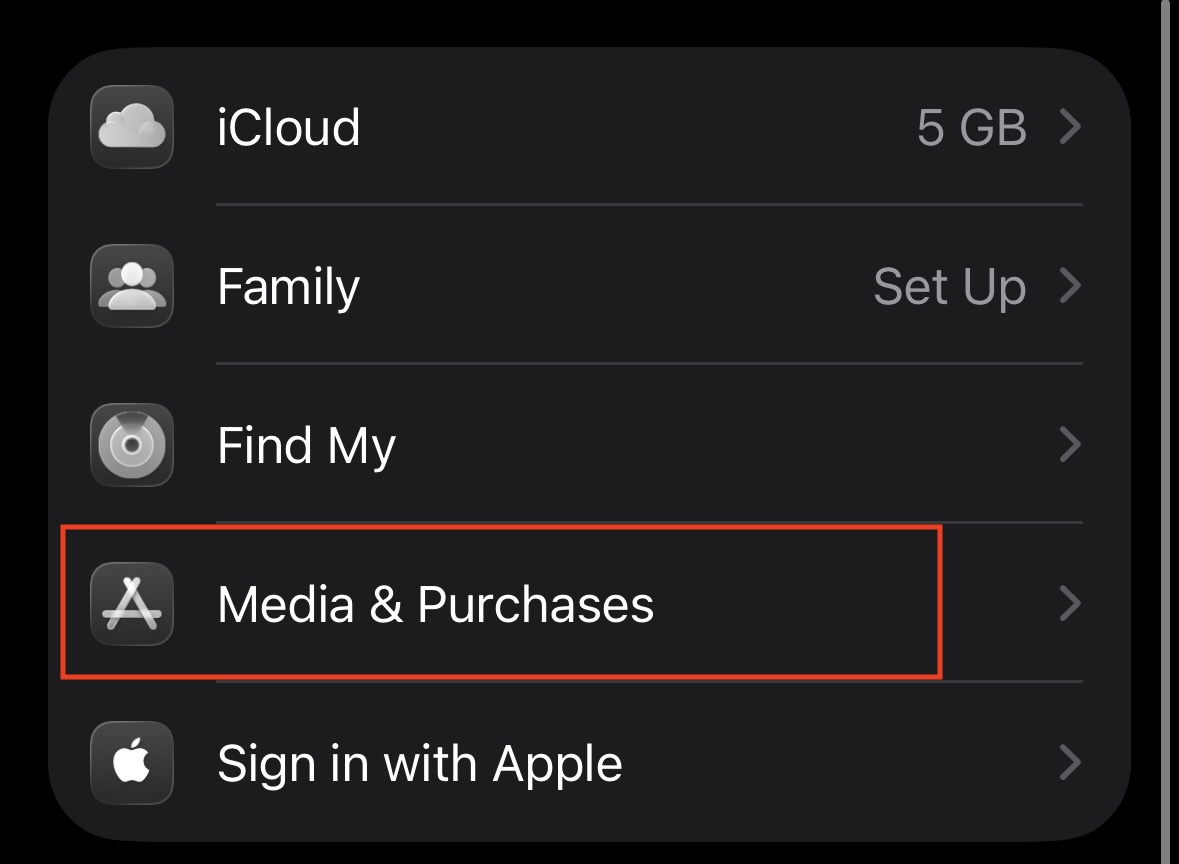
- Open the Settings application on your iOS device.
- Tap on your Apple ID Name banner at the very top of the screen.
- Tap on Media & Purchases.

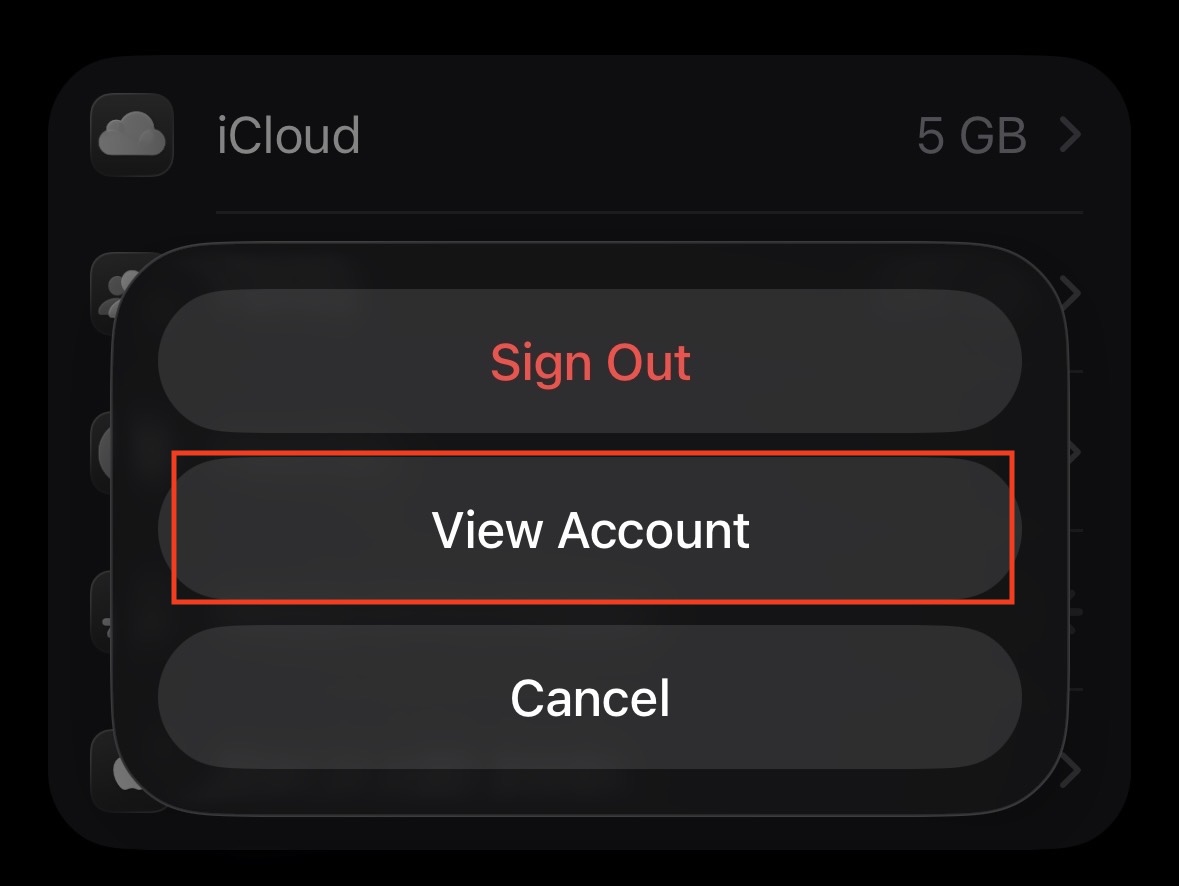
- A small pop-up menu will appear at the bottom of your screen. Tap View Account.

- You may be prompted to authenticate using Face ID, Touch ID, or your passcode.
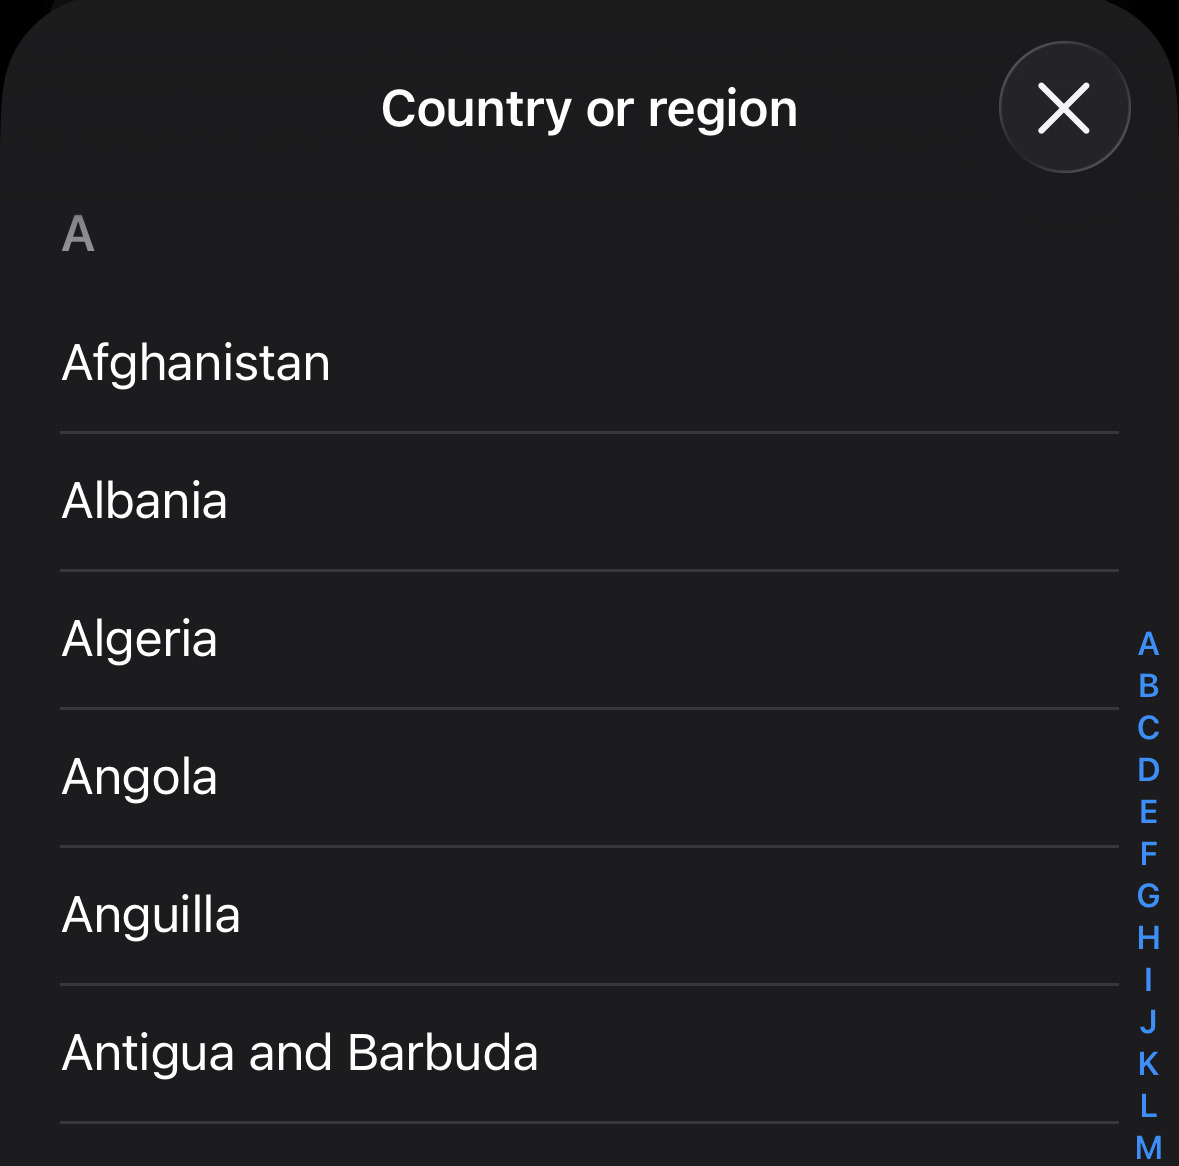
- Tap on Country/Region.

- Scroll through the alphabetical list and select your new country.

- The Terms & Conditions page for that specific region will appear. Read them (or skim them) and tap Agree in the top right corner.
- Tap Agree again on the confirmation pop-up.
- Select your new payment method and enter your new local billing address.
- Tap Next. Your region is now successfully updated.

2. Update Your Region via Mac
If you prefer working on a desktop environment, you can process this change directly through the macOS App Store. The interface is slightly different, but the core system requirements remain exactly the same.
- Open the App Store application on your Mac (you can find it in your Applications folder or via Spotlight search).
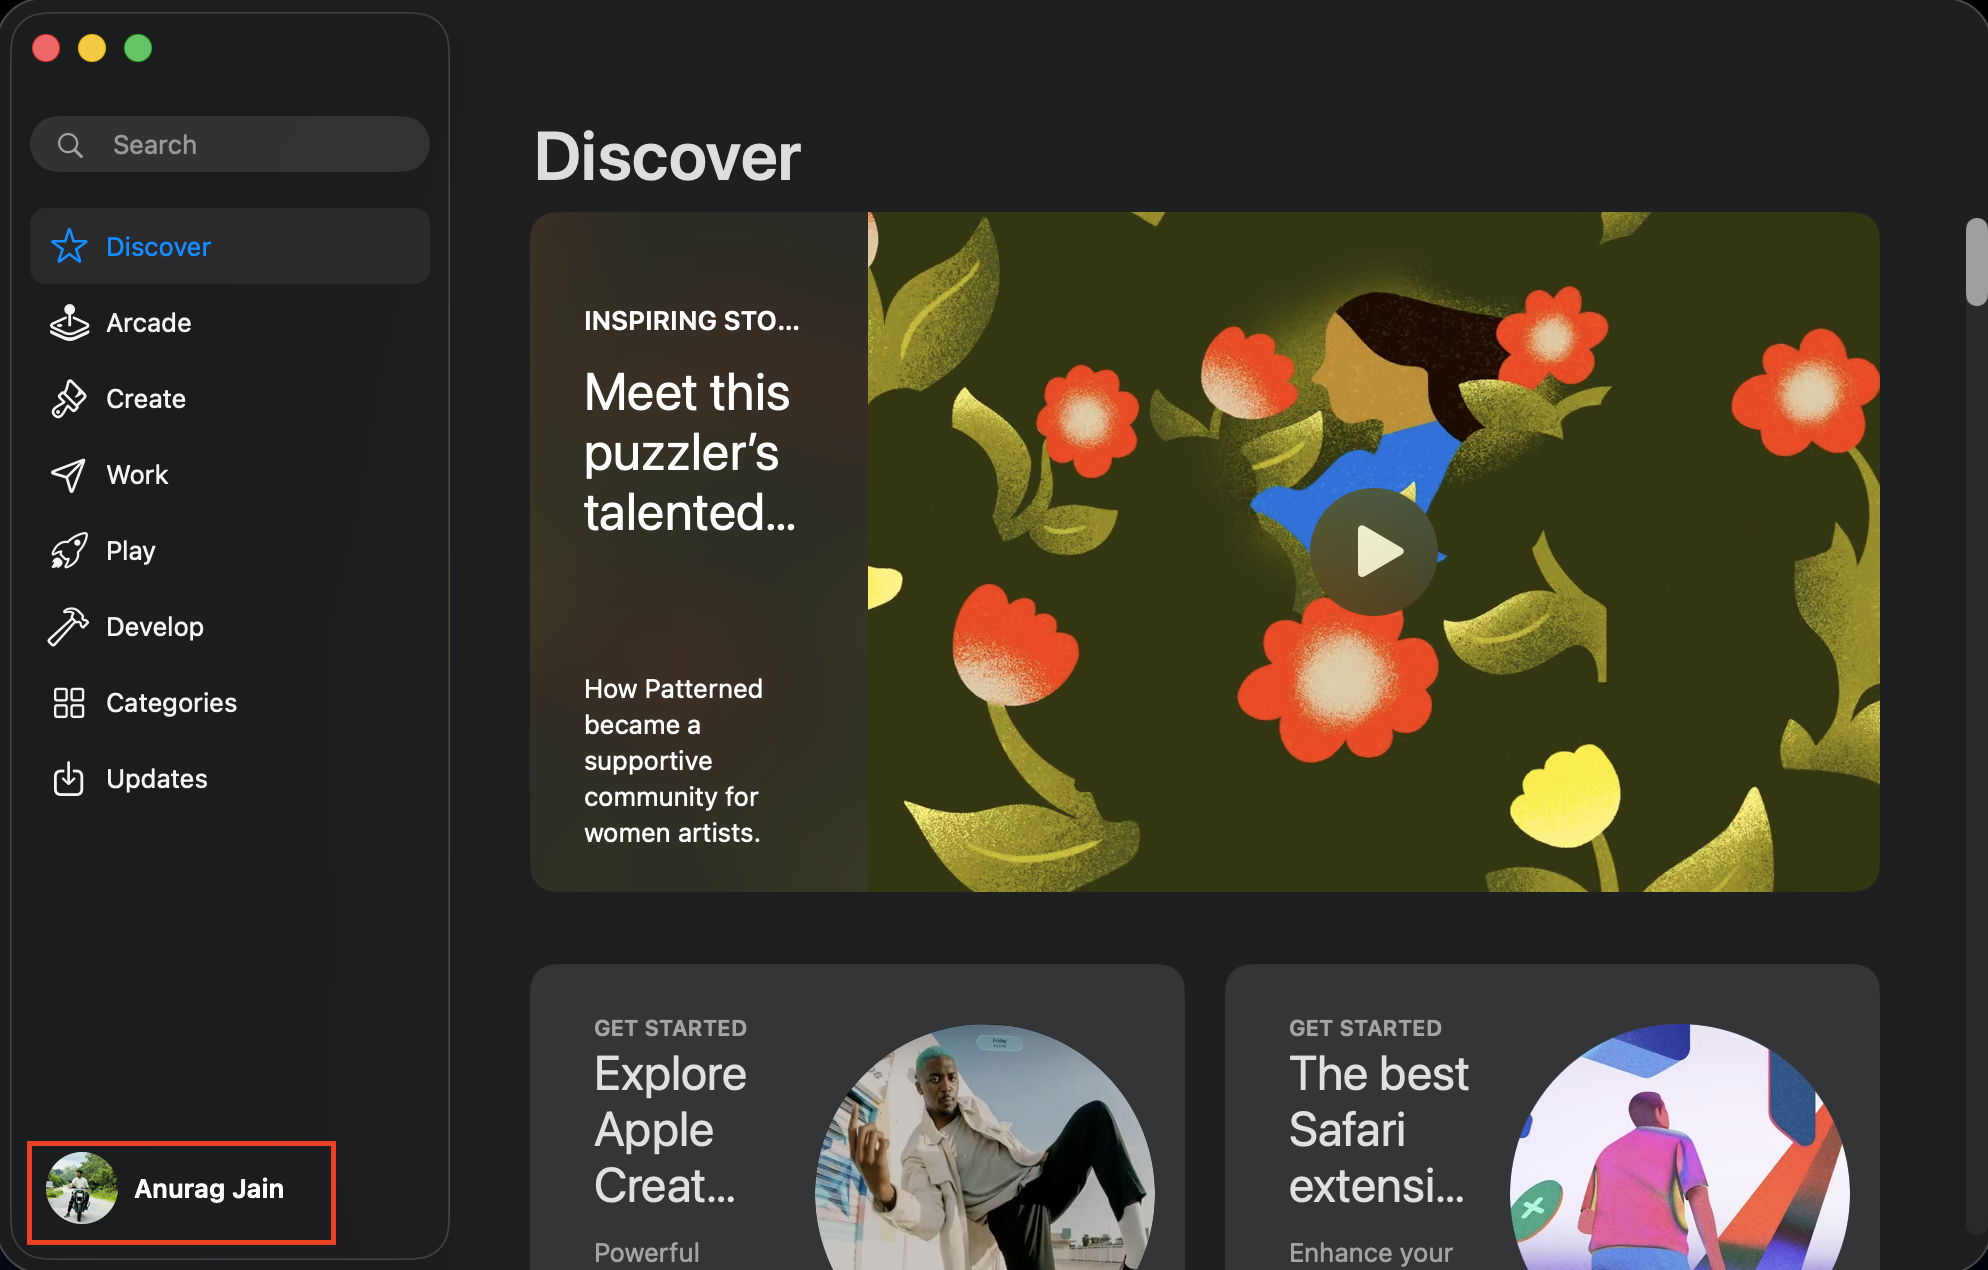
- Look at the bottom left corner of the App Store window and click on your Name or Profile Picture.

- If you are not signed in, click Sign In and enter your Apple ID credentials.
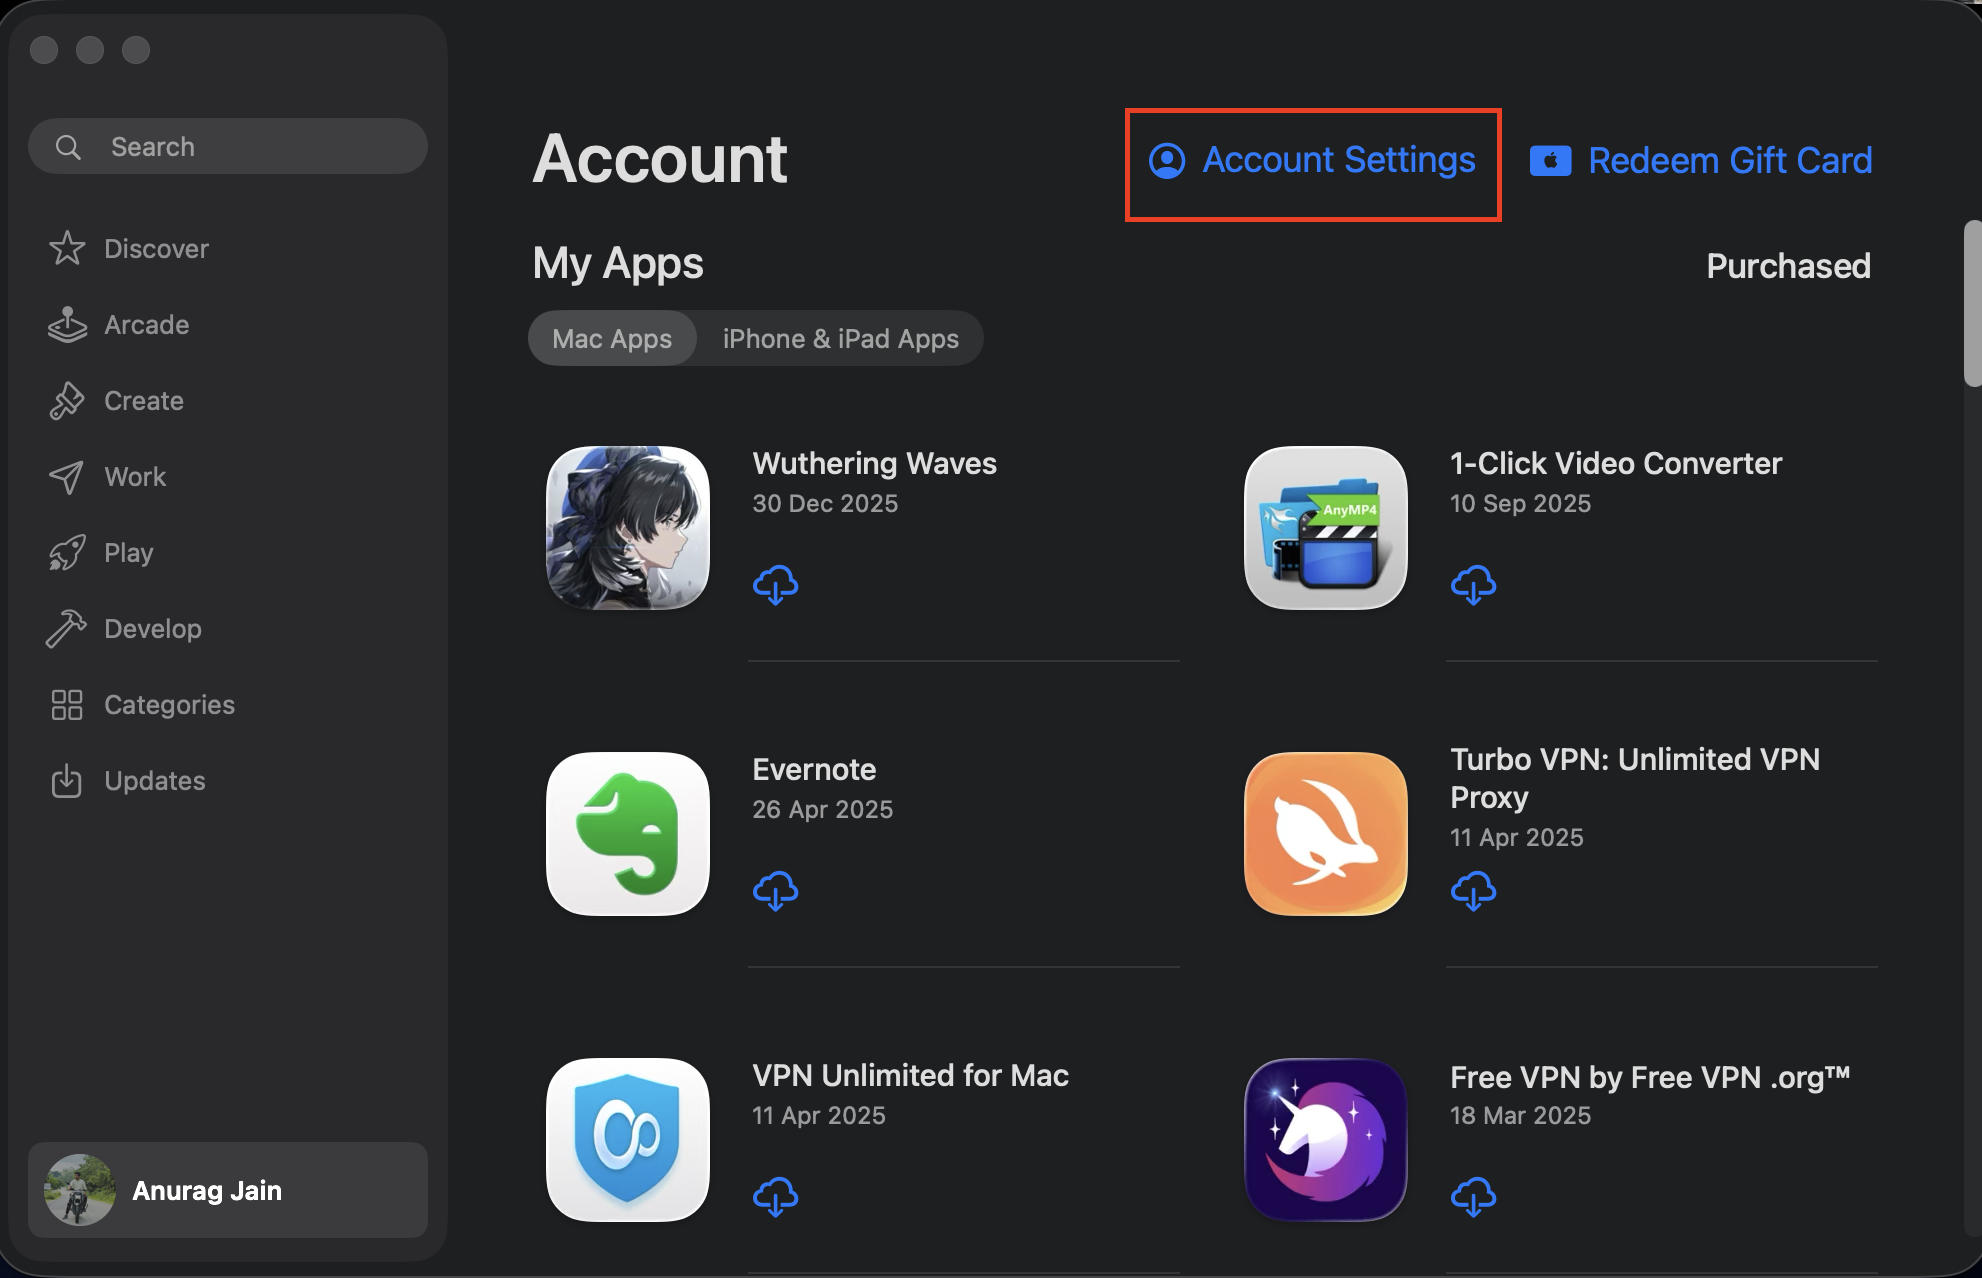
- Look toward the top right of the window and click on Account Settings.

- You will be prompted to enter your Apple ID password to unlock the settings page.
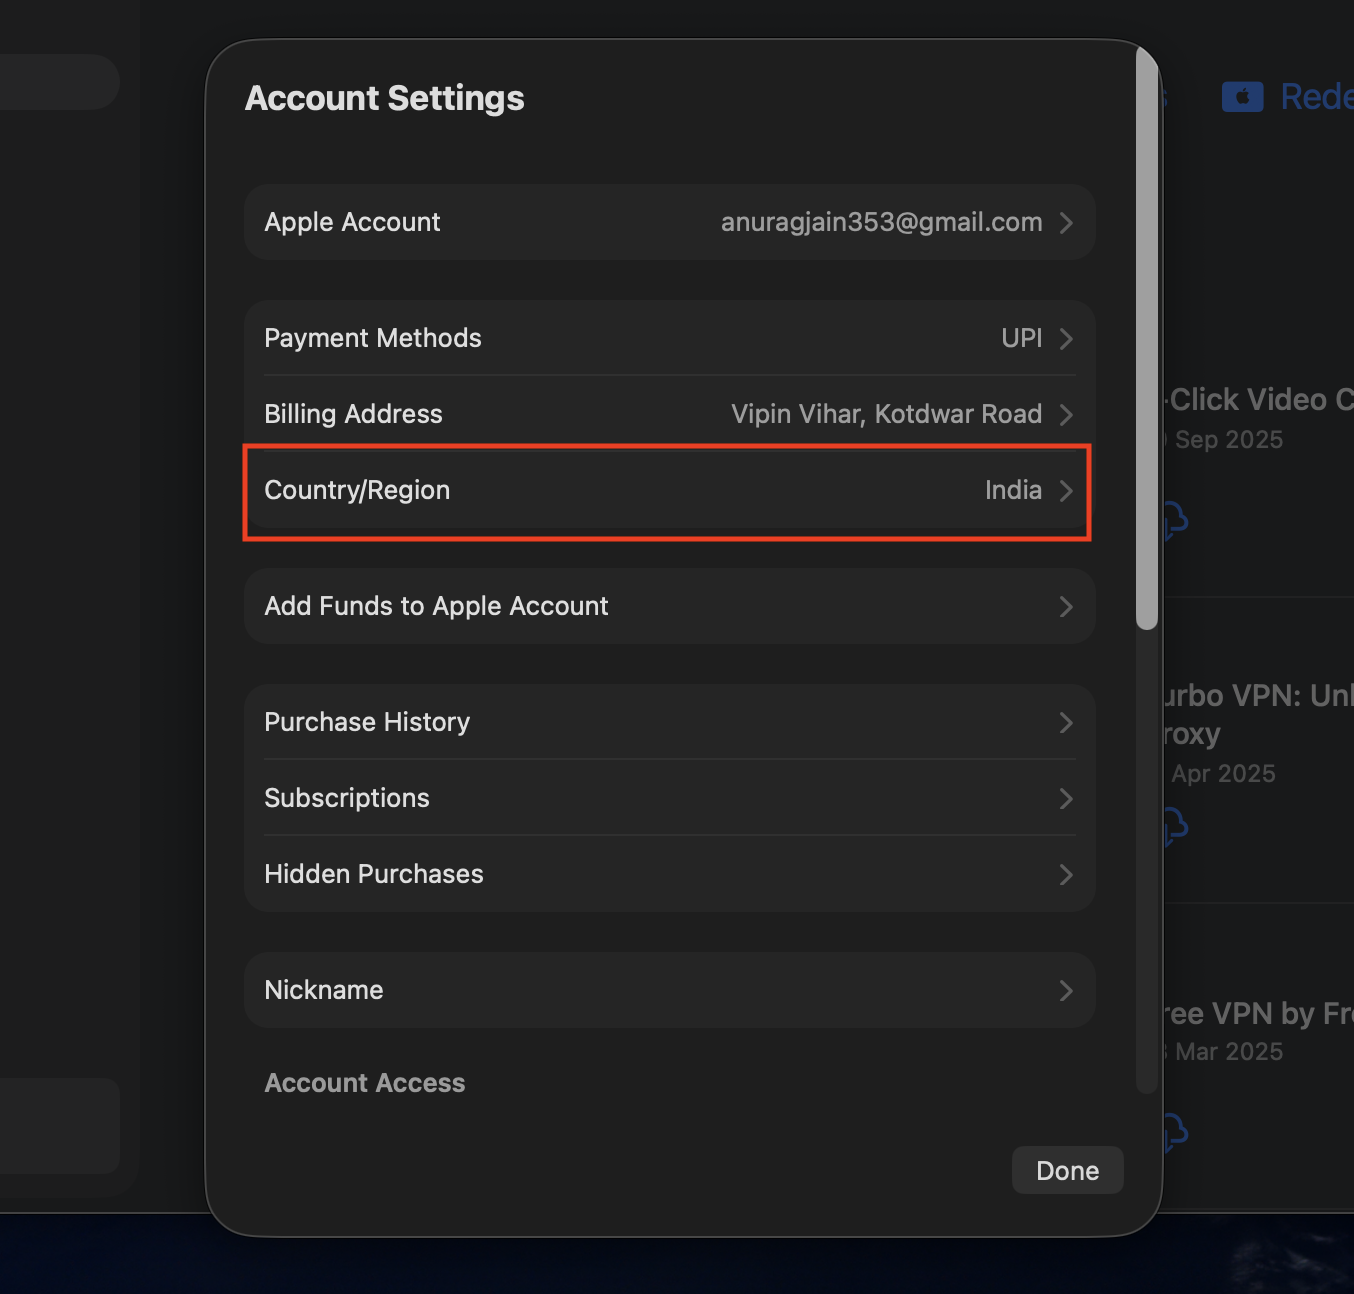
- In account settings, click on Country/Region.

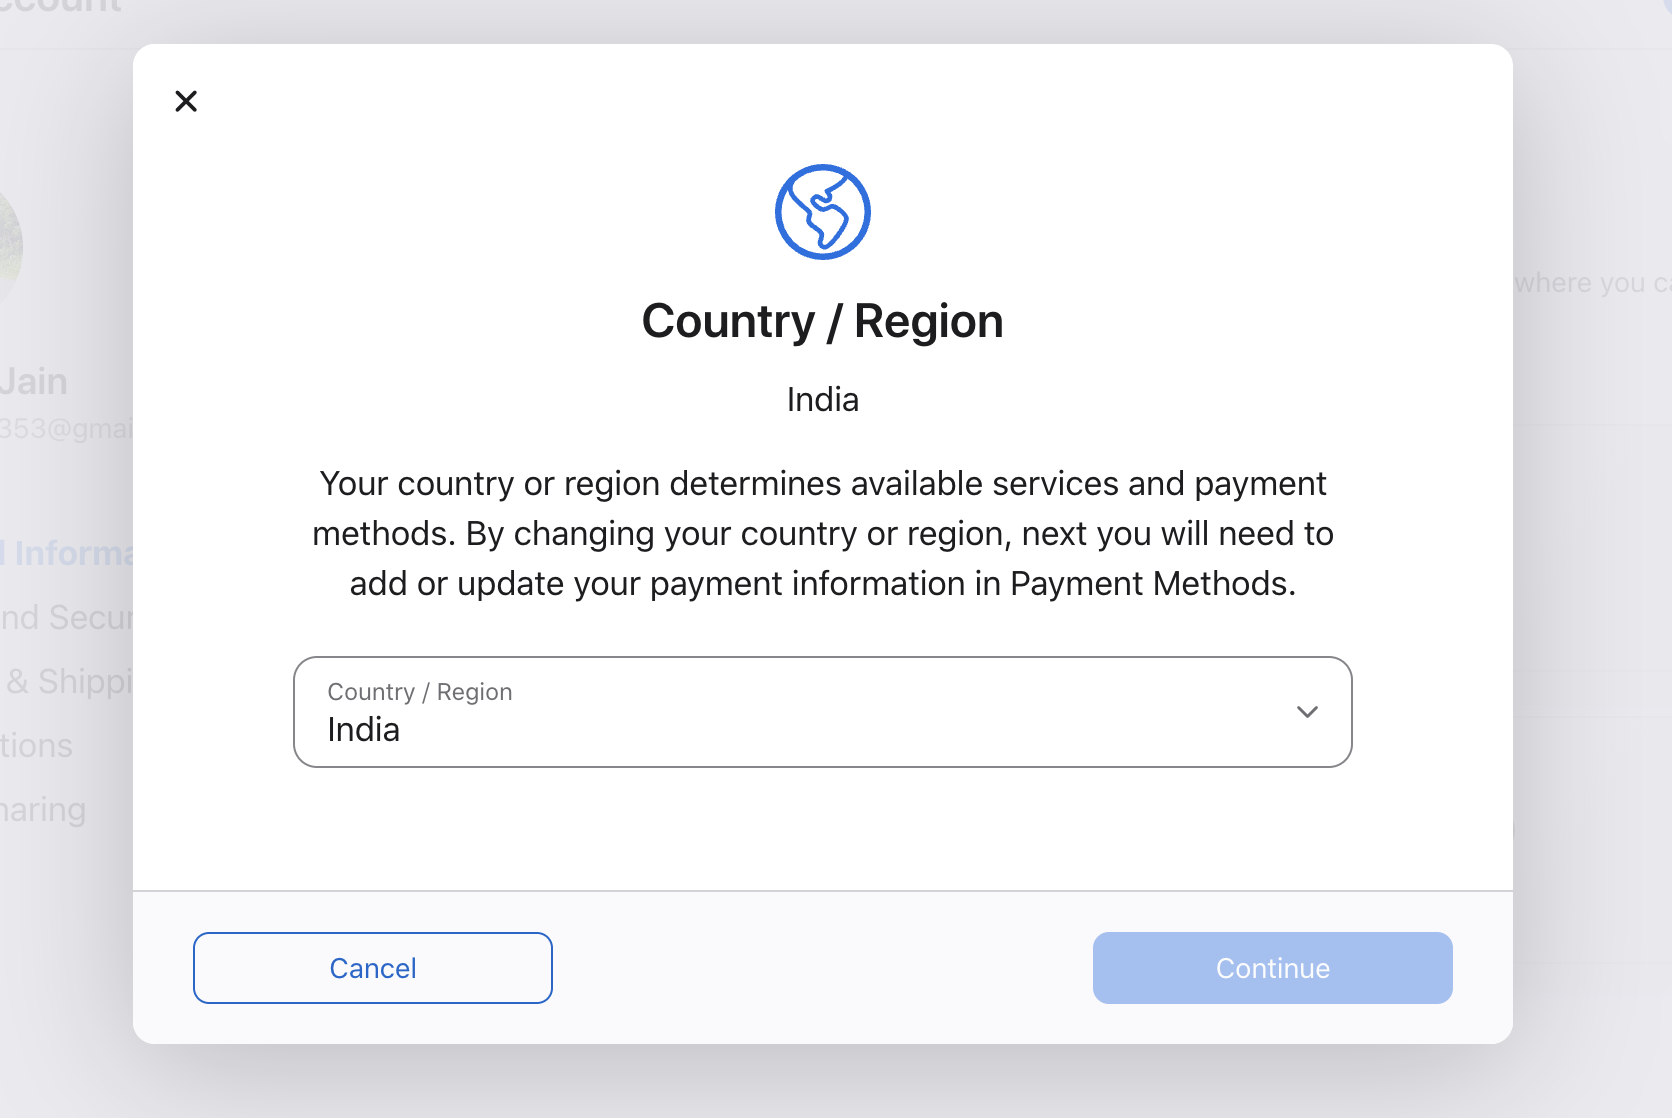
- A new menu will load, displaying a drop-down list of all available countries.
- Select your new region from the list.
- Review the Terms and Conditions and click Agree.
- Enter your new, regionally valid payment information and your new local billing address.
- Click Continue to finalize the geographic transition.
3. Update Your Region via the Web Browser
If you do not have an Apple device nearby, or if your iPhone is currently malfunctioning, you can still Change Your Country/Region on Your Apple ID Account using any standard web browser on a Windows PC or Android device.
- Open your preferred web browser and navigate to Apple Accounts.
- Sign in using your standard Apple ID email address and password.
- Authenticate your login using Two-Factor Authentication if prompted.
- On the main account dashboard, look at the left sidebar and click on Personal Information.
- Click on the Country/Region box.

- Follow the on-screen instructions to update your geographic data.

- You will be asked to enter your new payment method and billing address.
- Click Save to apply the changes to Apple’s cloud servers.

The Alternative: Create a Second Apple ID
Sometimes, changing the region of your primary Apple ID is simply impossible. You might have years of purchased movies that are not licensed in your new country, or you might have a massive Apple Music library that you refuse to rebuild from scratch. In these situations, the absolute best workaround is to maintain two separate Apple ID accounts.
Why Use Two Apple IDs?
Apple allows you to sign into your iPhone with one Apple ID for iCloud (your photos, contacts, and backups) while simultaneously signing into the App Store with a completely different Apple ID. This allows you to keep your primary data tied to your home country while downloading local apps with a secondary account.
- You do not have to cancel your existing subscriptions on your main account.
- You do not have to forfeit your remaining store credit.
- You retain access to all your previously purchased apps and media.
How to Set Up the Dual Account System
Creating a localized App Store account is the secret to bypassing aggressive geographical restrictions without destroying your current digital ecosystem.
- On your browser, head to the Apple Accounts page.
- Now, click on Create Your Apple Account, and start creating your Apple Account.
- When selecting the country for this new account, choose your new local region.
- Once the account is created, pick up your iPhone and open the Settings app.
- Tap your Apple ID Name at the top.
- Tap Media & Purchases, then select Sign Out. (Do not sign out of your main iCloud account at the very bottom of the settings page, only Media & Purchases).
- Once signed out, tap Media & Purchases again.
- Select Not [Your Name]? and sign in using the brand new, secondary Apple ID you just created.
- Open the App Store. You will instantly notice the currency has changed, and the localized apps are now available for download.
- Whenever you need an app from your original country, simply sign out of Media & Purchases and sign back in with your primary Apple ID.
Final Words
The “Item Not Available in Your Country” message is more than just a visual annoyance; it is a sign that the delicate web of digital licensing and regional commerce has tangled your user experience. It is rarely a glitch with your physical hardware. By methodically clearing your balance, canceling your active subscriptions, and updating your payment methods, you can successfully Change Your Country/Region on your Apple ID Account and reclaim your digital freedom.
Remember, modern digital storefronts are designed to enforce international licensing laws strictly, and sometimes they get too protective, locking out legitimate users who are simply traveling or moving to a new home. The steps above are designed to force the system to recognize your new residency on your terms. Once you fix these account blockers, you can go back to downloading and browsing soundly, knowing your App Store will actually deliver the local content you need when it is supposed to.
ALSO READ:


