- Windows 11 offers a modern look but can be tricky for users to manage audio settings due to familiar options being relocated. Adjusting your default audio device is important if you frequently switch between headphones, speakers, or other outputs for activities like gaming, work calls, or movie watching.
- You can easily set your default audio device using multiple ways in Windows 11 like the Quick Settings, System Settings, and Volume Mixer to handle different apps’ audio independently. These methods allow you to quickly switch between devices or set them permanently, according to your preferences.
Windows 11 brings a fresh, modern aesthetic to the operating system, with rounded corners, centered taskbars, and a revamped Settings menu. However, for long-time Windows users, this redesign can sometimes feel like a double-edged sword. While the interface is cleaner, many familiar features have been moved, renamed, or buried under new sub-menus. One of the most common frustrations users face is managing their audio output. Whether you are a gamer switching between a headset and speakers, a remote worker jumping onto a Zoom call, or a movie buff connecting to a Bluetooth soundbar, knowing how to control where your sound comes from is essential.
If you have ever started a video call only to realize everyone’s voice is blaring out of your monitor’s tiny speakers instead of your headphones, you know the panic of scrambling to find the right setting. If you are searching for this article, you are likely trying to figure out how to set default audio device on Windows 11 permanently or temporarily, or perhaps you are trying to route specific apps to specific speakers. This comprehensive guide will walk you through every method available in Windows 11, from the super-fast Quick Settings toggle to the advanced per-app volume mixer, helping you master your PC’s audio environment.
Why You Need to Change Your Default Audio Device
If you don’t know why you might need to change your default audio device, you can follow this article’s explanations. We have discussed the importance of managing audio outputs below.
In the early days of computing, most PCs had a single pair of speakers plugged into a green jack on the back. Today, the average setup is far more complex. You might have a dedicated gaming headset connected via USB, a high-quality set of bookshelf speakers plugged into an audio interface, a monitor that carries audio over HDMI, and perhaps a pair of Bluetooth earbuds for casual listening.
Windows 11 tries to be smart by automatically switching to a new device when you plug it in, but it doesn’t always guess correctly.
- Privacy: If you are in a shared office or a coffee shop, you need to ensure your sensitive conference calls or music are routed strictly to your headphones, not the laptop speakers.
- Audio Quality: Monitor speakers (built into screens) are notoriously tinny and quiet. You want to ensure your high-fidelity music flows through your dedicated external speakers or DAC (Digital-to-Analog Converter).
- Communication Separation: Windows allows for a unique setup where your music plays through speakers (Default Device) while voice chat plays through a headset (Default Communication Device).
- Glitch Prevention: Sometimes, when a monitor goes to sleep and wakes up, Windows “forgets” your preference and defaults back to the monitor’s HDMI audio. Knowing how to switch it back quickly is a vital skill.
How to Set Default Speakers or Headphones on Windows 11
You can set the default audio device using several different interfaces depending on whether you need a quick fix or a permanent system change. To set your default device, follow the steps given below-
1. Using Quick Settings (The Fastest Way)
This is the method you will use 90% of the time. Windows 11 has integrated audio controls directly into the Taskbar, making it incredibly easy to switch outputs on the fly without opening full menus. To use Quick Settings, follow the steps given below-
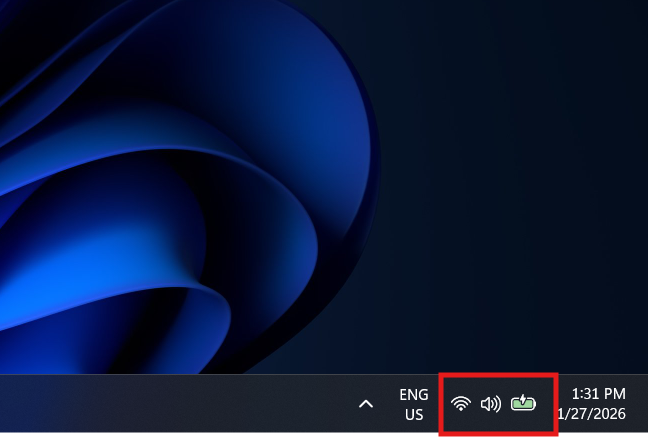
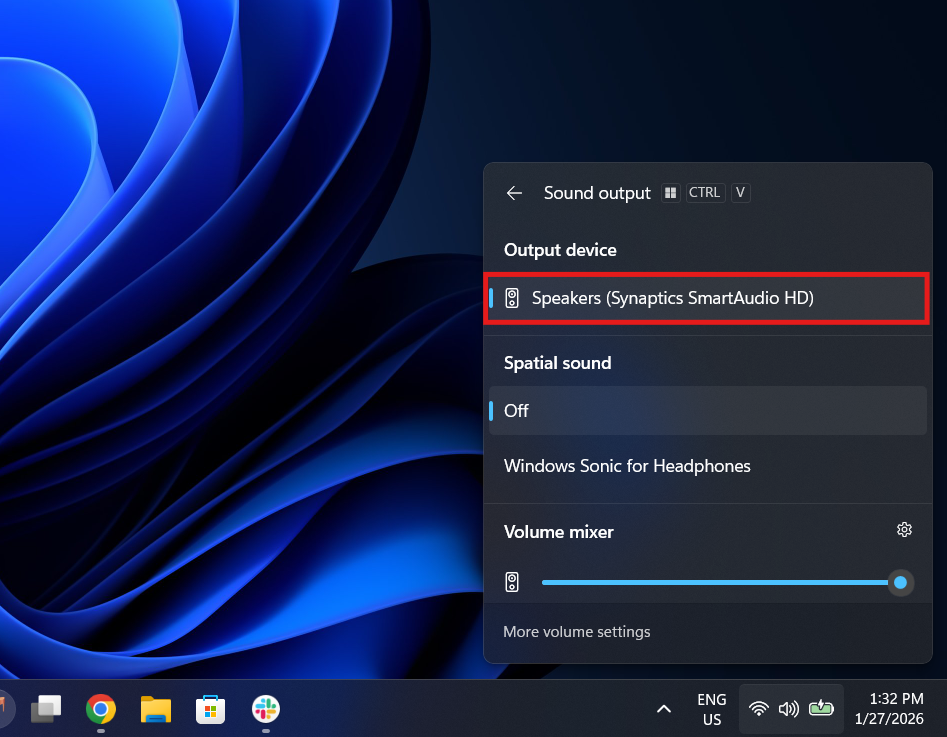
- Look at the bottom right corner of your Taskbar and click on the cluster of icons usually containing the Wi-Fi symbol, the Speaker icon, and the Battery icon.

- Click the small arrow icon pointing to the right (>) located next to the volume slider bar.

- Review the list of all currently connected audio devices that appears (e.g., “Headphones,” “Realtek Audio,” “Dell Monitor”).
- Click on the specific device you want to use for audio output.

- Verify that the checkmark has moved to your selection and click anywhere on the desktop to close the menu.
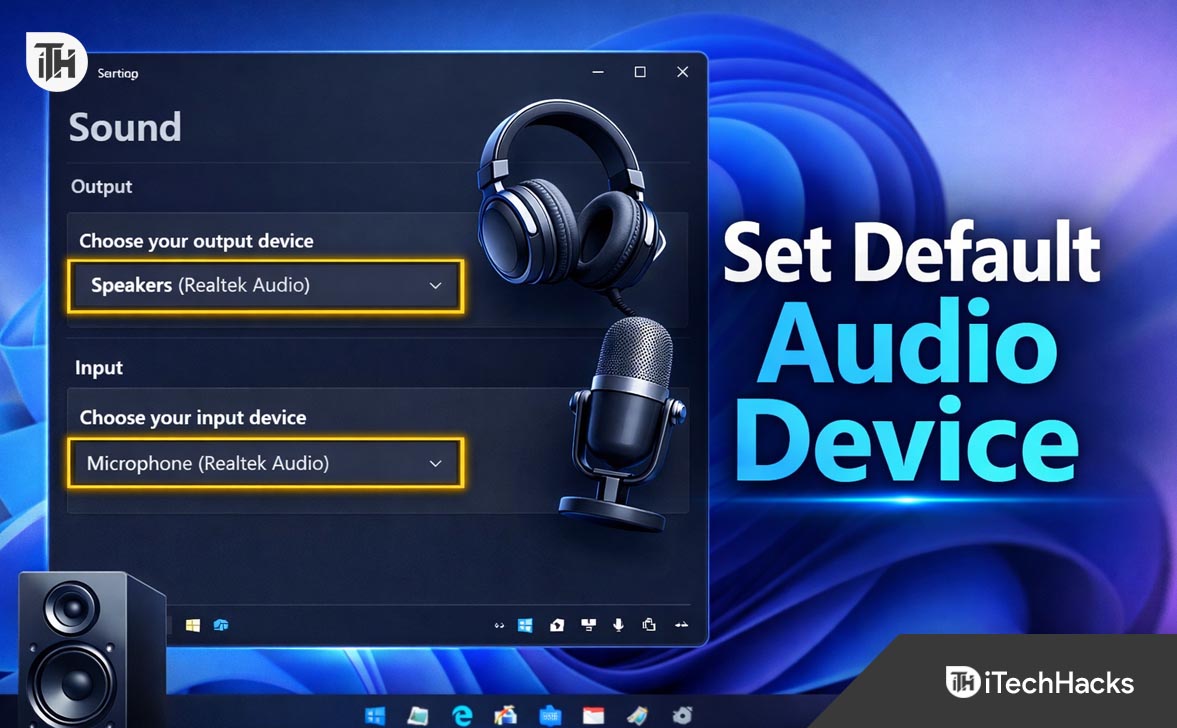
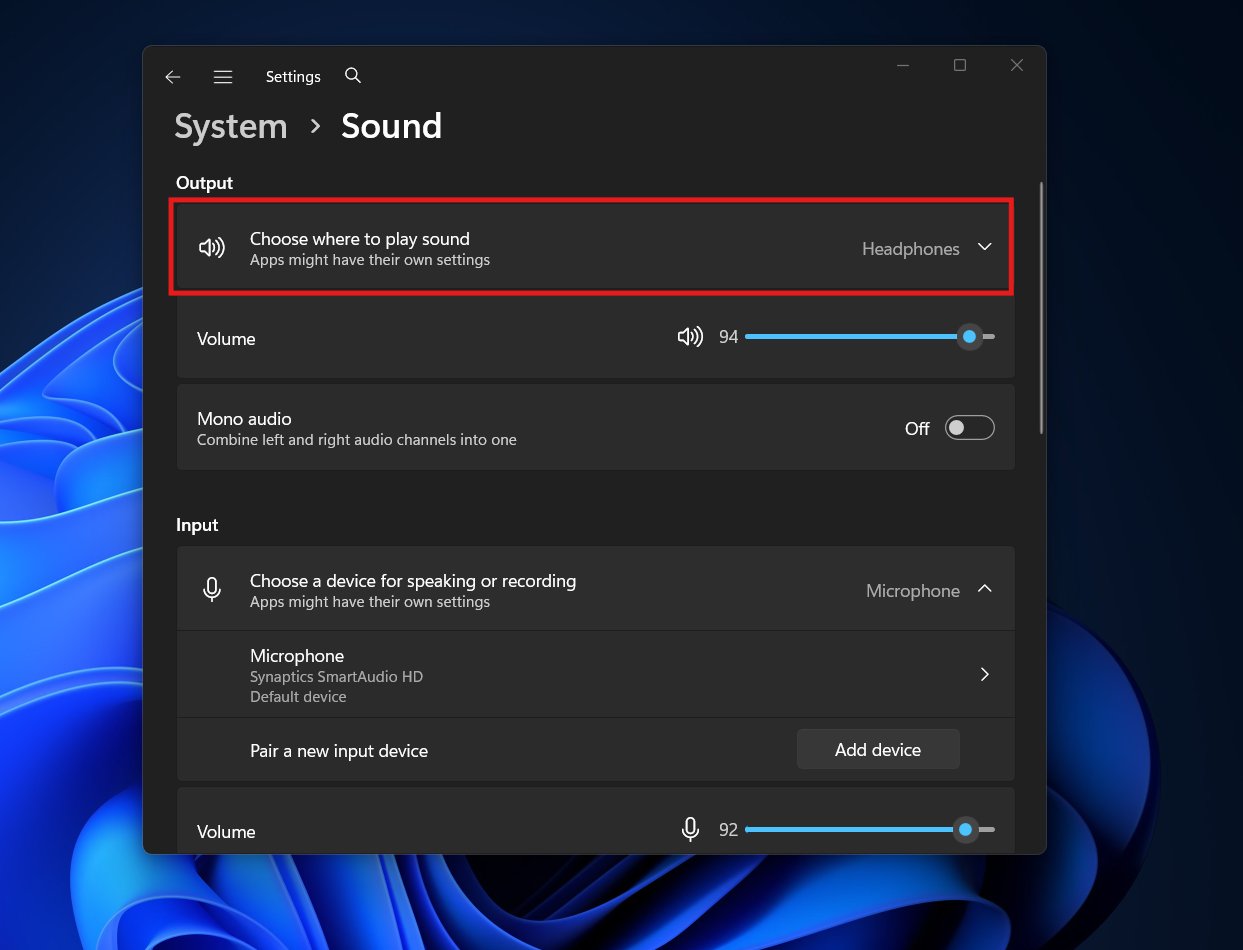
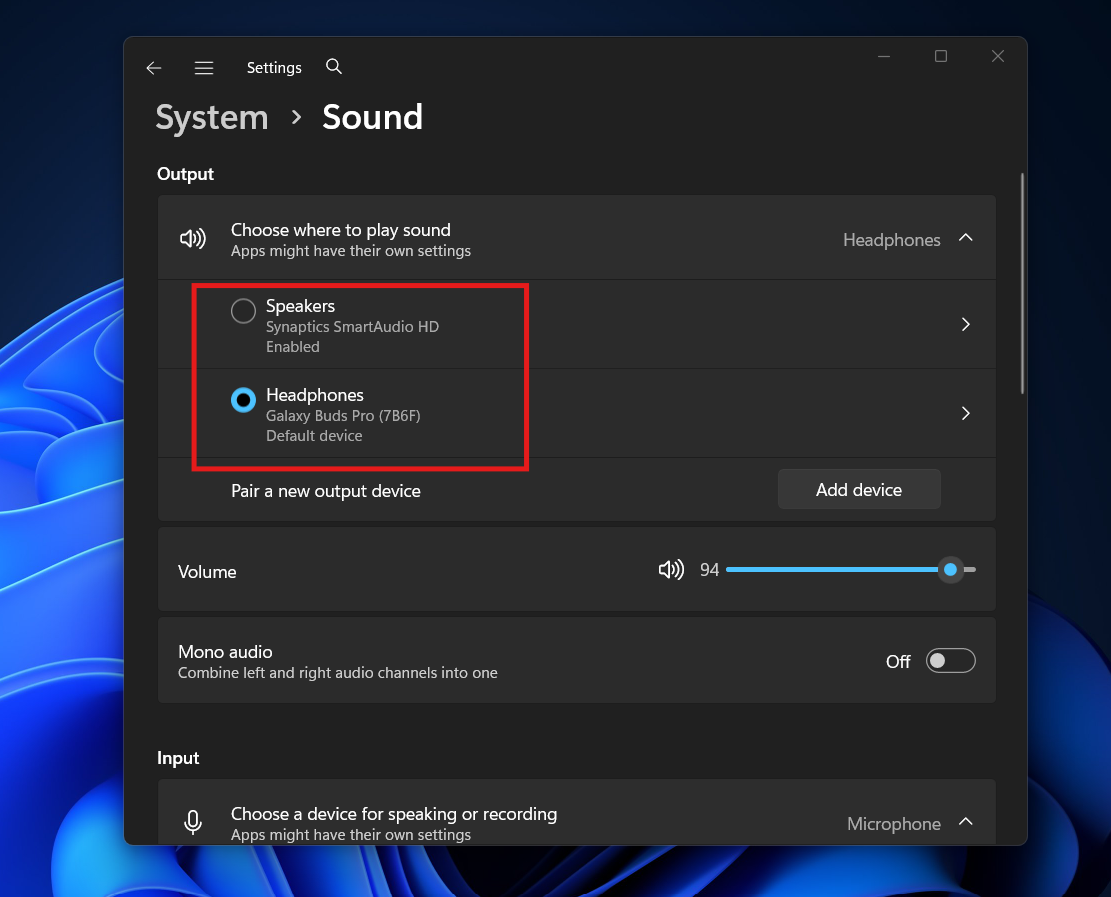
2. Using the System Settings App (The Standard Way)
If you need to see more details about your devices, such as driver information or format settings (16-bit vs 24-bit), the main Settings app is the place to go. To use the Settings app, follow the steps given below-
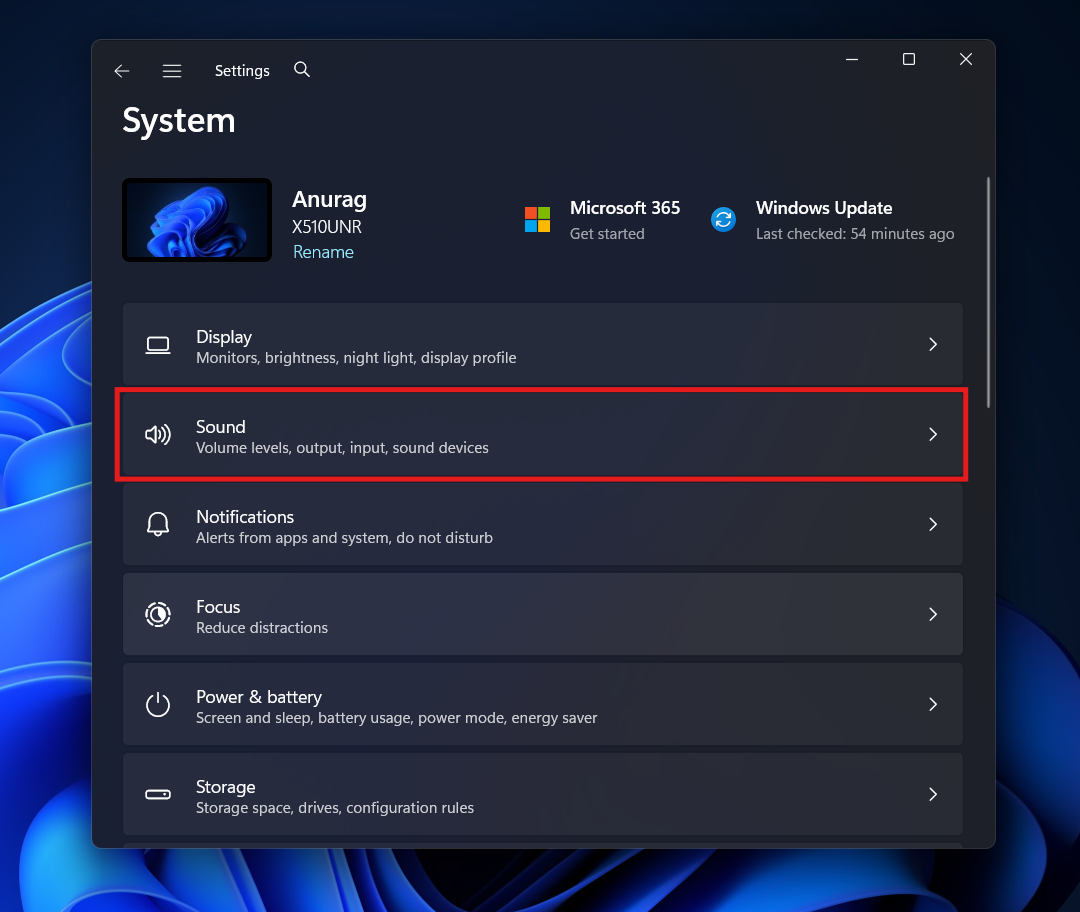
- Press the Windows Key + I on your keyboard to open the Settings menu.
- Click on System in the left sidebar, then select Sound from the main pane on the right.

- Locate the “Output” section at the top of the page and expand the “Choose where to play sound” menu if it is collapsed.

- Click the round radio button next to the device you wish to make your default audio output.

- (Optional) Click the arrow next to a device to see its properties, then locate the “Set as default sound device” dropdown menu to choose if it should be the default for Audio, Communications, or Both.
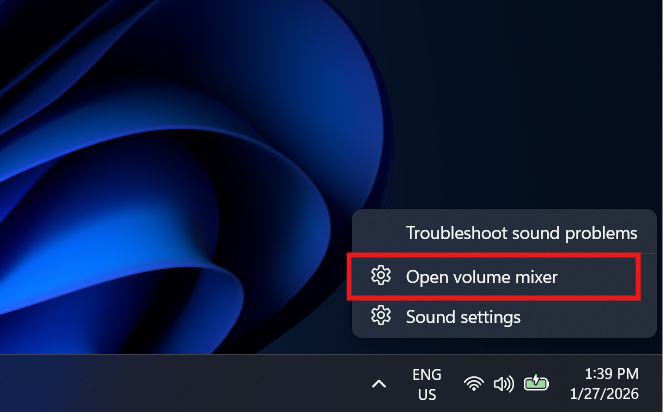
3. Using the Volume Mixer (Per-App Audio)
One of the best features of Windows 11 is the ability to route different apps to different speakers. For example, you can have Spotify playing on your external speakers while your Zoom meeting audio stays in your earbuds. To set per-app audio devices, follow the steps given below-
- Right-click the Speaker icon in the Taskbar and select Open Volume mixer.

- Scroll down to the “Apps” section to see a list of all currently running applications using audio.
- Click the small arrow next to the specific app you want to configure (e.g., “Spotify” or “Google Chrome”).
- Click the dropdown menu next to “Output device” and select the specific hardware you want that application to use.

- Repeat this process for any other open applications you wish to route to specific speakers.

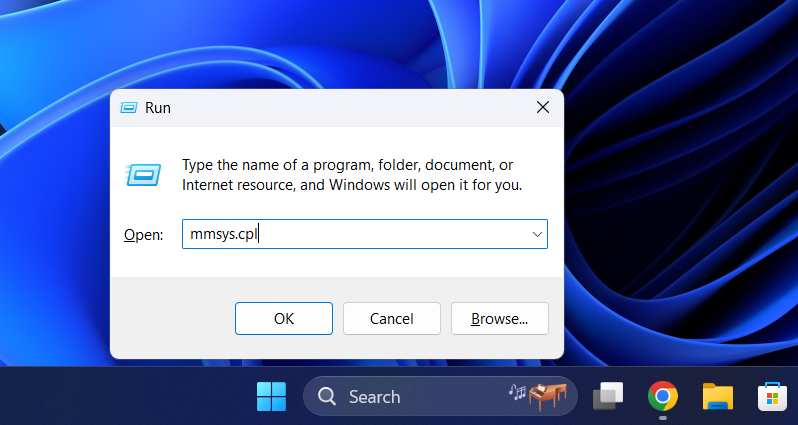
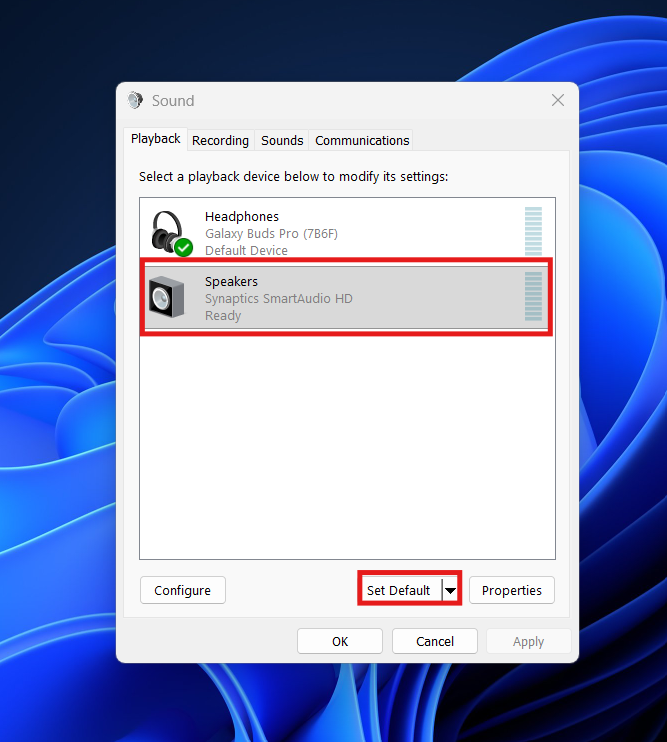
4. Using the Legacy Control Panel (For Advanced Users)
Old habits die hard, and many power users prefer the classic “mmsys.cpl” window because it allows for granular control over “Default Device” vs. “Default Communication Device” in a single view. To use the classic Sound Control Panel, follow the steps given below-
- Press Windows Key + R on your keyboard to open the Run dialog box.
- Type mmsys.cpl into the text box and press Enter to open the classic Sound window.

- Navigate to the “Playback” tab and locate the device you want to use.

- Click the desired device and select Set Default for general audio.

- (Optional) Right-click the device again and select Set as Default Communication Device if you only want to use it for voice calls.
- Click OK to save your changes and close the window.

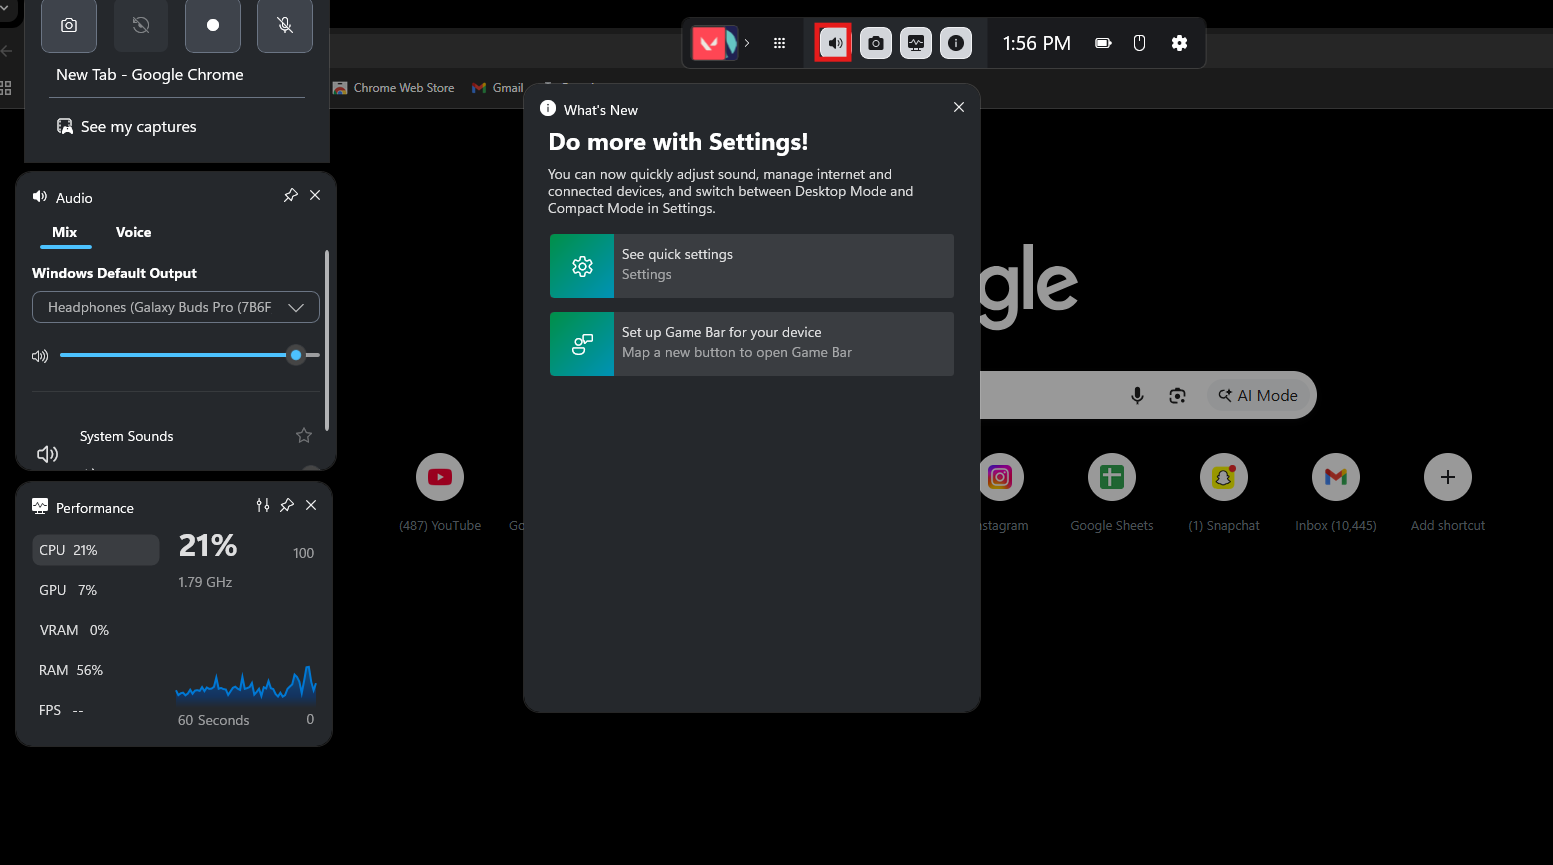
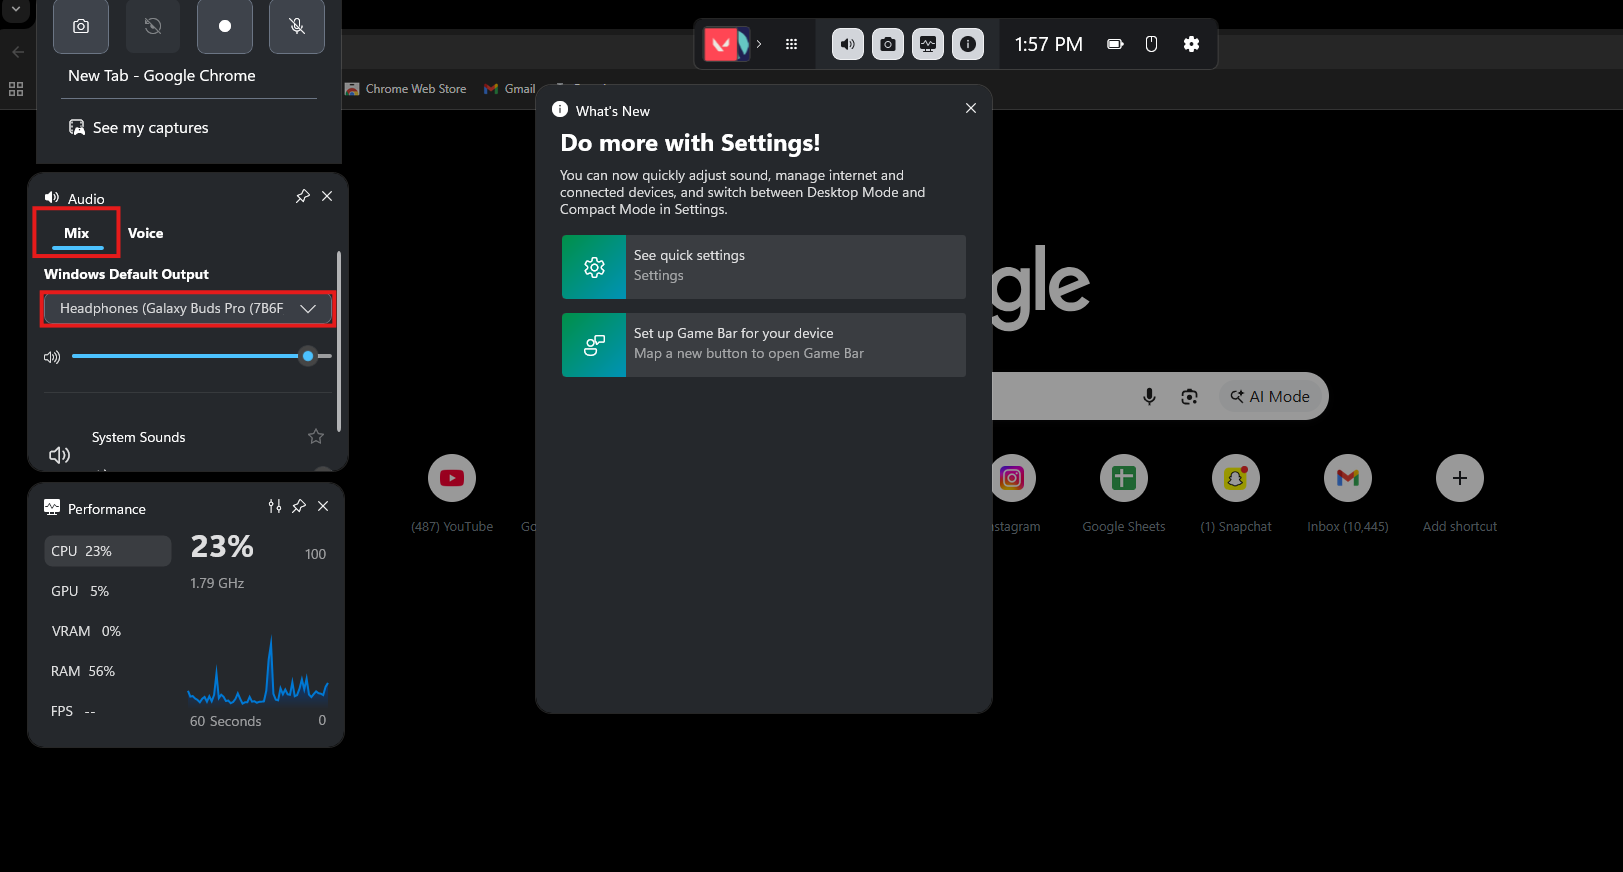
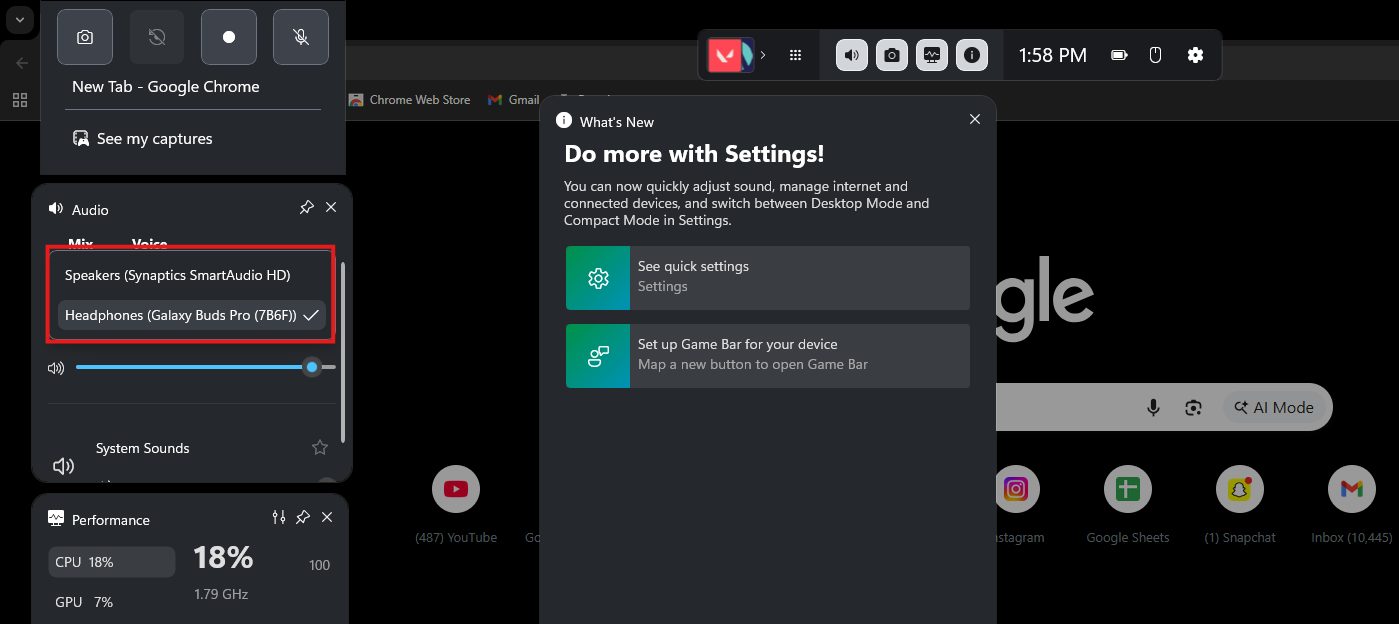
5. Using the Xbox Game Bar (For Gamers)
If you are in the middle of a game and don’t want to Alt-Tab out to the desktop to switch from speakers to your headset, the Game Bar is a lifesaver. To use the Game Bar, follow the steps given below-
- Press Windows Key + G on your keyboard to open the Game Bar overlay.
- Locate the “Audio” widget (if not visible, click the Speaker icon in the top menu bar).

- Click on the “Mix” tab within the Audio widget.
- Click the dropdown arrow under “Windows Default Output.”

- Select your headset or speakers from the list to switch audio instantly without leaving your game.

- Click anywhere outside the widgets or press Windows Key + G again to close the overlay.
Troubleshooting Common Audio Issues
Sometimes, even after setting the default device correctly, you might hear no sound or the sound might continue coming from the wrong place.
- Check In-App Settings: Many applications, especially communication apps like Zoom, Discord, and Microsoft Teams, have their own independent audio settings that override Windows defaults. If you change your Windows setting but Zoom is still silent, open Zoom’s settings -> Audio and ensure the Speaker is set to “Same as System” or manually select your headphones.
- Update Audio Drivers: Outdated drivers can cause Windows to fail to recognize a connected device. Go to Device Manager, expand Sound, video and game controllers, right-click your audio device, and select Update driver.
- Restart Audio Services: Sometimes the Windows background service hangs. Type “Services” in the Start menu search, open it, find Windows Audio, right-click it, and select Restart.
- Disable “Exclusive Mode”: Some apps take exclusive control of an audio device, preventing other apps from using it. In the classic sound panel (mmsys.cpl), right-click your device, go to Properties > Advanced, and uncheck “Allow applications to take exclusive control of this device.”
Final Words
By doing so, you can set the default audio device on Windows 11. Following the steps mentioned in this article, you will be able to seamlessly manage your audio inputs and outputs, ensuring that your music sounds great and your meetings are private. Whether you prefer the speed of the Quick Settings menu, the detailed control of the Volume Mixer, or the reliability of the classic Control Panel, Windows 11 offers a method that fits your workflow. Mastering these controls is the first step toward a personalized and frustration-free PC experience.
ALSO READ:
- Reduce High RAM Usage on Windows 11 Using Microsoft PC Manager
- How to Turn Off Share with Copilot AI Feature in Windows 11
- Windows 11 Storage Full? How to Free Up Space Fast
- How to Enable Windows 11 Dark Mode without Activation
- How to Turn Off Google Chrome AI Features on Windows 11
- Windows 11 Media Creation Tool: Steps to Install/Upgrade


 Error: Full Fix Guide")


