- After updating to macOS Sequoia, some users find their desktop files missing due to changes in iCloud settings, hidden file attributes, app compatibility, or file system glitches. The files are usually not lost and can be recovered.
- To recover missing files, you should first check and adjust iCloud settings, unhide files using Terminal or Finder, and restore files from the iCloud Archive. If these methods fail, using data recovery software or restoring from backups like Time Machine can help.
Updating your Mac to the latest macOS version, Sequoia, can be exciting as it brings new features and improvements. However, some users have encountered a frustrating issue after the update: their desktop files seem to have disappeared. If you’re facing this problem, don’t panic—your files are likely not lost for good. This guide will walk you through various methods to recover your missing files and prevent this from happening again in the future.
Understanding why files may go missing after an update can help you find the right solution faster. In many cases, it’s due to changes in settings, file visibility, or compatibility issues with certain applications. By following these simple steps, you’ll be able to get your desktop back to normal and regain access to your important files.
Why Do Files Disappear After the macOS Sequoia Update?
When updating to macOS Sequoia, files can sometimes disappear due to a few common reasons:
- iCloud Sync Changes: The update may have altered iCloud Drive settings, moving desktop files to iCloud.
- Hidden File Attributes: Files may be hidden rather than deleted, affecting their visibility.
- Compatibility Issues: Apps like Parallels may conflict with the new macOS, causing files to become inaccessible.
- File System Glitches: Occasionally, updates cause system errors that impact file indexing or access.
Missing Files After macOS Sequoia Update? Here’s How to Restore Your Desktop Files Quickly
If your desktop files are missing after updating to macOS Sequoia, follow these methods to recover them. Each method addresses a different possible cause, so try them in sequence until you restore your files.
Adjust iCloud Settings
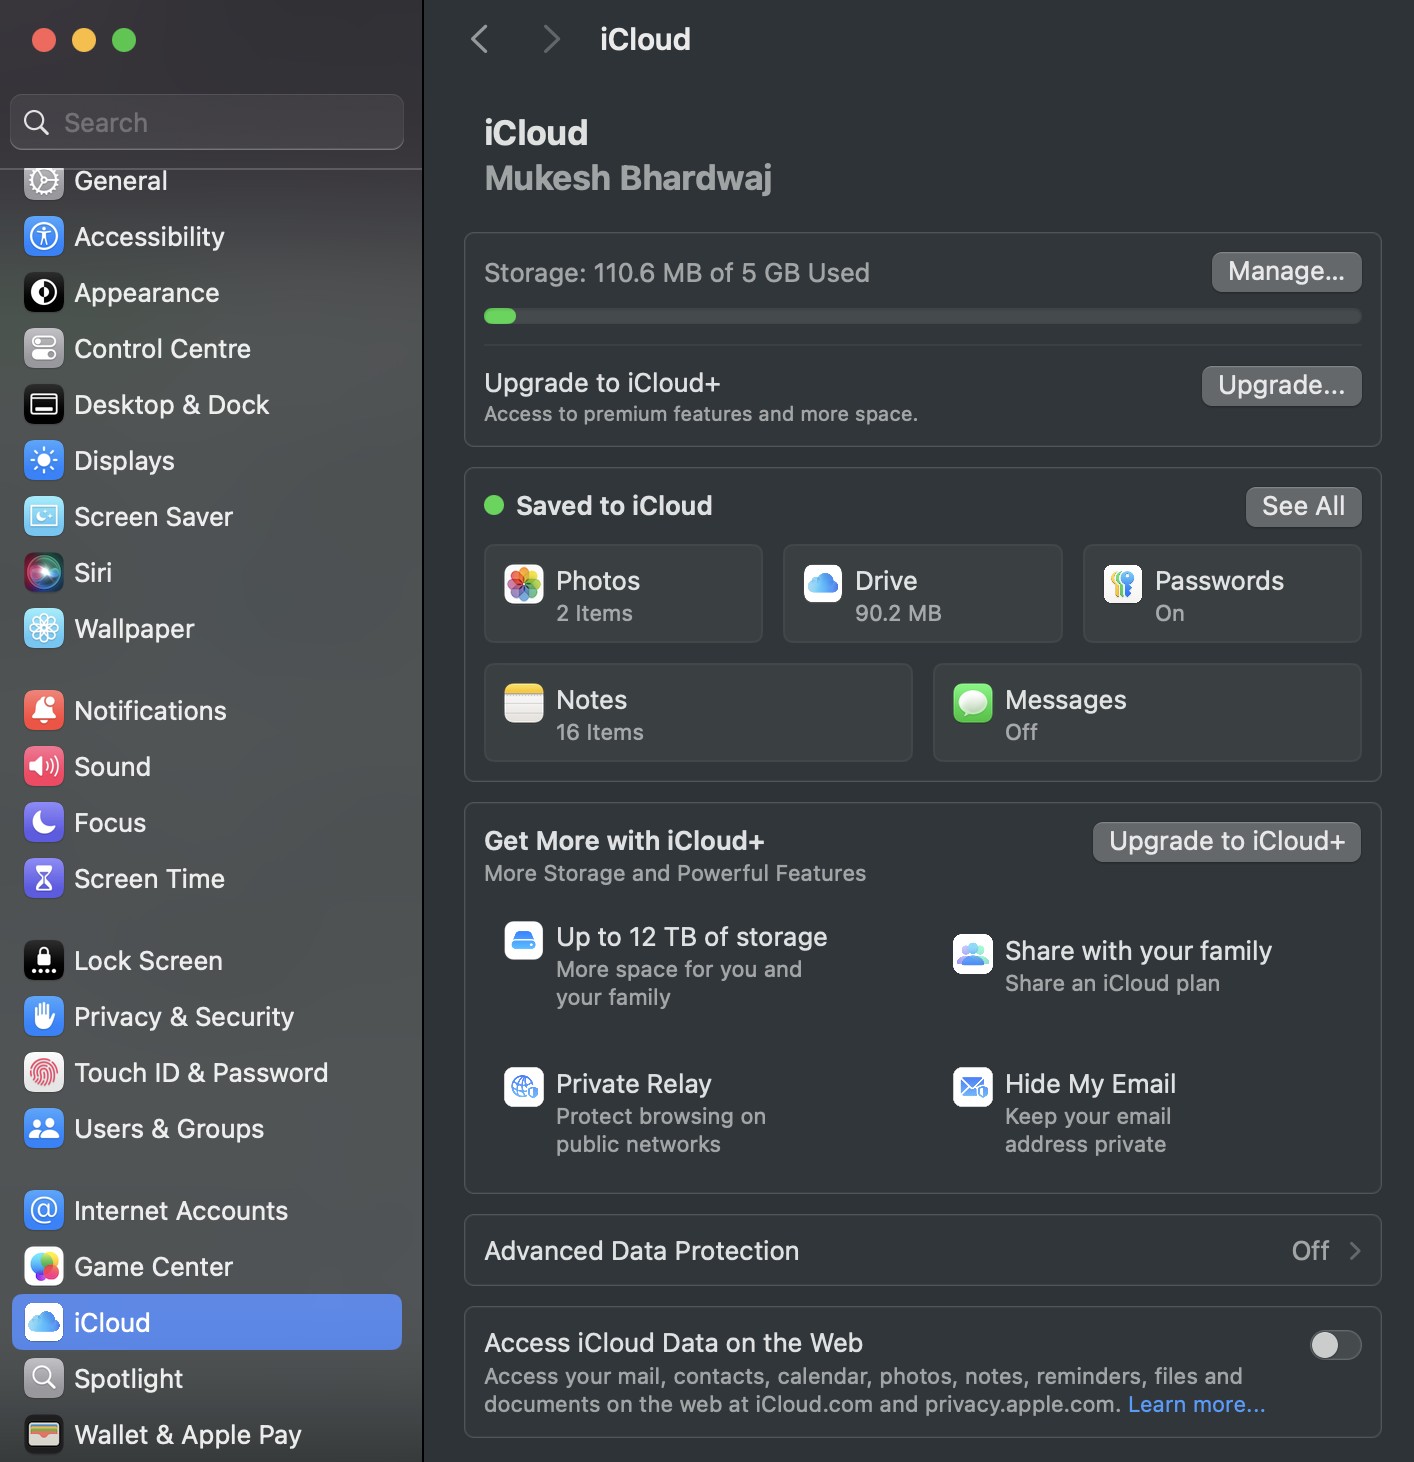
When macOS updates, it may change or enable iCloud settings that affect file locations. Here’s how to check and adjust your iCloud settings:
- Open System Settings on your Mac.
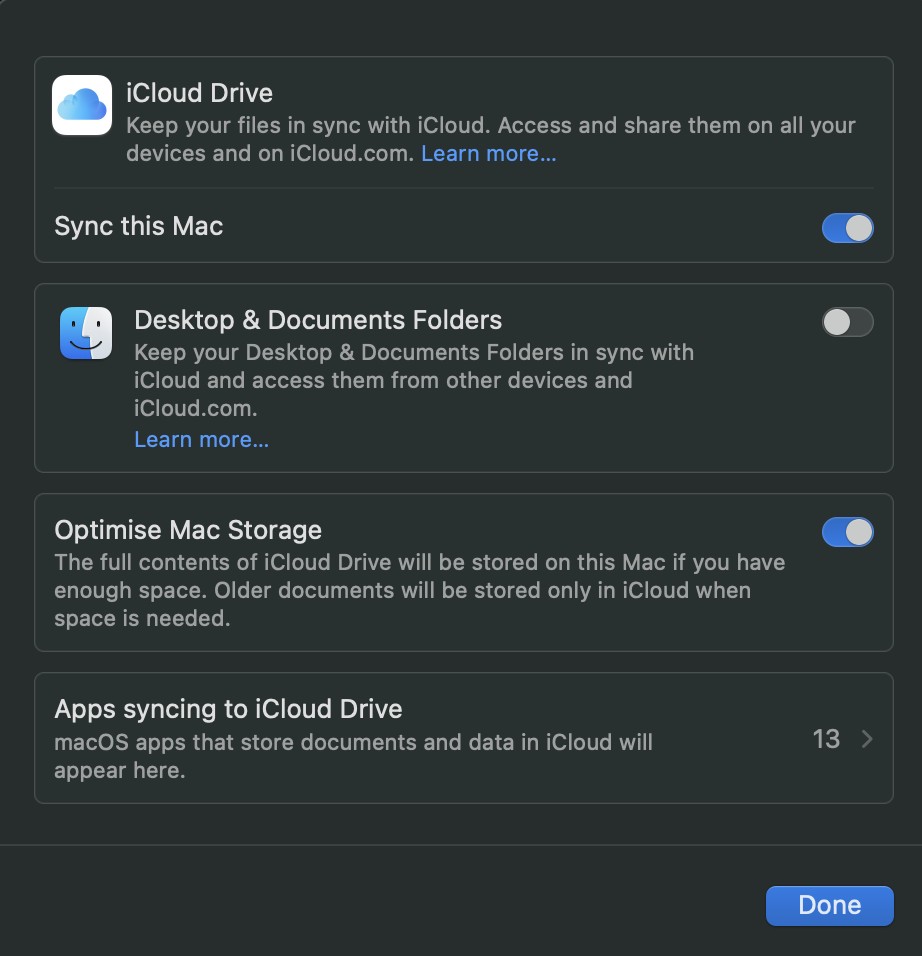
- Go to iCloud > iCloud Drive.

- Look for the Desktop & Documents Folders option and ensure it is turned on. If it’s already on, try toggling it off, waiting a moment, and then turning it back on.

- This can help resync files between iCloud and your desktop.
- Once you’ve adjusted the settings, check your desktop to see if the files have reappeared.
- If files appear in iCloud but not on your desktop, you may need to manually move them back from iCloud Drive to your local desktop.
Unhide Files Using Terminal
Sometimes, files aren’t deleted but are simply hidden. You can use Terminal to unhide these files. Here’s how:
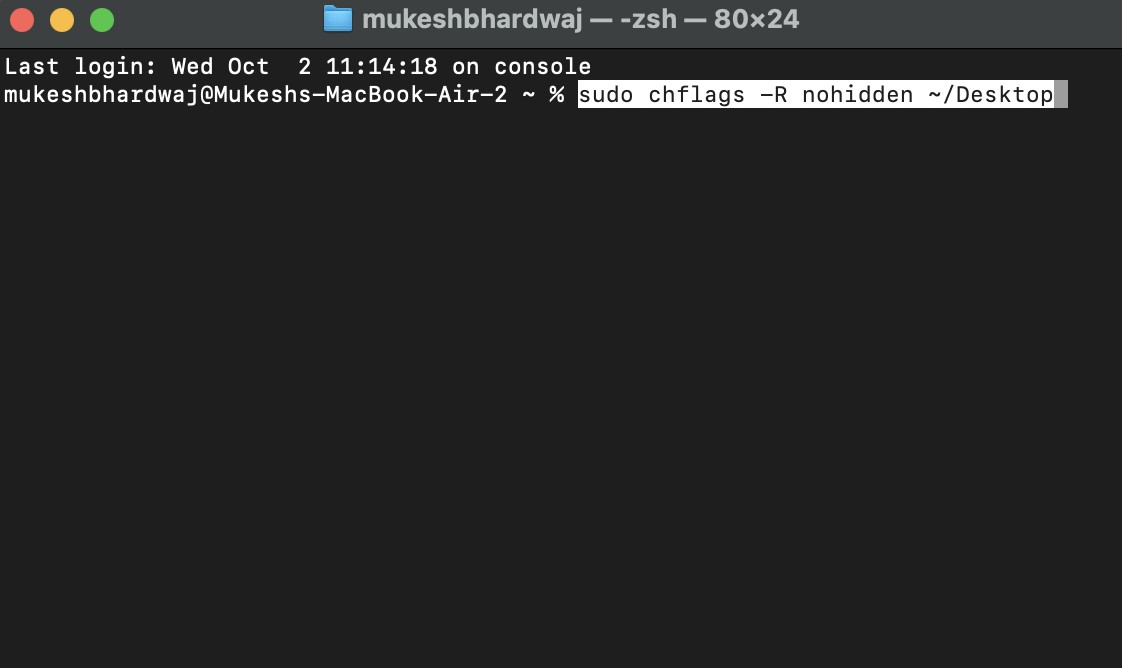
- Open Terminal, which you can find in Applications > Utilities.
- In Terminal, type the following command and press Enter:
sudo chflags -R nohidden ~/Desktop
- This command removes the hidden attribute from all files on your desktop.

- When prompted, enter your admin password, then press Enter.
- Check your desktop to see if the files are now visible.
This method should reveal any files that were marked as hidden during the update.
Reveal Hidden Files with Finder
If you suspect that files are hidden but prefer a non-Terminal approach, you can use Finder’s shortcut to show hidden files:
- Go to your desktop or open a Finder window.
- Press Shift + Command + Period (.). This keyboard shortcut toggles the visibility of hidden files in Finder.
- Look on your desktop to see if the missing files appear.
If this works, the files should now be visible on your desktop. Keep in mind that this will also show other hidden system files, so press the shortcut again to return to normal view once you’ve located your files.
Restore from iCloud Archive
In some cases, files might have been moved to an archive within iCloud. You can retrieve them as follows:
- Open Finder and select Go from the menu bar.
- Click Go to Folder… and enter the following path:
~/iCloud Drive (Archive)
- Press Enter. This opens the iCloud Drive Archive, where files are stored if they’re removed from the desktop due to sync settings.
- Browse through the folders to locate your missing files.
- Drag the files from the archive back to your desktop or any other preferred location on your Mac.
This method is particularly useful if files are stored temporarily in iCloud during the update.
Use Data Recovery Software
If you’re unable to recover files through the above methods, data recovery software may help. Here’s how to use EaseUS Data Recovery Wizard for Mac or similar software:
- Download and install EaseUS Data Recovery Wizard for Mac.
- Open the software and select the disk or location where your desktop files were originally stored (usually the main hard drive).
- Click Scan to start searching for lost files. The software will display a list of files it can recover.
- Use the file type and path filters to locate specific files you need to recover.
- Select the files you want to restore and click Recover. Choose a new location, such as your desktop or an external drive, to avoid overwriting other files.
Recovery software can often retrieve files that were mistakenly deleted or lost during the update process.
Restore from Backups
If you’ve been using Time Machine or another backup method, restoring from a backup is a reliable way to recover files:
- Connect your backup drive to your Mac.
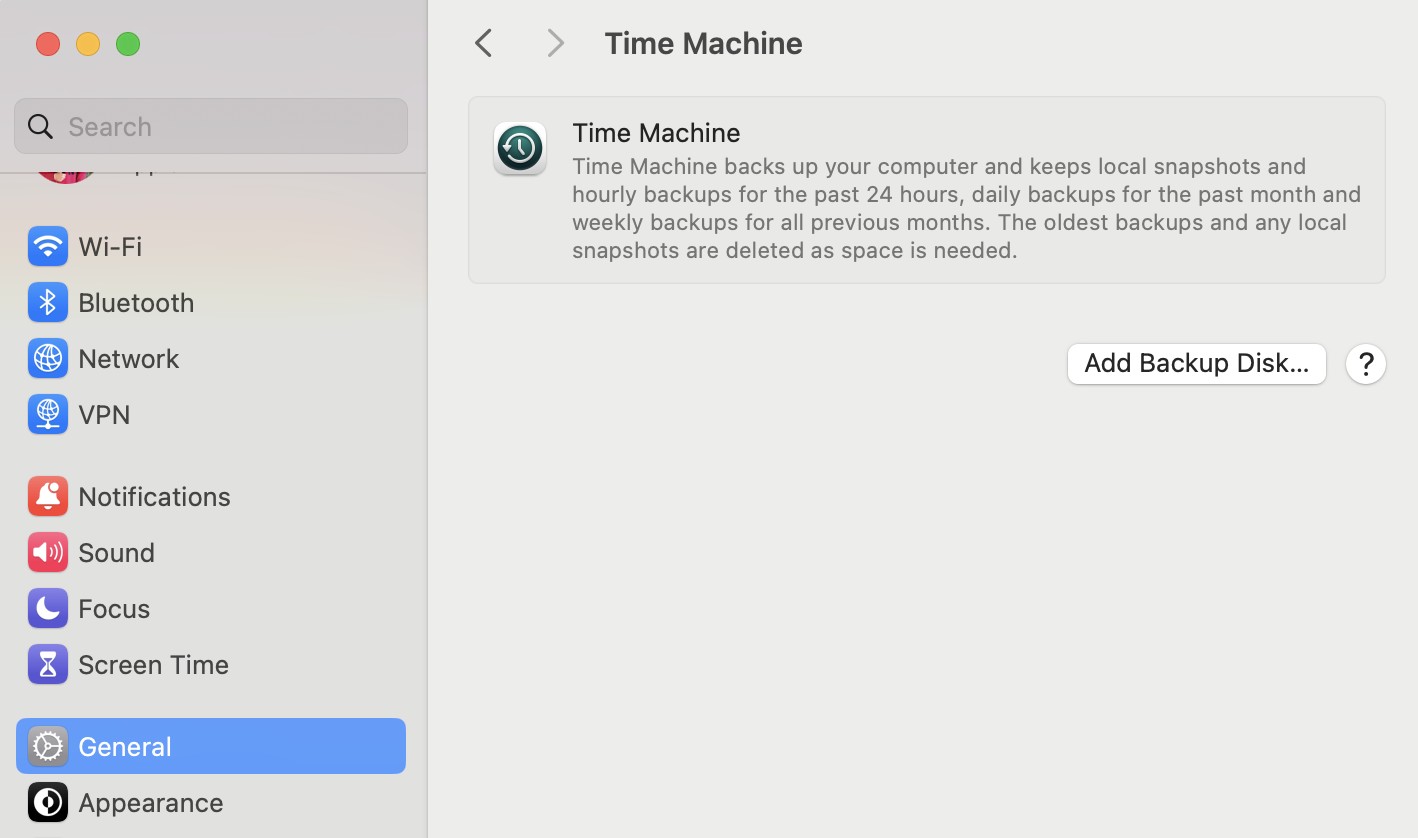
- Open Time Machine by clicking the Time Machine icon in the menu bar, or go to System Settings > Time Machine.

- Use the timeline on the right to select a backup date before the update.
- Navigate to the Desktop folder within Time Machine’s interface to view your files as they were before the update.
- Select the files or folders you wish to restore, then click Restore.
- If you have files saved on an external backup drive, you can also manually locate and drag them back to your desktop.
Restoring from a backup ensures you get your exact files back as they were before the update.
Adjust Parallels Settings (for Parallels Users)
For users who run Windows on their Mac using Parallels, there may be conflicts between Parallels and macOS that hide files:
- Open Parallels Desktop and go to your Windows environment.
- Open File Explorer and locate the files on your shared desktop folder.
- Right-click on the files and select Properties.
- Under the General tab, ensure that Read Only and Hidden options are unchecked. Click Apply and OK.
- Close Parallels and check if the files are now visible on your macOS desktop.
Parallels can sometimes affect file permissions, so adjusting these settings can resolve visibility issues.
Additional Tips for Preventing File Loss in the Future
Once you’ve recovered your missing files, it’s a good idea to take some preventive measures to protect your data from similar issues in the future. Here are a few tips to help ensure your files stay safe:
1. Regular Backups
- Use Time Machine: Set up automatic backups with Time Machine, which saves copies of your files and allows you to restore them to specific points in time. Connect an external drive and enable Time Machine in System Preferences.
- Consider Cloud Backups: In addition to local backups, consider using cloud storage services like iCloud, Google Drive, or Dropbox. This provides an extra layer of security in case of hardware failure.
2. Check iCloud Settings Regularly
- Go to System Settings > iCloud > iCloud Drive and confirm that Desktop & Documents Folders are configured according to your preferences.
- Disable automatic iCloud management if you prefer to keep files stored locally on your Mac. This will prevent macOS updates from automatically moving files to iCloud.
3. Update All Software Regularly
- Keep macOS Updated: Regular macOS updates often include bug fixes and security improvements. Make sure your system is up to date by checking System Preferences > Software Update.
- Update Third-Party Software: If you use apps like Parallels, keep them updated to avoid compatibility issues. Most apps notify you of updates, but you can also check for updates manually through the app’s settings or website.
4. Limit Use of Virtualization Tools
- Virtualization software can sometimes cause conflicts with macOS, especially during major updates. If you use tools like Parallels, keep your virtual machine configurations simple and avoid syncing critical folders like your desktop across systems.
Conclusion
Losing files after a macOS update can be stressful, but with the right steps, most files can be recovered. By following the methods outlined here, you should be able to restore your missing desktop files and take steps to safeguard your data in the future. Regular backups, careful management of iCloud settings, and keeping your software updated can help protect your files and prevent similar issues from arising. With these practices in place, you can enjoy the benefits of macOS updates without the worry of unexpected data loss.


 Free Download and Install")


