- Windows Spotlight feature automatically downloads and sets new lock screen images in Windows 11, but users may face bugs causing it not to work properly
- Troubleshooting steps to fix lock screen spotlight include ensuring network connection, setting correct date and time, turning off metered connection, and re-registering spotlight
- Steps to re-register spotlight using Windows PowerShell can help fix the issue, ensuring users can properly use Windows 11 spotlight feature.
Windows Spotlight is an intuitive feature that automatically downloads and sets a new lock screen in Windows 11. With this feature being turned on, you will always get new lock screen images whenever you turn on your computer or sign out and sign in again. This feature was introduced in Windows 10 and is available in Windows 11 as well. As intuitive as this feature may be, it does not mean that Spotlight will not have any bugs. Yes, there are some bugs that you can expect to see in Windows 11 with the spotlight. With that being said, many users have reported that Windows 11 lock screen spotlight is not working properly.
Fix Spotlight Not Working on Windows 11
If you have made your way to this article then probably you might be facing the same problem. If you are facing the same issue, then this article will prove helpful to you. In this article, we will be discussing all the troubleshooting steps to fix Windows 11 lock screen spotlight not working.
Ensure You Are A Connected To Network
If you are not connected to a network, then the Windows 11 lock screen spotlight may not work. You will have to ensure that you are connected to a stable internet connection if you want the Windows 11 lock screen spotlight to work properly. Although, if you are connected to an active internet connection, but still facing the issue of the Windows 11 lock screen spotlight not working, then you should move to the next troubleshooting step.
Ensure Correct Date And Time
If the date and time are incorrect, then also you are most likely to face this issue. You will have to set the correct date and time if Windows 11. To set the correct date and time follow the steps given below-
- Open the Settings app by pressing the Windows + I key combo on your keyboard.
- On the left sidebar of the Settings app, click on the Time & language section.
- Now on the right side of the Time & language section, click on the Date & Time option.
- Here, enable the toggle for the Set time automatically. This will set the time zone as well as the date and time automatically.
- Scroll down to the Related Links section. Here, click on the Language and region button.
- On the next screen, head to the Region section. Here, click on the drop-down menu next to the Country or region. From the list of countries, select your country.
This should fix the issue you were facing with Windows 11 lock screen spotlight.
Turn Off Metered Connection
Another thing that you can do is turn off the metered connection. If the metered connection is turned on, then also you may face an issue with the Windows Spotlight. You should try turning off the metered connection to fix the issue. Given below are the steps to turn off metered connection-
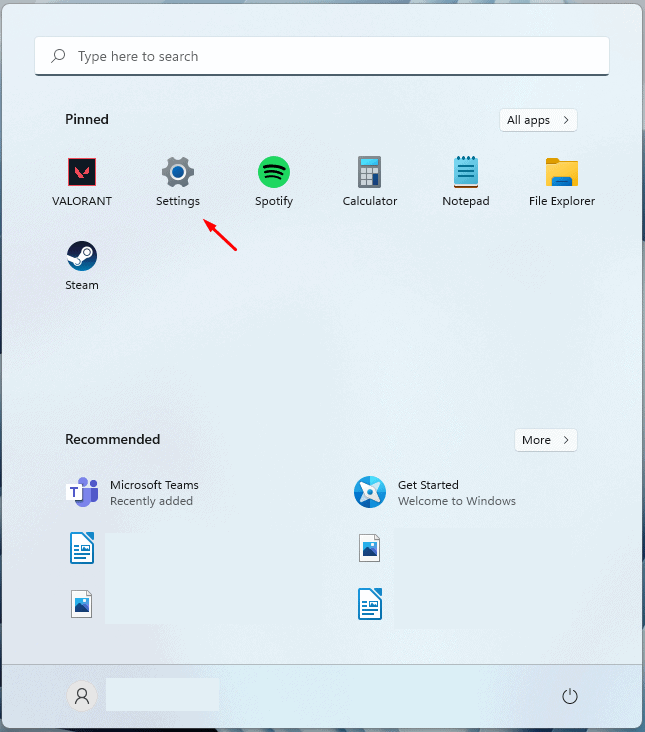
- In the Start Menu, search for Settings. Click on the Settings app from the search result to open the Settings. On the left sidebar, click on the Network & internet.
- Click on the Properties on the right-side.
- On the next screen, turn off the toggle for the Metered Connection.
Turn Off And The Turn On Spotlight Again
If you are facing issues with Spotlight, then you should try turning it off first, and then turn it on again. To do so, follow the steps given below-
- Firstly, press the Windows + I key combo to open the Settings app on your PC.
- On the left sidebar, click on the Personalization, and then on the right side click on the Lock screen.
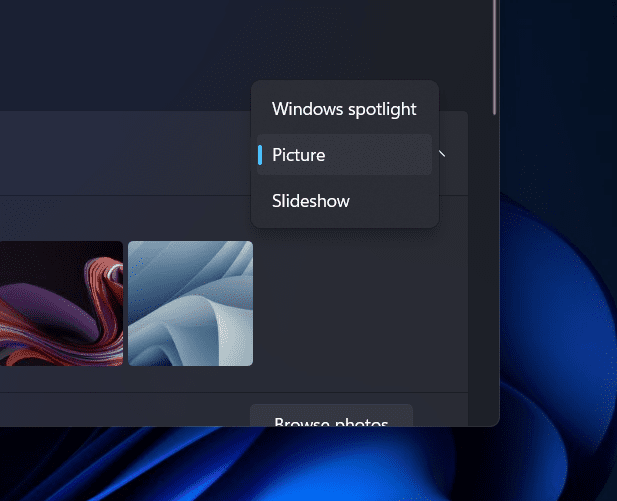
- Click on the drop-down menu next to the Personalize Your Lock Screen, and then click on Picture. This will turn off the Windows Spotlight.
- Wait for a few seconds, and then again, click on the drop-down menu, and then select Windows Spotlight from the list. Doing so will turn on the Windows Spotlight.
This should most probably fix the problem with the Windows Spotlight and you should be able to use it now.
Re-Register Spotlight
If you are still facing the problem then the last resort will be to re-register the spotlight. You will have to use Windows PowerShell to re-register the Spotlight. Follow the steps given below to re-register the Windows Spotlight using Windows PowerShell.
- Press the Windows + X key combo, and from the menu that opens up, click on Windows Terminal (Admin).
- Now in the Windows Terminal, enter and execute the following command-
- Get-AppxPackage -Name Microsoft.Windows.ContentDeliveryManager | Foreach {Add-AppxPackage -DisableDevelopmentMode -Register “$($_.InstallLocation)\AppXManifest.xml” -Verbose}
- After executing the command, restart your PC and the issue should be fixed. You should now be able to use Windows Spotlight.
RELATED GUIDES:
- Ethernet Doesn’t Have a Valid IP Configuration Error in Windows 11
- How To Defragment Hard Drive In Windows 11 PC
- How To Fix Windows 11 Blue Screen of Death Errors
- How to Fix Windows 11 Not Detecting Second Monitor (5 Ways)
- How To Use Windows 11 System Restore
Conclusion
If Windows 11 lock screen spotlight is not working properly, then you can prefer following the troubleshooting steps in this article. Following the above steps, you will be able to fix the issue with the Windows 11 spotlight.


