- Getting a new phone can be exciting, but transferring security codes with Google Authenticator is critical to avoid being locked out of accounts. Ensure codes are transferred correctly before resetting or selling the old phone.
- Use Google Authenticator to transfer codes either through cloud sync or offline via QR codes. For cloud sync, ensure your old phone has backed up codes, download the app on the new phone, and sign in using the same Google account.
- For a more secure offline transfer, use QR codes by exporting from the old phone and scanning with the new phone. Always test that new codes work properly on the new device before clearing data from the old phone.
Upgrading to a new smartphone is usually an exciting milestone. You get to unbox a faster device, enjoy a sharper display, and explore better camera features. However, for anyone who takes their digital security seriously, setting up a new phone comes with a moment of sheer panic regarding Two-Factor Authentication (2FA). Moving your contacts and photos is easy, but securely migrating the temporary codes that protect your email, financial dashboards, and business administration panels requires a bit more care.
If you make a mistake during this transition, you risk permanently locking yourself out of your own digital infrastructure. Two-Factor Authentication is an unforgiving security gatekeeper. It is explicitly designed to keep hackers out, but if you mishandle the migration, that very same system will mercilessly lock you out as well.
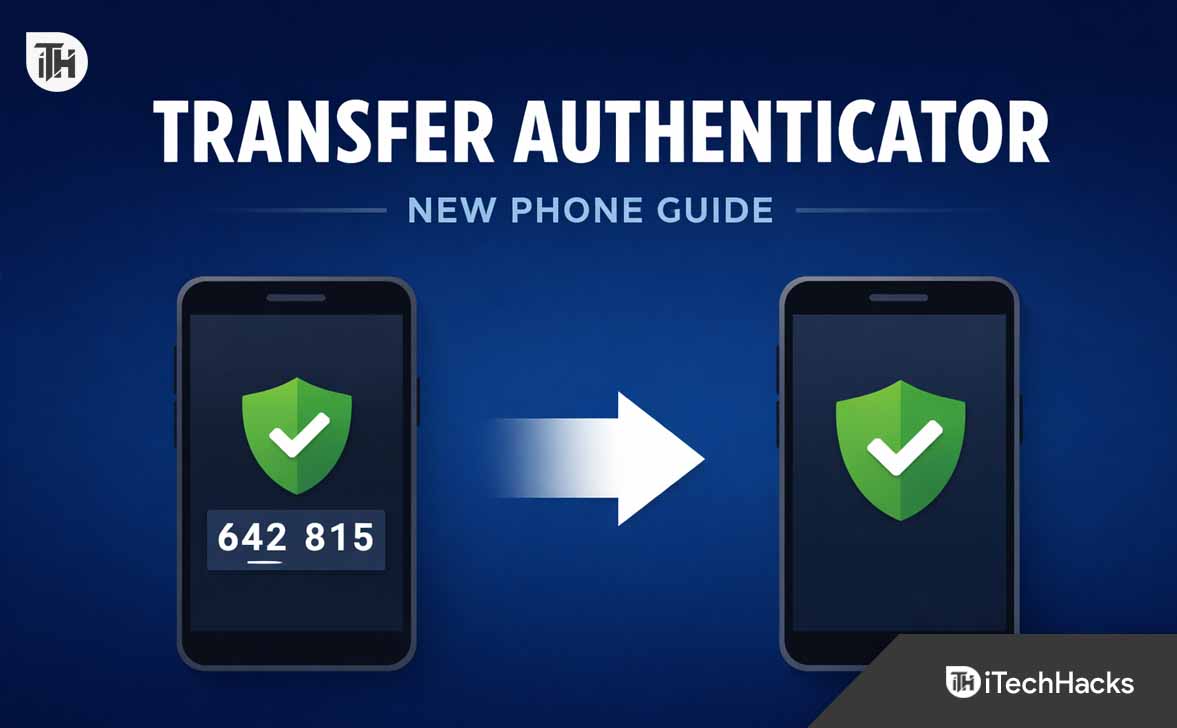
How to Use Google Authenticator Transfer to Move Codes to a New Phone
Fortunately, Google has drastically overhauled its security application in recent years to make this transition seamless. Whether you prefer the modern convenience of cloud backups or the airtight security of a completely offline migration, this comprehensive guide will explain exactly how to use google authenticator transfer safely so you can transition to your new hardware with total peace of mind.
The Golden Rule of 2FA Migration
Before we dive into the specific menus and technical steps, we must establish the absolute golden rule of digital security migration: Do not factory reset, trade in, sell, or delete the app from your old phone until you have physically verified that the codes are generating correctly on your new device.
A very dangerous misconception in the cybersecurity world is that simply downloading an authenticator application onto a new phone and signing into your email will magically restore your entire vault flawlessly. While modern cloud syncing does exist, relying entirely on the assumption that the sync worked without verifying the data in the real world can lead to a catastrophic lockout.
Your old smartphone is your absolute security lifeline. You must keep it powered on, connected to your local Wi-Fi, and fully intact until the entire transfer process is 100% complete and verified.
Why Authenticators Beat SMS Text Messages
Before moving your codes, it is worth understanding why you are going through this extra effort in the first place. Many smartphone users wonder why they shouldn’t just revert to receiving six-digit codes via standard SMS text messages to save themselves the hassle of an app transfer.
The reality is that SMS is fundamentally broken as a security standard. Hackers frequently utilize a tactic called “SIM swapping,” where they trick a telecom provider’s customer service representative into transferring your phone number to a rogue device they control. If a malicious actor has hijacked your phone number, they can easily intercept your SMS 2FA codes and bypass your security instantly.
Google Authenticator bypasses the vulnerable telecom network entirely. It utilizes a highly secure Time-Based One-Time Password (TOTP) algorithm. When you first scan a QR code on a website to set up 2FA, a mathematical seed is secretly shared between the website’s server and your specific phone’s hardware. Your phone then uses its internal clock to generate a new six-digit number every 30 seconds based on that seed. Because the generation happens entirely offline on your local device, it is physically immune to network interception.
When you learn how to use Google Authenticator transfer, you are learning the proper protocol for safely moving those highly sensitive mathematical seeds from one piece of hardware to another. You have two primary ways to achieve this: via an automated cloud sync, or completely offline via a manual QR scan.
Method 1: The Google Account Cloud Sync (The Modern Way)
In 2023, Google finally introduced a highly requested feature: end-to-end encrypted cloud backups for the Authenticator app. If you want the easiest possible transition and do not mind linking your 2FA codes directly to your primary Google Account, this is the path for you.
By utilizing the cloud, you are effectively skipping a manual “transfer” altogether and replacing it with a simple login synchronization.
Step 1: Verify the Backup on the Old Phone
Before you even pick up your shiny new smartphone, you need to ensure your old device has successfully backed up your existing codes to Google’s encrypted cloud servers.
- Open the Google Authenticator app on your old Android or iOS device.
- Look at the top right corner of the screen. You should see your Google profile picture or your account initial.
- Look closely at the small cloud icon situated right next to your profile picture.
- If the cloud icon is Green with a Checkmark, your codes are successfully synced to your Google Account. You are fully backed up and ready to proceed.

- If the cloud icon has a diagonal slash through it, the app is currently operating in offline mode. Tap your profile picture, select the primary Google Account you wish to use for backups, and allow the application a few moments to sync your local codes to the cloud.
Step 2: Install and Sync on the New Phone
Once the green checkmark is confirmed on the old device, you can safely shift your attention to your new hardware.
- Open the Apple App Store or Google Play Store on your new smartphone and download the official Google Authenticator application. Always verify that the developer is officially listed as “Google LLC” to avoid downloading malicious, copycat software.
- Open the app and tap the Get Started button on the welcome screen.
- You will be prompted to sign in. Select the exact same Google Account that you used to back up the codes on your old device.
- Once you authenticate your login, the app will instantly connect to the cloud infrastructure and download your entire vault of rotating 2FA codes.
If the codes do not immediately appear on the screen, force-close the application and reopen it. Ensure you are connected to a stable Wi-Fi network and verify that you didn’t accidentally log in with a secondary or alternate email address.
Method 2: The Manual QR Code Export (The Offline Way)
Many cybersecurity professionals, developers, and privacy advocates prefer to keep their Two-Factor Authentication codes entirely offline. Storing encryption keys in the cloud naturally creates a single point of failure—if a hacker somehow gains access to your Google Account password and bypasses its security, they also gain access to the very 2FA codes meant to protect your other platforms.
If you refuse to upload your security data to a server and want to know exactly how to use Google Authenticator transfer with maximum privacy, you must use the built-in offline export tool.
Step 1: Prepare Both Devices
You will need both your old phone and your new phone sitting side-by-side on a desk. Ensure the lenses on your new phone’s camera are completely clean and smudge-free so it can read barcodes quickly.
- On your new phone, download and open the Google Authenticator app.
- Tap Get Started.
- When prompted to sign in with an email, bypass the cloud sync entirely by tapping the option labeled Use Google Authenticator without an account at the bottom of the screen.
- The app will present a blank slate. Tap the Add a code button (usually represented by a plus icon in the corner), and then select Import existing accounts?
- Tap the Scan QR code. Your new phone’s camera will activate and ask for hardware permissions. Set the new phone down for a moment.
Step 2: Export from the Old Device
Turn your attention back to your old smartphone to package the data.
- Open the Google Authenticator app.
- Tap the Menu icon (three horizontal lines or dots) in the top-right or top-left corner of the screen.
- Select Transfer accounts from the drop-down menu.
- Tap Export accounts.
- The application will trigger a strict security check. You will be required to verify your identity using your device’s biometric security (Face ID, Touch ID, or your numeric PIN). This vital feature prevents someone who borrows your unlocked phone from silently stealing your entire 2FA vault.
- A list of all your currently saved accounts will appear, with a blue checkmark next to each one.
- Tap Next or Export in the bottom right corner. A large, complex QR code will instantly generate on your old phone’s screen.
- Note: If you are managing a massive vault with dozens of accounts, the app cannot physically fit all that encrypted data into a single image. It will divide the transfer into multiple QR codes (e.g., “1 of 3”).
Step 3: Scan and Finalize
With the export QR code proudly displayed on your old device, pick up your new device to complete the bridge.
- Point your new phone’s active camera directly at the old phone’s screen.
- Center the QR code within the framing box on the screen. The scan is usually instantaneous.
- If you had multiple QR codes generated, your new phone will prompt you to scan the next one. Tap Next on the old phone to reveal the second code, and repeat the scan until the vault is fully migrated.
Post-Transfer Verification: Trust, But Verify
You have successfully executed the steps for how to use Google Authenticator transfer, but your job is not quite done yet. The manual QR code transfer merely copies the mathematical seed; it does not inherently check if the new phone’s internal clock is properly calibrated to generate the exact same time-based numbers.
Before you celebrate and wipe your old device, you must test the new codes in a real-world scenario.
- Pick a low-stakes account, such as a secondary email address, a gaming platform, or a social media profile.
- Open a web browser on your computer and attempt to log in to that specific service.
- When the website prompts you for your Two-Factor Authentication code, look solely at your new phone.
- Type in the six-digit number displayed on the new device before the circular timer runs out.
- If the website accepts the code and logs you in successfully, the entire process was a massive success.
If the website rejects the code, your new phone’s internal clock is likely out of sync with Google’s servers. To fix this, go to your phone’s main operating system Settings, navigate to the Date & Time menu, toggle “Set Automatically” off for ten seconds, and then toggle it back on. This forces your phone to realign its clock with the master network, which will instantly fix your 2FA generation.
Securing Your Old Device
Once you have verified that the new phone is generating valid, working codes, you must decide what to do with the highly sensitive data lingering on the old hardware.
When you complete an offline QR transfer, your old phone will display a prompt asking if you want to Remove all exported accounts or Keep all exported accounts.
If you are selling, trading in, or recycling the old phone, you must absolutely select Remove all exported accounts. For maximum security, you should follow this up by factory resetting the entire device through the main operating system settings to wipe the hard drive completely clean.
If you are keeping the old phone as a backup, you can select Keep all exported accounts. Having a secondary device tucked away in a safe drawer, powered off, with a working offline copy of your Authenticator vault is an incredibly smart contingency plan. If your primary phone is ever lost or destroyed, you will have immediate access to your accounts via the backup device without having to endure grueling, multi-week account recovery processes.
Conclusion
Navigating strict cybersecurity protocols can often feel tedious, but taking the time to migrate your data properly is an essential investment in your digital peace of mind. Taking the time to fully understand how to use Google Authenticator transfer ensures that your digital identity remains safe, secure, and entirely within your control during a hardware upgrade.
Whether you choose the modern convenience of automated cloud syncing or the airtight, disconnected privacy of a manual QR code handoff, the tools provided by Google are robust and highly reliable. Remember to take the process slowly, follow the steps carefully, and always verify your newly generated codes before wiping any data from your previous device. By following this complete guide, you can confidently enjoy your new smartphone knowing your digital life is completely protected.
ALSO READ:
- How to Fix Chrome Not Loading Most Websites on macOS Sequoia
- Xbox App Not Working on iPhone After iOS 26? Fix It Now
- How to Unlock a Keyboard That Won’t Type on Windows 11
- Crunchyroll Error Code Shak-1001? 10 Easy Fixes You Can Try
- How to Fix WSLRegisterDistribution Failed with Error 0x8007019e
- Google Thinks I’m a Robot Every Time I Search? Here’s How to Fix It


