

- To change the toner cartridge in an HP LaserJet Pro MFP M126nw, first lift the scanner assembly, open the top cover, remove the old cartridge, and carefully replace it with a new cartridge by aligning it with the printer's guides. Ensure all protective packaging is removed before installation.
- Always check the exact cartridge number before purchase because HP LaserJet Pro MFP M126nw printers sold in different regions might use different cartridges like HP 88A CC388A or HP 83A CF283A. This helps avoid compatibility issues.
Changing the toner cartridge in an HP LaserJet Pro MFP M126nw is a simple maintenance task that you can complete at home or in the office without calling a technician. The entire process usually takes less than five minutes, provided you have the correct replacement cartridge and remove its protective packaging properly.
You should replace the cartridge when printed pages become consistently faded, the toner warning light remains on, or the printer displays a low or very low toner message. Before purchasing a replacement, check the cartridge number carefully because HP sold different versions of the M126 series in different regions.
This guide explains how to identify the correct toner, safely remove the old cartridge, install the replacement, test the printer, and solve common problems that may appear after installation.
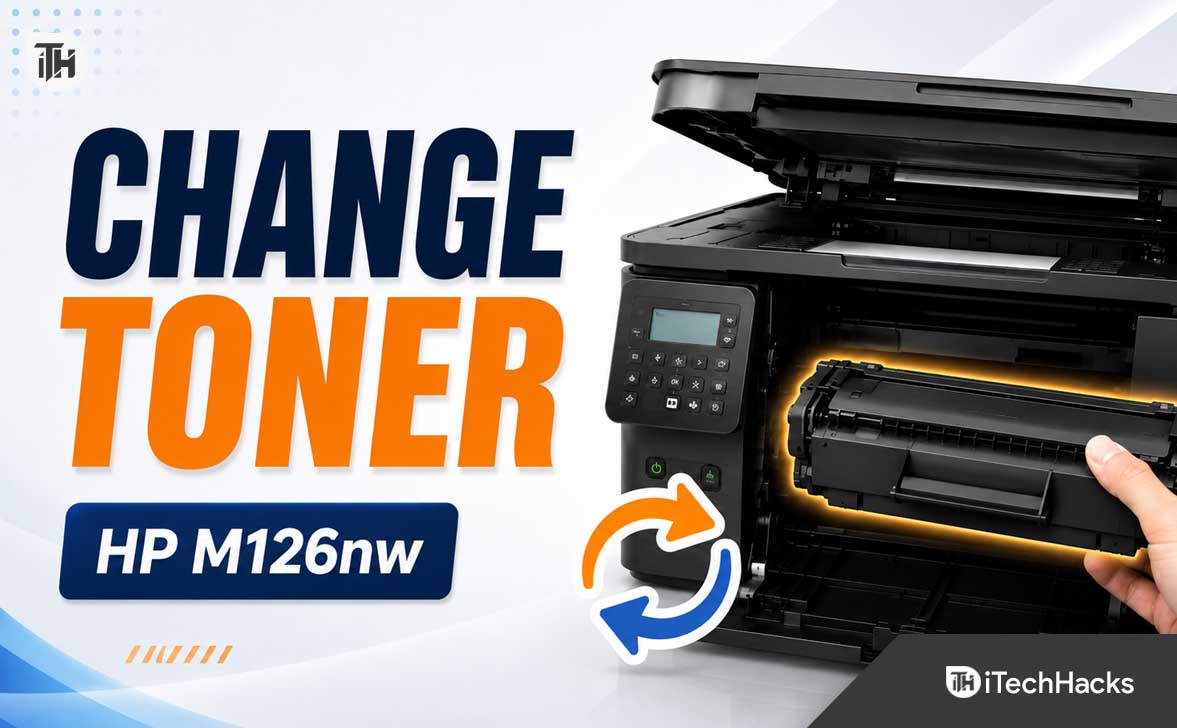
Which Toner Cartridge Does the HP LaserJet Pro MFP M126nw Use?
The cartridge required for the HP LaserJet Pro MFP M126nw can vary depending on the country or region where the printer was originally sold. This is important because cartridges that appear similar may not be recognized by every regional version of the printer.
In India and China, the HP LaserJet Pro MFP M126nw commonly uses the HP 88A Black Original LaserJet Toner Cartridge, with part number CC388A. HP also lists certain 88A dual-pack and higher-capacity variants for supported M126 Plus models in these markets. In other regions, some M125 to M128 series printers use the HP 83A, with part number CF283A.
Do not assume that an HP 83A and HP 88A are interchangeable simply because their shape looks similar. Cartridge compatibility can depend on the printer’s regional configuration, internal contacts, and cartridge chip.
How to Confirm the Correct Cartridge
The safest way to identify the required cartridge is to remove the existing toner and read the label printed on its body. Look for a number such as CC388A or CF283A.
You can also check the following:
- The toner number printed near the cartridge access area
- The original printer box or purchase invoice
- The product number printed on the rear label of the printer
- The supplies section of the official HP support page for your exact product number
- The compatibility list printed on the replacement cartridge box
For an HP LaserJet Pro MFP M126nw purchased in India, the HP 88A CC388A is normally the correct choice. Still, matching the number with the old cartridge is the best way to avoid buying an incompatible product.
When Should You Change the Toner Cartridge?
A low toner message does not always mean that the cartridge must be replaced immediately. Toner-level readings are estimates, and the printer may continue producing acceptable pages after the warning first appears.
Consider replacing the toner when you notice one or more of these signs:
- Text remains faint even after adjusting the print-quality settings
- Large sections of the page appear unusually light
- White vertical areas appear repeatedly on printed documents
- The toner warning light stays on
- The printer displays a Cartridge Very Low message
- Gently redistributing the toner no longer improves print quality
- The cartridge produces repeated spots, lines, or drum-related marks
HP states that a cartridge does not necessarily need immediate replacement when the first low-toner warning appears. You can continue printing until the quality is no longer acceptable, although keeping a replacement available helps prevent interruptions.
Try Redistributing the Toner First
If the pages have only recently started looking faded, you may be able to print a few more documents by redistributing the remaining toner.
Lift the scanner assembly, open the toner access cover, and remove the cartridge by its handle. Hold it horizontally with both hands and gently rock it from side to side several times. Do not shake it forcefully or turn it upside down.
Reinstall the cartridge and print a test page. This is only a temporary solution. Once the fading returns, install a replacement cartridge.
What You Need Before Replacing the Toner
No screwdriver or printer repair tool is required to change the cartridge in the HP M126nw. Prepare the following items before opening the printer:
- A compatible HP 88A, HP 83A, or correctly matched replacement cartridge
- The plastic bag and box from the new cartridge
- A few sheets of plain white paper
- A dry, lint-free cloth in case loose toner is present
- A flat and well-lit working area
Keep the new cartridge sealed until you are ready to install it. Toner cartridges contain a light-sensitive imaging drum, so leaving the cartridge exposed to bright light for an extended period may affect print quality.
How to Change the Toner Cartridge in HP LaserJet Pro MFP M126nw
Follow the steps below carefully. Avoid touching the imaging drum, metal contacts, shutter, or roller surface on the cartridge.
Step 1: Finish or Cancel Active Print Jobs
Allow any document currently being printed to finish. If a job is stuck, cancel it from the printer queue before opening the machine.
Removing the cartridge while the printer is processing a page can leave paper inside the print path or trigger a paper-jam message.
Step 2: Turn Off the Printer
Press the power button and wait for the printer to shut down. Disconnect the power cable if the printer is in a busy area where somebody might accidentally switch it on.
Turning off the printer is a sensible safety precaution because it prevents internal components from moving while the cartridge is being handled. If the printer has just completed a large print job, wait a few minutes before opening it because internal areas near the paper path may be warm.
Step 3: Lift the Scanner Assembly
Stand in front of the printer and place your fingers underneath the sides of the scanner section. Lift the complete scanner assembly upward until it remains in the raised position.
Do not lift only the scanner lid used for placing documents on the glass. The entire scanner unit must be raised to reach the toner access cover below it.
Step 4: Open the Top Toner Cover
Locate the top cover underneath the raised scanner assembly. Lift this cover upward to expose the toner cartridge compartment.
The old cartridge should now be visible. Avoid placing your hands deeper into the printer than necessary.
Step 5: Remove the Old Toner Cartridge
Grip the cartridge using its central handle and pull it upward and slightly toward you. Keep the cartridge level while removing it to reduce the chance of spilling loose toner.
Do not force the cartridge sideways. It should move along the internal guide rails with moderate resistance. If it feels stuck, check whether the scanner assembly and top cover are fully open.
Place the used cartridge on a sheet of paper or immediately put it into the plastic bag supplied with the replacement. This helps prevent toner from transferring to your desk, clothing, or floor.
Step 6: Unpack the New Cartridge
Remove the replacement cartridge from its box and protective bag. Hold it by the handle or plastic sides rather than the roller area.
Depending on the cartridge manufacturer, you may find protective clips, plastic guards, an instruction sheet, or a sealing strip attached to it. Remove only the packaging items indicated by the cartridge instructions.
Do not use scissors or a knife close to the cartridge body. A sharp object can puncture the toner chamber or scratch the imaging drum.
Step 7: Gently Distribute the Toner
Hold both ends of the new cartridge and gently rock it from side to side five or six times. Keep it approximately horizontal during this process.
This movement distributes the toner powder evenly inside the chamber. It helps the cartridge produce consistent print density from the first few pages.
Do not shake the cartridge vertically or aggressively. Vigorous movement can push toner toward seals and openings, resulting in leakage.
Step 8: Remove the Sealing Tape
Locate the pull tab on the side of the cartridge. Bend or release the tab as directed, and then pull it steadily away from the cartridge until the entire sealing strip comes out.
Pull the strip in one continuous, straight movement. Do not pull it sharply upward, twist it, or stop halfway. If the strip tears and a section remains inside, the cartridge may produce blank or extremely faint pages.
Dispose of the sealing strip with the other packaging. Never attempt to push it back into the cartridge after removal.
Step 9: Avoid Touching the Imaging Drum
While handling the cartridge, do not touch the exposed roller or drum surface. Depending on the cartridge, this component may appear green, blue, or another glossy color.
Fingerprints, scratches, dust, and skin oils can create repeating marks, faded patches, or lines on every page. If you accidentally touch the drum, do not clean it with water, alcohol, tissue paper, or a rough cloth.
Step 10: Insert the New Toner Cartridge
Hold the cartridge by its handle and align its sides with the guide tracks inside the printer. Lower it into the compartment while keeping it straight.
Push gently until the cartridge is fully seated. It should rest securely without rocking or remaining unusually high. HP’s official replacement procedure instructs users to align the cartridge with the internal tracks and insert it until firmly seated.
If the cartridge does not slide into position, remove it and check the model number, orientation, protective clips, and guide alignment. Do not force it because this could damage the printer’s internal contacts.
Step 11: Close the Printer
Lower the toner access cover until it closes completely. Next, carefully lower the scanner assembly back into its normal position.
Do not allow the scanner section to drop suddenly. If either cover refuses to close, reopen it and verify that the toner cartridge is seated correctly.
Step 12: Turn On the Printer
Reconnect the power cable if it was removed, and then switch on the printer. Wait while the HP LaserJet Pro MFP M126nw initializes.
The printer may rotate internal components briefly while checking the cartridge. This sound is normal. There is usually no manual toner reset required after installing a properly recognized cartridge.
How to Test the New Toner Cartridge
After the printer becomes ready, print a simple document containing black text. A one-page document is enough to confirm that the cartridge has been installed correctly.
Check the page for:
- Dark and evenly printed text
- No blank sections
- No repeated dots or horizontal bands
- No loose toner that rubs off the paper
- No Cartridge Missing or Very Low message
The first one or two pages may not always look perfectly uniform, especially with a remanufactured or compatible cartridge. Print several pages before deciding that the cartridge is defective.
If pages remain blank, turn off the printer and remove the cartridge. Confirm that the sealing strip was completely removed and that no protective cover remains attached.
Common Problems After Changing the HP M126nw Toner
The New Toner Cartridge Does Not Fit
A cartridge that cannot be inserted normally is often the wrong model or is not aligned with the printer’s guide rails. Compare the number on the new cartridge with the number printed on the old one.
Also check for an orange transport clip, side protector, plastic shield, or other packaging component that should have been removed. Never modify or cut the cartridge to make it fit.
The Printer Says Cartridge Is Missing
On supported M125 to M128 series control panels, an E3 condition can indicate that the cartridge is missing or incorrectly installed. Remove the cartridge, inspect it for remaining packaging, and reinstall it firmly.
Switch the printer off for approximately 30 seconds before turning it back on. If the warning remains, inspect the cartridge chip for visible damage or contamination. Avoid scraping or bending the chip contacts.
A compatible cartridge with an incorrect or defective chip may not be recognized even if it physically fits.
The Toner Light Stays On
First, verify that the printer is producing normal pages. Some refilled or third-party cartridges reuse an existing chip, so the printer may continue showing a low-toner warning even though toner has been added.
Remove and reinstall the cartridge, restart the printer, and print another page. With a new cartridge that includes a working compatible chip, the warning should normally clear after initialization.
Pages Are Blank After Replacement
Blank pages usually indicate that the cartridge’s sealing tape has not been removed completely. Turn off the printer, remove the cartridge, and inspect both sides for a pull tab or remaining strip.
A protective drum cover or transport piece may also block toner transfer. Review the instructions supplied with the cartridge and remove all required shipping materials.
The Print Is Still Faded
Remove the cartridge and gently rock it horizontally again. Reinstall it and print three to five pages.
Also check whether EconoMode or another toner-saving setting is enabled in the printer driver. HP does not recommend using EconoMode continuously when acceptable print quality is required because the cartridge’s mechanical components may wear before all remaining toner is used.
If only one side of each page is faded, the cartridge may be defective, incorrectly filled, or unevenly assembled. Testing another known-good cartridge is the fastest way to separate a cartridge problem from a printer problem.
Lines, Dots, or Repeated Marks Appear
Marks that repeat at regular intervals often point to damage, contamination, or fingerprints on the imaging drum. Remove the cartridge and visually inspect the drum without touching it.
If you see a scratch or damaged area, replacing the cartridge is usually the proper solution. Cleaning the drum manually can make the problem worse.
The Top Cover Will Not Close
Do not press down hard on the cover. Reopen it and check whether the cartridge handle is sitting in the correct position and both sides are resting evenly on the internal tracks.
The wrong regional cartridge, an unremoved transport clip, or a cartridge inserted at an angle can prevent the cover from closing.
Toner Spilled Inside or Outside the Printer
Keep the printer switched off and avoid blowing on the toner. Blowing or using compressed air can spread the fine powder into other parts of the printer and the surrounding room.
Use a dry, lint-free cloth to collect a small amount of loose toner. A vacuum designed specifically for toner is preferable for a larger spill. Avoid using an ordinary household vacuum because fine toner can pass through unsuitable filters and spread into the air.
If toner gets on your clothing, shake off as much as possible outdoors and wash the area with cold water. Hot water can cause toner particles to bond more strongly with fabric.
Mistakes to Avoid When Changing the Toner
The HP M126nw cartridge replacement process is straightforward, but a few common mistakes can cause leaks, recognition errors, and poor print quality.
- Buying by printer appearance: Match the exact cartridge and product number instead.
- Forcing the cartridge: A correctly aligned cartridge should follow the guide rails naturally.
- Forgetting the sealing strip: This is a common cause of blank pages.
- Touching the drum: Fingerprints can appear as repeated print defects.
- Shaking aggressively: Excessive shaking may cause toner leakage.
- Leaving the cartridge in bright light: Keep it covered until installation.
- Using liquid cleaner: Water and household cleaners should not be applied to the cartridge.
- Mixing regional cartridges: An 83A and 88A should not be treated as automatic substitutes.
- Closing the scanner forcefully: Check the cartridge position when the cover does not close normally.
Original, Compatible, or Refilled Cartridge: Which Is Better?
Original HP Cartridge
An original HP cartridge is generally the simplest option for reliable recognition, consistent print density, and predictable installation. It is also usually the most expensive choice.
Original cartridges make sense for offices that print important invoices, forms, reports, or customer documents and want to minimize troubleshooting.
Compatible Cartridge
A compatible cartridge is manufactured by another company for use with the printer. Quality varies significantly between suppliers.
A well-made compatible cartridge can reduce printing costs, but a poor-quality product may leak, produce uneven pages, create noise, or display a persistent cartridge warning. Look for clear compatibility information, a replacement guarantee, and recent customer feedback for the exact printer model.
Refilled Cartridge
The HP 88A cartridge can be refilled, but adding toner powder does not restore worn internal components. The drum, wiper blade, magnetic roller, seals, and chip may also need inspection or replacement.
A basic refill may work for ordinary home printing, but it can produce fading, background shading, streaks, or toner leakage when the cartridge is already worn. Professional refilling or remanufacturing is usually safer than opening the cartridge without the correct toner, tools, and protective equipment.
How to Store a Spare Toner Cartridge
Keeping a spare cartridge is useful when the printer is used for office work, billing, school assignments, or other time-sensitive documents. Improper storage, however, can reduce cartridge reliability.
- Keep the cartridge sealed in its original protective bag
- Store it horizontally rather than standing it on one end
- Keep it away from direct sunlight
- Avoid damp rooms and areas with extreme temperature changes
- Do not store it near heaters, windows, or air-conditioner outlets
- Keep the box where it will not be dropped or crushed
Before installing a cartridge that has been stored for a long time, allow it to reach normal room temperature while it is still sealed. This reduces the possibility of condensation forming on internal components.
What to Do With the Used Toner Cartridge
Do not immediately throw the old cartridge into ordinary household waste. Place it in the protective bag and box from the new cartridge so residual toner remains contained.
Check whether HP’s cartridge recycling program, a local electronics recycler, an office-supply retailer, or a cartridge remanufacturer accepts used toner cartridges in your area. Recycling allows useful plastic and metal components to be recovered while keeping toner waste properly contained.
If you plan to have the cartridge professionally refilled, transport it horizontally inside a sealed bag. Inform the technician about any issues such as repeated marks, leakage, unusual noise, or cartridge recognition errors, since these symptoms may require more than a toner refill.
Frequently Asked Questions
How long does it take to change the toner in an HP M126nw?
The replacement normally takes three to five minutes. It may take slightly longer the first time because you must identify and remove all protective packaging from the new cartridge.
Does the HP LaserJet Pro MFP M126nw use HP 88A toner?
Models sold in India and China commonly use the HP 88A CC388A cartridge. Some related M125 to M128 series models in other markets use HP 83A CF283A. Always verify the number printed on the existing cartridge and the printer’s product label.
Can I install an HP 83A instead of an HP 88A?
You should not treat the two cartridges as interchangeable. Purchase the cartridge specified for the country and product number of your printer. Even when two cartridges look similar, chip recognition and regional compatibility may differ.
Do I need to reset the printer after changing the toner?
A manual reset is not normally required. Install the cartridge correctly, close both covers, and switch on the printer. It should initialize and detect a compatible cartridge automatically.
Can I continue printing when the toner light is on?
You can often continue printing while the quality remains acceptable. A low-toner indicator is an estimate rather than a guarantee that the cartridge is completely empty. Keep a replacement ready so printing is not interrupted when fading becomes severe.
Why does the printer still show low toner after a refill?
Refilling adds powder but may not reset or replace the cartridge chip. The printer can therefore continue displaying the previous estimated toner status. Print quality is a more useful indicator when using a refilled cartridge, although chip-related warnings may remain.
Should I shake the new toner cartridge?
Gently rock it from side to side several times while holding it horizontally. Do not shake it forcefully, vertically, or near your face because excessive movement can cause leakage.
Can changing the cartridge affect the printer’s Wi-Fi settings?
No. Replacing the toner cartridge does not normally change the wireless network name, password, IP configuration, or saved printer connection. A Wi-Fi problem appearing at the same time is likely a separate issue.
Why are pages blank after installing a new toner?
The sealing strip or another transport protector is probably still attached. Remove the cartridge and inspect it carefully. Also verify that the cartridge is compatible and fully seated.
How many pages does an HP 88A cartridge print?
The HP 88A is commonly rated for approximately 1,500 standard black pages under standardized testing conditions. Actual yield depends on page coverage, document type, print density, cartridge condition, and how frequently the printer is used.
Can I touch the green or glossy roller on the cartridge?
No. That surface is part of the imaging system and can be damaged by fingerprints, scratches, oils, and bright light. Handle the cartridge only by its plastic body and handle.
Should I replace the cartridge as soon as the Very Low message appears?
Immediate replacement is not always necessary if pages still look acceptable and the printer allows printing to continue. Replace it when quality becomes unsuitable or when uninterrupted printing is important.
Final Thoughts
To change the toner cartridge in an HP LaserJet Pro MFP M126nw, lift the scanner assembly, open the top cover, remove the old cartridge, prepare the replacement, pull out its sealing strip, and install it along the internal guide rails. Close the printer, switch it on, and print a test page to confirm that the new toner is working correctly.
The most important step happens before installation: confirm the exact cartridge number. HP M126nw printers sold in India generally use the HP 88A CC388A, while some M125 to M128 series printers from other markets use the HP 83A CF283A. Checking the old cartridge label prevents most compatibility problems.
Handle the new cartridge gently, avoid touching the imaging drum, and never force it into the printer. With the correct toner and careful installation, the HP LaserJet Pro MFP M126nw should return to producing clear, dark, and consistent black-and-white prints within a few minutes.
ALSO READ: